 Free Hero Rotation


Rehgar Abilities and Strategy
Welcome to our Abilities page for Rehgar. Here, we give you an overview of every ability in Rehgar's kit. For each of them, we explain what it does, how to best use it, and how it works in combination with Rehgar's other abilities. We also give you strategy tips to play Rehgar efficiently.
Rehgar's Tips and Tricks
- Rehgar is surprisingly good at clearing Mercenary Camps all by himself.
 Lightning Shield can be cast on
  Earthbind Totem to damage Minion waves from a safe distance.
- Using
 Ghost Wolf's empowered Basic Attacks while fighting enemy Heroes or clearing Mercenary Camps increases your damage output significantly.
 - It is better to cast
 Ancestral Healing too early than too late. The more the enemy focuses on killing a single target of your team, the earlier you should cast Ancestral Healing on them.
Chain Heal
- Mana: 60
- Cooldown: 8 seconds
Heal an ally with a wave of healing for 260 (+4% per level) Health. The wave then bounces 2 times to nearby allies within 7 range, restoring 260 (+4% per level) Health to them.
Chain Heal is your standard healing Ability and quite easy to use, yet it is very effective in what it does. While it may not be as strong as other healing Abilities in terms of burst healing, the fact that it automatically heals two nearby allied targets makes up for that. The bounces prioritize Heroes.
Chain Heal is designed to provide a moderate amount of sustain healing to multiple allied Heroes at the same time, however, it can occasionally be used to heal your Minions in lane, assuming there are no allied Heroes nearby. Do not use this trick when you are low on Mana or when allied Heroes may need healing.
Remember that you can quickly cast Chain Heal on yourself by pressing [Alt + Q].
Lightning Shield
- Mana: 50
- Cooldown: 8 seconds
Imbue an ally with lightning dealing 64 (+4% per level) damage a second to nearby enemies. Each enemy hit restores 2 Mana to Rehgar. Lasts 5 seconds.
The name of this Ability may be a bit misleading at first because you do
not actually apply a defensive Shield to your allies with it,
unless you decide to go for ![]() Earth Shield at Level 13.
Lightning Shield is a great tool to make melee Heroes who are
capable of diving far into the ranks of the enemy team
even more dangerous by providing additional damage.
Earth Shield at Level 13.
Lightning Shield is a great tool to make melee Heroes who are
capable of diving far into the ranks of the enemy team
even more dangerous by providing additional damage.
Lighting Shield is also your main priority Ability when clearing Mercenary Camps on your own, as it will damage multiple enemies at the same time. Keep casting Lightning Shield as soon as it is available in those situations.
You can also use Lightning Shield on your
![]() Earthbind Totem to damage hostile Minion waves from
afar: simply place it next to the enemy Wizard Minion (the one that
spawns a Regeneration Globe after it dies) and then cast
Earthbind Totem to damage hostile Minion waves from
afar: simply place it next to the enemy Wizard Minion (the one that
spawns a Regeneration Globe after it dies) and then cast
![]() Lightning Shield on it.
Lightning Shield on it.
Each enemy hit by Lightning Shield restores 2 Mana. Hitting a full wave of Minions will therefore give you a huge amount of Mana back, enough to cast all your Basic Abilities one more time.
Remember that you can quickly cast Lightning Shield on yourself by pressing [Alt + W].
Earthbind Totem
- Mana: 50
- Cooldown: 15 seconds
Create a totem that Slows nearby enemies by 35%. The totem has 260 (+4% per level) Health and lasts for 6 seconds.
Earthbind Totem is Rehgar's only crowd control Ability, which Slows enemies in a small radius around the totem. Depending on where the totem gets placed, it will fulfill a different purpose. You can use it offensively to chase and Slow down enemies who are currently retreating, or you can place it defensively next to enemy frontliners if your team is getting engaged, to buy some extra time for your allies, which will allow them to position themselves properly.
As previously mentioned, you can also use Earthbind Totem to provide some waveclear if combined with your Lightning Shield. Keep in mind, however, that Earthbind Totem does have a fairly long cooldown of 15 seconds. It is a powerful tool to provide some crowd control for your team, but it needs to be placed with diligence. Another thing to keep in mind is Earthbind Totem's short casting range, which will require you to make sure that it is actually safe to cast it, without putting yourself into a dangerous position by getting too close to the enemy team.
Ancestral Healing
In this section we discuss how this Heroic Ability works and give some tips on how to use it. If you are looking for a detailed explanation on when and why you should pick it, check the dedicated section in the Talent Build page.
- Heroic
- Mana: 80
- Cooldown: 100 seconds
After 1 second, heal an allied Hero for 1180 (+4% per level) Health.
Ancestral Healing is a remarkable healing Ability, which is capable of restoring large amounts of Health points to an injured ally or Rehgar himself. It is an Ability that can significantly influence the outcome of an entire team fight by either saving one of your comrades (if you time Ancestral Healing correctly), or by losing one of your teammates (if you cast Ancestral Healing too late). This may sound like a heavy burden on your shoulders, however, with a little bit of practise, you should be able to learn quite quickly how to use your Ancestral Healing properly during heated team fight situations. The following will assist you in that endeavour.
Too late: due to the 1 second delay, it is extremely risky to cast Ancestral Healing if you are almost certain that the target allied Hero will die before it connects. It may trick enemies into performing a reckless maneuver to finish a wounded target off, but, if you time your Ancestral Healing misses by just a millisecond, you may end up losing a valuable team member. Besides, keep in mind that if your targeted ally dies while Ancestral Healing is still in its delay phase, you will have to wait 10 seconds before you can cast a new one. To avoid this misplay, try to predict what will happen next.
Too early: if you cast Ancestral Healing too early on your desired target, you end up overhealing them. To avoid this misplay, be patient during team fights. Look at the amount of Health your teammates have and evaluate how much damage they will take soon. If they are full Health but they will take a lot of damage in the next second, then it may still be appropriate to use Ancestral Healing on them.

Correct: using your Ancestral Healing on a target that is currently being focused by the enemy team, and still has around half of its Health, is in most cases a good choice. This way you ensure that your ally survives the 1-second delay of Ancestral Healing and that your Ability heals for its full amount.
Bloodlust
In this section we discuss how this Heroic Ability works and give some tips on how to use it. If you are looking for a detailed explanation on when and why you should pick it, check the dedicated section in the Talent Build page.
- Heroic
- Mana: 70
- Cooldown: 90 seconds
Grant nearby allied Heroes 40% Attack Speed and 35% Movement Speed and causes them to heal for 30% of the Basic Attack damage to their primary target. Lasts for 6 seconds.
Bloodlust allows your team to close in on to your opponents very fast while at the same time increasing their Attack Speed and Movement Speed significantly. What makes Bloodlust a truly powerful Heroic Ability with strong Marskmen (such as Raynor) and other Heroes with strong Basic Attacks (for example Thrall) is the inherent life steal.
Keep in mind that Bloodlust can also be used defensively in order to escape dangerous situations, however, use it this way only if necessary else you will probably not have it available for the next team fight.
Purge
- Cooldown: 60 seconds
When used on an allied Hero, make them Unstoppable for 0.5 seconds. When used on an enemy Hero, Slow them by 80%, decaying over 2 seconds.
Cannot be cast on yourself.
![]() Purge is a versatile Trait
which can be cast on either allied or enemy Heroes, but Rehgar is not a valid target.
When used on allied Heroes, they become Unstoppable
for half a second, something which removes most
crowd control effects from them.
When used on enemy Heroes, they become Slowed for a short duration.
Purge is a versatile Trait
which can be cast on either allied or enemy Heroes, but Rehgar is not a valid target.
When used on allied Heroes, they become Unstoppable
for half a second, something which removes most
crowd control effects from them.
When used on enemy Heroes, they become Slowed for a short duration.
You will rarely need to use ![]() Purge offensively
to briefly Slow an enemy.
Making your allies Unstoppable
is a great way to ensure they can perform any action
they intend to execute while being targeted by enemy
crowd control effects.
Purge offensively
to briefly Slow an enemy.
Making your allies Unstoppable
is a great way to ensure they can perform any action
they intend to execute while being targeted by enemy
crowd control effects.
Being the Unstoppable just 0.5 seconds long,
compared to the standard 1-second duration, it is slightly harder
to use ![]() Purge to counter some specific Abilities
(such as
Purge to counter some specific Abilities
(such as ![]() Temporal Loop by Chromie).
Temporal Loop by Chromie).
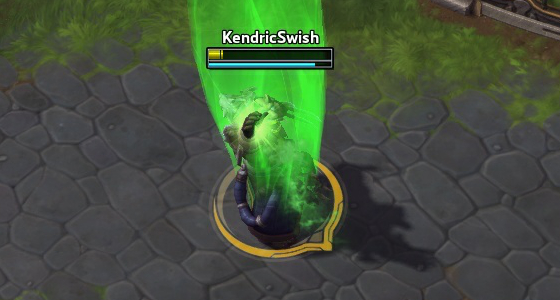
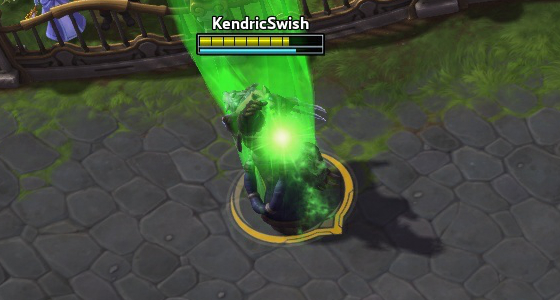
Ghost Wolf
Instead of using a mount, Rehgar transforms into a Ghost Wolf with 20% increased Movement Speed. Basic Attacks in Ghost Wolf form cause him to lunge at his target and deal 75% bonus damage. Dealing damage, using abilities, and Channeling cancels Ghost Wolf form.
Rehgar's Mount is quite unique compared to other Heroes as it allows you to run faster without the risk of being dismounted and makes your next Basic Attack hit harder. Keep in mind, however, that, after cancelling your Ghost Wolf form, you need to wait for 4 seconds before you can use it again.
![]() Ghost Wolf offers Rehgar great mobility,
which allows him to reposition himself very
quickly during team fights and skirmishes. By the same token, Rehgar can use
the enhanced Basic Attacks of his Ghost Wolf form in order to clear Minion
waves and especially Mercenary Camps a lot more quickly.
Sometimes it can even help you secure kills.
Ghost Wolf offers Rehgar great mobility,
which allows him to reposition himself very
quickly during team fights and skirmishes. By the same token, Rehgar can use
the enhanced Basic Attacks of his Ghost Wolf form in order to clear Minion
waves and especially Mercenary Camps a lot more quickly.
Sometimes it can even help you secure kills.
Ideally, you should use ![]() Ghost Wolf to deal damage
as frequently as possible, but only when it is safe and appropriate to do so.
In particular, be extremely careful when using it
against enemy Heroes or when they are nearby because
it will be harder for you to retreat with
Ghost Wolf to deal damage
as frequently as possible, but only when it is safe and appropriate to do so.
In particular, be extremely careful when using it
against enemy Heroes or when they are nearby because
it will be harder for you to retreat with ![]() Ghost Wolf,
your only mobility tool, on cooldown for 4 seconds.
Ghost Wolf,
your only mobility tool, on cooldown for 4 seconds.
Changelog
- 30 Mar. 2022: Guide reviewed for the latest Balance Update.
- 03 Feb. 2022: Guide reviewed for the latest Balance Update.
- 07 Dec. 2021: Guide reviewed for the latest Major Patch.
- 17 Jul. 2020: Guide reviewed for the latest Balance Update.
- 05 Jun. 2020: Builds and Descriptions changed according to the latest Balance Update.
- 08 May 2020: Descriptions changed according to the current metagame.
- 30 Aug. 2019: Reviewed Ability Section following balance patch.
- 12 Jul. 2019: Reviewed Ability Section
- 12 Feb. 2019: Updated Ancestral Healing's description in accordance with the latest patch.
- 15 Dec. 2016: Updated Bloodlust description following the changes in Ragnaros patch.
More Healer Guides
Elitesparkle is a multiple times Master player in Europe who plays Heroes of the Storm since its release. He is an active member of the community who likes to teach new and veteran players all he knows about his favorite game.
- Heroes of thre Storm PTR Patch Notes: April 16th
- Blizzard Games Return to China: New Agreement Signed With NetEase
- Blizzard Reportedly Reuniting with NetEase to Bring Back WoW in China
- Ex-Activision Blizzard CEO Bobby Kotick Shows Interest in Buying TikTok
- Heroes of the Storm Collection Update: February 6th
- Heroes of the Storm Live Patch Notes: February 6th
- Timeline of Blizzard Presidents
- Johanna Faires Appointed Blizzard Entertainment President
- Heroes of the Storm Gul'dan
- Heroes of the Storm Master Tier List
- Heroes of the Storm Tier List Hub
- Heroes of the Storm Probius
- Heroes of the Storm General Tier List