

Well of Eternity Heroic Dungeon Guide (WoD 6.1.2)

Well of Eternity is one of the three new heroic dungeons, introduced in World of Warcraft Patch 4.3. The dungeon contains 3 boss encounters. Each of the first two bosses drops one epic item of 378 item level, while the final boss drops two items, as well as a Chaos Orb.
This is the middle dungeon of the three. Here, with the help of Nozdormu, you will travel back in time in order to recover the Dragon Soul and bring it to the present, where it will be used to help defeat Deathwing. During this dungeon, you will receive help from notable lore characters such as Illidan Stormrage and Tyrande Whisperwind.
Introduction
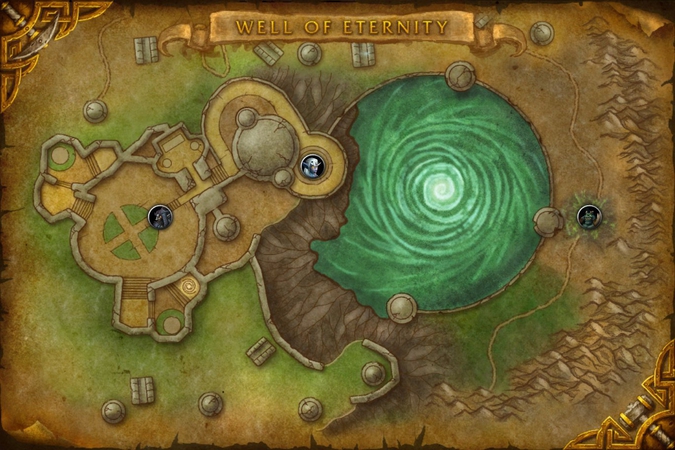 Well of Eternity can be accessed from the Caverns of Time instance hub, or
through the Dungeon Finder. The instance features 3 boss encounters, that must
be completed in order. The entire dungeon is heavily scripted, and you will be
quite clearly driven in the right direction (mostly by Illidan).
Well of Eternity can be accessed from the Caverns of Time instance hub, or
through the Dungeon Finder. The instance features 3 boss encounters, that must
be completed in order. The entire dungeon is heavily scripted, and you will be
quite clearly driven in the right direction (mostly by Illidan).
Our guide will provide you with all the necessary information in order to defeat the bosses and complete the dungeon. Additionally, we will also provide you with information regarding the 4 quests associated with this dungeon.
Loot
Armor
| Item Name | Armor | Slot | Main Stats | Source |
|---|---|---|---|---|
| Cloak of the Royal Protector | Back | Strength/Mastery | Queen Azshara | |
| Historian's Sash | Cloth | Waist | Intellect/Spirit | Documenting the Timeways |
| Courtier's Slippers | Cloth | Feet | Intellect/Spirit | Trash Mobs |
| Slippers of Wizardry | Cloth | Feet | Intellect/Hit | Queen Azshara |
| Cowl of Highborne Sorcerors | Cloth | Head | Intellect | Mannoroth/Varo'then |
| Chronicler's Chestguard | Leather | Chest | Intellect/Spirit | Documenting the Timeways |
| Spaulders of Eternity | Leather | Shoulders | Intellect | Mannoroth/Varo'then |
| Waterworn Handguards | Leather | Hands | Intellect/Spirit | Trash Mobs |
| Helm of Thorns | Leather | Head | Agility | Mannoroth/Varo'then |
| Puppeteer's Pantaloons | Leather | Legs | Agility | Queen Azshara |
| Peroth'arn's Belt | Leather | Waist | Agility | Peroth'arn |
| Chain of the Demon Hunter | Waist | Intellect/Spirit | The Path to the Dragon Soul | |
| Demonsbane Chestguard | Chest | Intellect | Mannoroth/Varo'then | |
| Breastplate of the Queen's... | Chest | Agility | Queen Azshara | |
| Legguards of the Legion | Legs | Agility | Mannoroth/Varo'then | |
| Boots of the Treacherous... | Plate | Feet | Intellect/Spirit | The Path to the Dragon Soul |
| Helm of Power | Plate | Head | Intellect | Mannoroth/Varo'then |
| Annihilan Helm | Plate | Head | Strength/Parry | Mannoroth/Varo'then |
| Girdle of the Queen's... | Plate | Waist | Strength | Peroth'arn |
| Treads of the Past | Plate | Feet | Strength/Mastery | Documenting the Timeways |
Weapons
| Item Name | Type | Main Stats | Source |
|---|---|---|---|
| Scepter of Azshara | One-Hand Mace | Intellect/Spirit | Queen Azshara |
| Gavel of Peroth'arn | One-Hand Mace | Strength/Parry | Peroth'arn |
| Trickster's Edge | One-Hand Axe | Agility | Peroth'arn |
| Pit Lord's Destroyer | Two-Handed Mace | Strength/Mastery | Mannoroth/Varo'then |
| Thornwood Staff | Staff | Agility | Mannoroth/Varo'then |
| Demonic Skull | Off-Hand Frill | Intellect/Spirit | The Path to the Dragon Soul |
| Orb of the First Satyrs | Off-Hand Frill | Intellect/Hit | Peroth'arn |
| Ironfeather Longbow | Bow | Strength | The Path to the Dragon Soul |
Rings and Trinkets
| Item Name | Type | Main Stats | Source |
|---|---|---|---|
| Alurmi's Ring | Ring | Agility | Documenting the Timeways |
| Mannoroth's Signet | Ring | Agility | Mannoroth/Varo'then |
| Queen's Boon | Ring | Dodge/Parry | Queen Azshara |
| Foul Gift of the Demon Lord | Trinket | Intellect/Mastery | Mannoroth/Varo'then |
| Varo'then's Brooch | Trinket | Strength/Mastery | Mannoroth/Varo'then |
| Horned Band | Ring | Intellect | Peroth'arn |
Quests
There are 4 quests that can be completed within the instance.
The first 3 (In Unending Numbers, The Vainglorious, and The Path to the Dragon Soul) are part of the quest chain that runs through the three Hour of Twilight dungeons.
The fourth quest is Documenting the Timeways. In order to receive it, you must have completed all the quests in End Time.
The quests reward you with item level 378 gear, just like the bosses (see loot section above). Failure to complete the quests will not affect your ability to progress through the dungeons, or the Dragon Soul raid.
In Unending Numbers
This quest is given by Nozdormu, at the entrance of the instance, after you turn in The Well of Eternity, which you were given after completing the Murozond quest in End Time.
The objectives of this quest will be completed automatically as you follow Illidan through the first part of the dungeon.
The Vainglorious
After defeating Peroth'arn, you will find Nozdormu at the end of the staircase that leads to the rest of the instance. Upon turning in In Unending Numbers, he will give you the next quest of the chain: The Vainglorious.
This quest simply requires you to succeed in the encounter with Azshara, the second boss of the dungeon.
The Path to the Dragon Soul
After defeating Azshara, you will be taken to the next part of the dungeon where Nozdormu will be waiting for you. Upon turning in The Vainglorious, he will give you the next quest of the chain: The Path to the Dragon Soul.
This quest simply requires you to succeed in the encounter with Mannoroth, the third boss.
After defeating this final boss, you will turn in the quest to Illidan, who will send you to Hour of Twilight.
Documenting the Timeways
Documenting the Timeways is given by Alurmi, who is standing next to Nozdormu at the entrance of the instance.
It requires you to kill specific units inside the instance. Fortunately, through the normal course of the instance, you will kill these units anyway.
After defeating the last boss, you will be able to turn in this quest to Alurmi, who, by then, will have caught up with your group.
Closing the Portals and Peroth'arn
As soon as the dungeon starts, after a short speech from Nozdormu and Peroth'arn, you will have to defeat a large Legion Demon. Once this mob is dead, you will be greeted by Illidan, who will turn you and your entire party invisible and offer instructions for proceeding in the dungeon.
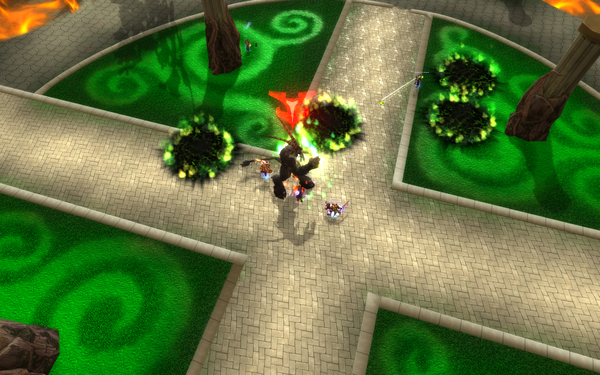
Trash and Portals
Simply follow Illidan's commands, and you will be guided to three trash packs, each guarding a set of green crystals. Kill the mobs (they are very easy to dispose of) and right-click the small crystal. Once you have done this with all three sets of crystals, the many demons occupying the courtyard will disappear, and you will be able to engage Peroth'arn.
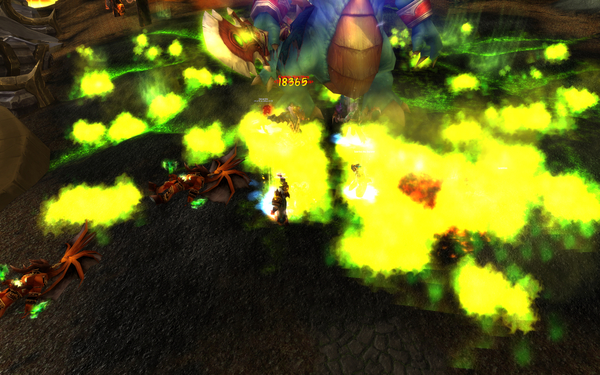
Peroth'arn
Peroth'arn is a tank and spank encounter with a short lore intermission when the boss' health reaches 70%.
The fight is relatively easy, but to avoid making mistakes, you should keep in mind a few things:
-
 He regularly places void zones on the ground (
 Fel Flames).
 - He deals increasing damage to the tank, by stacking a debuff on him
(
 Corrupting Touch).
 - He casts
 Fel Decay on a random target, dealing a large amount of
Shadow damage and extra Shadow damage over time. When the healer heals a target
affected by the DoT, the healer will take 50% of the healing done, as
damage.
Fel Decay on a random target, dealing a large amount of
Shadow damage and extra Shadow damage over time. When the healer heals a target
affected by the DoT, the healer will take 50% of the healing done, as
damage.
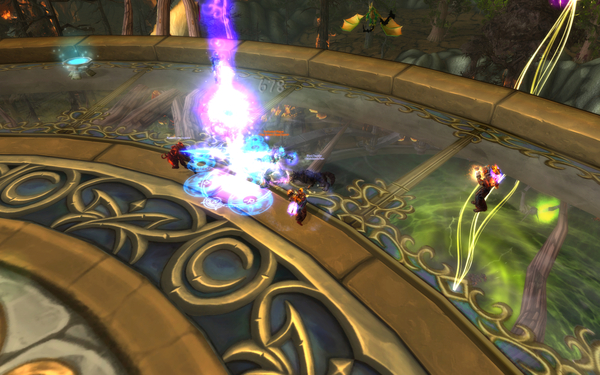
 Around 70% health, Peroth'arn becomes invisible, and the entire party is cloaked
by Illidan, becoming invisible as well. Peroth'arn will summon Eyes of
Peroth'arn that will be searching the area. For the next 40 seconds, players
must avoid coming in close proximity with the eyes, to avoid being discovered.
Around 70% health, Peroth'arn becomes invisible, and the entire party is cloaked
by Illidan, becoming invisible as well. Peroth'arn will summon Eyes of
Peroth'arn that will be searching the area. For the next 40 seconds, players
must avoid coming in close proximity with the eyes, to avoid being discovered.
If a player is discovered by an Eye of Peroth'arn, Peroth'an will attack
them and enrage himself for 15 seconds (![]() Fel Quickening). If 40 seconds
go by and no one is discovered by an Eye, then the boss becomes visible and
takes extra damage for 15 seconds (
Fel Quickening). If 40 seconds
go by and no one is discovered by an Eye, then the boss becomes visible and
takes extra damage for 15 seconds (![]() Enfeebled).
Enfeebled).
Finally, at 20% health, the boss goes into a frenzy, although this is quite easy to deal with.
Achievement: Lazy Eye
The ![]() Lazy Eye achievement requires that your group defeats Peroth'arn
without any member being detected by one of his eyes, during the short
transitional phase described above. This means that all 5 group members will
have to avoid detection for 40 seconds.
Lazy Eye achievement requires that your group defeats Peroth'arn
without any member being detected by one of his eyes, during the short
transitional phase described above. This means that all 5 group members will
have to avoid detection for 40 seconds.
While this achievement is simply in concept, it is quite difficult to execute, as the eyes move rather quickly, and even if one manages to avoid their own eye, it is possible to come into range of eyes that are following other players. In addition to simply trying to avoid the eyes, we recommend the following two strategies:
- Have the entire party stacked together (preferably following a specfic
member, who can be marked) and running around the outer edges of the room.
Movement speed increasing buffs can help here (such as
 Stampeding Roar);
 - Have 2 or 3 of your party members purposefully die as soon as the boss is pulled, and leave them dead during the Eye phase. This will make avoiding the eyes much easier for the remaining players. Afterwards, make use of combat resurrections to bring these players back.
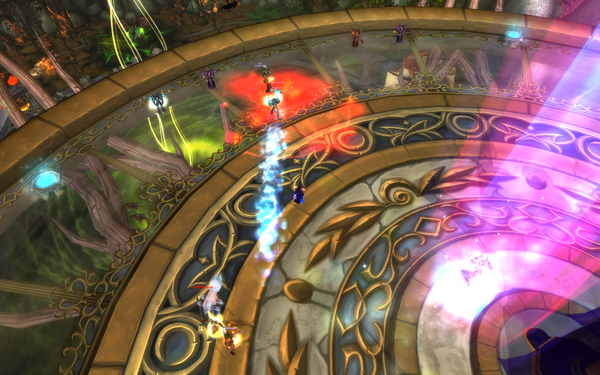
Queen Azshara's Palace
After defeating Peroth'arn, Illidan will go his own way and you will have
to head on towards Queen Azshara's Palace. You will encounter a few mobs along
the way, but they are not difficult to kill and should present no issues for
your party. The only thing to watch out for is the ![]() Fel Lightning ability
cast by the Eye of the Legion mobs for which your party should be spread out.
Fel Lightning ability
cast by the Eye of the Legion mobs for which your party should be spread out.
The actual encounter against Queen Azshara is a bit more complicated, and it may prove harder to defeat.
Azshara
You do not fight Azshara herself, but her minions.
She is immune for the entire duration of
the fight, and only (occasionally) casts a spell that you must interrupt
(![]() Total Obedience). Fortunately, the spell has an 8 second cast time and
there is a very obvious emote, warning players. In addition to this, she will
regularly mind control a random player. The mind control is broken by killing
a "hand" (a hostile NPC) that appears above the mind controlled player (it
has 150,000 health and dies quickly).
Total Obedience). Fortunately, the spell has an 8 second cast time and
there is a very obvious emote, warning players. In addition to this, she will
regularly mind control a random player. The mind control is broken by killing
a "hand" (a hostile NPC) that appears above the mind controlled player (it
has 150,000 health and dies quickly).
In order to defeat Azshara, you will have to kill all 6 of her Magi, although they are not all active at once. When you first engage Azshara, 2 Magi will become active. When one is killed, another 2 become active, and so on. Alternatively, if enough time passes and no Magi have been killed, another pair will activate anyway.
There are three types of Magi, based on the regular Mage talent specialisations: Arcane, Fire, and Frost. There are 2 Magi of each type and 2 Magi of the same type never activate at the same time. They have the following abilities (we have underlined the really important ones):
- Arcane Magus:
- does a moderate amount of party wide damage per second, while channeling
 Arcane Shock (cannot be interrupted);
 -
 summons an orb of Arcane energy that falls slowly towards the ground, dealing damage where it lands (
 Arcane Bomb).
- does a moderate amount of party wide damage per second, while channeling
- Fire Magus:
- nukes his main aggro target with
 Fireball (interruptible);
 - deals damage to a random player and others within 10 yards of them (
 Firebomb);
 - deals party-wide damage (
 Blast Wave).
- nukes his main aggro target with
- Frost Magus:
- deals damage to random players with
 Ice Fling (interruptible);
 -
 does a ground attack that deals damage to enemies in a line (
 Coldflame);
 - charges random players, dealing moderate damage to everyone in 5 yards of the target location.
- deals damage to random players with
The encounter can be summarised as follows:
- Interrupt Azshara's
 Total Obedience and kill the Hand of the Queen
(to break the mind control).
Total Obedience and kill the Hand of the Queen
(to break the mind control). - Stay spread out and avoid the various harmful ground effects that the magi use.
- Interrupt Fireball and Ice Fling, and stun the magi whenever you can.
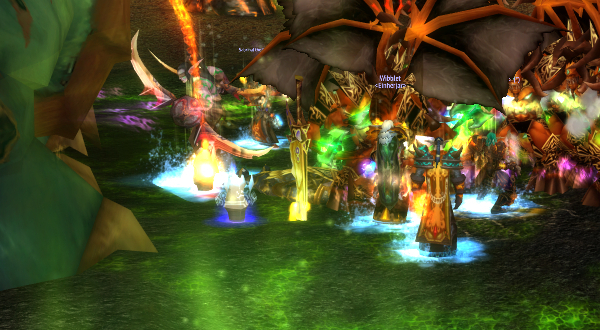
Varo'then and Mannoroth
Once Azshara's servants are dead, you will witness a long, scripted event, during which you will need to mount some Bronze Drakes that will eventually fly you down, next to the Well of Eternity.
Prelude
After landing, you will be accompanied by Illidan Stormrage and Tyrande Whisperwind. Together, you will have to clear a path to the last boss encounter, against Mannoroth and Varo'then. The trash mobs you will have to face are extremely easy to defeat, and should not strain your party at all.
While fighting the trash, Illidan will imbue himself with
![]() Waters of Eternity. This buff grants him, and any players in close
proximity to him, highly reduced damage taken from Fire attacks. This buff
persists during the fight against the bosses, and is very important.
Waters of Eternity. This buff grants him, and any players in close
proximity to him, highly reduced damage taken from Fire attacks. This buff
persists during the fight against the bosses, and is very important.
Varo'then and Mannoroth
When first engaging the two bosses, Illidan will single-handedly tank Mannoroth, while your party must kill Varo'then. After Varo'then is dead, Mannoroth will enter a second phase of the encounter, during which he should be nuked.
 Varo'then only has one ability,
 ![]() Magistrike, which requires your party
to spread out a bit (the ability chains to nearby targets). In the meanwhile,
Mannoroth will regularly place down many fire
patches (
Magistrike, which requires your party
to spread out a bit (the ability chains to nearby targets). In the meanwhile,
Mannoroth will regularly place down many fire
patches (![]() Fel Firestorm). It is very difficult to avoid these, so you
need to be constantly on the move while he channels the ability.
Fel Firestorm). It is very difficult to avoid these, so you
need to be constantly on the move while he channels the ability.
 Additionally, many Doomguard Devastators will exit a portal and attempt to
harm your party, but Tyrande deals with them easily. At a certain point, two
Dreadlord Debilitators will incapacitate Tyrande. As a result, the Doomguard
Devastators will begin to overwhelm your party. You must kill the Debilitators
in order to free Tyrande (they are channeling a spell that cannot be
interrupted). While Tyrande is incapacitated, there is a beam of moonlight,
Additionally, many Doomguard Devastators will exit a portal and attempt to
harm your party, but Tyrande deals with them easily. At a certain point, two
Dreadlord Debilitators will incapacitate Tyrande. As a result, the Doomguard
Devastators will begin to overwhelm your party. You must kill the Debilitators
in order to free Tyrande (they are channeling a spell that cannot be
interrupted). While Tyrande is incapacitated, there is a beam of moonlight,
![]() Blessing of Elune. Standing in the moonlight causes players to deal
massive Arcane damage (in addition to their current damage) to the
Doomguard Devastators.
Blessing of Elune. Standing in the moonlight causes players to deal
massive Arcane damage (in addition to their current damage) to the
Doomguard Devastators.
 Once Varo'then is dead, he drops his sword. This item should be right-clicked by
a party member. This weakens Mannoroth and causes him to enter the second
phase of the encounter, at which point your party should nuke him.
Once Varo'then is dead, he drops his sword. This item should be right-clicked by
a party member. This weakens Mannoroth and causes him to enter the second
phase of the encounter, at which point your party should nuke him.
 As Mannoroth's health drops, various demons spawn from a nearby portal
and attack the party. Despite their high numbers, you should not try disposing
of them (this is Tyrande's role), but should keep focusing on Mannoroth instead.
As Mannoroth's health drops, various demons spawn from a nearby portal
and attack the party. Despite their high numbers, you should not try disposing
of them (this is Tyrande's role), but should keep focusing on Mannoroth instead.
Note that in the most recent PTR build, prior to live release, Mannoroth had a massive health pool (roughly 80M) and it took our party an extremely long time to grind down his health.
Finally, if the fight lasts long enough (if a party member is dead or if
your DPS is low), Illidan will cast ![]() Gift of Sargeras on himself
and the entire party. This provides a substantial buff, allowing you to
finish off Mannoroth.
Gift of Sargeras on himself
and the entire party. This provides a substantial buff, allowing you to
finish off Mannoroth.
Achievement: That's Not Canon!
The ![]() That's Not Canon! achievement requires your group to make use of a
little known encounter ability. When Mannoroth reaches 90% of his health, he
will sacrifice Varo'then, instantly killing him, and regenerating his own
health in the process.
That's Not Canon! achievement requires your group to make use of a
little known encounter ability. When Mannoroth reaches 90% of his health, he
will sacrifice Varo'then, instantly killing him, and regenerating his own
health in the process.
As such, in order to complete this achievement, all you need to do is ignore Varo'then at the start of the fight, and nuke Mannoroth.
Conclusions
At the end of this dungeon, the Dragon Soul item will have been recovered by Nozdormu, who will pass it on Thrall, who will have to deliver it to Wyrmrest Temple, in the present time. These events are covered in the next dungeon, Hour of Twilight.
We hope that, like us, you will have appreciated the stunning visual aspect of this dungeon, most particularly, the view from Azshara's Palace (though, your graphic card might disagree).