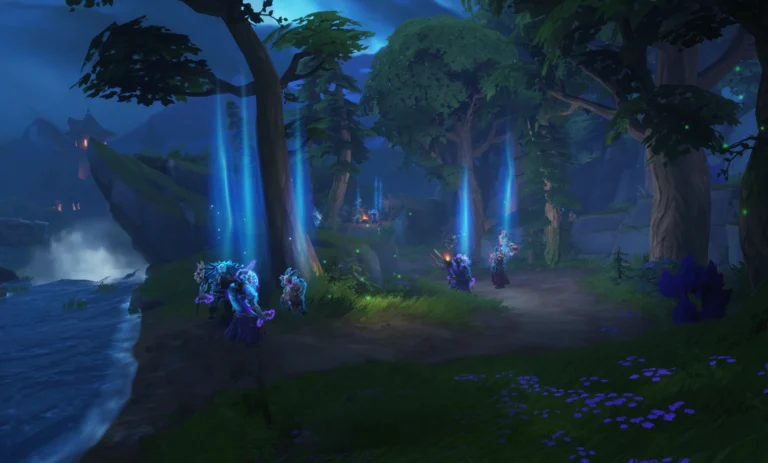
Stormwatch is an encampment in the highland cliffs, filled with bandits, raiders, and pillagers. In the eye of the storm is Warlord Brogg, full of thunder and fury. His raiders gathering just beyond the Stronghold, ready to stake their claim on the fort.
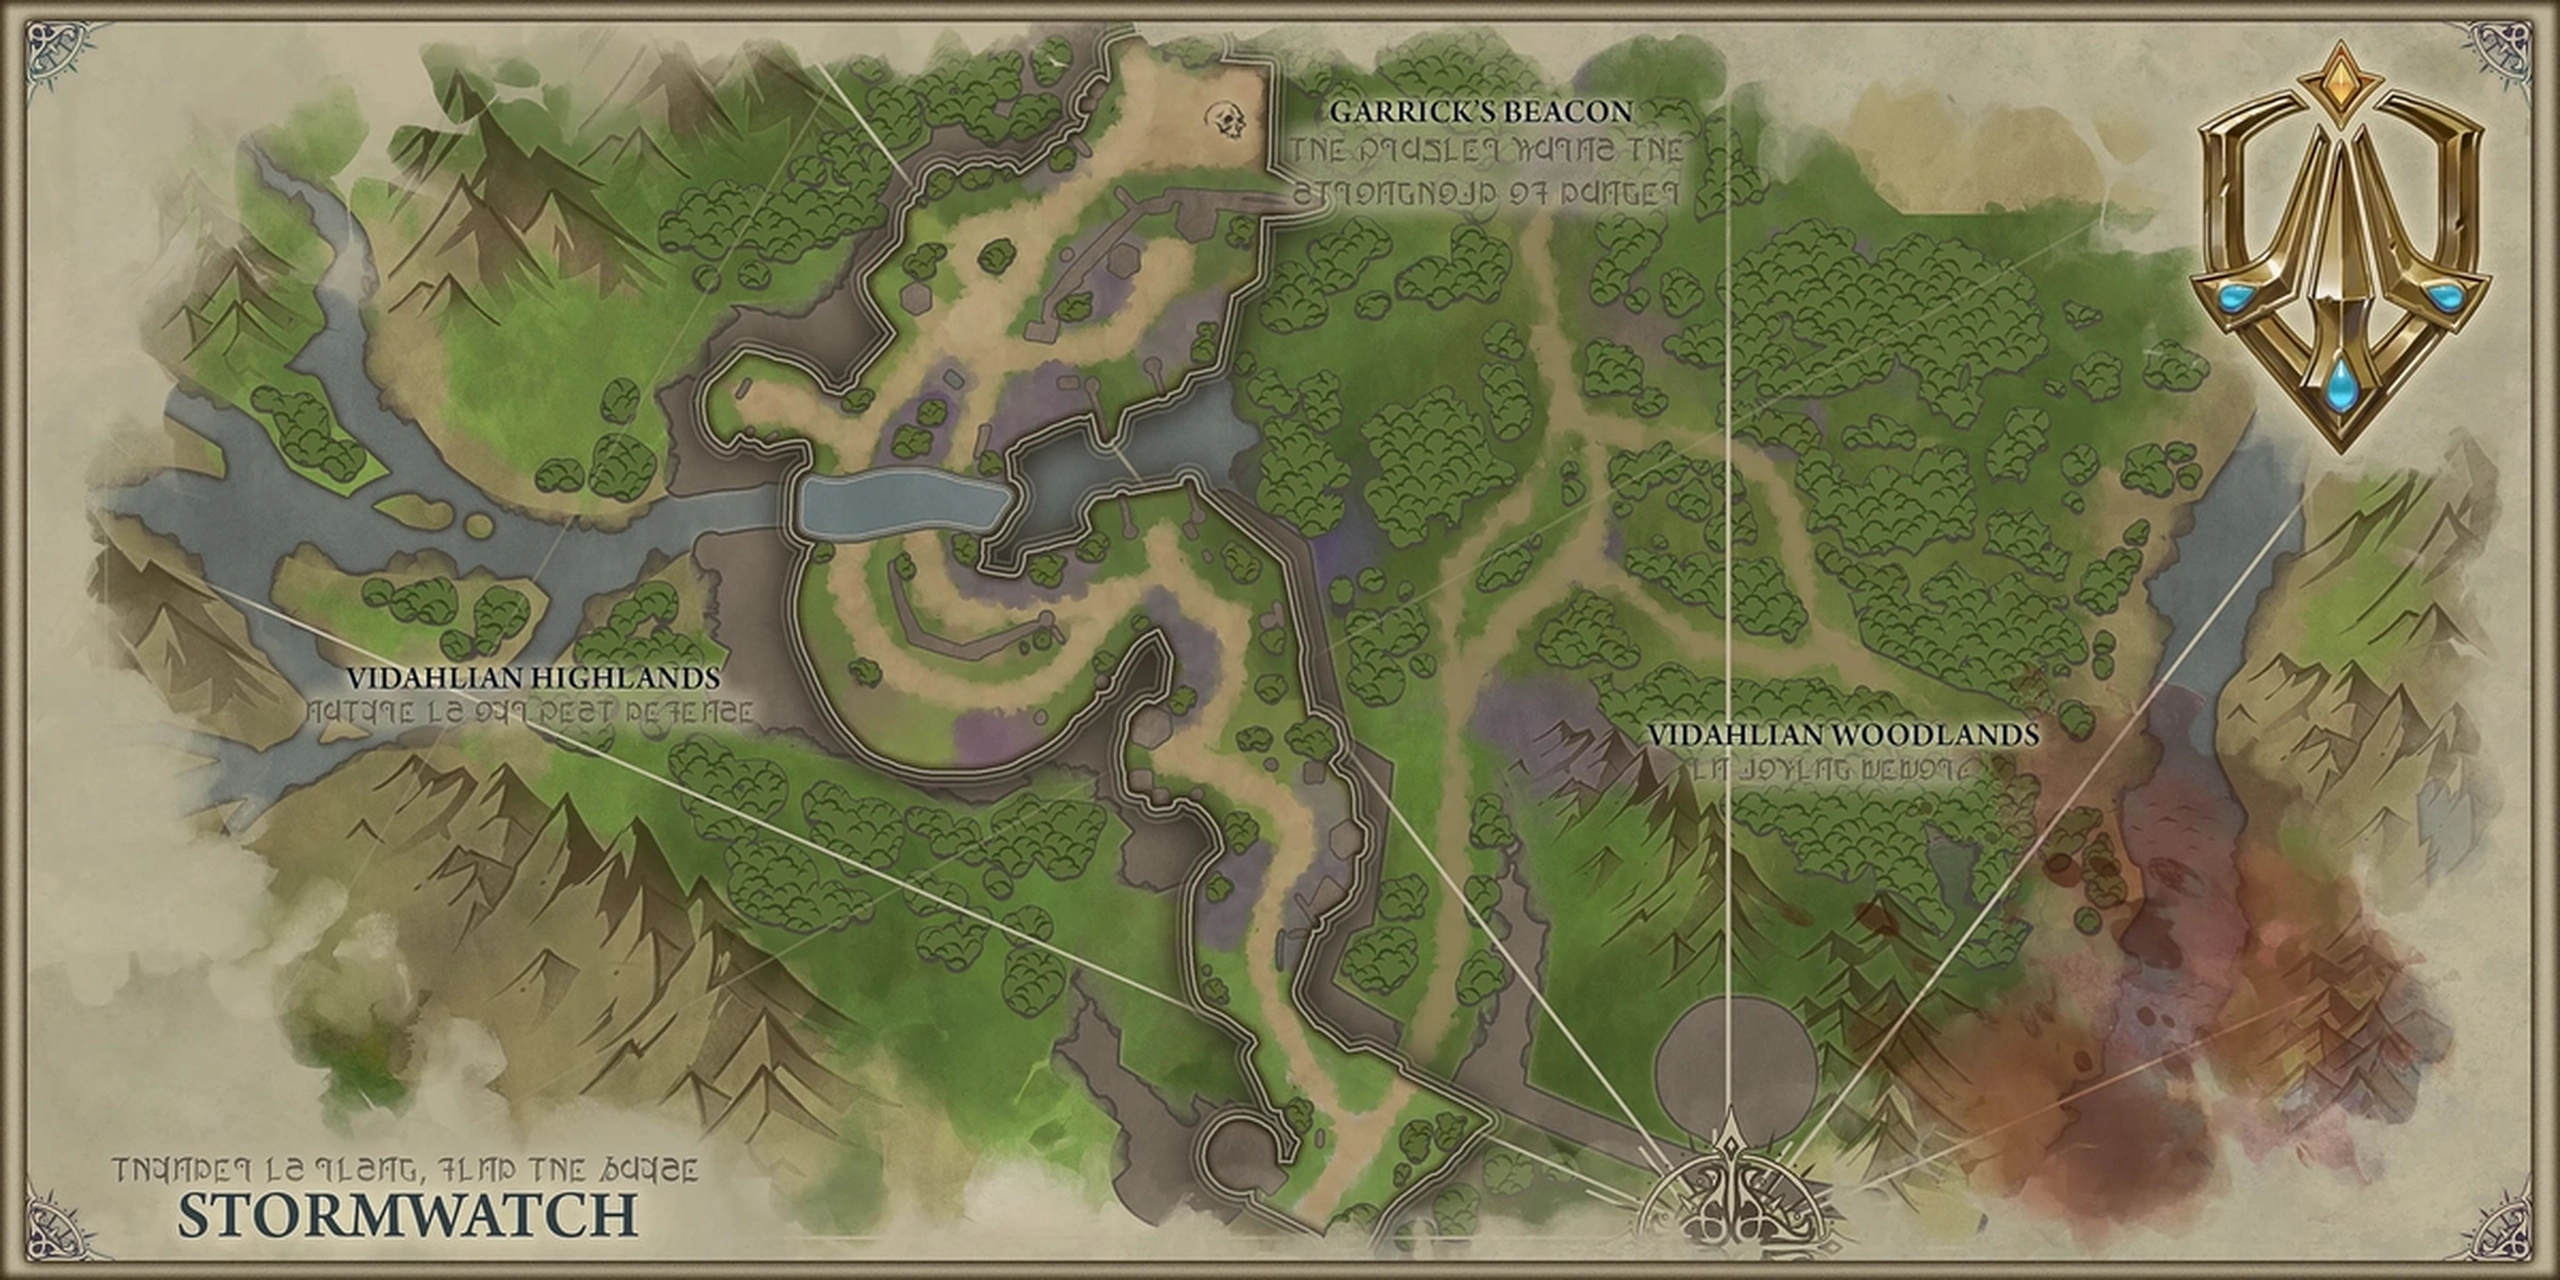
Stormwatch Maps

Stormwatch Trash Mobs
| Enemy | Name | Score | Stunnable | Abilities |
|---|---|---|---|---|
 | Mancatcher | 2 | Yes | Auto Attack Basic melee physical damage attack. Grip Every 40 seconds, target someone more than 10 yds away, pull them to you, and applying a 65% slow for 1 second. |
 | Profane Invoker | 4 | Yes | Auto Attack Basic melee physical damage attack. Shadow Bolt (Interruptible) After 2 seconds, send a bolt of shadow to your target, dealing a small amount of magic damage. Wither (Adept+) (Interruptible) (Dispellable) (Priority) After 3 seconds, apply a high damage DoT to your target. |
 | Nightmist Cutthroat | 3 | Yes | Auto Attack Basic melee physical damage attack. Backstab Whenever a player is within melee range and faces away from you, Backstab your target until they move out of range. Mist Step (Adept+) Every 14 seconds, disappear and reappear behind a random target and Backstab them. |
 | Executioner | 5 | No | Auto Attack Basic melee physical damage attack. Executioner’s Cleave (Adept+) Every 4 seconds, cleave your target and apply a stacking debuff that increases damage taken by 5% per stack. |
 | Dire Rat | 1 | Yes | Bite Basic melee physical damage attack. Frenzy Gain Death Throes upon reaching 50% health. Death Throes: Fixate on a random enemy and gain 50% increased Haste and 50% Life Steal on attacks. |
 | Ashen Arsonist | 3 | Yes | Auto Attack Basic melee physical damage attack. Flame Blast (Interruptible) After 2 seconds, deal fire damage and apply a DoT in a cone towards your target. 18 second cooldown. Big Oogha Flame (Adept+) (Interruptible) (Dispellable) (Priority) After 3 seconds, deal high damage and apply a high damage DoT to your target. 15 second cooldown. |
 | Shinchopper | 1 | Yes | Auto Attack Basic melee physical damage attack. |
 | Pillager | 2 | Yes | Auto Attack Basic melee physical damage attack. Blood Frenzy (Adept+) Gains 1 stack each time something nearby dies. Gain 10% Haste, Damage, and Max Health per stack. |
 | Bully Basher | 4 | Yes | Auto Attack Basic melee physical damage attack. Together Stronk! (Adept+) (Interruptible) (Priority) After 4 seconds, reduce the damage you take by 20% and increase the damage of your nearby allies. Bully Bash An attack with large physical damage. 20 second cooldown. |
 | Facestabber | 2 | Yes | Auto Attack Basic melee physical damage attack. Stab Yer Face! Target a random player, attach to them, and deal continuous damage. Every instance of damage applies a stacking debuff. This effect is removed when target is healed to full health. 35 second cooldown. Throw Knife After 2 seconds, throw a knife at target player. 18 second cooldown. |
 | Stormscreamer | 5 | Yes | Auto Attack Basic melee physical damage attack. Crackling Bolt (Interruptible) Deals damage to target. Ball Lightning (Interruptible) Target a random party member, after 3 seconds release a slow moving projectile in their direction. Coming into contact with the projectile deals high damage. 18 second cooldown. Sky Zapper (Adept+) (Interruptible) (Priority) Apply a buff to self. Deal damage to random party members periodically. |
Notable Trash Enemy Abilities
Profane Invokers aren’t something to worry about until Adept+. In Adept+, they will cast Wither, a high priority interrupt. If this ability goes through, the party’s healer needs to be prepared to dispel whoever gains the DoT from this cast.
Nightmist Cutthroats will continuously Backstab anyone not looking at them that’s within melee range of them. Walking out of melee range will stop their Backstab. In Adept+, they will begin to use Mist Step to appear behind a random target. Be ready to move when you see a Nightmist Cutthroat disappear.
Executioners in Adept+ will gain Executioner’s Cleave, applying a debuff with each cleave. The tank needs to make sure to reset the these stacks, once they accumulate about 4, by kiting until they fall off. Everyone else needs to make sure they aren’t standing next to the tank to avoid Executioner’s Cleave.
Pillagers will ramp up each time an enemy NPC dies nearby. Kill them before they ramp up too much as they can become strong very quickly.
The Dire Rats will go into a Frenzy at 50% health. It’s wise to hold burst damage and/or CC for when they reach 50% health.
Make sure not to stand in the Ashen Arsonists’ Flame Blast cone. Once you reach Adept+, make sure to prioritize interrupting Big Oogha Flame. If this is not interrupted, the party’s healer needs to be ready to dispel the DoT and spot heal the initial burst of damage.
In Adept+, make sure to interrupt the Bully Basher’s Together Stronk! ability as it massively buffs himself all the other enemies around him.
Facestabbers will deal a lot of damage with their Stab Yer Face!. Utilize stuns, displacements, or disorients to stop their attack.
Before Adept+, you can focus on interrupting the Stormscreamer‘s Ball Lightning, but you can simply walk out of its path and be fine. In Adept+, the main priority kick is Sky Zapper as this does high, unavoidable damage throughout the duration.
Route
We will go over one of the possible routes in Stormwatch. When choosing a route to take, we must remember to avoid pulling more than three caster mobs with priority interrupts and avoid overcapping the Kill Score requirement.
| Pull | Pull Size | Kill Score | Enemies |
|---|---|---|---|
| 1 | 4 Mancatchers, 2 Nightmist Cutthroats, 2 Pillagers, 1 Executioner | 23 | 9 |
| 2 | 3 Mancatchers, 2 Nightmist Cutthroats, 1 Pillager, 1 Profane Invoker | 18 | 7 |
| 3 | 3 Nightmist Cutthroats, 2 Pillagers, 1 Mancatcher, 1 Profane Invoker, 1 Executioner | 24 | 8 |
| 4 | 3 Ashen Arsonists, 2 Nightmist Cutthroats, 1 Mancatcher, 1 Profane Invoker, 1 Executioner | 26 | 8 |
| 5 | 7 Pillagers, Warlord Brogg | 14 | 8 |
| 6 | 7 Shinchoppers, 1 Bully Basher | 12 | 8 |
| 7 | 4 Pillagers | 8 | 4 |
| 8 | 9 Dire Rats | 9 | 9 |
| 9 | 4 Facestabbers, 3 Shinchoppers, 1 Executioner, 1 Stormscreamer | 21 | 9 |
| Total Score: 155/155 |
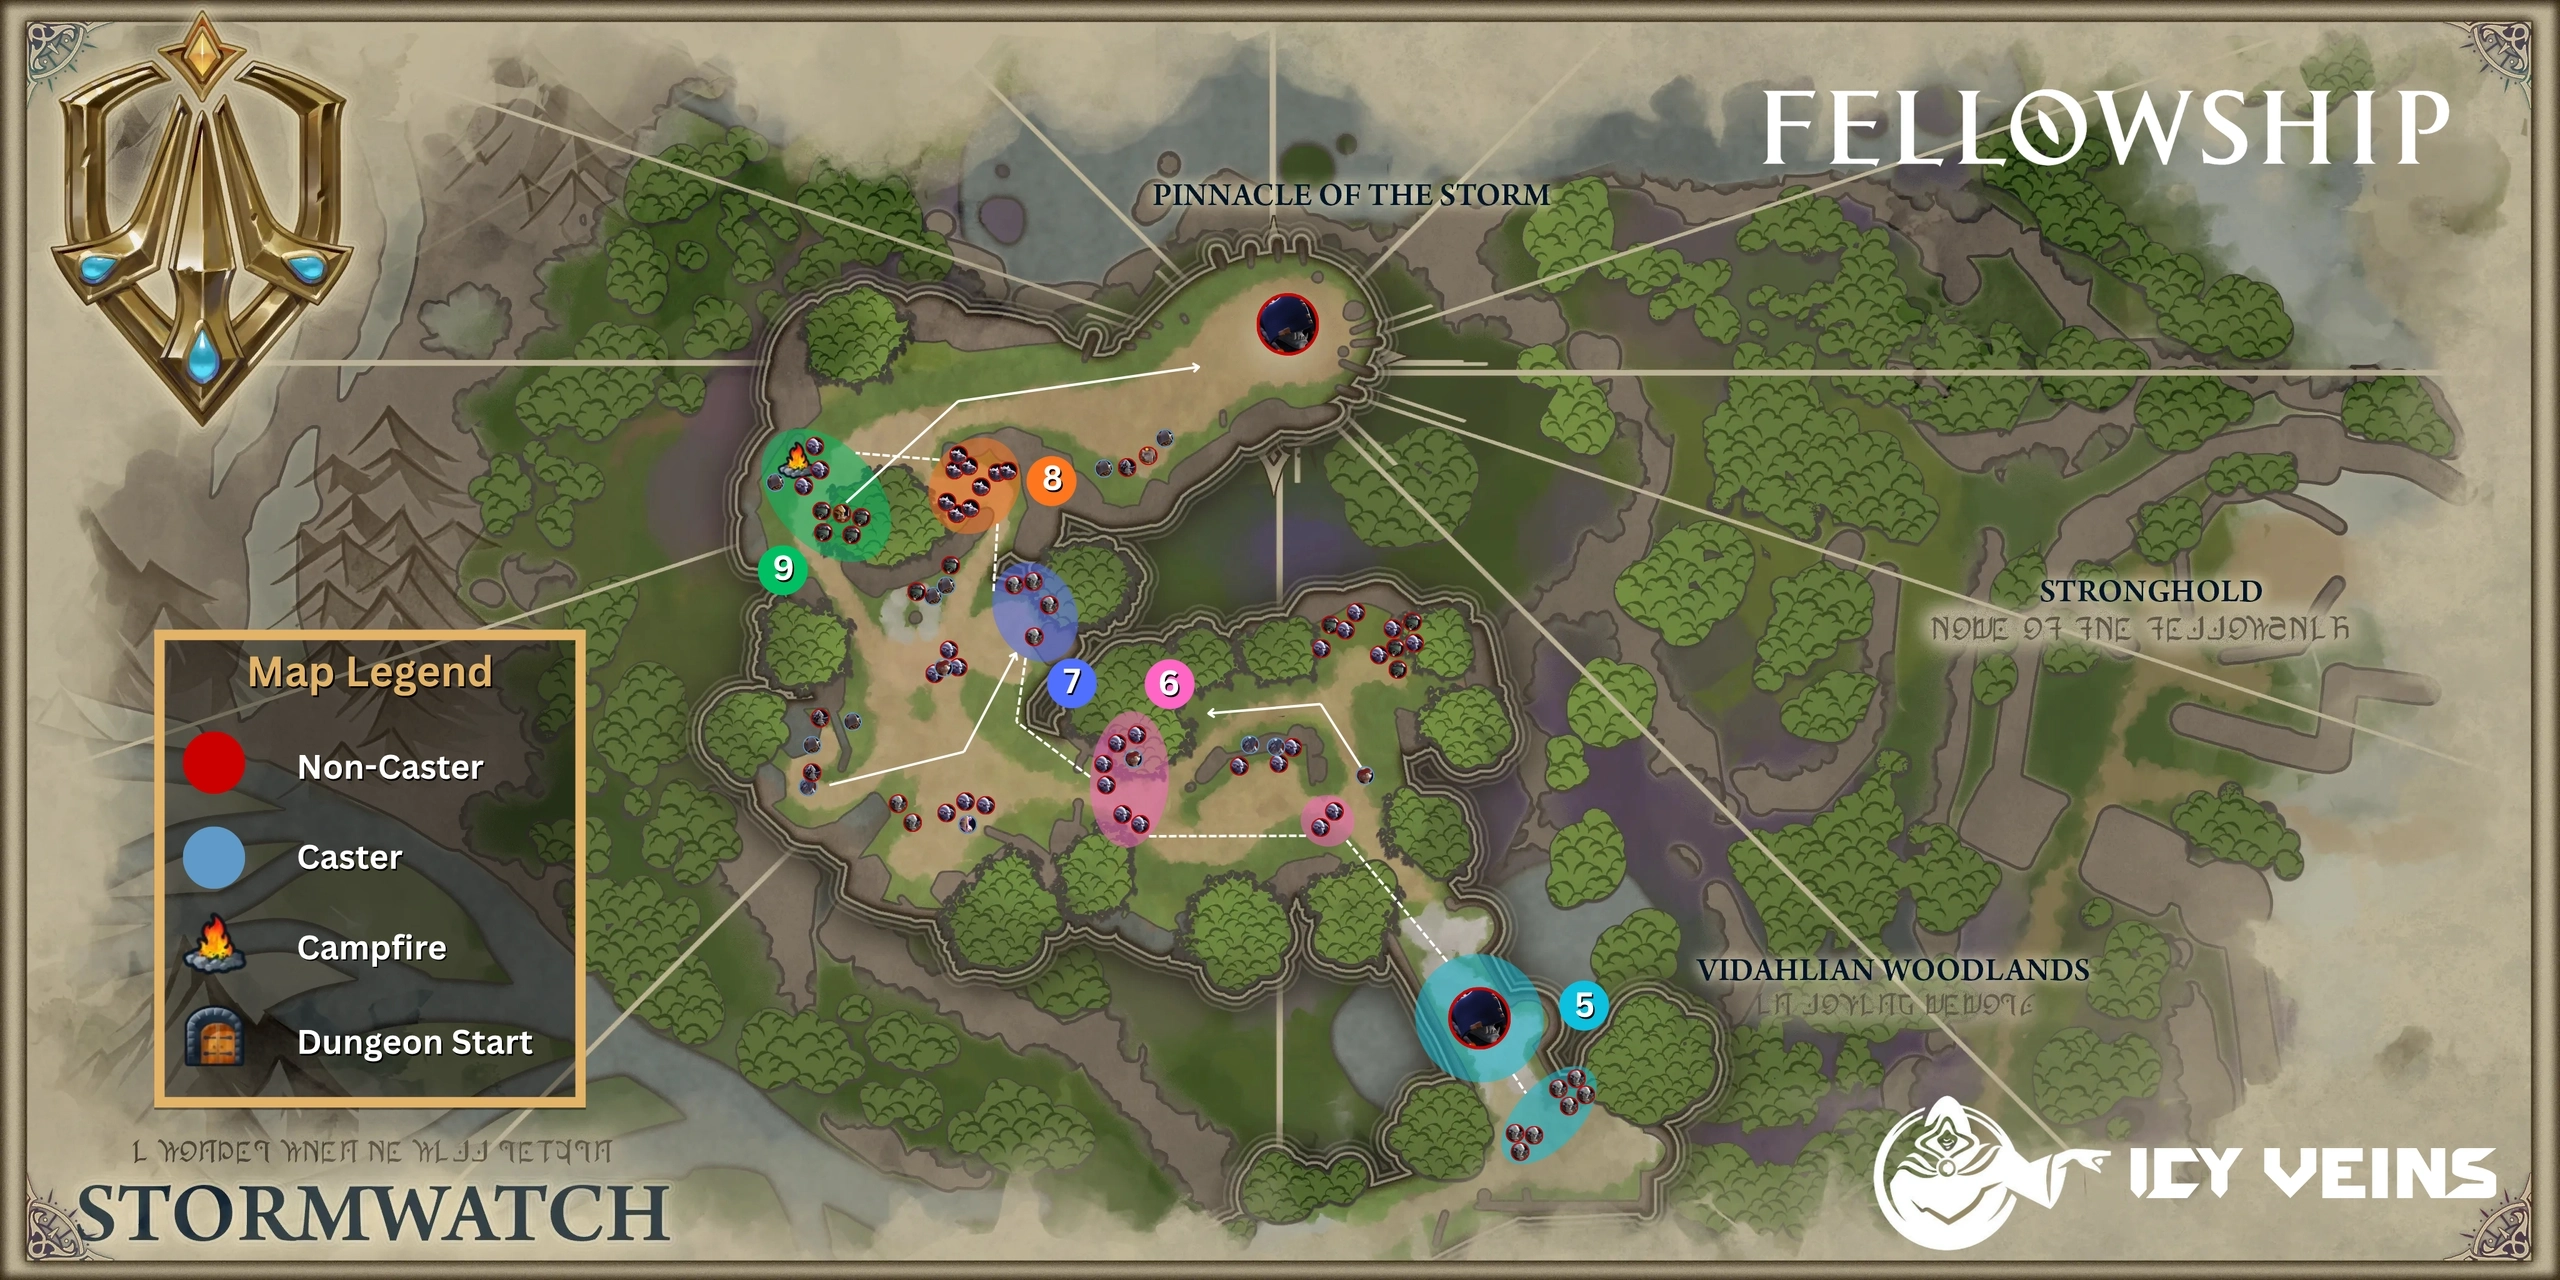
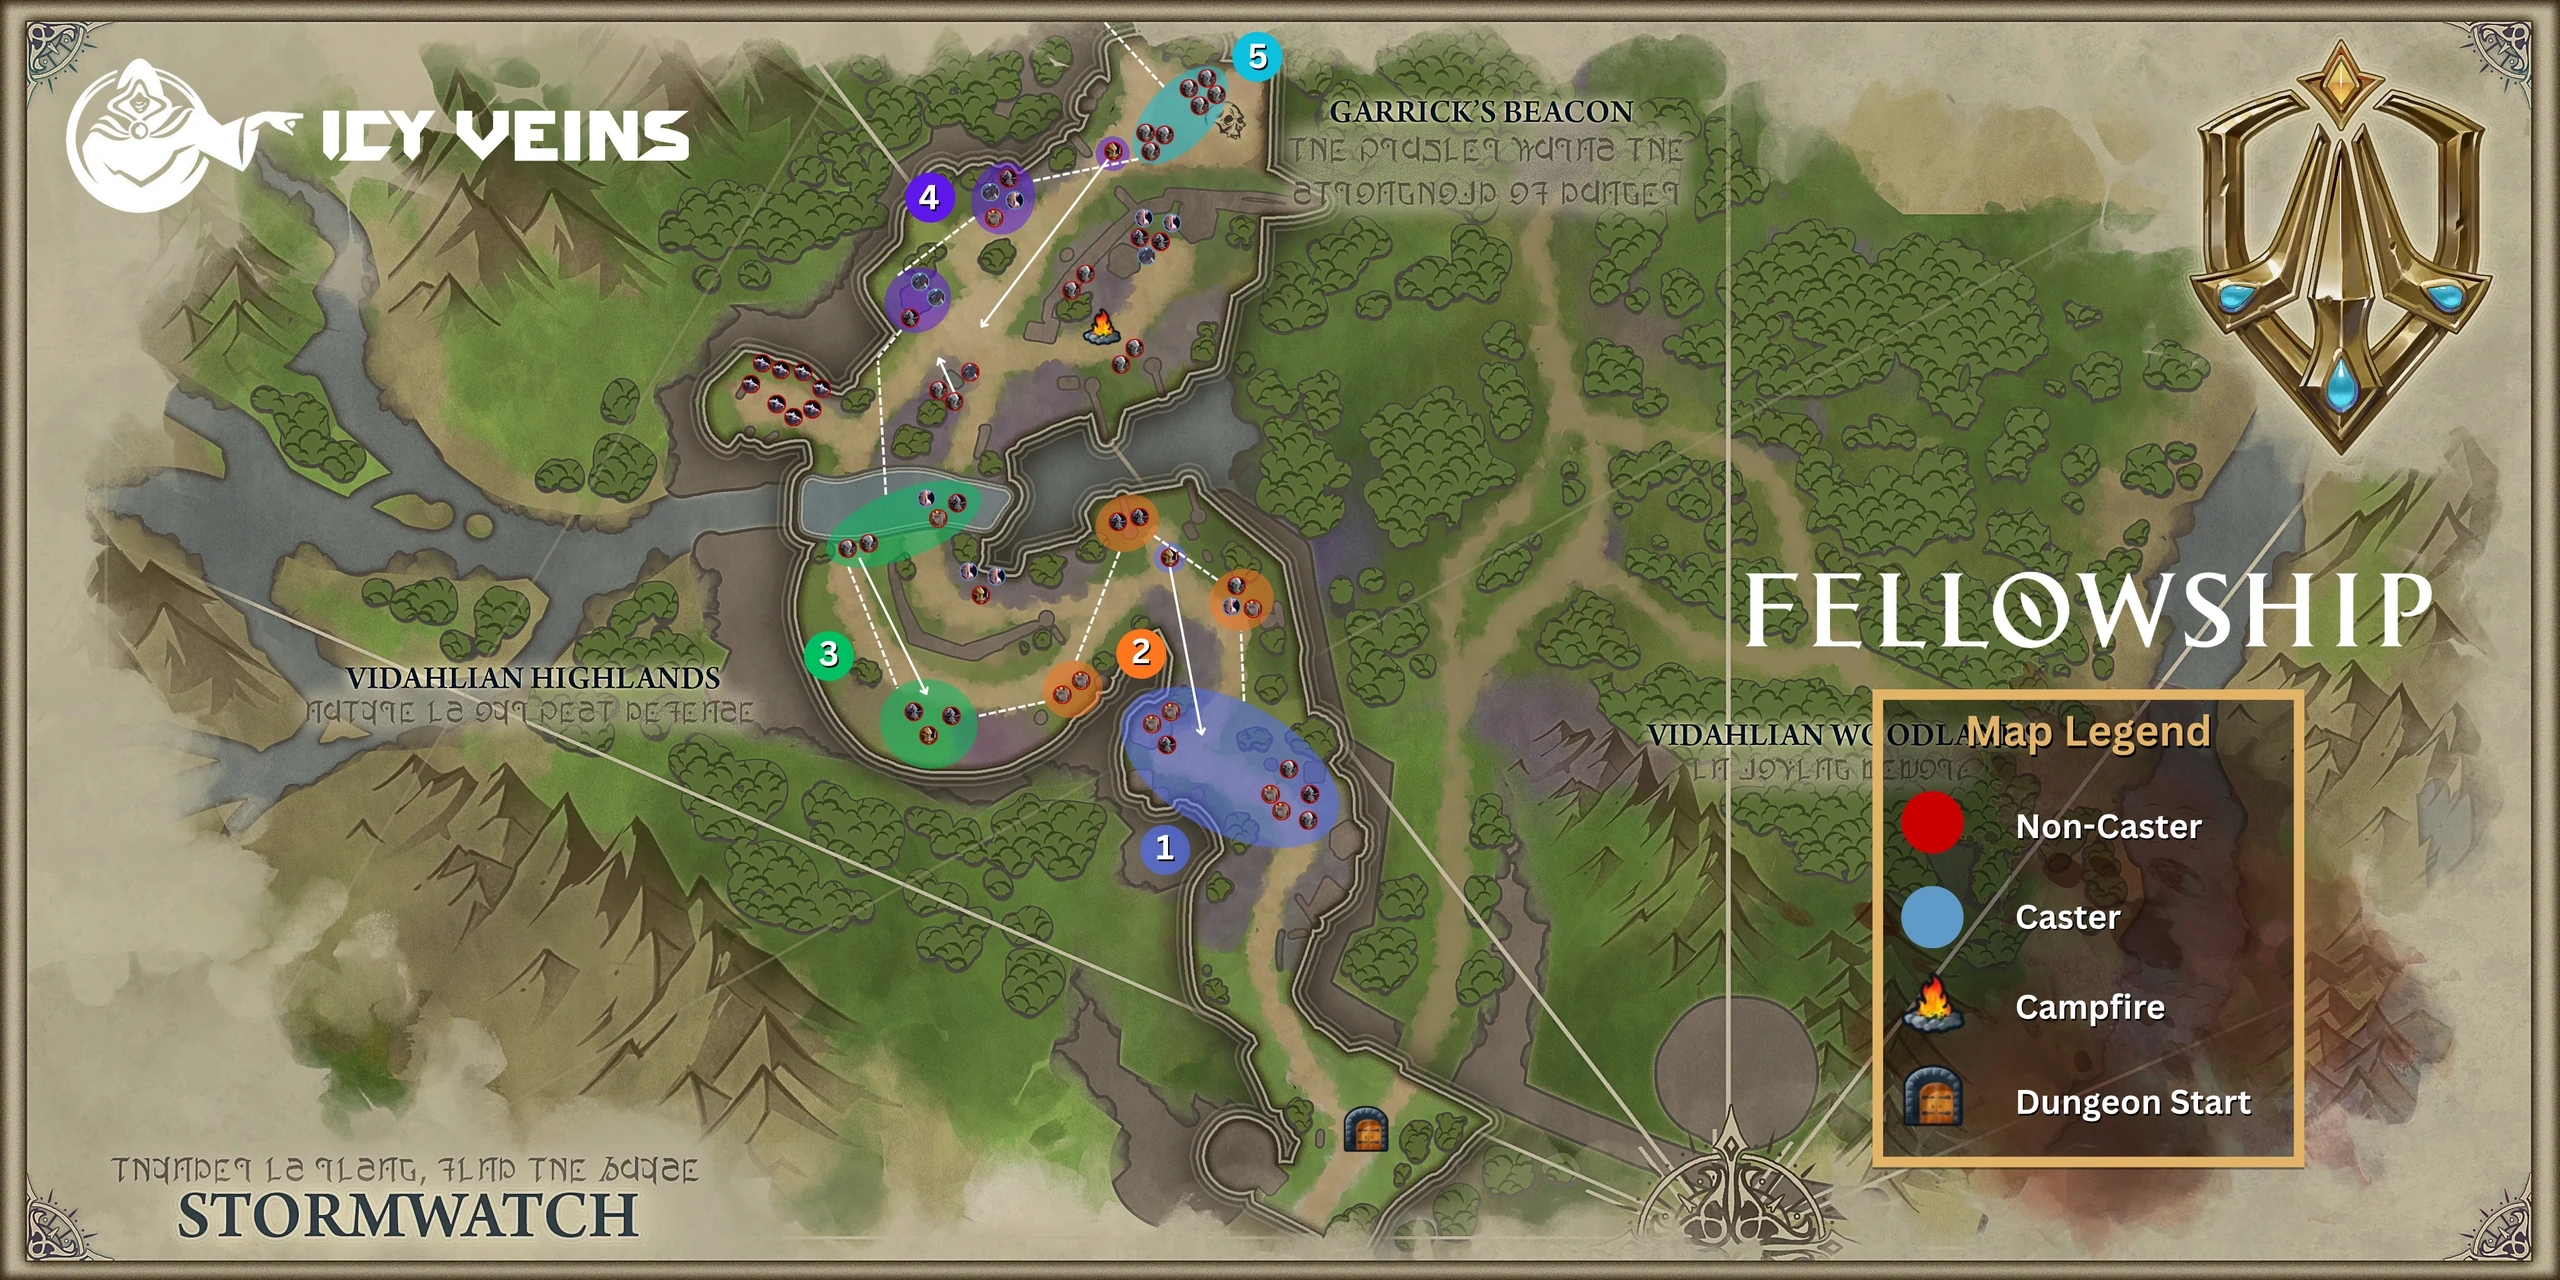
This guide will refer to the different pulls by their corresponding number on the above map and table.
1. After spawning into the dungeon, we head North and grab the first two packs we see. The Executioner will walk into us while on patrol. Kill the Pillagers first, if possible, and avoid the Nightmist Cutthroat’s Backstab. In Adept+, the tank will need to kite the Executioner to drop the stacks of Executioner’s Cleave. Once everything else is dead, you can drag the Executioner to the next pull.
2. This pull only has 1 caster to worry about, the Profane Invoker. When playing this dungeon in Adept+, you can ignore their Shadow Bolts and just focus on interrupting the Wither cast.
3. There is only 1 Profane Invoker in this pack as well. Focus Pillagers, interrupt Wither, and have Tank kite the Executioner to drop their debuff stacks when necessary.
4. Avoid the lair of rats on your left and the pack with 2 Pillagers and 1 Ashen Arsonist.
Grab the 2 Ashen Arsonists and 1 Nightmist Cutthroat in front of the tent and loop around the left side of the tent if the Pillagers threaten to aggro. Then grab the 1 Mancatcher, 1 Profane Invoker, the other Nightmist Cutthroat, and third Ashen Arsonist. The Executioner will path into you while on patrol.
This pack will have 4 casters. This means that you might need to let one cast through. The highest priority to interrupt will be the Big Oogha Flame from the 3 Ashen Arsonists. Wither can be let through since it doesn’t do a burst of damage to a target like Big Oogha Flame does. The healer can easily dispel Wither with minimal issues.
The Executioner can be dragged into the next pull, if he’s still alive.
5. If you brought the Executioner with you, make sure to kill him before bringing the Pillagers to Warlord Brogg. In higher difficulties, you may want to kill most (if not all) of the Pillagers before going to Warlord Brogg. The fight with Warlord Brogg will queue up to end when he reaches 80% or lower. If he’s currently channeling or casting an ability, it will delay his departure and allow you to deal a little more damage to him. Whatever health% your team gets him down to is the health% that the final fight with Warlord Brogg will begin at.
6. Hug the left wall to avoid the pack with the Ashen Arsonists. We only need to worry about interrupting the Adept+ Together Stronk! ability from the single Bully Basher in this pack.
7. Hug the right wall to avoid all other packs but the 4 Pillagers. You can pull these into the next pack if you’re confident that they will die before the Dire Rats do.
8. Hold burst damage for when the Dire Rats are 50% health to reduce the amount of time they’re alive while in their Frenzy.
9. Pull the patrol into the pack on top of the campfire, make sure to knock the Facestabbers off when they use Stab Yer Face! by using stuns, displacements, or disorients. Use your interrupts on the Stormscreamer and prioritize interrupting their Adept+ Sky Zapper ability.
Stormwatch Boss Guide
The Stormwatch boss fight is against Warlord Brogg. This fight will require good positioning and coordination with your party members in order to survive.
Warlord Brogg’s Abilities
| Name | Recast | Interruptible | Description |
|---|---|---|---|
| Charged Bolt | 0s | Yes | Deal high damage to random party member. |
| Storm’s Conduit | N/A | No | Deals Lightning damage periodically, jolting nearby heroes for magic damage. |
| Perfect Storm | 32s | No | After channeling for 3 seconds, deal massive damage to all party members nearby. |
| Lightning Rod (Adept+) | 38s | No | Target random player with an AoE. Deal continuous damage divided among all players within the AoE. |
| Raiders | 70s | No | Summons 2 Mancatchers. |
| Dread Arc | 20s | Yes | After 3 seconds, target a random player and deal high damage to them, chaining to other party members nearby. |
Before the Fight
Make sure your healer has mana before engaging.
Assign one ranged DPS to interrupt Dread Arc. The other DPS and the tank will be focusing on Charged Bolt. The tank should be the first to use their interrupt since their interrupt cooldown will be up faster than both ranged and melee DPS.
Remember: Keep yourself healthy by avoiding as much damage as possible. Dying can lead to a wipe.
Warlord Brogg
Tank should stay opposite to where the DPS and Healer is so that it requires minimal, if any, movement for them to avoid the Forked Lightning. Forked Lightning will always target the person with the highest aggro. Another good reason for the Tank to be on the opposite side of the boss is to make it easier to tell when Warlord Brogg is targeting a squishy with his Charged Bolt.
Warlord Brogg will always turn towards the target he intends to target Charged Bolt with.
Warlord Brogg will open with summoning 2 Mancatchers with his Raiders! ability. Try to cleave these down before he casts his Perfect Storm ability as the Mancatchers can pull you back into the devastating damage of the Perfect Storm’s AoE.
There are two interruptible casts that Warlord Brogg does: Charged Bolt and Dread Arc. You should always be looking to interrupt Charged Bolt when it’s targeting anyone other than the Tank.
Once you reach Adept+, Warlord Brogg will begin to use Lightning Rod. Lightning Rod is a boss ability for your Healer to hold cooldowns for. It will center on one target, the damage is divided among those within the AoE. Make sure everyone in the party is within this Soak UNLESS it’s on the Tank and your Tank has defensives up.
Wishlist Fellowship
If you enjoyed your time with Fellowship during the open beta, or if you’re at all interested in playing, be sure to wishlist the game on Steam. The game launches into Early Access on October 16th.