Amrine Excavation Expedition Guide for New World
Welcome to our quick guide to the Amrine Excavation Expedition in New World. This guide will give you proper direction to completing this Expedition quickly and smoothly.
Location, Entrance, and General Information
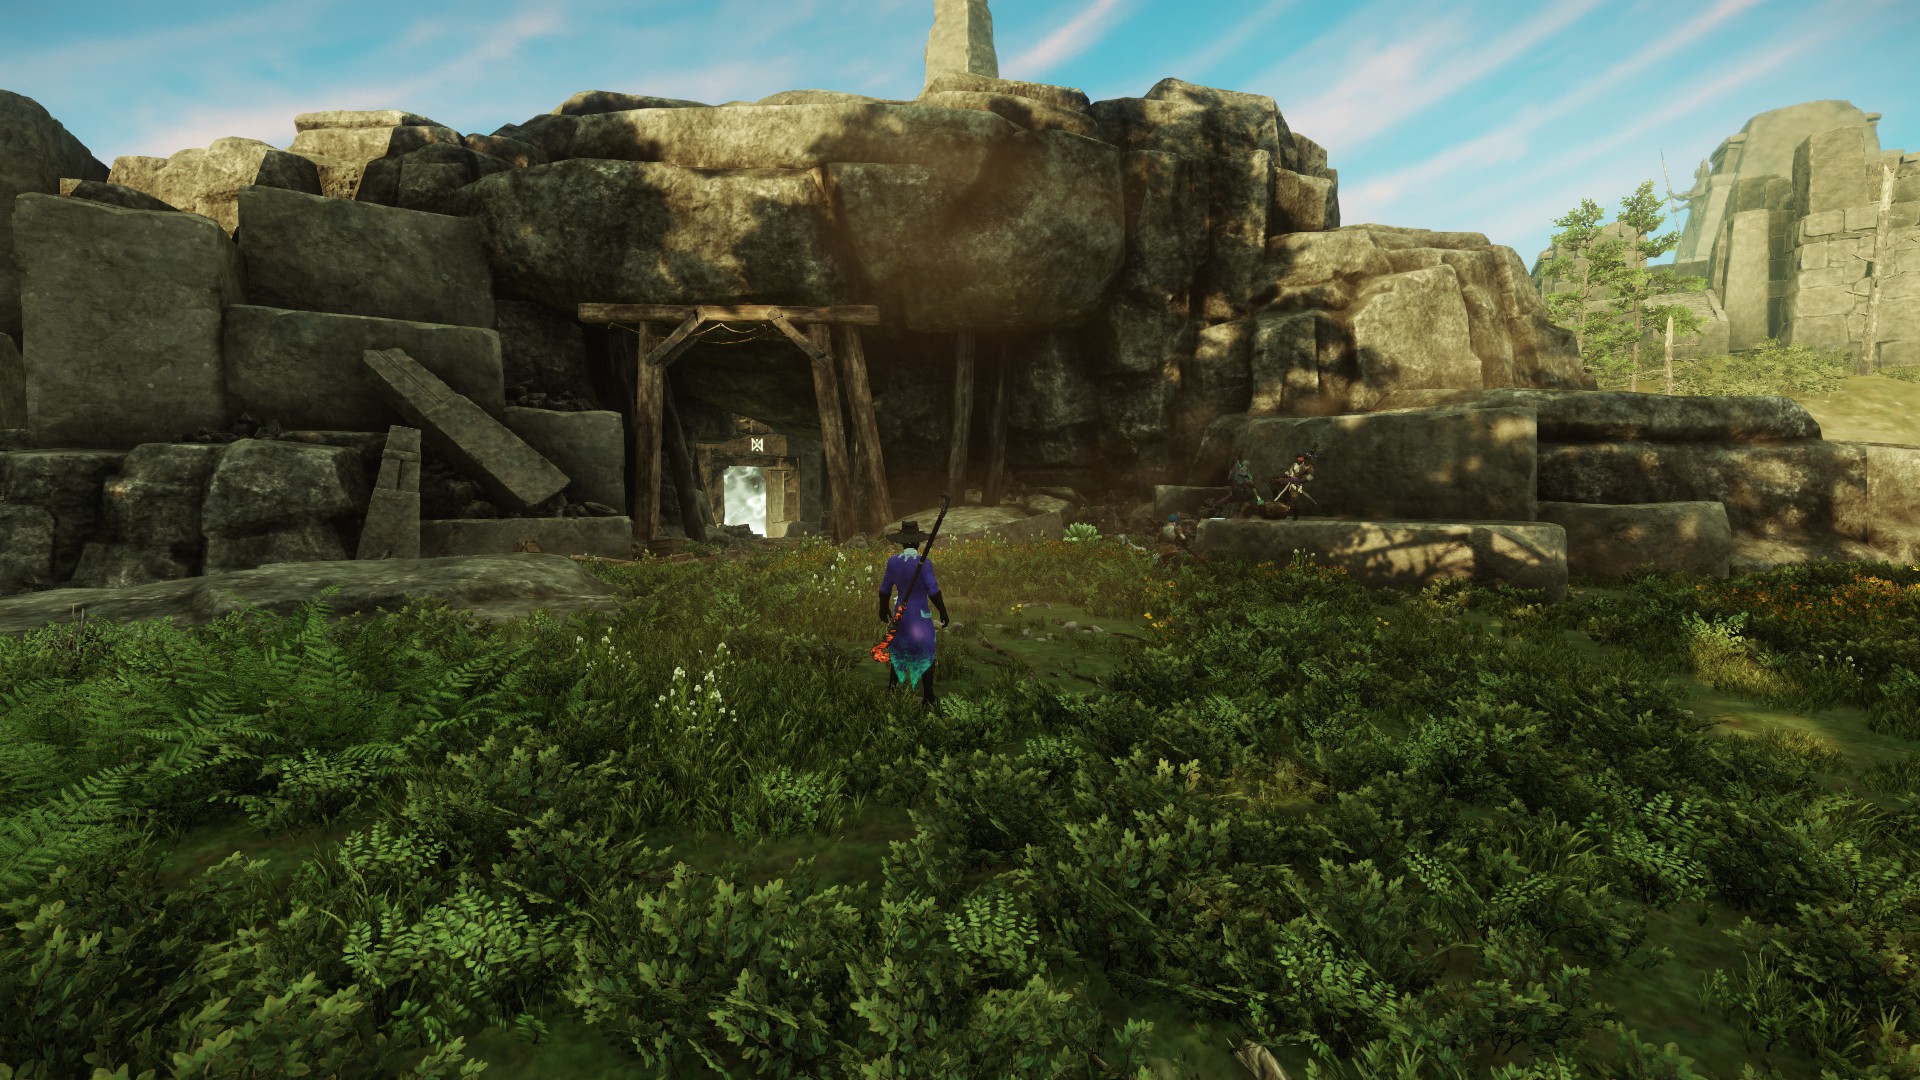
The Amrine Excavation This Expedition is located directly North of the Settlement of Windsward. While its in-game recommended level is 25, we suggest going in as early as level 23, because that is when you can start to receive repeatable quests for the Expedition.
The entrance to the expedition is located inside the tunnel pictured below.
Enemy Type
The Amrine Excavation contains solely Lost foes who are weak to Strike, Ice, and Nature damage, while being strong against Thrust and Void damage.
Repeatable Quests
At level 23 you can receive the  Bones For Barkimedes (Expedition) quest,
which once completed, will allow you to take the quest of the same name
( Bones For Barkimedes (Expedition)) as a repeatable. Each time you
complete the Expedition, you should encounter 5 Ravagers that each drop a bone;
loot them all to be awarded 4,920 XP upon completing the quest with
Barkimedes.
Bones For Barkimedes (Expedition) quest,
which once completed, will allow you to take the quest of the same name
( Bones For Barkimedes (Expedition)) as a repeatable. Each time you
complete the Expedition, you should encounter 5 Ravagers that each drop a bone;
loot them all to be awarded 4,920 XP upon completing the quest with
Barkimedes.
This repeatable is great, because Amrine can be run through extremely quickly and the pick-up and hand-in for this quest is directly outside the door for the Expedition. You can also start to receive Expedition faction missions from Windsward once you reach level 23.
Layout
This expedition is not all that long and yet still has one area that you will pass through twice. The first time you go through the Grand Traverse, all the puzzle buttons will be locked; however, after going through the expedition farther, you will come back to the room and be able to interact with the puzzle buttons (see below). You will find mostly lost zombies, ghosts, abominations, and Ravagers. Make sure you pay attention when Ravagers die, because each one will drop a bone that you need for the repeatable quest. There are 5 Ravagers and you need the loot from all of them to complete the quest.

Bosses
This Expedition has two bosses, Foreman Nakashima and Simon Grey. In Expeditions, you can only be picked up from being downed one time before you are forced to respawn, and most boss rooms seal off the entrance once the boss is engaged. This effectively gives you two lives in a boss fight, assuming that your teammates can pick you up when you get knocked down.
Foreman Nakashima

This boss is a purple ghost that you summon by activating the Spectral Shrine in the middle of the boss platform. You can only activate this Shrine if you looted the candle out of the box in the hallway leading up to this room.
Abilities
The boss will occasionally summon a medium-sized chain ring around a random player. If any player passes through the chain, it will stun everyone nearby it for a few seconds. While the chain ring is up, the Foreman will summon ghosts to charge through the space occupied by the chain ring.
Each ghost will be preceded by a faint white line that is easy to see if you move your camera to look down. After a short delay, the ghost will charge down this line dealing a large amount of damage to those hit.
Strategy
This boss had no adds to worry about and can be tanked anywhere; however, to avoid being pushed through a chain ring the tank should put their back to a wall.
Everyone should make sure to not go through a chain ring, as the resulting stun almost guarantees that everyone stunned will be hit by ghosts. Also, keep an eye out because ghosts that are targeting a ring at a distance can travel far away from the ring and still hit you.
Simon Grey
The final boss of the Expedition, an extremely large Ravager, is found shortly after a respawn point. There are three trash monsters in the room that you should clear out before approaching the boss and starting the encounter.

Abilities
As the fight begins, Simon will summon three lost minions around him and he will continue to summon new minions throughout the fight. Simon will also occasionally vomit onto the ground, dealing damage to those in front of him. If any of the minions are still alive when Simon pukes, they will run over to the vomit, eat it, and then become empowered, doing additional damage.
If these empowered minions survive long enough, then Simon will eat them and become empowered himself. You can tell if Simon or a minion is empowered because of a red glow on them.
Strategy
The minions that the boss spawns should be taunted by the tank (we recommend
holding back taunts and AoE damage until Simon summons his minions), with an
Ability like ![]() Defiant Stance, and killed by the DPS, as otherwise they
will attack the group's healer.
Defiant Stance, and killed by the DPS, as otherwise they
will attack the group's healer.
Once they are taunted, the DPS should focus them down quickly and then get back to dealing damage to the boss. If the healer or a DPS get aggro from the adds, the other DPS should switch to those and quickly kill them while the player with aggro avoids taking damage by running away.
After Simon is defeated a chest will be lootable next to the portal out of the expedition.
Puzzles

Once you clear through the Broken Vestibule, you will activate a respawn point and re-enter the Grand Traverse. Here there are 3 buttons that can be stepped on to activate them. In order to activate the bridge to the next zone all three will have to be activated at the same time. Once activated, an enemy will spawn at the West and East button.
The East button spawns a Ravager, which is needed for the Bones for Barkimedes quest. The two players who activated the West and East buttons should both run back to the middle, bringing their monster with them to the tank who should be waiting at the middle button.
Secrets

In some Expeditions, there are hidden resources or treasure chests that can be easily missed if you are not investigating every corner. In the room with the 3-button puzzle there are several gatherable resources and a chest down in the water. The chest is somewhat hidden within a waterfall.
Loot Drops

 Flare Spark
 Darkness Defined
 Simon's Hacksilver Ring
 Nakashima's Keepsake
 Excavator's Safety Helmet
 Prosperous Promise
 The Space Between
 Crusher's Craze
 Amrine's Forgotten Axe
 Burial Spear
 Amrine Excavator's Amulet
 Coagulated Blood
Heartrune
To acquire the Amrine Heartrune, you must complete the normal difficult of Amrine Excavation, or you can obtain it in the Mutated version of Starstone Barrows because it is uniquely combined with Amrine Excavation when it is Mutated.
Mutated Drops
Some items can only drop on certain difficulty levels of the Mutated version within some expeditions. This expedition is unique--when Starstone Barrows is Mutated it combines segments of both Amrine Excavation and Starstone Barrows. As such, this list will compile the list of shared drops from Mutated Starstone Barrows.
Level 1+
 Simon Grey's Helmet
 Simon Grey's Shambles
 Simon Grey's Wristguards
 Simon Grey's Pants
 Simon Grey's Boots
- The Space Between
- Crusher's Craze
- Amrine's Forgotten Axe
 Lost Faith
- Darkness Defined
- Amrine Excavator's Amulet
 Cavern Lurker's Defense
- Nakashima's Keepsake
 Frozen Mire
 Simon Grey's Toothpick
- Excavator's Safety Helmet
 Tomb Raider's Rifle
- Burial Spear
- Simon's Hacksilver Ring
- Prosperous Promise
- Flare Spark
 Staff of the Befouled Temple
 Obsidian Edged Musket
 Graveguard's Seal
 Creeping Cold
 Staff of the Immolated Veil
 Sunderstrike
- Obsidian Rapier
 Fanged Ring
 Masquerade Mask
 Glacial Longsword
 Fleeting Reality
 The Obelisk
 Ancient Heartstring
 Tip of the Morning Star
 Stonehewn Ring
Level 8+
Level 9+
Changelog
- 07 Mar. 2023: Drop list updated, Tuning Orbs removed, Heartrune info added.
- 16 Oct. 2021: Guide created.
Lemoni is a New World content creator with thousands of hours of gameplay. He specializes in theory crafting builds and various gameplay mechanics to improve player performance. He also enjoys long walks on the beach.
- Icy Veins Launches Genshin Impact Guides Section
- Icy Veins Podcast About Path of Exile
- ARPG Vault Discord Giveaway
- Icy Veins is Getting a New Look
- Join Us Live on Twitch for the Icy Veins Podcast
- New World Update 1.5.6
- TwitchCon Amsterdam New World PvP Arena Open & Twitch Drop
- New World July Team Update Video