Although Chrono Odyssey doesn’t have a “formal” Main Story Quest (MSQ), there are a few “Epic Quests” that help guide your character progression and the storyline within the game. As you progress through these Epic Quests, you will eventually have to encounter a total of 4 Chrono Gates, each including a powerful enemy waiting for you at the end of it.
In this post, we’ll take a deep-dive into each of the four Chrono Gates, ensuring you understanding where they’re located, and what you have to do to come out successful.
The First Chrono Gate (Waterfall Cave)
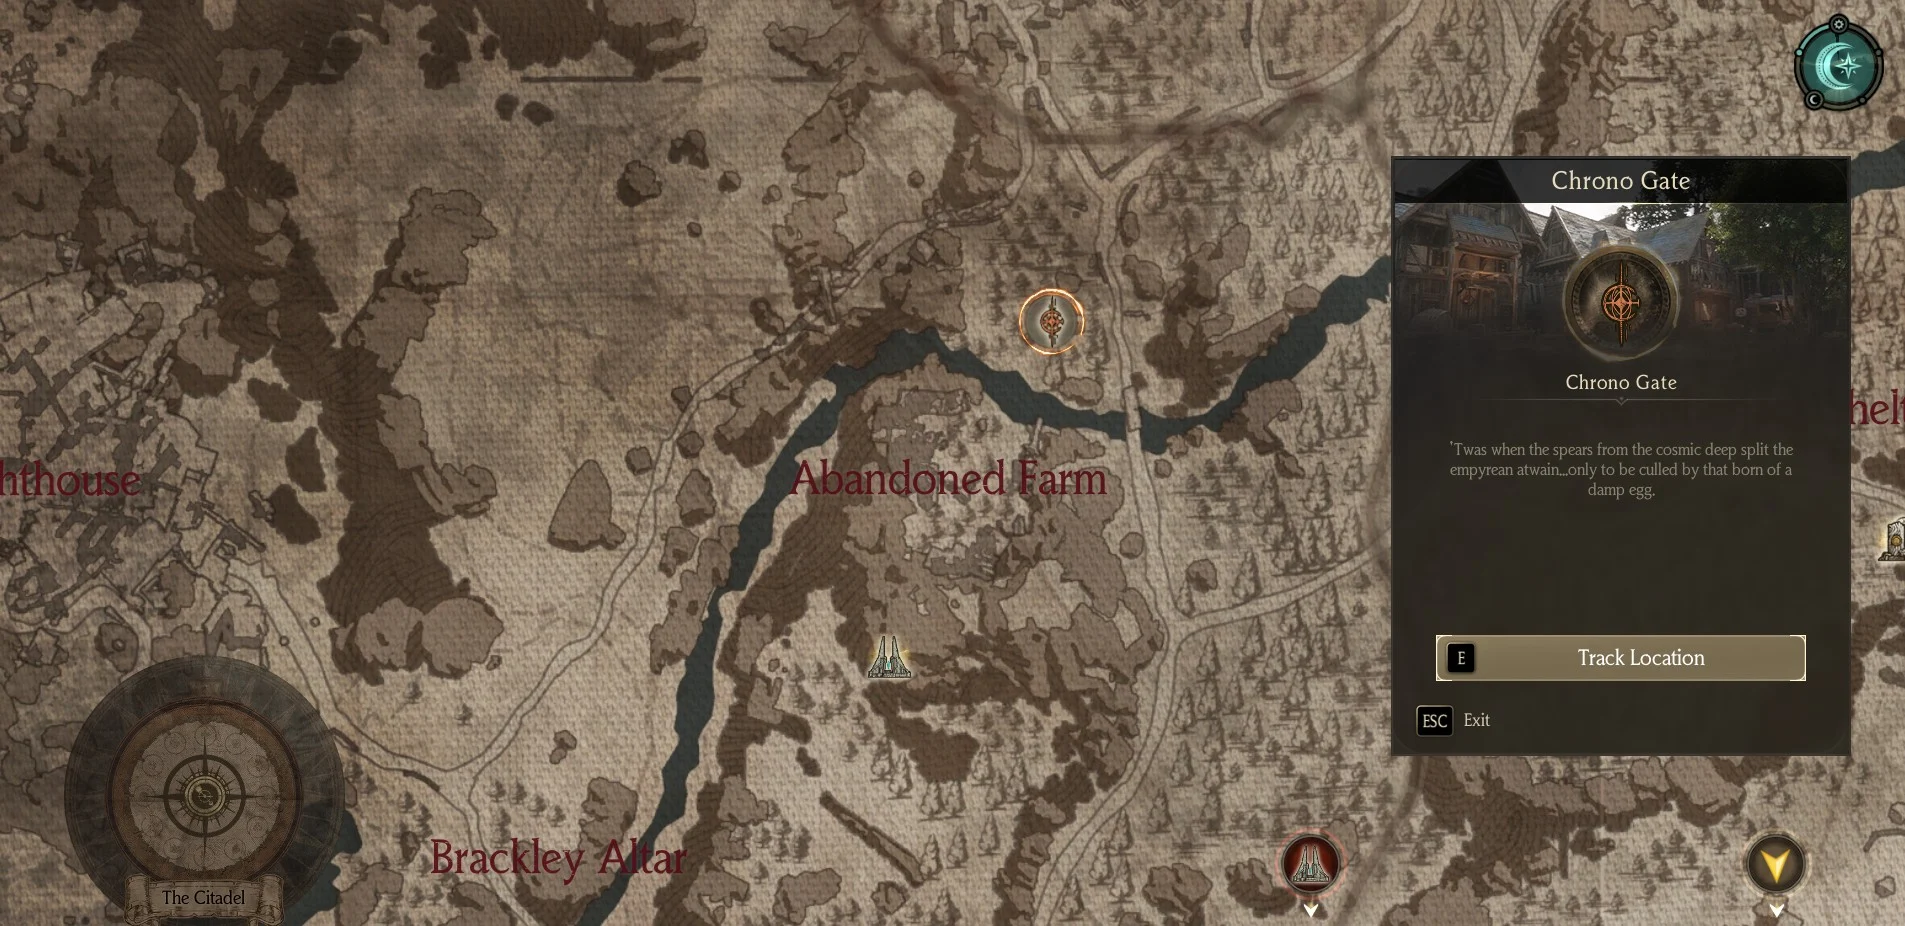
You will actually have the opportunity to challenge the very first Chrono Gate just a few minutes after creating your character, and trust us, it’s not going to be easy. This first Chrono Gate is located within a cave located at the just north of the “Abandoned Farm”. In order to find the cave, you will likely need to do a bit of a walk around a large cliff (instead of just jumping down due to fall damage).
When you enter the cave, you will eventually find a small portal on top of a pillar that will bring you directly to this Chrono Gate, allowing you to challenge the first Chrono Gate boss. We recommend you give it a few tries just to get a better feel of the combat system in the game, but to not get discouraged if you fail (trust us – you likely will not get this on your first try).
If you are playing the Ranger class, you can attempt to kite this boss from a distance and slowly dish off damage over a long period of time. If you’re a melee class (or not having luck as a Ranger at first), it’s HIGHLY recommended that you actually leave the cave and do some exploring. Keep exploring and doing some side quests until you are above level 5, have a full set of level 5 gear, and have a stack of consumable (like health potions) equipped and ready for action.
At this point, when you challenge the Chrono Boss, you will likely be able to take it down with ease.
The Second Chrono Gate (The Hole)
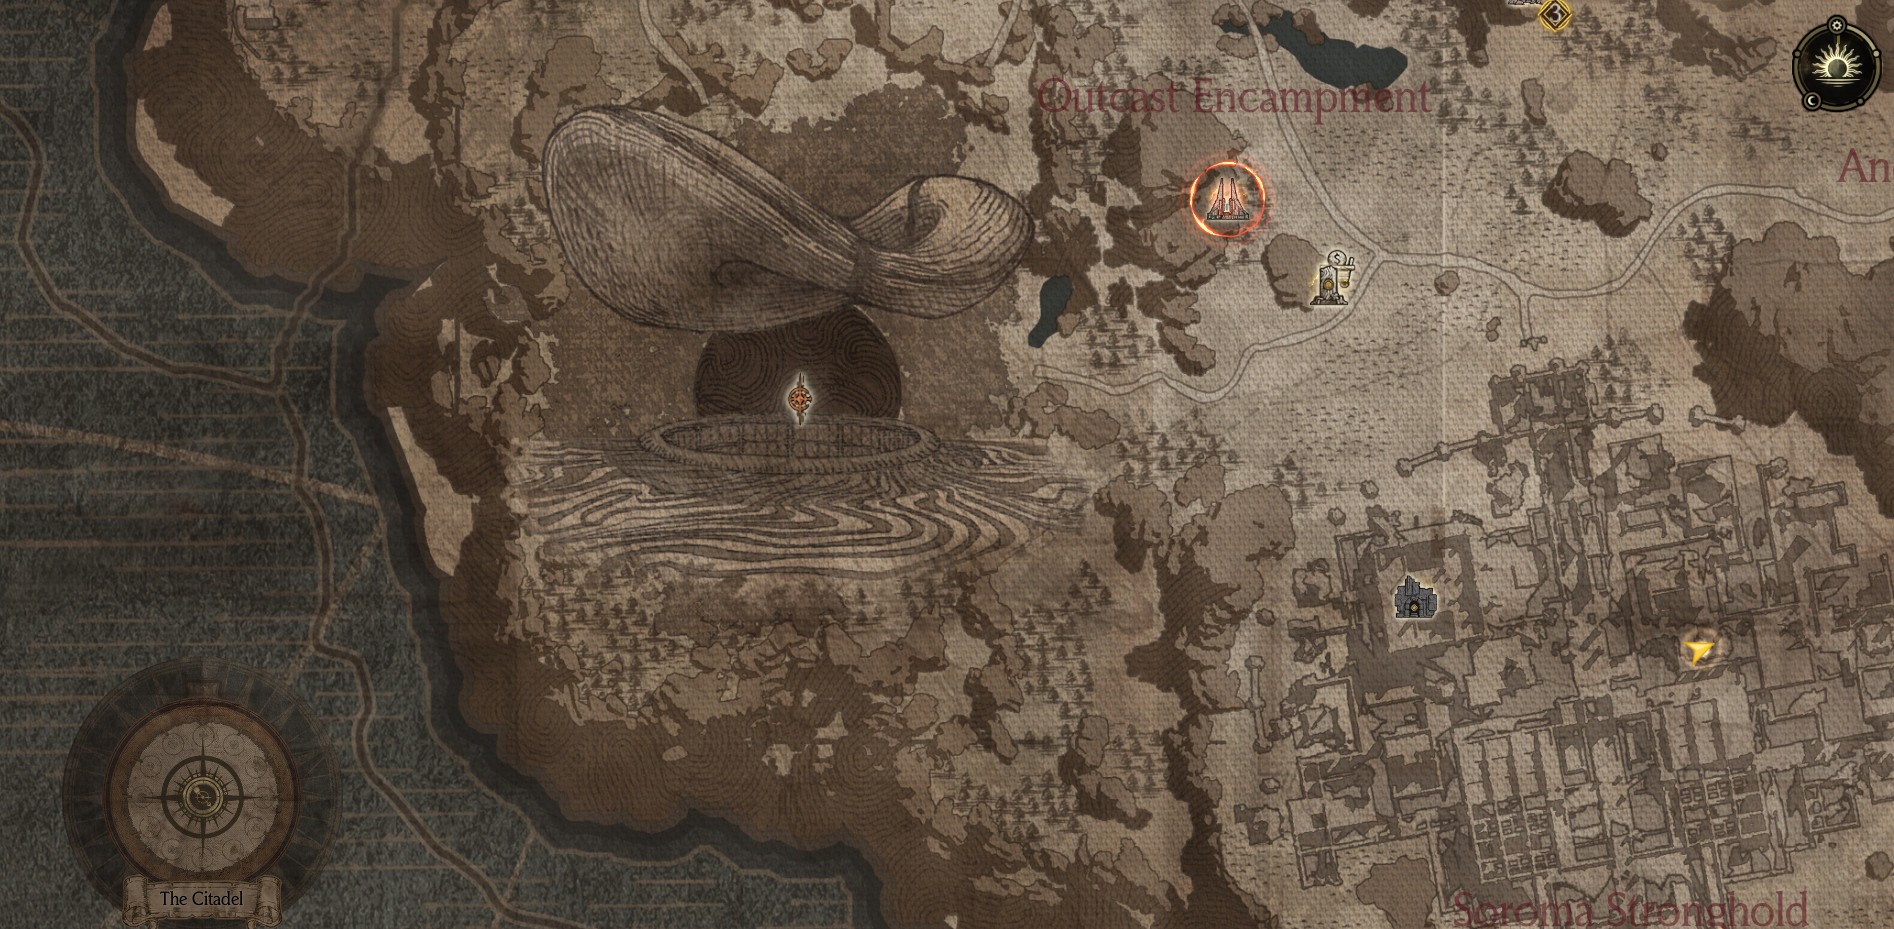
The next Chrono Gate is located in the southwestern portion of the map, and is indicated by a large, dark hole (just southwest of the Outcast Encampment). When you approach this area, you will see a massive hole in the ground, where you’ll actually need to jump down into in order to be teleported to the second Chrono Gate.
Unlike the first Chrono Gate, this battle will actually have some mechanics. As you take your first few steps, you’ll quickly notice that there are fire traps everywhere, and an extremely tall creature (known as the “Earthbreaker”) at the end of the hallway. You’ll have to run past all of these fire traps (avoiding the flames as much as possible), until you approach two levers. In order to start dealing damage to the boss, you will need to activate both levers, which will disable the Earthbreaker’s energy flow.
Please note: As you are trying to pull these levers, the Earthbreaker Chrono Boss will be trying to stomp on you, so be prepared to dodge if needed to ensure you don’t take any unnecessary damage.
Once both levers are triggered, the Earthbreaker boss will visually get shocked, and you will then be able to use as many skills as possible to burst down its health bar.
Once Earthbreaker starts to regain its power, you’ll see the notice appear on your screen saying, “Warning! Purification mode initialized. Evacuate to the entrance for safety.” At this point, you will want to run back to where you first entered, and then use some consumables to regain health.
Once you see the “Purification is complete.” notice appear, you can re-enter and continue the same process stated above. You’ll continue this process until you defeat the Earthbreaker, which then unlocks the ability to use this massive beast as a summon within your Chronotector (which will help you take down the next Chrono Gate enemy).
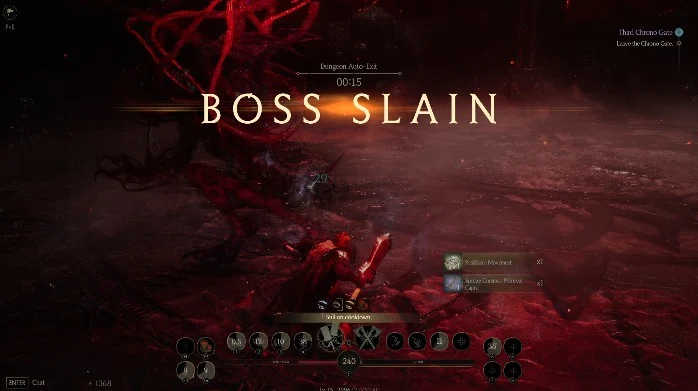
The Third Chrono Gate (Seroma Stronghold Lever)

You can find the location of the third Chrono Gate directly within the Soroma Stronghold, located at the red “X” in the image above. Once you get to this location on the map, you’ll see a lever off to the side in a large, empty room. Once you activate the lever, a staircase will slowly appear, allowing you to follow the steps and challenge the third Chrono Gate enemy (known as “Primeval Capra”).
Primeval Capra visually looks very cool, but be cautious, since his attacks are even cooler (and they hurt). As you begin to dish off damage, Primeval Capra will unleash a large screech and then summon a large number of mobs. As these mobs appear, it’s the perfect chance to use any AoE skills you may have.
Helpful Tip: If you keep one of these mobs alive, you can easily kite it around circles and reset your cooldowns for skills, consumables, and your Summon ability on your Chronoctor to help make the fight even easier.
As you continue to dish off damage, you will see two more waves of mobs appear, with the third (and final) wave having the mobs appear with him remaining in the battle. At this point, it’s recommended to slowly defeat each of the lower-powered mobs, and then focus your damage output on Primeval Capra.
Be sure to dodge his abilities as much as possible, and to use your Summon ability to help you break the stamina of this boss (opening you up to dish off major damage). As long as you follow these steps of using your cooldowns and Chronoctor wisely, and kiting when needed, you shouldn’t have a problem taking down this boss.
If you’re still struggling, don’t worry – you can always go and explore the world of Setera a bit more, level up, upgrade your gear, and then challenge him again once you’re ready.
The Fourth Chrono Gate (Face Statue in the Southeast)
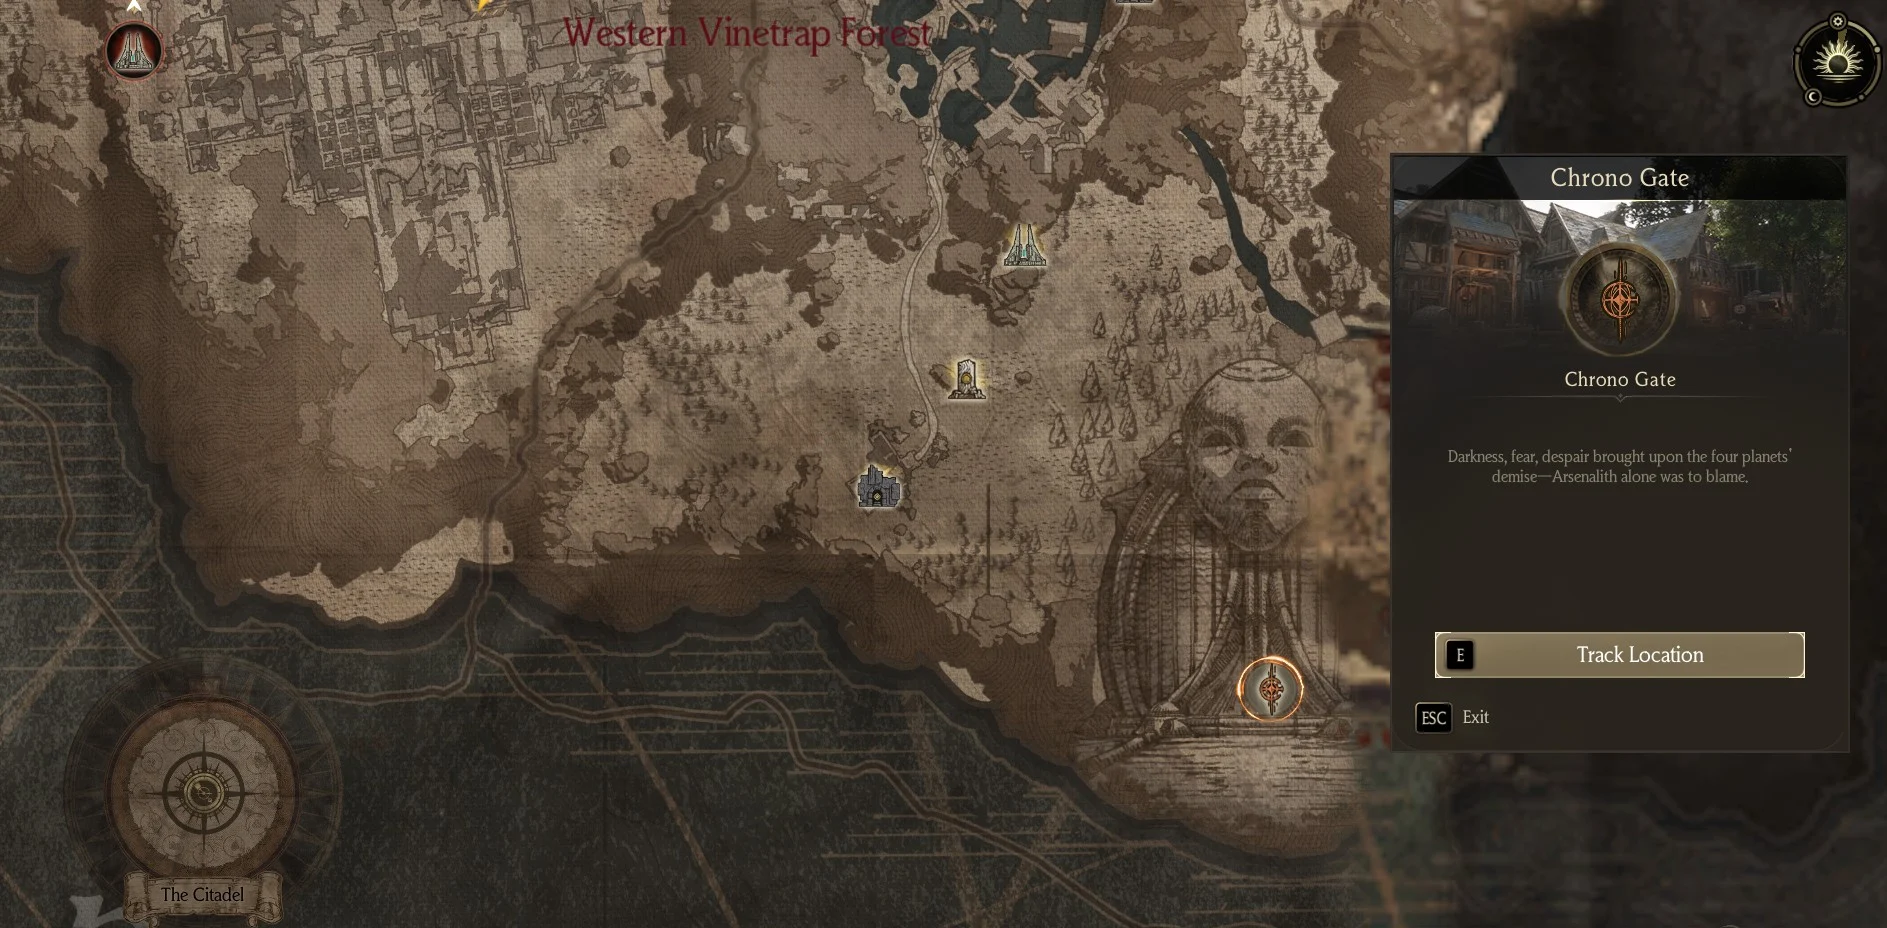
The fourth (and final) Chrono Gate that’s available in the Closed Beta Test is located in the lower right corner of your map, directly under the large face icon. As you approach this area, you will come across a massive fountain, which you’ll quickly discover is full of blood. Once you jump into the fountain, you’ll be able to inspect the bloody water, thus teleporting you to the final Chrono Gate.
Many players tend to believe that this final Chrono Gate is actually easier than the third one, but regardless, it’s important to ensure you’re ready for this final fight. It’s recommended to be level 15 for this battle, and to ensure you have level 15 weapons and armor equipped to make this battle as easy as possible.
As you enter this Chrono Gate, you will be surrounded by a dust storm (making it a bit tricky to see). As you move forward, you will have around four “mini” encounters with the enemy (Arsenalith), where you only need to dish off a small amount of damage that will then trigger him to run down the path a little further, where he waits for you for the next encounter.
On the fifth encounter (when the text, “Respawn Point Activated” appears on the screen), you’ll have the actual fight, where you’ll need to focus on dodging his attacks at the right time, using your consumables wisely, and of course, using your Summon Chronotector ability to dish off some additional damage.
Helpful Tip: You can predict the attacks that Arsenalith will do based on the weapon he is holding. Sometimes he will be holding a large bow, signaling a ranged attacks. Other times he will be holding a massive hammer, signaling a large melee smash.
Follow these steps, and create a gap of space between you and the enemy in case you need to regenerate some health slowly, and you won’t have any issues taking down this final Chrono Gate!
What’s Next?
After you defeat the fourth and final Chrono Gate in the Chrono Odyssey Closed Beta, you can then sit back and explore the land of Setera. Feel free to continue to level your character, explore solo and group dungeons, gather some resources, or even start a new character and learn a whole new class!