Build Introduction
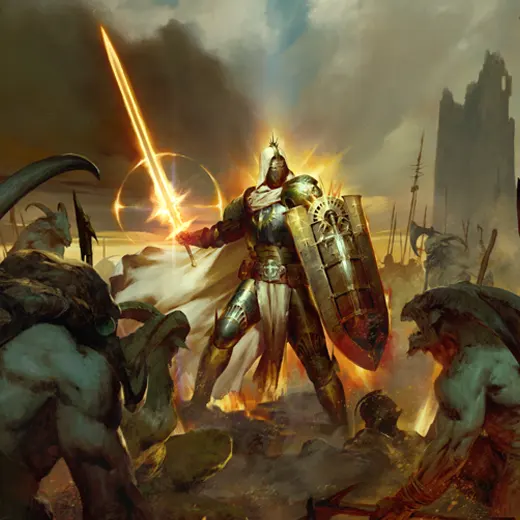
Welcome to the comprehensive guide for the Blessed Shield Paladin for the endgame of Diablo 4. Bringing back the popular “Captain America” build from older entries in the Diablo series, this build focuses on hurling shields with righteous fury to explode large groups of enemies while still having powerful single target damage as well. If you want to hurl your shields and blow up hordes of demons this is the build for you! Let’s dive in.
Strengths and Weaknesses
- Powerful ranged playstyle.
- High defensive potential.
- New twist on thorns based gameplay.
- Lower mobility.
- Buff management.
- Resource heavy.
Build Requirements
 Aspect of the Juggernaut’s Covenant
 Aspect of the Indomitable
 Aspect of Utmost Glory
 Aspect of Chastisement
 Virtuous Aspect
 Vanguard’s Aspect
Quick Navigation
Want to skip ahead? Use the table below to jump to the sections you are looking for.
Skill Bar and Skill Tree Points
Your skill bar should contain the following six skills. The location of these skills doesn’t matter, place them wherever is comfortable for you.
Paladin Class Mechanic – Oaths
Paladins are able to devote themselves to one of four Oaths which drastically change your game play and give you access to some new resources that allow you to take your build even further. Each Paladin archetype is represented in the Oath system allowing players to choose between Zealot, Juggernaut, Judicator, or Disciple. For this build we will want to take the Juggernaut Oath.
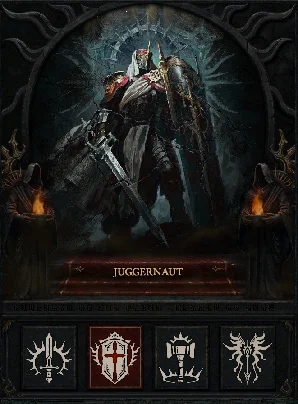
While we have this Oath, whenever we cast a Juggernaut Skill it will consume 8 stacks of Resolve, granting our Juggernaut skills more damage and more size for 5 seconds. It also increases the minimum number of our Resolve stacks and makes it so that Resolve is no longer consume whenever we get hit by enemies. Generating and consuming Resolve stacks is core to using the Juggernaut Oath to do damage and survive.
Gear, Stats, Gems, and Runes
The following sections will cover all systems that are critical if you want to improve the power of your character and move towards the highest difficulties in the endgame of Diablo 4.
Legendary Aspects
Below you will find all of the best-in-slot Aspects found on Legendary Items that are important for this build. Remember that all Legendary Powers can be added into your Codex of Power once you salvage the items. You can still find some aspects through dungeons though they will always be at the minimum power level. To get the most out of this system, combine these Aspects with the right stats and unique items.
| Gear Slot | Gems | Aspect / Unique | Aspect / Unique Power |
| Helm |  Aspect of Might Aspect of Might | Basic Skills grant 20% Damage Reduction for [2-10] seconds. | |
| Chest | Juggernaut Oath makes your Juggernaut Skills 25% larger but consume Resolve equal to your Maximum, granting x[6-12%] increased Juggernaut Skill damage for each point consumed | ||
| Gloves | N/A |  Aspect of the Juggernaut’s Covenant Aspect of the Juggernaut’s Covenant | Consume Resolve stacks with Juggernaut Oath grants an additional x[60-100%] damage. |
| Pants |  Aspect of the Indomitable Aspect of the Indomitable | Gain up to [100-140%] Armor and impairment resistance based on your Block Chance. | |
| Boots | N/A |  Wildbolt Aspect Wildbolt Aspect | Every [3.5-2] seconds, distant enemies are pulled in to you and take x[10%] increased damage for 3 seconds. |
| Amulet |  Aspect of Chastisement Aspect of Chastisement | Your Juggernaut Skills deal x[55-75%] increased damage to Bosses and Crowd Controlled enemies. | |
| Ring 1 |  Virtuous Aspect Virtuous Aspect | Using a Valor Skill increases your damage by x[40-60%] for 7 seconds. | |
| Ring 2 |  Vanguard’s Aspect Vanguard’s Aspect | Juggernaut Skills deal x[100-140%] increased damage to the first 3 enemies hit | |
| Weapon |  Aspect of Utmost Glory Aspect of Utmost Glory | While Healthy your skills deal x[20-35%] increased damage. Double this bonus against Weakened enemies. | |
| Shield | Gain x[20-50%] increased Strength, Resistance, Armor and Retribution Chance. |
To see how this build compares to the others on our site, you can check out our Endgame Tier List.
Stat Priority and Tempering Affixes
Below are the affixes to prioritize on gear. Each line of affixes is listed in order of importance. Tempering Manuals and their recommended affixes are provided in the second column and the bolded yellow affixes are the most important targets for the Masterworking Capstone Upgrade. Be sure to check out our Tempering and Masterworking guides for more details about these topics.
| Slot | Gear Affixes | Tempering Affixes |
| Helm | 1. Cooldown Reduction 2. Strength 3. Maximum Life 4. Armor | Resolve Generated – |
| Chest | 1. Strength 2. Maximum Life 3. Armor 4. Resistance to All Elements | Resolve Generated – |
| Gloves | 1. Critical Strike Chance 2. Cooldown Reduction 3. Armor 4. Strength | Juggernaut Damage – |
| Pants | 1. Strength 2. Maximum Life 3. Armor 4. Resistance to All Elements | Resolve Generated – |
| Boots | 1. Movement Speed 2. Strength 3. Armor 4. Maximum Life | Aura Cooldown Reduction – |
| Amulet | 1. Strength 2. Ranks to Heavyweight 3. Ranks to Ripose 4. Critical Strike Chance | Maximum Resolve Stacks – |
| Ring 1 | 1. Critical Strike Chance 2. Strength 3. Cooldown Reduction 4. Lucky Hit: Chance to make enemies vulnerable for 2 seconds | Juggernaut Damage – |
| Ring 2 | 1. Critical Strike Chance 2. Strength 3. Cooldown Reduction 4. Attack Speed | Juggernaut Damage – |
| Weapon | 1. Strength 2. Maximum Life 3. Damage % 4. Vulnerable Damage | Chance for Blessed Shield to deal double damage – |
| Shield | 1. Strength 2. Maximum Life 3. Armor 4. Cooldown Reduction | Chance for Blessed Shield to deal double damage – |
Uniques and Mythic Uniques
Below you will find information about the various Uniques and Mythic Uniques that are useful to this build. Moreover, if you are interested in target farming Mythic Uniques, check out our How to Farm Mythic Uniques guide.
Uniques
 Mantle of the Grey – This chest makes us consume all of our Resolve stacks at once for a massive boost in damage. Since Juggernaut Oath is all about generating and spending Resolve for big damage, this chest slots in very easily to the build for a bigger damage amplifier.
 Herald of Zakarum – This shield grants us a massive bonus to all of our defensive stats, strength, and even increases the chance of Retribution hits which can matter due to how we utilize thorns when paired with Blessed Shield. An easy pick up.
Mythic Uniques
These are the chase rare items in Diablo 4. They have a very low drop rate from most content and a slightly higher drop rate from Tormented Bosses in Torment 1 and beyond. We will be listing only the ones useful to this build. If a mythic unique is not listed here, it is not useful to this build but may be useful to other setups. Let’s take a look.
 Ring of Starless Skies – This powerful ring gives us up to 50%x damage and reduces our resource cost by half. Since we are consuming our resources frequently throwing our shields, this ring is a perfect fit if you’re lucky enough to get one and will make managing the resources much easier. If you find one, you can drop Virtuous Aspect for it.
 Heir of Perdition – An extremely potent helm that gives us a 60% damage multiplier to all of our damage as well as core skill ranks. Since Blessed Shield is a core skill, this helm gives us a ton of damage potential while also giving us a bit more mobility which is nice. If you’re lucky enough to find one, can you simply replace your helm immediately with this.
Gems and Runewords
Listed below are the best gems to socket into gear for each slot type.
Gems
| Weapon Gems | Armor Gems | Jewelry Gems |
Runes
Runewords return from Diablo 2 in Vessel of Hatred! You are limited to two Runewords across your gear and it requires two sockets in the same item. So this limits creating Runewords by combining two Runes to either Helm, Chest, Pants, or Two-Handed Weapons. We recommend putting these in some combination of your Helm, Chest, or Pants. Let’s jump in.
| Rune Name | Rune Effects |
| Gain 25 Offering: Stores offering every 0.3 seconds. Cast a Non-Basic Skill to gain the stored offering | |
| Requires 5 Offering (Overflow: Increased resource restored): Restore 3.5 primary resource | |
| Gain 300 Offering: Cast 5 skills then become exhausted for 3 seconds. | |
| Requires 25 Offering (Overflow: Gain multiple stacks): Gain 2.5% Critical Strike Chance for 5 seconds, up to 25% |
Paragon Board
We recommend using the following Legendary Nodes and Glyphs to truly take this build into the endgame. Note that each glyph’s information and radius listed below is for the level 100 Version. As a reminder, glyph’s reach their maximum radius at level 46 and unlock their Legendary Bonuses at level 45.
Season 12 Mechanics
Kill Streak System
Season 12 brings the kill streak mechanic back from previous Diablo games. As you slaughter your way through the hordes of hell you will begin a streak and get a pop-up to start tracking your kill count. Once it begins there is a short period before your streak ends. You refresh the duration of your streak with more kills, direct damage, or on the initial application of damage-over-time effects. Once the timer fully ends, you gain experience and seasonal reputation based on the level of your streak. There are five levels of kill streak based on your current kill count.
Bloodied Items
However, there is more to the kill streak system than just experience and seasonal reputation. A new type of bonus affix can appear on your Legendary items that makes the items “Bloodied” and grants bonuses based on the level of your kill streaks. There are three types. For Armor items you gain ‘Rampage’ items, for Weapons you gain ‘Feast’ items, and for Jewelry you gain ‘Hunger’ items. For this build we recommend the following Bloodied affixes:
- Armor “Rampage” – Increased Attack Speed per Kill Streak Tier OR Increased Critical Strike Chance per Kill Streak Tier
- Weapon “Feast” – Every 25 Kills, Gain Berserking for 7 seconds OR Every 40 Kills, Reset 2 Random Cooldowns
- Jewelry “Hunger” – Increased Rampage item drops during Kill Streaks OR Increased Rune item drops during Kill Streaks
Bloodsoaked Sigils
Bloodsoaked Sigils empower content and increase Bloodied drop rewards for your Nightmare Dungeons, Infernal Hordes, and Lair Bosses. Be careful, these Sigils increase the difficulty of the content by around a full Torment level and adds a Relentless Butcher who will continually respawn and stalk you down!
Mercenaries
As you play through the campaign in Vessel of Hatred, you will unlock various NPC Mercenaries who can join you on your quest to slay demons. Each Mercenary has their own small talent tree that will give them bonuses and skills to help you. Additionally, you can assign a Mercenary that you don’t take with you as a reinforcement to jump in when you activate certain skills. Let’s take a look at how we want to set them up for this build.
We hare Raheir, the Shieldbearer
- Core Skill:
 Ground Slam
 - Core Skill Passive:
 Raheir’s Aegis
 - Iconic Skill:
 Bastion
 - Iconic Skill Passive:
 Inspiration
Our reinforcement Mercenary will be Varyana, the Berserker Crone
- Opportunity Skill: Skill Cast in Combat
- Reinforcement Skill:
 Bloodthirst
Build Mechanics
Rotation and Playstyle
The endgame setup for Blessed Shield is to generate resolve through Clash and spend it using the Juggernaut Oath via Blessed Shield to cause massive damage. Thanks to the Legendary Paragon Node Castle, we stack armor everywhere for even more multipliers. Let’s review our skills.
- Cast
 Clash for the Resolve, Block Chance and enter ‘Crusader’s March’ for buffs
 - Use
 Blessed Shield spending the Resolve to do large damage thanks to Juggernaut’s Oath. It will pulse your thorns damage every second it’s out for 3 seconds doing a large burst as it returns.
 - Activate
 Fanaticism Aura to apply Weakened to enemies and give yourself more attack speed and critical strike chance. Crits will activate the Aura’s passive for you.
 - Press
 Defiance Aura against tough elites and bosses as it will massively boost your thorns damage and therefore the pulses from Blessed Shield dealing even more area damage.
 - Use
 Falling Star to reposition and move around to avoid dangerous things on the ground or avoid boss mechanics that could kill you
 - Press
 Rally to refill your Faith and increase your movement speed so keep the fight going without having to rely on Clash outside of its buffs
Runeword Synergy
 Igni builds up offering for us passively building 75 offering every second. Whenever we press anything other than Clash we will consume the buff gaining the stored offering.
 Lum paired with Igni will allow us cheap and easy Faith restoration outside of Rally letting us continue to spam Blessed Shields
 Cir gives a huge amount of offering after pressing any 5 skills (even the same skill 5 times) and then goes on an internal cooldown of 3 seconds. This is the ‘exhaustion’ mentioned in the tooltip.
 Gar paired with Cir’s massive amount of offering will guarantee the maximum number of stacks from Gar giving us 25% increased critical strike chance which lasts 5 seconds. With only 3 seconds of downtime on Cir we can attain near 100% uptime on this buff which is a huge boost in damage.
Which Elixir Should You Use?
Visit the Alchemist in any main town to craft helpful Elixirs that increase stats, and experience gain for 30 minutes. Make sure to forage plants and pick up the necessary crafting materials during your adventures; they randomly spawn around the world. Use ![]() Elixir of Iron Barbs II for the increased Armor which will buff your Castle paragon node and the increased Thorns which will further buff Blessed Shield’s pulse damage.
Elixir of Iron Barbs II for the increased Armor which will buff your Castle paragon node and the increased Thorns which will further buff Blessed Shield’s pulse damage.
Season Updates
For a comprehensive look at what’s new in Season 12, its mechanics and theme, new activities, and other changes, check out our comprehensive Season Hub.
Let’s review the changes for this build in Season 12:
 Castle Changed. No longer grants damage equal to 1.8% of your Armor. Now grants damage equal to 125% of the Damage Reduction gained from Armor
- Bugfix: Fixed an issue with
 Blessed Shield where it was not gaining the full bonus from Thorns on its attacks
The ![]() Castle change brings down a lot of the power from Paladin, However the change still makes it grant anywhere from 100% to 110% increased damage which is a bit stronger than the 90% damage of other Paragon Legendary Nodes such as
Castle change brings down a lot of the power from Paladin, However the change still makes it grant anywhere from 100% to 110% increased damage which is a bit stronger than the 90% damage of other Paragon Legendary Nodes such as ![]() Shield Bearer. This means it is no longer giving us anywhere from 800-1000% more damage but remains very strong. The bugfix will drastically increase this build’s damage as we use the thorn explosions from
Shield Bearer. This means it is no longer giving us anywhere from 800-1000% more damage but remains very strong. The bugfix will drastically increase this build’s damage as we use the thorn explosions from ![]() Blessed Shield to do the majority of our damage and finally gaining the full benefit is a massive boost in overall damage.
Blessed Shield to do the majority of our damage and finally gaining the full benefit is a massive boost in overall damage.
Obol Gambling
A final point on acquiring gear is using your Obols to target farm specific slots instead of randomly spending them on random drops. Similar to Kadala in Diablo 3, you can use Obol Vendors in towns to try and get what you’re missing. With the expansion when a level 60 Character spends obols, all gear from the vendors will be at least 750 item power, the highest non-ancestral power allowing you to fill out gear with the affixes or Legendary Aspects you need while also having a small chance to grant Ancestral Items, Uniques, and even Mythic Uniques!
Check out our Obol Gambling Tool Guide HERE.
Changelog
- March 5th 2026: Build updated for Season 12
- January 9th 2026: Paragon setups adjusted
- December 15th 2025: Guide created.
