


Build Introduction
Welcome to the comprehensive guide for the ![]() Hammer of the Ancients Barbarian at endgame, utilizing insane overpowers and powerful slams to annihilate anything in your way. Bosses? No problem. Nightmare Dungeons? Easy. The Pit? Trivial. With the new Runewords, new Paragon Glyph Levels, New Uniques, and the power of more skill points, this Vessel of Hatred version of a beloved Barbarian build has little problem turning demons in front of them into paste. Let’s dive in!
Hammer of the Ancients Barbarian at endgame, utilizing insane overpowers and powerful slams to annihilate anything in your way. Bosses? No problem. Nightmare Dungeons? Easy. The Pit? Trivial. With the new Runewords, new Paragon Glyph Levels, New Uniques, and the power of more skill points, this Vessel of Hatred version of a beloved Barbarian build has little problem turning demons in front of them into paste. Let’s dive in!
Strengths and Weaknesses
- Strong AoE damage style
- Huge damage numbers
- Easily stuns enemies
- Powerful screen clearing slams
- Resource management
- Requires cooldown management
- Stationary and little mobility
- Getting the biggest numbers requires some endgame uniques
Build Requirements
 Aspect of Anger Management
 Aspect of Heavenly Strength
 Wildbolt Aspect
Want to know more about the Uniques supporting this build? Jump to the Uniques Section.
Quick Navigation
Use the table below to jump to the sections you are looking for.
Skill Bar and Skill Tree Points
 Hammer of the Ancients
  Rallying Cry
  War Cry
  Challenging Shout
  Wrath of the Berserker
  Ground Stomp
 Wondering what to do after Level 70? Head to the Paragon Board section to power up the build even further.
Follow the points allocated in the image above for the complete build. The additional skill points are completed using the Season Journey Ranks.
Barbarian Class Mechanic – The Arsenal System
The Barbarian can wield four weapons simultaneously as well as choose a weapon expertise to use as their Technique allowing them to gain that weapon’s bonus even if they’re wielding another weapon type. Finally, the Barbarian can assign its skills to use different weapon types shuffling between Two-Handed Bludgeoning Weapons, Two-Handed Slashing Weapons, and Dual-Wield Weapons.
For ![]() Hammer of the Ancients it requires that we use our Two-Handed Bludgeoning Weapon so we don’t get to customize our weapon selection as much as other builds.
Hammer of the Ancients it requires that we use our Two-Handed Bludgeoning Weapon so we don’t get to customize our weapon selection as much as other builds.
For our Weapon Technique Slot, we will be choosing Polearm for its damage bonus while healthy (above 80% life) for more consistent damage.
Gear, Stats, Gems, and Runes
The following sections cover all systems that are important if you want to improve the power of your character in the endgame of Diablo 4.
Legendary Aspects
Each Aspect is listed with its matching gear slot. Do your best to keep each Aspect in the assigned slot. Remember to salvage Legendary Items with higher Aspect values to unlock them in the Codex of Power, and then imprint them onto gear pieces with the preferred affixes.
| Slot | Gems | Aspect / Unique | Aspect / Unique Power |
|---|---|---|---|
| Helm | Aspect of Heavenly Strength | While wielding a Two-Handed Weapon, gain [30-40%] Damage Reduction | |
| Chest | Casting After exploding an Earthquake | ||
| Gloves | N/A | – Your attacks randomly deal 1% to [200-300%] of their normal damage | |
| Pants | Aspect of Anger Management | While above 50 Primary Resource, deal [15-20%]x increased damage and gain Berserking but lose 3 Primary Resource Regeneration | |
| Boots | N/A | Wildbolt Aspect | Every [3.5-1.5] seconds, Distant enemies are Pulled In to you and take 15%x increased damage from you for 3 seconds. This effect cannot occur while you are in Stealth |
| Amulet | Aspect of the Warpath | While you have Overpower charges, your Bludgeoning weapon attacks deal [40-60%]x increased damage | |
| Ring 1 | Accelerating Aspect | Critical Strikes with Core Skills increase your Attack Speed by [30-50%]+ for 5 seconds | |
| Ring 2 | Tidal Aspect | Your Maximum Overpower is increased by [1-3] while you are Fortified | |
| Two-Handed Bludgeoning Weapon | Aspect of Walloping | Your Skills using Bludgeoning weapons deal [40-60%]x increased damage if the enemy is Incapacitated or Vulnerable | |
| Two-Handed Slashing Weapon | Crushing Aspect | While Fortified, you deal [45-65%]X increased damage | |
| Dual Wield Weapon 1 | Vehement Brawler’s Aspect | Casting an Ultimate Skill increases your damage by [35-55%]X for 8 seconds. Gain 2 additional Ultimate Skill Ranks | |
| Dual Wield Weapon 2 | Skills deal [0.35 – 0.5%]x increased damage per point of Fury you have but 10 Fury drains per second |
To see how this build compares to the other builds on our site, you can check out our build tier lists.
Stat Priority and Tempering Affixes
Below are the affixes to prioritize on gear. Each line of affixes is listed in order of importance. Tempering Manuals and their recommended affixes are provided in the second column, and the bolded yellow affixes are the most important targets for Masterworking upgrades. Be sure to check our Tempering and Masterworking guides for more details about these topics.
| Slot | Gear Affixes | Tempering Affixes |
|---|---|---|
| Helm | 1. Cooldown Reduction 2. Maximum Life 3. Strength 4. Armor | + Resistance to All Elements (Defensive) |
| Chest | 1. Strength 2. Maximum Life 3. Fury Generation 4. Armor | + Resistance to All Elements (Defensive) |
| Gloves | 1. Attack Speed 2. Strength 3. Critical Strike Chance 4. Critical Strike Damage Multiplier | + Critical Strike Damage (Offensive) |
| Pants | 1. Strength 2. Maximum Life 3. Fury Generation 4. Armor | + Resistance to All Elements (Defensive) |
| Boots | 1. Movement Speed 2. Maximum Life 3. Strength 4. Fury Generation | + Movement Speed (Mobility) |
| Amulet | 1. Strength 2. Attack Speed. 3. Critical Strike Chance 4. Critical Strike Damage Multiplier | + Cooldown Reduction (Resource) |
| Ring 1 | 1. Attack Speed 2. Critical Strike Damage Multiplier 3. Critical Strike Chance 4. Strength | + Cooldown Reduction (Resource) |
| Ring 2 | 1. Critical Strike Chance 2. Critical Strike Damage Multiplier 3. Attack Speed 4. Strength | + Cooldown Reduction (Resource) |
| 2-Handed Bludgeoning Weapon | 1. Weapon Damage 2. Maximum Life 3. Critical Strike Damage Multiplier 4. Strength | + Critical Strike Chance (Weapon) |
| 2-Handed Slashing Weapon | 1. Strength 2. Maximum Life 3. Critical Strike Damage Multiplier 4. Physical Damage Multiplier | + Critical Strike Chance (Weapon) |
| Dual Wield Weapons | 1. Strength 2. Maximum Life 3. Critical Strike Damage Multiplier 4. Physical Damage Multiplier | + Critical Strike Chance (Weapon) |
Uniques and Mythic Uniques
Below you will find information on Unique Items and Mythic Unique Items that are useful and recommended for this setup. If a Mythic Unique is not listed here, it is NOT recommended and won’t benefit this specific build in any way.
Uniques
 Fists of Fate – While at first glance this might look like a meme item, dealing 1% of your damage on some hits, it scales all the way to 300% which is an average of a 150%x damage increase or a 1.5x multiplier on all of your hits. And since we’re going to be slamming as many hammers as possible this will give us a huge boost to those hits for that crushing screen clearing hammer you know and love
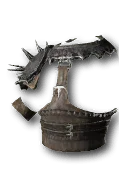 Mantle of Mountain’s Fury – The earthquake bit is less important these days whereas before exploding all the quakes into one big hit was the reason to run this, we now run this unique for the damage buff to
  Hammer of the Ancients for a few seconds after we pop the quake giving us even bigger hammer hits
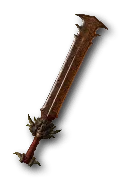 Ramaladni’s Magnum Opus – This item was changed in Lord of Hatred to now work with all skills not just skills using the weapon meaning big two-handed builds like this one can finally benefit from its power. With only 100 Fury this is a 50%x multiplier with a max roll. As we often have more than 100 fury from paragon and other aspects, this damage bonus only goes up and scales our hammer even higher
Mythic Uniques
 The Grandfather – The infamous grandfather still grants a huge multiplier to your total critical strike damage up from 100 to 150% in Lord of Hatred! Since our build is forced to use a 2-Handed Bludgeoning weapon we don’t mind that Grandfather lacks weapon damage as an affix as we still benefit from its huge boost to stats and damage.
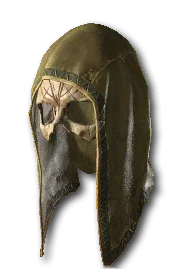 Harlequin Crest – While not as powerful as Heir of Perdition in terms of damage, it is unparalleled in its boost to your survival. If you find you need the damage mitigation more than the DPS from heir, you can swap heir out for this mythic and if it is the only one of the two you have, this is still an incredibly powerful helm to utilize
 Melted Heart of Selig – This item doubles your resource which effectively doubles the bonus from Ramaladni’s Magnum Opus and makes it even easier to maintain the bonuses from our chosen charm set ‘Sescheron’s Fury’. It does make managing your resources a bit more precarious for maximum effect but it is incredibly powerful
 El’Druin, Sword of Justice – The new mythic on the block. This is a reference to the old ‘In-Geom’ unique from Diablo 3 reducing all of your cooldowns by a set amount for 12 seconds. This makes us able to spam Ground Stomp and two of our Shouts for a short period of time leading to massive boosts in defensive, damage, and giving us tons of CC and quakes to pop for Mantle of Mountain’s Fury. You can replace your other one-hander if you acquire this unique.
Gems and Runes
Below you will find the details about why we’re using the gems we are as well as which runes we want to combine for runewords in Vessel of Hatred. Let’s jump in.
Gems
| Weapon Gems | Armor Gems | Jewelry Gems |
|---|---|---|
For your jewelry, you can freely swap between Diamonds and Skulls based on your needs. Armor and Resistances no longer have hard caps you need to hit to reach your defensive potential. Instead you can now freely swap the gems between them depending on what you need the most. Are you dying to physical strikes? Use Skulls for more physical resistanes. Are you dying to elemental abilities light lightning damage or poison pools? Use Diamonds for more resistances. Always be sure to check your Toughness stat and use what works best for you!
Runes
Runewords return from Diablo 2 in Vessel of Hatred! You are limited to two Runewords across your gear, and it requires two sockets in the same item. So, this limits creating Runewords by combining two Runes to either Helm, Chest, Pants, or Two-Handed Weapons. We generally recommend them in both of your Two-Handed Weapons for Barbarian. Let’s jump in.
| Rune Name | Rune Effect |
|---|---|
| Gain 25 Offering: Stores offering every 0.3 seconds. Cast a non-basic skill to gain the stored offering. | |
| Requires 25 Offering, Cooldown 1 second: Gain 2.5% Critical Strike Chance for 5 seconds up to 10% | |
| Gain 300 Offering: Cast 5 Skills then become exhausted for 3 seconds | |
| Requires 100 Offering, Cooldown 5 seconds: Gain +1 to Skills for 10 seconds (overflow more skill ranks up to +3) |
Paragon Boards
Paragon unlocks at Level 70 and plays a big role in endgame progression and character power. The following Legendary Nodes and Glyphs are recommended for this build. Keep in mind each Glyph’s information and radius listed below is for the level 50 version.
Season Mechanics
In Season 14, any unique can be mythic! You will also be able to use the Horadric Cube to upgrade any unique into a Mythic Unique increasing the power of its unique aspect. You will only be able to wear one crafted Mythic Unique however, any Mythic Uniques you find as drops can be worn alongside your crafted Mythic. The old mythics have been renamed as “Iconic Mythic” to help differentiate the original run from Season 14’s mechanic.
For this setup we recommend using the cube to craft ![]() Ramaladni’s Magnum Opus as a Mythic Unique since it grants the largest power boost.
Ramaladni’s Magnum Opus as a Mythic Unique since it grants the largest power boost.
For an overview of Diablo 4’s latest season CLICK HERE!
Talisman
Lord of Hatred introduces Talisman Sets. The Talisman is a Seal and Charms are placed within. Charms have some general affixes from a limited pool and can have Set bonuses which can grant significant power.
For our Seal we will want a Legendary Seal with the +1 Charm Slot affix to grant us access to all six charm slots. For the additional bonus we’ll take anything that triggers while having the set bonus for Sescheron’s Fury active such as Damage While Berserking, or Damage Reduction to even resistances and resource generation.
For our Charms we will be using the 5 piece charm set Sescheron’s Fury which will grant us the following bonuses:
- 2 Set: While at or above 100 Fury, you become Colossal, losing 50% Cast Speed but gaining 20% Character and Skill Size and 120% increased damage
- 3 Set: You gain an additional 10 Fury when hit and 30% Maximum Life
- 5 Set: Your Maximum Fury is increased by 50. Colossal further increases Skill Size by 50% and damage to 600%x
For our final Charm slot, we will want to use a Unique Charm. Specifically a Unique Charm with the power of ![]() Banished Lord’s Talisman which help us grant more consistent overpower stacks and even more critical strike damage while we have these stacks. While we could simply wear this unique, using it here on the charm slot frees up our amulet to have stronger aspects for more general damage.
Banished Lord’s Talisman which help us grant more consistent overpower stacks and even more critical strike damage while we have these stacks. While we could simply wear this unique, using it here on the charm slot frees up our amulet to have stronger aspects for more general damage.
Mercenaries
As you play through the campaign in Vessel of Hatred, you will unlock various NPC Mercenaries who can join you on your quest to slay demons. Each Mercenary has their own small talent tree that will give them bonuses and skills to help you. Additionally, you can assign a Mercenary that you don’t take with you as a reinforcement to jump in when you activate certain skills. Let’s take a look at how we want to set this up for this build.
We hire Raheir, the Shieldbearer
- Core Skill:
 Ground Slam
 - Core Skill Passive:
 Raheir’s Aegis
 - Iconic Skill:
 Bastion
 - Iconic Skill Passive:
 Inspiration
Our Reinforcement Mercenary will be Varyana, The Berserker Crone
- Opportunity Skill:
 War Cry
 - Reinforcement Skill:
 Bloodthirst
Build Mechanics
In this section, we will detail how to play this build, what the various skills and passives are used for and what your damage rotation should be to get the full benefit of this setup to smash the most demons and bosses. Let’s get started!
Playstyle
This build has come back to the old style of HotA that we all know and love. Big hammers dealing big damage. No more Earthquakes doing all of the damage or blowing them up via the new uniques. This is just straight forward raw ![]() Hammer of the Ancients damage thanks to the new systems and items in place that allow for some pretty wild combinations. Let’s take a deeper look!
Hammer of the Ancients damage thanks to the new systems and items in place that allow for some pretty wild combinations. Let’s take a deeper look!
Skill Use
- Hammer of the Ancients – The bread and butter of the build. We want to be spamming this as often as our resources allow.
 Ground Stomp – Press this to stun enemies and generate fury when needed
 Wrath of the Berserker – We want to keep this active as long as possible thanks to the 30%x damage multiplier it grants us
- War Cry – Our main damage amplifying shout, we should be pressing this whenever we run into a tough elite or boss
 Rallying Cry – Since this shout doesn’t have a cooldown we want to keep this active 100% of the time to increase our resource generation and keep us moving quickly
 Challenging Shout – The main defensive button, press this whenever we’re in a tight spot or facing tough elites
Runeword Synergy
Let’s take a quick look at the runewords we will be using for this setup and explain the interactions that help this build work.
 Igni is our first ritual rune granting us 25 offering every 0.3 seconds. This is about 75 every second and to trigger it we simply need to cast a non-basic skill to gain the stored up offering so every Hammer should trigger this rune.
 Gar is our first invocation rune paired with Igni for a bonus to crit whenever we cast a non-basic skill which is…all the time as we dont use basic skills in this build. A free 10% Crit Chance at all times means we need that much less across our gear to achieve critically striking on nearly every hit
 Cir is our second ritual rune which gives us a burst of 300 offering after using 5 skills, any 5 skills, with a 3 second exhaustion period before we can get the offering again. With our rune combo this cooldown matters very little if at all. Lets take a look.
 Vex is our final invocation rune and paired with cir. With 100 offering it gives +1 rank to all skills. With 300 offering it gives its maximum +3 to all skills for 10 seconds. Since Cir overflows this rune to its maximum in one go, and Vex’s bonus lasts 10 seconds, the 3 secondown cooldown on Cir means nothing to us. We can keep vex’s +3 skills up permanently by cycling through our skills and spamming hammers which gives us more potency for our shouts, more damage on our wrath and hammers and makes the build feel that much more smooth.
Season Updates
For a complete overview of Season 14, its mechanics and theme, new leveling activities, and other changes coming with the Season of Death Awakening, please check out our Season Hub!
Let’s take a look at what’s changing for Barbarian and this setup
- Challenging Shout no longer increases damage taken by bosses as they cannot be taunted by this ability
- Fury gained as a result of damage taken now capped at 0.5 Fury per 1% Maximum life lost and no longer benefits from increased resource generation
- Tidal Aspect maximum overpower stacks reduced from 2-4 to 1-3 and is now a utility aspect rather than offensive
 Dominate damage reduced from 23.6% per stack to 1.8% per stack at Glyph level 150 in line with other classes
 Ire damage increased from 6.2%+ to 9.3%+ per 5 strength
- Wrath of the Berserker now increases all damage by 30%x while active
Obol Gambling
A final point on acquiring gear is using your Obols to target farm specific slots instead of randomly spending them on random drops. Similar to Kadala in Diablo 3, you can use Obol vendors in town to try and get what you’re missing. When a level 70 Character spends Obols, all gear from that vendor will be 850 item power, the highest non-Ancestral in the game, allowing you to fill out gear with the affixes or Legendary Aspects you need.
Check out our Obol Gambling Tool Guide HERE.
Changelog
- June 24th 2026: Updated for Season 14
- April 23rd 2026: Updated for Season 13 and Lord of Hatred
- March 5th 2026: Updated for Season 12
- December 5th 2025: Updated for Season 11
- September 17th 2025: Updated for Season 10
- June 28 2025: Updated for Season 9
