


Build Introduction
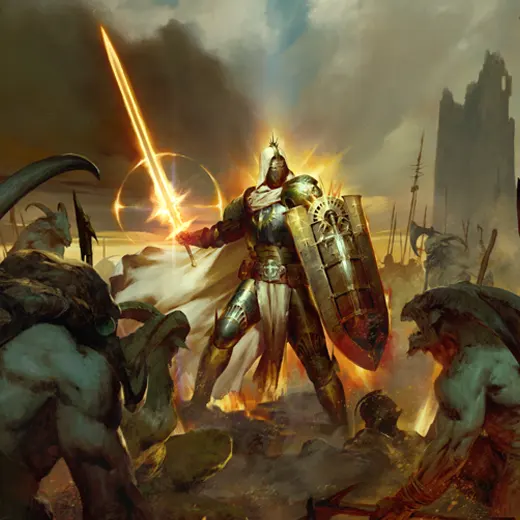
Welcome to the comprehensive guide for the Spear of the Heavens Judgement Paladin for the endgame of Diablo 4. This build drops holy spears from the sky upon your foes which you judge to be unworthy causing them to erupt for massive damage. If you like a more methodical playstyle with absolutely massive damage potential and big holy explosions, this is the build for you. Let’s dive in!
- Massive screen clearing damage.
- Great AoE clear thanks to chain explosions.
- Little to no resource management.
- Very cooldown reliant.
- Slower pace of play due to no generator or spender.
- Middling defensives.
Build Requirements
 Aspect of the Indomitable
 Aspect of the JudicatorAspect of Firm DecreeAspect of the Golden HourAspect of Holy Punishment
Quick Navigation
Want to skip ahead? Use the table below to jump to the sections you are looking for.
Skill Bar and Skill Tree Points
Your skill bar should contain the following six skills. The location of these skills doesn’t matter, place them wherever is comfortable for you.
Paladin Class Mechanic – Oaths
Paladins are able to devote themselves to one of four Oaths which drastically change your game play and give you access to some new resources that allow you to take your build even further. Each Paladin archetype is represented in the Oath system allowing players to choose between Zealot, Juggernaut, Judicator, or Disciple. For this build we will want to take the Judicator Oath.
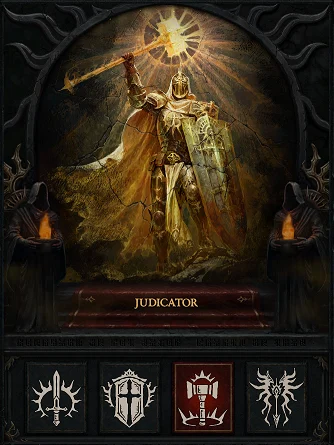
This Oath causes your Basic Skills to apply Judgement and causes Judgement to be detonated early by Judicator Skills dealing more damage in a small area and gaining the benefits of Judicator Skills. Lastly, each time you Judge an enemy they take increasing damage from you until they die!
Gear, Stats, Gems and Runes
The following sections will cover all systems that are critical if you want to improve the power of your character and move towards the highest difficulties in the endgame of Diablo 4.
Legendary Aspects
Below you will find all of the best-in-slot Aspects found on Legendary Items that are important for this build. Remember that all Legendary Powers can be added into your Codex of Power once you salvage the items. You can still find some aspects through dungeons though they will always be at the minimum power level. To get the most out of this system, combine these Aspects with the right stats and unique items.
| Gear Slot | Gems | Aspect / Unique | Aspect / Unique Power |
|---|---|---|---|
| Helm | Lucky Hit: Your Judicator Skills have up to a [30-40%] chance to call down a Blessed Spear that carries a Judgement Mark and deals Judgement’s damage on impact. | ||
| Chest | | Aspect of Glynn’s Anvil | Your maximum Resolve is increased by 2 and you gain [3-4%] Damage Reduction per Resolve |
| Gloves | N/A | Aspect of the Judicator | Increases the damage and size of Judgement’s Explosion by x[40-60%] |
| Pants | Aspect of Firm Decree | Judging an enemy grants you [20-30%] Damage Reduction for 8 seconds | |
| Boots | N/A |  Wildbolt Aspect Wildbolt Aspect | Every [3.5-2] seconds distant enemies are pulled in to you and take x[10%] increased damage for 3 seconds. |
| Amulet | Aspect of the Golden Hour | Judgement detonations can detonate other Judgements early. Judgement deals x[60-100%] increased damage. | |
| Ring 1 | Judgement deals x[80-100%] increased damage. Judgement has a 33% chance to explode twice. | ||
| Ring 2 | Aspect of Holy Punishment | Holy & Fire damage are increased by x[40-60%] | |
| Weapon | Dealing direct damage grants x[0.8 – 1.0%] increased critical strike chance for each enemy hit within 10 seconds up to x[40-50%]. At Maximum you gain: Lucky Hit – Critical Strikes have up to a 50% chance to deal double damage, heal you for [X] life and refresh the duration of this bonus | ||
| Shield | Gain x[40-50%] increased Strength, Resistance, Armor and Retribution Chance |
To see how this build compares to the others on our site, you can check out our Endgame Tier List.
Stat Priority and Tempering Affixes
Below are the affixes to prioritize on gear. Each line of affixes is listed in order of importance. Tempering Manuals and their recommended affixes are provided in the second column and the bolded yellow affixes are the most important targets for the Masterworking Capstone Upgrade. Be sure to check out our Tempering and Masterworking guides for more details about these topics.
| Slot | Gear Affixes | Tempering Affixes |
|---|---|---|
| Helm | 1. Cooldown Reduction 2. Strength 3. Maximum Life 4. Armor | + Maximum Resolve Stacks (Defensive) |
| Chest | 1. Strength 2. Maximum Life 3. Armor 4. Resistance to All Elements | + Maximum Resolve Stacks (Defensive) |
| Gloves | 1. Cooldown Reduction 2. Strength 3. Critical Strike Chance 4. Critical Strike Damage Multiplier | + Critical Strike Damage (Offensive) |
| Pants | 1. Strength 2. Maximum Life 3. Armor 4. Resistance to All Elements | + Maximum Resolve Stacks (Defensive) |
| Boots | 1. Strength 2. Movement Speed 3. Maximum Life 4. Armor | + Movement Speed (Mobility) |
| Amulet | 1. Strength 2. Critical Strike Chance 3. Critical Strike Damage Multiplier 4. Cooldown Reduction | + Cooldown Reduction (Resource) |
| Ring 1 | 1. Critical Strike Chance 2. Cooldown Reduction 3. Strength 4. Critical Strike Damage Multiplier | + Cooldown Reduction (Resource) |
| Ring 2 | 1. Critical Strike Chance 2. Cooldown Reduction 3. Strength 4. Critical Strike Damage Multiplier | + Cooldown Reduction (Resource) |
| Weapon | 1. Weapon Damage 2. Maximum Life 3. Critical Strike Damage 4. Strength | + Critical Strike Chance (Weapon) |
| Shield | 1. Cooldown Reduction 2. Strength 3. Maximum Life 4. Damage Reduction | + Cooldown Reduction (Resource) |
Uniques and Mythic Uniques
Below you will find information about the various Uniques and Mythic Uniques that are useful to this build. Moreover, if you are interested in target farming Mythic Uniques, check out our How to Farm Mythic Uniques guide.
Uniques
 Judicant’s Glaivehelm – This helm gives us a chance to call down extra spears that carry Judgement marks and deal Judgement’s damage on impact giving us even more Judgement spam and a lot of extra damage.
 Griswold’s Opus – A sword that gives a stacking damage to critical strike and gives us another source of double damage while we’re at maximum stacks. Since we stack a lot of critical strike chance, this is very easy to maintain and provides us with a large damage boost
 Herald of Zakarum – This shield provides an insane buff to all of our defenses and our strength letting us scale our armor to the moon to benefit from the Castle legendary paragon node even more.
- Seal of the Second Trumpet – A ring that provides a massive increase to Judgement’s damage through a substantial multiplier and a chance to explode twice every time we explode our Judgements. A must have to get this build’s power really going!
Mythic Unique
These are the chase rare items in Diablo 4. They have a very low drop rate from most content and a slightly higher drop rate from Tormented Bosses in Torment 1 and beyond. We will be listing only the ones useful to this build. If a mythic unique is not listed here, it is not useful to this build but may be useful to other setups. Let’s take a look.
 Heir of Perdition – An alternative helm to the famous ‘shako’ that provides a large 80% damage multiplier that further take this build’s damage to the next level. If you’re fortunate enough to acquire one, replace your Judicant’s Glaivehelm.
- El’Druin, Sword of Justice – The new mythic in town, this sword provides an effect similar to the ‘In-Geom’ unique from Diablo 3. Reducing all of your cooldowns by a set amount for a short period of time. In our build’s case this lets us throw our spear of the heavens infinitely for a short time getting out as many judgements as possible for maximum damage. Definitely worth the pick up if you’re lucky enough to get this weapon.
Gems and Runewords
Gems
Listed below are the best gems to socket into gear for each slot type.
| Weapon Gems | Armor Gems | Jewelry Gems |
|---|---|---|
Runes
Runewords return from Diablo 2 in Vessel of Hatred! You are limited to two Runewords across your gear and it requires two sockets in the same item. So this limits creating Runewords by combining two Runes to either Helm, Chest, Pants, or Two-Handed Weapons. We recommend putting these in some combination of your Helm, Chest, or Pants. Let’s jump in.
| Rune Name | Rune Effects |
|---|---|
| Gain 300 Offering: Cast 5 Skills then become exhausted for 3 seconds. | |
| Requires 100 Offering (Overflow: More skill ranks up to 3): Gain +1 to Skills for 10 seconds. | |
| Gain 25 Offering: Stores offering every 0.3 seconds. Cast a Non-Basic Skill to gain the stored offering (up to 500 offering) | |
| Requires 25 Offering (Overflow: Gain multiple stacks): Gain 2.5% Critical Strike Chance for 5 seconds, up to 10% |
Paragon Board
We recommend using the following Legendary Nodes and Glyphs to truly take this build into the endgame. Note that each glyph’s information and radius listed below is for the level 150 Version. As a reminder, glyph’s reach their maximum radius at level 50 and unlock their Legendary Bonuses at level 50.
Season Mechanics
There are no specific seasonal mechanics in Season 13. Instead the Lord of Hatred expansion and all of its features are available to explore. These include:
- War Plans
- New Skill Trees
- Talisman Sets
- The Horadric Cube
- Echoing Hatred
For a full overview of Diablo 4’s newest expansion CLICK HERE!
Talisman
Lord of Hatred introduces Talisman Sets. The Talisman is a Seal and Charms are placed within. Charms have some general affixes from a limited pool and can have Set bonuses which can grant significant power.
For our Seal, we will want a Legendary Seal with +1 Charm Slots as an affix so we can utilize all six charm slots. For the other affix choose a bonus that works with the Heaven’s Radiant Fire charm set giving either damage reduction, more cooldown reduction or resistances.
For our Charms we will be utilizing the 5-piece charm set Heaven’s Radiant Fire which will provide the following bonuses:
- 2 Set: Judgement now spreads to targets that don’t have it and Judging enemies grants Judgement Day increases your damage by 12.5%X for 10 seconds up to 5 times
- 3 Set: You gain 25% Damage Reduction and Heal for 3% of your Maximum life every second while affected by Judgement Day
- 5 Set: Increases Judgement Day’s Maximum number of stacks to 40
For our sixth charm slot, we will want to use a Unique Charm, specifically a Unique Charm with the power of ![]() Fists of Fate which allows us to gain the 1.5x average damage multiplier without actually needing to wear these gloves so we can squeeze in another aspect and better stats on our items.
Fists of Fate which allows us to gain the 1.5x average damage multiplier without actually needing to wear these gloves so we can squeeze in another aspect and better stats on our items.
Mercenaries
As you play through the campaign in Vessel of Hatred, you will unlock various NPC Mercenaries who can join you on your quest to slay demons. Each Mercenary has their own small talent tree that will give them bonuses and skills to help you. Additionally, you can assign a Mercenary that you don’t take with you as a reinforcement to jump in when you activate certain skills. Let’s take a look at how we want to set them up for this build.
We hare Raheir, the Shieldbearer
- Core Skill:
 Ground Slam
 - Core Skill Passive:
 Raheir’s Aegis
 - Iconic Skill:
 Bastion
 - Iconic Skill Passive:
 Inspiration
Our reinforcement Mercenary will be Varyana, the Berserker Crone
- Opportunity Skill: Skill Cast in Combat
- Reinforcement Skill:
 Bloodthirst
Build Mechanics
Rotation and Playstyle
This endgame setup relies on casting its namesake skill as often as possible, Spear of the Heavens, to apply Judgement which is a passive that marks an enemy for 3 seconds dealing 80% damage. We want to get out as many of these as can since they will chain explode thanks to Aspect of the Golden Hour. Let’s dive into our skills
 Spear of the Heavens – Our main skill. Cast on Cooldown at everything in front of you
 Aegis – Press Aegis on cooldown which will apply further Judgements.
 Holy Light Aura – Press on cooldown which will of course, apply even more Judgements and its cooldown is reduced.
We use the above three skills constantly to apply Judgements and detonate them in rapid succession. The next three skills are more supportive. Let’s review.
 Rally – We spend this in order to reduce our cooldowns per charge of rally and keep the fight and judgements coming.
 Defiance Aura – We activate this as a defensive buff to gain more life and gain a little damage whenever we gain Resolve.
 Fanaticism Aura – We press this to Weaken enemies and reduce the damage they deal with to us. Additionally critical strikes will trigger its passive giving us more attack speed and crit chance for even more damage.
Runeword Synergy
 Cir gives a massive amount of offering after we use any 5 skills, even the same skill 5 times and then goes on an internal cooldown for 3 seconds which is what the ‘become exhausted’ is referring to.
 Vex uses the offering to give us more ranks to all of our skills including our ultimate Zenith giving us more damage. It also provides ranks to every other skill making its utility second to none.
 Igni builds up offering for us passively building up 75 offering every 1.2 seconds which is a little more than we spam Zenith which triggers the rune giving us a ton of offering on demand just for using our main skill.
 Gar gives us a 10% critical strike chance bonus at full stacks which we’ll achieve every time we trigger Igni. Since Igni builds up 75 offering every second, delaying even by only 0.3 seconds means we get a full 100 offering to dump into gar which sends its stacks to maximum nearly every time we press a skill keeping us at a permanent 10% crit chance buff
Season Updates
For a complete overview of Season 13, its mechanics and theme, new leveling activities, and other changes coming with the launch of Lord of Hatred, please check out our Season Hub!
In Lord of Hatred, Judgements have received a bit of a nerf but remain a powerful fun clearing option with more ease through the new talent trees to spread them and detonate them for screen clearing power. The tankiness of the build also went through the roof rendering you functionally immortal even if the damage went down slightly. If you’re looking to stand among demons and be a bastion of holy judgement, this is the setup for you!
Obol Gambling
A final point on acquiring gear is using your Obols to target farm specific slots instead of randomly spending them on random drops. Similar to Kadala in Diablo 3, you can use Obol Vendors in towns to try and get what you’re missing. With the expansion when a level 70 Character spends obols, all gear from the vendors will be at least 850 item power, the highest non-ancestral power allowing you to fill out gear with the affixes or Legendary Aspects you need while also having a small chance to grant Ancestral Items, Uniques, and even Mythic Uniques!
Check out our Obol Gambling Tool Guide HERE.
Changelog
- April 24th 2026: Build updated for Season 13 and Lord of Hatred
- March 5th 2026: Build updated for Season 12
- January 10th 2026: Paragon setups updated.
- December 15th 2025: Guide created.
