Build Introduction
The ![]() Lightning Storm Druid lashes out with Luminous Lightning! This is a
Lightning Storm Druid lashes out with Luminous Lightning! This is a ![]() Grizzly Rage and
Grizzly Rage and  Dire Wolf’s Aspect build.
 ![]() Tempest Roar allows use of
Tempest Roar allows use of ![]() Lightning Storm while in Dire Werewolf form for deadly effect.
Lightning Storm while in Dire Werewolf form for deadly effect.
Just starting on your druid adventure? Check our Druid Leveling Guide for options on how to level, and swap to this one at Level 60.
Strengths and Weaknesses
- Large zones of coverage to kill enemies in a wide area
- Top-end damage that kills bosses just as easily
- Lightning bolts can have unpredictable targeting
- Ramping and setup can be inconsistent
Build Requirements
The following Unique Items and Legendary Aspects are required for build functionality to get started on the Lightning Storm Druid:
 Dire Wolf’s Aspect
Get more info on the Unique items supporting this build in the Unique Items section.
Quick Navigation
Want to jump ahead? find the sections you’re looking for here:
Skill Bar and Skill Tree Points
Use Key Passive ![]() Perfect Storm while leveling and gearing for Spirit Generation.
Perfect Storm while leveling and gearing for Spirit Generation.
![]() Raging Lightning Storm can be taken during farm.
Raging Lightning Storm can be taken during farm.
![]() Primal Lightning Storm can be taken for bossing to help Stagger the boss sooner.
Primal Lightning Storm can be taken for bossing to help Stagger the boss sooner.
If you are missing skill points, complete Renown events in each zone. See how these Skills play in the Rotation and Gameplay section.
Druid Class Mechanic – Spirit Boons
Druids unlock powerful Spirit Boon passives, giving offerings to the animal spirits to receive their Blessing. Once fully unlocked, activate the final Boon by Spirit Bonding with one of the four animal spirits to take two passives from that row.
| Boon Name | Animal | Effect |
|---|---|---|
| Gift of the Stag | Deer | Gain 30 Maximum Spirit. Gain 10 Spirit Per Second. |
| Swooping Attack | Eagle | Gain 20% Attack Speed. |
| Avian Wrath | Eagle | Gain 40% Critical Strike Damage. |
| Calamity | Wolf | Extend the duration of Ultimate Skills by 35%. |
| Overload | Snake | Dealing Storm damage also applies an additional 20% Poisoning damage over 5 seconds. Lucky Hit: Dealing Poison damage has up to a 35% chance to summon a Lightning Bolt on the target dealing 120% damage. |
While leveling and gearing, use the Energize Spirit Boon, replacing Swooping Attack. This will help with Spirit Management.
Druid’s primary resource is Spirit. See the Spirit Management Section on how to keep casting!
Gear, Stats, Gems, and Runes
Check these sections for all important Lightning Storm gearing considerations to improve the power of your character in the endgame.
Legendary Aspects
Gear Slots with multiple options are listed in recommended priority. Any slot with an Optional Mythic Unique or Unique Item will include a valid alternative legendary power to use while still leveling and gearing.Combine these with the right stat priorities.
| Slot | Gem | Aspect | Unique/Legendary Aspect Power |
|---|---|---|---|
| Staff |  Aspect of the Rabid Bear Aspect of the Rabid Bear | While Grizzy Rage is active, your direct damage is converted into Poison damage, you deal 40-80% more Poison damage, and you passively spread Rabies. | |
| Helm | Required Unique – | Lucky Hit: Storm Skills have up to a 15-35% chance to grant 4 Spirit. Your base Storm Skills are now also Werewolf Skills | |
| Chest | Mythic –  Juggernaut’s Aspect Juggernaut’s Aspect | If you haven’t attacked in the last 2 seconds, gain Stealth and 40% Movement Speed. | |
| Gloves | Required Unique – | Lightning Storm gains 1 additional strike each times it grows. Lightning Storm Critical Strikes cause lightning to strike twice, dealing 10-40% increased damage. | |
| Pants |  Dire Wolf’s Aspect Dire Wolf’s Aspect | Grizzly Rage is now a Werewolf Skill and Shapeshifts you into a Dire Werewolf. Dire Werewolves gain 20-40% Movement Speed and 20-40% Spirit Cost Reduction instead of Damage Reduction. In addition, kills Heal you for 10% of your Maximum Life. | |
| Boots | Unique –  Aspect of Metamorphosis Aspect of Metamorphosis | Shapeshifting into a new animal form increases the value of your Bestial Rampage bonuses by 2-5%, up to 20-50%. This bonus decays by 2% per second. | |
| Amulet |  Aspect of Retaliation Aspect of Retaliation | Your Core Skills deal up to 35-75% increased damage based on your amount of Fortify. | |
| Ring 1 |  Aspect of the Rampaging Werebeast Aspect of the Rampaging Werebeast | The duration of Grizzly Rage is increased by 3-10 seconds. In addition, Critical Strikes while Grizzly Rage is active increase your Critical Strike Damage by 5% for the duration, up to a maximum of 100%. | |
| Ring 2 | Mythic – Aspect of the Unsatiated Aspect of the Unsatiated | Spending your Primary Resource reduces the Resource cost of your Skills and increases your damage by 10% for 3 seconds, up to 50%. |
Staff is used over other 2-handed weapons for the faster attack speed. The Damage Over Time bonus will get some value from the Overload Boon.
To see how this build compares to the other builds on our site, you can check out our build tier lists.
Stat Priority and Tempering Affixes
Each line of affixes is listed in order of importance, and some alternatives are given. The bolded affixes are the most important targets for Masterworking upgrades. Unique Items cannot be Tempered, but can be Masterworked. Check the Tempering guide and Masterworking guide for more details about these topics.
| Slot | Gearing Affixes | Tempering Affixes |
|---|---|---|
| Staff | Willpower Maximum Life Critical Strike Damage Spirit Cost Reduction | |
| Helm – | Willpower% Maximum Resource Lightning Resistance Ranks to | |
| Chest – | Max Life Werewolf Attack Speed Lupine Ferocity’s Damage Bonus Ranks to | |
| Chest – Legendary Aspect | Willpower Max Life Spirit Per Second Armor | |
| Gloves – | Damage to Distant Enemies Ranks to Critical Strike Chance Ranks to | |
| Pants | Armor Willpower Max Life Dodge Chance | |
| Boots – | Movement Speed Shapeshifting Attack Speed Cold Resistance Ranks to | |
| Boots – Legendary Aspect | Willpower Movement Speed Max Life Spirit Per Second | |
| Amulet | Willpower% Ranks to Ranks to Ranks to | |
| Ring – (Recommended Mythic) | Attack Speed Critical Strike Chance Lucky Hit Chance Ranks to Core Skills | |
| Rings – Legendary Aspect | Critical Strike Chance Maximum Life Resource Cost Reduction Critical Strike Damage |
- Some Gear Affixes like Cost Reduction, Spirit on Kill or Spirit Per Second can be useful to invest into in early gearing or leveling.
- Armor cap is 1000 for up to 85% Physical Damage Reduction. This is generally reached with either one Armor Gear Affix and one Total Armor% Temper, or using a
 Juggernaut’s Aspect.
 - After capping Critical Strike Chance, Offensive Tempers for Storm Critical Strike Chance can be moved to Grizzly Rage Duration.
For the dedicated page for Gear Systems and Itemization Overview, check here.
After gearing, look at progression systems like Paragon next.
Uniques and Mythic Uniques
The following Unique Items are recommended for the Lightning Storm Druid.
-
 Tempest Roar is required for the build to function, making
  Lightning Storm a Werewolf Skill as well as providing significant Spirit Generation. This also allows Lightning Storm to benefit from Shapeshifting passives such as
  Quickshift, synergize with other Unique Items
  Mad Wolf’s Glee, and be usable during
  Grizzly Rage.
-
 Unsung Ascetic’s Wraps gives extra Lightning Strikes and double-strikes on Critical Strike.
- (Before Mythic)
 Mad Wolf’s Glee is an excellent offensive Unique Item, giving movement speed and Skill Ranks to all Werewolf Skills.
 Wildheart Hunger has gear affixes and grants a stacking bonus to
  Bestial Rampage. For a boot slot, this is a strong offensive option. Stacks are maintained during
  Grizzly Rage with the forced shift of
  Que Earthen Bulwarks.
![]() Tempest Roar can be target-farmed from Duriel.
Tempest Roar can be target-farmed from Duriel. ![]() Unsung Ascetic’s Wraps can be target-farmed from The Beast in the Ice.
Unsung Ascetic’s Wraps can be target-farmed from The Beast in the Ice.
Mythic Unique Items
The following Mythic Unique Items are situational to the build:
 Ring of Starless Skies is a powerful Resource Cost Reduction tool and damage multiplier with exellent Gear Affixes. Replaces
  Aspect of the Unsatiated.
 Shroud of False Death gives +1 rank to all Skill Passives which means several bonuses to Damage Multipliers, Damage Reductions, Resistances, Fortify, Healing and Critical Strike Chance.
Gems and Runewords
The following are the recommended Gem and Runeword setups for the Lightning Storm Druid
Gems
| Weapon Gems | Armor Gems | Jewelry Gems |
|---|---|---|
Poison and Lightning Resistance are covered by Paragon nodes.
Horadric Jewels
Seasonal Players can use these Horadric Jewels, placed in jewelry gear slots. Check out the Horadric Spell section for all available options.
| Jewel | Description |
|---|---|
| You deal 20% and take 10% more Elemental damage. | |
| You gain 6% primary stat, 6% maximum life and you are always Unhindered. However, you will be hunted in Sanctuary’s darkest places by Jewel Guardians who were entombed to protect this relic. | |
| Your Catalytic Skill deals 33% damage of your Infusion’s element over 3 seconds. Lucky Hit: Dealing damage of your Infusion’s element has up to a 33% chance to trigger its secondary effect. |
Runewords
Use these Runeword combinations for the Lightning Storm Druid, placed in Armor slots:
| Runeword Combination | Runeword Effects |
|---|---|
| Lith Gar | |
| Igni Que | Stores Offering every 0.3 seconds. Cast a Non-Basic Skill to gain the stored Offering. (Up to 500 Offering). Evoke the Druid’s Earthen Bulwark, granting yourself a Barrier. |
Runewords use a conditional Rune of Ritual to generate Offering. The Offering is consumed by the Rune of Invocation to trigger its effect. Runes replace Gems in gear with two sockets. Up to two sets of Runeword Pairs can be placed at a time.
![]() Gar is an efficient way to gear Critical Strike Chance.
Gar is an efficient way to gear Critical Strike Chance. ![]() Que will periodically cast
Que will periodically cast ![]() Earthen Bulwark, granting Barrier, Unstoppable, Fortify, and forcing form change even during
Earthen Bulwark, granting Barrier, Unstoppable, Fortify, and forcing form change even during ![]() Grizzly Rage to help maintain
Grizzly Rage to help maintain ![]() Wildheart Hunger stacks.
Wildheart Hunger stacks.
Options
Paragon Board
The following are the preferred Glyphs, Boards, and pathing recommended for making the most of the Lightning Storm Druid.
The road to max Paragon is long. The above Paragon tabs show the following:
- The BASE SETUP tab spends 50 fewer points than the max 328 points, taking stricter pathing to take all most all Legendary, Rare and Magic Nodes, and activates all Glyph Nodes with their secondary effects.
- The FULL SETUP tab completes the paragon board in its final form, filling in the rest of the board to get the rest of the Magic and Rare Nodes, as well as give additional additive bonuses especially within the Glyph areas.
Glyphs have two significant breakpoint increases. At level 15, the glyph grows in radius and gains a special effect. At level 46, the glyph grows to its max radius and gains a strong conditional damage multiplier.
Glyphs are placed as if they are at least level 15+ in radius. Total Boards placed are now limited to a max of 5; the Starter Board and four Class Boards. Rotate boards as necessary.
For a more defensive setup, exchange ![]() Fulminate for
Fulminate for ![]() Territorial.
Territorial.
Horadric Spell (Season 9)
Season 9: Sins of the Horadrim offers seasonal Powers accessed from a Powers tab on the character Sheet and Horadric Jewels placed into Jewelry slots to augment these Powers.
The Horadric Catalyst is equipped to a Skill on the Skill Bar, triggered on the Skill’s use. One Infusion adds effects and modifies the damage type of the Catalyst, and three Arcana enhance the Catalyst or provide extra effects on Catalyst trigger.
Pushing
| Type | Power | Description |
|---|---|---|
| Catalyst, Attached to | Shape an Ethereal Column that Taunts for 3.0 seconds. Piercing waves flow from it and deal damage, until you create another one or move too far away. | |
| Infusion | Your Spell Catalyst now deals Poison and or Poisoning damage. Bonus: Enemies damaged by it take 150% Poisoning damage over 4 seconds. This effect can only happen on each enemy every 3 seconds. While equipped, your Poison Damage Bonus is equal to that of your highest Damage Type Bonus. Rank 5: Deactivates monster Vampiric effects for 5 seconds. | |
| Arcana | Denial – Your Catalyst deactivates monster Damage Resistance Aura effects for 2.5 seconds, but you take 10% more stacking damage for the same time (+0.5 each rank). | |
| Arcana | Denial – Your Catalyst destroys enemy Barriers and Knocks them Down for 1.0 seconds after the removal (+0.8 each rank). | |
| Arcana | Denial – Your Catalyst gains a specialized Execute effect for non-Boss enemies with 10% or less Life. (+2% each rank). Astral Pillar: Will launch additional waves towards Executable non-Boss enemies to Execute them. |
Most Catalysts are functional and can be played by preference. Other setups can work outside push content, such as:
- (Speedfarm)
 Propulsion with
  Floaty Bobble,
  Gleaming Conduit and
  Bloody Charm blinks to enemies, and grants movement speed on execute.
Horadric Jewels
Use these Jewels, placed in jewelry gear slots, to enhance the Horadric Spell:
| Jewel | Description |
|---|---|
| You deal 20% and take 10% more Elemental damage. | |
| You gain 6% primary stat, 6% maximum life and you are always Unhindered. However, you will be hunted in Sanctuary’s darkest places by Jewel Guardians who were entombed to protect this relic. | |
| Your Catalytic Skill deals 33% damage of your Infusion’s element over 3 seconds. Lucky Hit: Dealing damage of your Infusion’s element has up to a 33% chance to trigger its secondary effect. |
There are some situationally useful Jewels to consider:
- (Resource)
 Spark of Creation can be a useful Spirit Generator in early gearing.
 - (Qol) While
 Idol From Below is powerful, If the Jeweled Guardians are bothersome, replace it with another like
  The Starflux.
Mercenaries
Once unlocked, Mercenaries are followers that aid the Player in combat. A main mercenary is chosen to fight alongside you, granting strong buffs or perks, and a secondary Mercenary is chosen to periodically Reinforce you under a chosen Opportunity condition.
The following Mercenary options are recommended for the Lightning Storm Druid:
Main Mercenary – Varyana, the Berserker
- Skills:
 Cleave,
  Hysteria,
  Bloodthirst,
  Bloodlust
Reinforcement – Raheir, the Shieldbearer
- Reinforcement Ability –
 Crater
 - Opportunity –
 Lightning Storm
Hysteria and Bloodlust will both give strong Attack Speed bonuses.
Build Mechanics
Rotation and Playstyle
- Build stacks of
 Quickshift and
  Wildheart Hunger by Alternating
  Maul and
  Lightning Storm.
 - Activate
 Grizzly Rage to enter Dire Werewolf Form.
  Blood Howl for buff maintenance or to heal.
- Channel and hold or Clickcast your
 Lightning Storm to slay your foes.
Use ![]() Earthen Bulwark for Barrier, Fortify and Unstoppable, as needed. It will not be available during
Earthen Bulwark for Barrier, Fortify and Unstoppable, as needed. It will not be available during ![]() Grizzly Rage but will still get full effect from
Grizzly Rage but will still get full effect from ![]() Que triggers.
Que triggers.
![]() Maul does not need to hit a target for Werebear Shapeshifting buffs. Make sure you’re familiar with your Force Hold keybind to easily Maul in place.
Maul does not need to hit a target for Werebear Shapeshifting buffs. Make sure you’re familiar with your Force Hold keybind to easily Maul in place.
Skills, Support and Synergies
The Lightning Storm Druid has simple execution as a build, but a lot of mechanics are coming together to make it work. ![]() Lightning Storm is our Core Skill and main ability. It is a Channeled Skill. While channeled:
Lightning Storm is our Core Skill and main ability. It is a Channeled Skill. While channeled:
- The storm grows, covering a larger area as the ability is held. This size is preserved for 6 seconds between channels. As the storm grows, the Lightning Bolts can grow more inaccurate.
 Unsung Ascetic’s Wraps adds strikes and double-strikes on Critical Strike.
 - Channeled abilities cannot Overpower.
- Lightning Storm now (mostly) scales with Attack Speed modifiers even while held Channeled. There is a still a slight increase to rate of fire by clicking rapidly over holding to channel.
Supporting Skills
![]() Maul is Werebear buff maintenance Skill to help maintain Shapeshifting skills like
Maul is Werebear buff maintenance Skill to help maintain Shapeshifting skills like ![]() Quickshift,
Quickshift, ![]() Heightened Senses,
Heightened Senses, ![]() Bestial Rampage and Unique Item
Bestial Rampage and Unique Item ![]() Wildheart Hunger. This does not need to hit an enemy, it’s just the Form change that matters. Force Hold and swipe at the air before engaging enemies for the
Wildheart Hunger. This does not need to hit an enemy, it’s just the Form change that matters. Force Hold and swipe at the air before engaging enemies for the ![]() Bestial Rampage buff.
Bestial Rampage buff.
![]() Cyclone Armor is largely just used for the passive effect, but the active knockback can be handy.
Cyclone Armor is largely just used for the passive effect, but the active knockback can be handy.
![]() Earthen Bulwark is used for Unstoppable, Barrier and Fortify. It will also help maintain
Earthen Bulwark is used for Unstoppable, Barrier and Fortify. It will also help maintain ![]() Wildheart Hunger stacks from triggers of
Wildheart Hunger stacks from triggers of ![]() Que forcing form shift.
Que forcing form shift.
![]() Blood Howl is maintained for the buff bonus,
Blood Howl is maintained for the buff bonus, ![]() Backlash and
Backlash and ![]() Vigilance buff.
Vigilance buff.
Grizzly Rage
This build uses ![]() Grizzly Rage as its Ultimate Skill. With
Grizzly Rage as its Ultimate Skill. With  Dire Wolf’s Aspect, we become the Dire Werewolf.
Dire Werewolf Grizzly Rage grants Unstoppable for its duration, grants movement speed and healing on kill, and a damage buff that grows over time. With  Aspect of the Rabid Bear, our damage type for all attacks becomes Poison, which helps unify several multipliers.
Grizzly Rage’s cooldown cannot be reduced while Grizzly Rage is active. Any Skill not tuned to Grizzly Rage, such as Earth Skills will be unavailable while Grizzly Rage is active. Thanks to ![]() Tempest Roar, all Storm Skills will be active, including
Tempest Roar, all Storm Skills will be active, including ![]() Lightning Storm.
Lightning Storm.
Only one point is invested into Grizzly Rage because further points only reduce the cooldown, and we do not need the Rank 5 effect since we should always be already Armor capped without the effect.
![]() Grizzly Rage has a capped duration, but we gain or extend Grizzly Rage duration with:
Grizzly Rage has a capped duration, but we gain or extend Grizzly Rage duration with:
 Aspect of the Rampaging Werebeast gives up to 10 seconds extra duration.
- Kills extend the duration by 1 second.
- Overpowering Bosses extends duration by 5 seconds.
 Lightning Storm Lightning Strikes do not Overpower, but stray other damage events like Lightning Bolts or other sources have a small chance to.
 - Offensive Tempers on gear give more duration on
 Grizzly Rage.
If this is not sufficient to maintain Grizzly Rage for most of the time or your downtime becomes too disruptive, consider one or more of the following options:
- Exchange the Swooping Attacks Spirit Boon for Calm Before the Storm
- Target your Mastercrafts towards Grizzly Rage Duration or Cooldown.
- Put more Skill Points into
 Grizzly Rage for cooldown.
Bestial Rampage
Our Key Passive is ![]() Bestial Rampage for the high damage and attack speed multipliers. These are maintained built with
Bestial Rampage for the high damage and attack speed multipliers. These are maintained built with ![]() Maul for Werebear and
Maul for Werebear and ![]() Lightning Storm for Werewolf.
Lightning Storm for Werewolf. ![]() Wildheart Hunger stacks give additional bonuses to
Wildheart Hunger stacks give additional bonuses to ![]() Bestial Rampage. During
Bestial Rampage. During ![]() Grizzly Rage, triggers of
Grizzly Rage, triggers of ![]() Que will force form to help maintain stacks.
Que will force form to help maintain stacks.
Other Key Passives are available, such as ![]() Perfect Storm, which is a comparable damage, better Spirit Generation but at a slower pacing. To use this Key Passive:
Perfect Storm, which is a comparable damage, better Spirit Generation but at a slower pacing. To use this Key Passive:
- Change
 Bestial Rampage for
  Perfect Storm.
 - Move
 Dire Wolf’s Aspect to Boots
 - Use
 Tibault’s Will. Mastercraft the All Stats.
Spirit Management
We have several sources of Spirit Cost Reduction and Spirit Generation that make Spirit not a difficult issue to manage for this build.
- Gift of the Stag Spirit Boon gives 10 Spirit Per Second.
 Dire Wolf’s Aspect gives Spirit Cost Reduction during
  Grizzly Rage.
  Tempest Roar has a Lucky Hit Chance to restore Spirit.
If this is not sufficient for uptime, we can optionally use one or more of the following:
- Key Passive
 Perfect Storm. Pair this with
  Tibault’s Will and move
  Dire Wolf’s Aspect to Boots.
  Mangled Aspect or
  Aspect of the Umbral on ring before getting
  Ring of Starless Skies.
- Gear extra Resource Cost Reduction, Resource Generation, or Spirit Per Second on gear, as available.
- Use Energize Spirit Boon over Swooping Attack.
- Worst case, use
 Maul as an attack to build Spirit.
Elixirs, Incense and Health Potions
The Alchemist offers helpful consumables at the cost of foraged materials found throughout Sanctuary.
- Craft
 Elixir of Advantage II for Attack Speed and Lucky Hit bonuses.
 - One of each Incense Category can be used, for a total of three active Incenses at a time. In priority:
- Defensive –
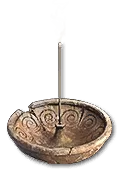 Reddamine Buzz for Max Life, or
  Song of the Mountain if you need the Armor, up to 1000 armor cap.
 - Core Stat –
 Blessed Guide for Willpower.
 - Resistance –
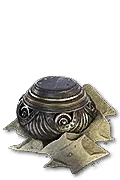 Soothing Spices for All Resist, All Resist Maximum, and Armor.
- Defensive –
- Upgrade your Potion as you level, increasing the instant healing of the potion!
Season 9 Updates
Alongside the nerf to ![]() Mjölnic Ryng,
Mjölnic Ryng, ![]() Grizzly Rage is the theme of the season, with lots of buffs to related aspects, and
Grizzly Rage is the theme of the season, with lots of buffs to related aspects, and  Dire Wolf’s Aspect moving to Utility Slot, making some room for everything to fit. The overpower nerfs that are hurting the rest of the builds do not affect the Lightning Storm Druid so everything is looking up.
There is some testing to do, like if  Aspect of the Rabid Bear‘s Poison conversion would affect things like
 ![]() Fulminate. If the damage conversion is before multiplier are applied, then you would simply want to swap that glyph for
Fulminate. If the damage conversion is before multiplier are applied, then you would simply want to swap that glyph for ![]() Tracker or
Tracker or ![]() Keeper.
Keeper.
The following list details the important changes in the Season 9 Patch Updates that are specific to the Lightning Storm Druid. For general Season 9 information, check out our Season 9 Hub.
Itemization:
 Mjölnic Ryng – Damage bonus reduced from 40-100% to 20-40%.
 Dire Wolf’s Aspect
 - Category changed from Offensive to Utility.
- Grizzly Rage is now a Werewolf Skill and Shapeshifts you into a Dire Werewolf. Dire Werewolves gain 20-40% Movement Speed and 20-40% Spirit Cost Reduction instead of Damage Reduction. In addition, kills Heal you for 10% of your Maximum Life.
 Aspect of the Rampaging Werebeast
 - The duration of Grizzly Rage is increased by 3-10 seconds. In addition, Critical Strikes while Grizzly Rage is active increase your Critical Strike Damage by 5% for the duration, up to a maximum of 100%.
 Aspect of the Rabid Bear
 - Previous: While Grizzy Rage is active, Skills that Critically Strike apply Rabies and your Poison damage is increased by 60-105%.
- Now: While Grizzy Rage is active, your direct damage is converted into Poison damage, you deal 40-80% more Poison damage, and you passively spread Rabies.
Skills and Stats:
 Maul – Damage increased from 26% to 80%.
 Vigilance – Damage Reduction reduced from 7/14/21% to 5/10/15%.
 Toxic Claws – Now: You deal 5/10/15% increased Poison damage. This is doubled while in Werewolf form and for 8 seconds after leaving it.
 Grizzly Rage Damage bonus per second in the form increased from 3% to 4%. Companion Skills are now always usable during Grizzly Rage.
 Grizzly Rage Rank 5 Bonus
 - Previous: Companion Skills can be Cast during Grizzly Rage.
- Now: You gain 30% increased Armor while Grizzly Rage is active.
 Prime Grizzly Rage
 - Previously: Grizzly Rage makes you Unstoppable for 6 seconds.
- Now: You are Unstoppable while Grizzly Rage is active.
Bug Fixes:
- Fixed an issue where Shroud of False Death also granted bonuses to Spirit Boons.
- Fixed an issue where
 Aspect of the Rabid Bear would not always work for the entire duration of Grizzly Rage.
Changelog
- 27 June, 2025: Updated for patch 2.3 and season 9.
- 24 April, 2025: Updated to new unified format and for Season 8 Patch 2.2 changes.
- 16 January, 2025: Updated for Season 7 and Patch 2.1 updates. Two tab paragon board introduced.
- 15 October, 2024: Updated for new onsite Paragon Tool
- 29 September, 2024: Updated for Season 6. Changes to Paragon, Skill Tree, Skill Bar, and recommended Uniques.
- 7 August: 2024: Updated for post-launch of season 5. No Changes to Skills, Gearing or Paragon.
- 4 August, 2024: Significant changes to Skills and Paragon to adjust for season 5, the change to Shepherd’s Aspect and the introduction of the
 Mjölnic Ryng.
 - 17 June, 2024: Updated for mid-season patch 1.4.3.
- May 15, 2024: Small changes in gear affixes to adjust for season launch changes from PTR.
- 3 May, 2024: Guide reworked for the significant 1.4.0 changes to gearing and for season 4 speculative changes. Format changed to frontload basic build information and offer extra information and options afterwards.
14 March, 2024: Guide created, fully replacing previous guide.
- Ownership transferred.
- Adjusted Gear, Skills, and Paragon sections to hit defensive stats targets and improve overall damage output.
- Improved readability, explanations, and options.
