Crusader Invoker Set Dungeon Guide
Welcome to our guide to complete the Invoker set dungeon for Crusaders, a required step to complete the Masters of the Universe Conquest.
Overview of the Invoker Set Dungeon
The Invoker Set Dungeon is located in Act I, the Overlook Road. Simply head to the Act I town, New Tristram, and exit from the gate where Diablo 3's campaign starts (the Captain Rumford events). Head up the slope towards the game's starting point, and look behind the overturned cart on the hill. The entrance will appear if you have the Invoker 6-piece bonus equipped.
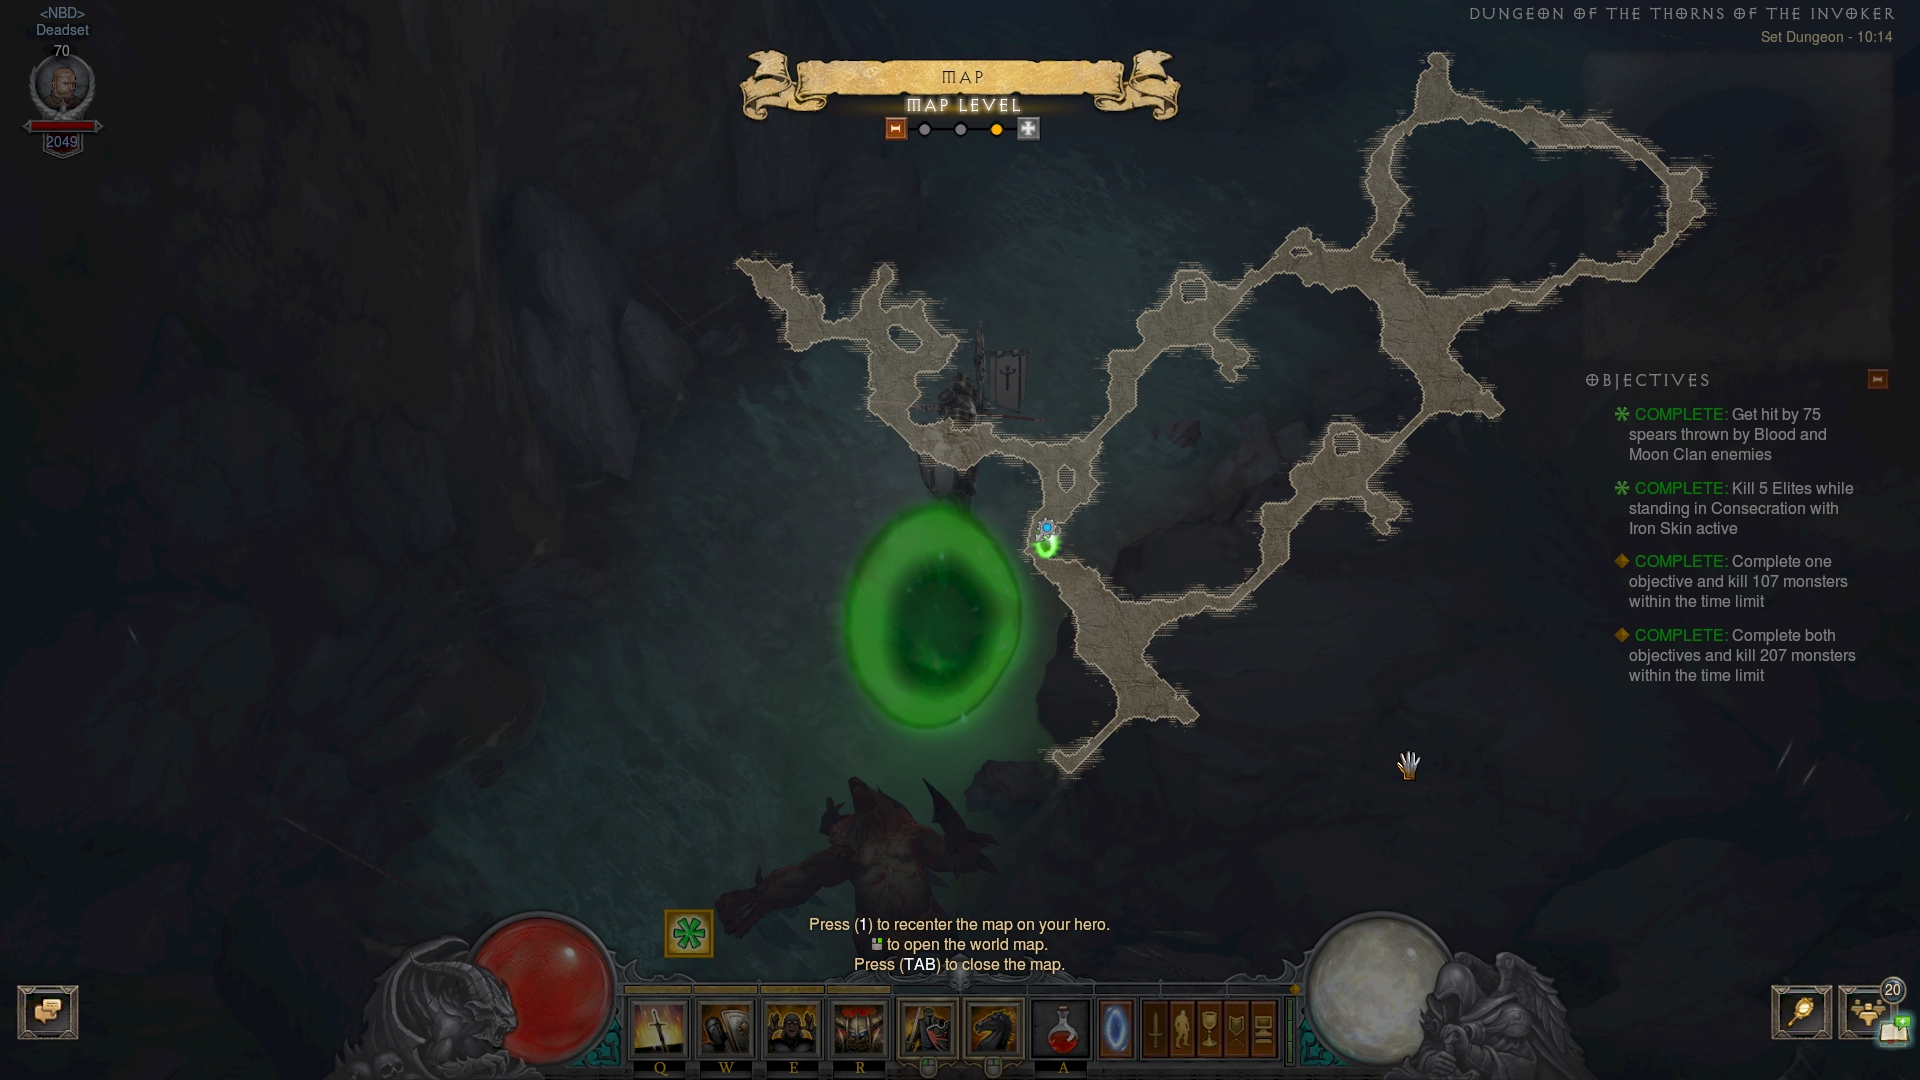
The Invoker Set Dungeon's two unique Primary Objectives are to: 1) Get hit by
75 spears thrown by Blood and Moon Clan enemies; and 2) Kill 5 Elites while
standing in ![]() Consecration with
Consecration with ![]() Iron Skin active.
Iron Skin active.
The Invoker Set Dungeon is made of a cave tileset with a twisting, 8-shaped layout. A proven attempt path is to go upwards at the first major intersection, and following the outer edges of the "eight" shape, revealing any minor side areas as you come across them.
The Invoker Set Dungeon is populated by four kinds of enemies:
- Blazing Ghouls — they come in great numbers and engage you in melee combat. They provide the main portion of the dungeon's kill count objective, and will likely kill themselves into your Thorns damage.
- Blood Clan Mauler — similarly to the ghouls, these melee minions will pad out the kill counter.
- Blood & Moon Clan Impaler — these spear-tossing goatmen are necessary for the first Primary Objective, and their low health is a major reason to tone down your Thorns stat during the attempt.
- Champion of Thorns — the unique enemies on the map. They resemble Act
3's Blood Clan Mauler trash, and are key to the second Objective. They are
exactly 5 in number, so be wary of having your
 Consecration and
 Iron Skin cooldowns up when you encounter one.
Tips for the Invoker Set Dungeon
You do not need exceptionally high Thorns damage to complete the Invoker Set Dungeon — it will, in fact, be to your detriment to maximize Thorns because you will start oneshotting the Blood & Moon Clan Impalers. Anywhere in the 100-150,000 Thorns is a safe sweetspot of 2-3 spears shots per goatman, while maintaining good killing speed.
Blood & Moon Clan Impalers mostly come in their own tiny packs, so when you see them ahead, simply stop in place and allow each to toss a few spears (stopping in one spot helps because their projectiles can miss). This will allow you to get through the first Primary Objective by the first third of the dungeon, allowing you carefree killing of those packs for the rest of the attempt.
Using an ![]() In-geom (either in hand or cubed) and an
In-geom (either in hand or cubed) and an
![]() Akarat's Awakening in your off-hand will help you reset the important
Akarat's Awakening in your off-hand will help you reset the important
![]() Consecration and
Consecration and ![]() Iron Skin cooldowns for each Elite for the second
Objective. Do not use those cooldowns for any other enemies, as it will not be
necessary and will put the attempt at risk. If you see an Elite nearby and the
CDs are not up, disengage to a safe distance and wait them out without attacking
— the Invoker set has a damaging aura.
Iron Skin cooldowns for each Elite for the second
Objective. Do not use those cooldowns for any other enemies, as it will not be
necessary and will put the attempt at risk. If you see an Elite nearby and the
CDs are not up, disengage to a safe distance and wait them out without attacking
— the Invoker set has a damaging aura.
When you're right next to the Elite, activate ![]() Consecration and
Consecration and
![]() Iron Skin in quick succession and in that order — the weaker
Iron Skin in quick succession and in that order — the weaker
![]() Bed of Nails does not have the oneshotting potential of
Bed of Nails does not have the oneshotting potential of
![]() Reflective Skin. Follow their activation with a quick
Reflective Skin. Follow their activation with a quick ![]() Punish
swing to seal the kill during their uptime.
Punish
swing to seal the kill during their uptime.
Unlike normal Invoker setups, using ![]() Belt of the Trove is not recommended
to avoid any
Belt of the Trove is not recommended
to avoid any ![]() Bombardment mishaps as you setup a proper Elite kill for the
second Objective.
Bombardment mishaps as you setup a proper Elite kill for the
second Objective.
Build for the Invoker Set Dungeon
| Active Skills |
|---|


|
| Passive Skills |
| Slot | Pieces | Stat Priority |
|---|---|---|
| Head |
|
|
| Shoulders |
|
|
| Torso |
|
|
| Wrists |
|
|
| Hands |
|
|
| Waist |
|
|
| Legs |
|
|
| Feet |
|
|
| Amulet |
|
|
| Ring #1 |
|
|
| Ring #2 |
|
|
| Weapon |
|
|
| Off-hand |
|
To help you with farming the gear you need for your builds, we have two very useful guides that you can access by clicking the links below: a Salvage Guide to help you quickly check whether or not you can safely salvage a piece of gear and a Legendary Farming Guide to help you efficiently farm legendaries and set items.
| Slot | Gems |
|---|---|
| Jewelry | |
| Helm | |
| Torso and Pants |
|
| Weapon |
|
Kanai's Cube
- Weapon Slot:
 In-geom
 - Armor Slot:
 Aquila Cuirass or
  Heart of Iron (depending on your worse roll)
 - Jewelry Slot:
 Unity
Unity
Changelog
- 18 Feb. 2018: Added guide.
This build is presented to you by Deadset, one of the very few professional Diablo 3 players. Deadset regularly publishes video guides on Youtube and streams on Twitch, where you can see how this and other builds play out in practice.
- Diablo 3 Season 38 Preview
- Diablo 3 Season 37 (Official Preview)
- What's Coming in Diablo 3 Season 36?
- Diablo 3 Season 35: Official Preview
- All Diablo 3 Season 34 Class Guides and Compendium
- Diablo 3 Season 34 Delayed a Week
- Season 34 Official Preview
- Diablo 3 Season 33 Unintentionally Prematurely Ended