


Build Introduction
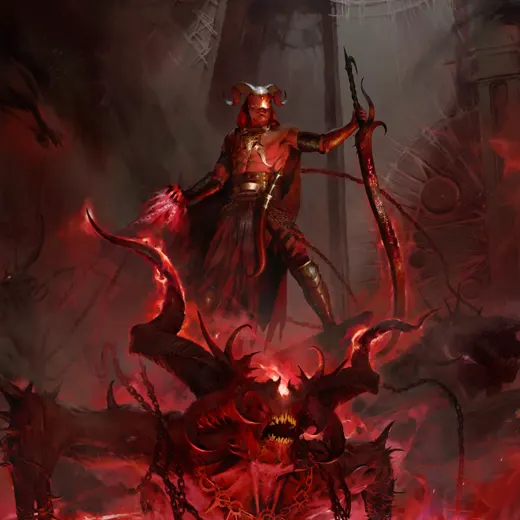
This is your actual full on “true” Summoner Warlock build where we focus entirely on the damage output of our minions whilst standing safely behind our army. If you’re looking for a true summoner feel to your Warlock, this is the build for you.
Have questions or feedback on the guide? Join the livestream and ask GhazzyTV or come to Cashlarond’s stream!
Curious how this build fares in various content types? Take a look at our build tier lists.
Strengths and Weaknesses
- True Summoner gameplay
- Great survivability & Damage
- Can start leveling with it and stay throughout all endgame
- Requires set-up for biggest burst damage
Build Requirements
This build doesn’t have any specific required aspects or unique to perform very well in the end-game.
Quick Navigation
Want to skip ahead? Use the table below to jump to the sections you are looking for.
Skill Bar and Skill Tree Points
 Command Ae’grom
 Sigil of Summons
 Sigil of Subversion
 Tortured Wretch
 Command Fallen
 Metamorphosis
Follow the points allocated in the Skill Tree above for the complete 83-point build. 14 skill points are locked behind the Season Rank System.
Class Mechanic – Soul Shards
Soul Shards is the Warlock’s unique class mechanic allowing you to bind yourself to a Soul Shard Greater Demon that will fight beside you. They come with a variety of different effects as well as on-use-abilities to help you on the battlefield.
Below you’ll find the recommended Soul Shard Demon to bind for this build:
- Legion Shard – Grants Summon Ae’grom skill which will spawn Lesser Demons consistently on the battlefield. Casting a Greater Demon Skill increases Lesser Demon Cast Speed by25% and Cooldown Rate by 20% for 10 seconds. When 200 of your Lesser Demons die, your next Greater Demon Skill Cast has no Dominance Cost.
- Spawn Fragment – Ae’grom now passively spawns Vile Child Lesser Demon every 1 second. Summoning a Greater Demon increases this spawn rate by 50% for 4 seconds, up to 150%. Additional stacks do not refresh this duration. Command Ae’grom no longer spews Vile Children and instead causes all of your Lesser Demons to explode, dealing 113% damage.
Gear, Gems and Stats
The following sections cover the important systems that are essential to improving the power of your character in the endgame of Diablo 4.
Legendary Aspects
Each aspect is listed with its matching gear slot. Do your best to keep each aspect in the assigned slot. Aspects placement is planned with potential Unique and Mythic Unique gear upgrades in mind for easiest and cheapest transition. Obol gambling is a great way to try to obtain specific slot Legendary Aspects and even Uniques early. For exact Runewords suggestions, see here.
| Gear Slot | Gems | Aspect / Unique | Legendary Aspect / Unique Power |
|---|---|---|---|
| Helm |  Royal Sapphire Royal Sapphire |  Cage of Madness (* Should be highest priority to be made into Mythic Quality) Cage of Madness (* Should be highest priority to be made into Mythic Quality) | Your Evade transforms you into an angry Lunatic for up to 15 seconds that explodes dealing Command Fallen’s damage and increasing by 100%[x] for every second you’re transformed for. While you are an angry Lunatic, your Movement speed is increased by 60%[x] and you periodically spawn a Mini Lunatic that seeks enemies. |
| Chest |  Nagu + Nagu +  Que Que |  Fleshwrit Carapace Fleshwrit Carapace | Sigil Skills deal x#% increased damage. Active Sigils gain 1 kill every second and unused kills are saved when they expire. |
| Gloves | n/a |  Aspect of Calamity Aspect of Calamity | Hex increases your critical strike chance. |
| Pants |  Neo + Neo +  Prid Prid | 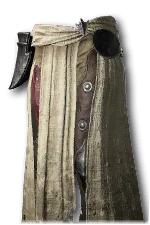 Morlu Fleshward Morlu Fleshward | You cannot recover above 65% of your Maximum Life but your Defensive Skills deal x#% increased damage. |
| Boots | n/a |  Bane-Link Aspect Bane-Link Aspect | Hexed enemies are Slowed by 70% [50 – 70]% for 3 seconds when you make them Vulnerable or become Vulnerable for 3 seconds when you Slow them. |
| Weapon 1H |  Royal Skull Royal Skull | 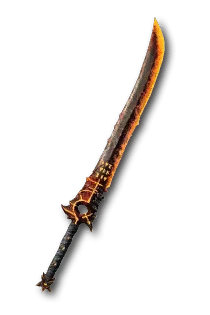 Shard of Verathiel Shard of Verathiel | Basic Skills deal x#% increased damage but additionally cost 25 Primary Resource. |
| Off-Hand (Focus) | Royal Skull | Hellbent Commander Aspect | You deal x% increased summon damage. |
| Amulet (50% Scaling) |  or Royal Skull or Royal Skull |  Seed of Horazon Seed of Horazon | Your Demonology Skills deal x [0.6 – 0.75%] increased damage per Wrath you have and you take + [0.2 – 0.25%] reduced damage per Dominance you have. |
| Ring | or Royal Skull |  Aspect of Adaptability Aspect of Adaptability | Basic Skills generate # additional Primary Resource, once per Skill. |
| Ring | or Royal Skull | 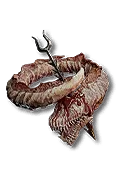 The Fecund Seal The Fecund Seal | Sigil of Summons deal x#% increased damage and you can summon up to 2 additional Lesser Demons with 10 kills outside the ritual. |
Affixes and Tempering Priority
- Affixes on gear are sorted in priority descending order.
- Bolded affixes are the most important targets for Masterworking upgrade. If multiple affixes marked – any selected is acceptable for case by case gear.
- Affixes marked by multiple “*” – indicate desirability of obtaining them as Greater Affix originally or with lucky Tempering.
Be sure to check our Tempering and Masterworking guides for more details about these topics.
| Slot | Affixes | Tempering Affixes |
|---|---|---|
| HelmetCage of Madness (* Should be highest priority to be made into Mythic Quality) | * 1. Maximum Life * 2. + Ranks to Demonology 3. Willpower 4. Total Armor |  Natural Resistance – Physical Resistance Natural Resistance – Physical Resistance |
| ChestFleshwrit Carapace | * 1. Maximum Resource 2. Maximum Life 3. Willpower 4. + Ranks to Tortured Wretch | Natural Resistance – Fire Resistance |
| Gloves | * 1. Attack Speed * 2. Critical Strike Cahnce 3. Critical Strike Damage 4. Willpower | Worldly Finesse – Critical Strike Damage Multiplier |
| PantsMorlu Fleshward | * 1. + Ranks to Command Fallen 2. Willpower 3. Total Armor 4. Maximum Life | Natural Resistance – Fire Resistance |
| Boots | * 1. Willpower 2. Maximum Life 3. Movement Speed 4. Total Armor | Natural Motion – Movement Speed |
| AmuletSeed of Horazon | * 1. Maximum Resource 2. Critical Strike Damage 3. Vulnerable Damage 4. Willpower | Worldly Finesse – Critical Strike Damage Multiplier |
| Ring | * 1. Attack Speed 2. Willpower 3. All Damage 4. Critical Strike Damage | Worldly Finesse – Critical Strike Damage Multiplier |
| RingThe Fecund Seal | * 1. Attack Speed 2. Willpower 3. All Damage 4. Critical Strike Damage | Worldly Finesse – Critical Strike Damage Multiplier |
| Weapon 1HShard of Verathiel | *** 1. Weapon Damage 2. Critical Strike Damage 3. Maximum Life 4. Willpower | Worldly Finesse – Critical Strike Chance |
| Off-hand (Focus) | *** 1. Weapon Damage 2. Critical Strike Chance 3. Maximum Resource 4. Willpower | Worldly Finesse – Critical Strike Chance |
For the dedicated page on Gear Systems and Itemization Overview, check the guide here.
Ancestral and Mythic Uniques
See below for information on useful Uniques and how to integrate them into this build:
| Unique | Category | Synergy | Source |
| Cage of Madness (* Should be highest priority to be made into Mythic Quality) | Best in Slot | – Massive Damage Scaling | Grigoire Guide |
| Shard of Verathiel | Best in Slot | – More damage | Varshan Guide |
| The Fecund Seal | Best in Slot | – Improves the efficiency of Sigil of Summons | Harbinger of Hatred |
| Seed of Horazon | Best in Slot | – Scales damage based on our Maximum Wrath | Grigoire Guide |
| Fleshwrit Carapace | Best in Slot | – Ramps our Sigils even further | Lord Zir Guide |
Gems and Runewords
See below for a more detailed explanation of the best Gems and Runewords to socket into your gear.
| Weapon Gems | Armor Gems | Jewelry Gems |
|---|---|---|
| Royal Skull for increased damage. |  Runeword or Royal Sapphire for increased Willpower. Runeword or Royal Sapphire for increased Willpower. | Royal Diamond or Royal Skull for resistances or armor as needed. |
| Runeword Combination | Effect |
| Nagu + Que | Maintain at least 1 active summon for 5 seconds to gain offering for each summon up to 5. Invoke the Druid’s  Earthen Bulwark Skill. Earthen Bulwark Skill. |
| Neo + Prid | Deal damage after not taking any damage for 2 seconds to gain massive Offering. Invoke the Warlock’s  Dark Prison. Dark Prison. |
Paragon Board
Below you’ll find the entire end-game paragon board set-up for this build in detail!
It is imperative to level up all Glyphs to level 50 first to increase activation radius and then to level 51 to unlock secondary damage multiplier. More about paragon glyphs and how to level them, here.
Some paragon points are locked behind the Season Rank System.
Season Mechanics
In Season of Death Awakening, a death cult is after us! Defeat Ruptures, Realmwalkers, Risen, and Reapers for seasonal reputation and rewards. In the endgame, Uniques can now be upgraded to Mythic quality boosting all modifiers to be top rolled and even comes with a 30% bonus to the unique power!
Seasonal content and reputation will be the best source for these new Mythic uniques. They can also be crafted at the Jeweler vendor or randomly upgraded through the Horadric Cube. You can equip as many Mythic uniques as you want that were aquired from drops or caches, but you can only have 1 crafted Mythic unique equipped at a time.
For a complete overview of Season 14, mechanics and theme, new leveling activity, and other changes coming, please take a look at our comprehensive season hub here.
Talismans
The Lord of Hatred expansion introduces Talismans as a new character progression system. You get to equip a Seal and place Charms into its slots for a massive power boost. The recommended setup for the Tortured Saws Demons Warlock build is listed below:
- Seal – A 6 Charm slot Seal with Critical Strike Multiplier or any damage multiplier is best here. The best set to aim for is called
 Berú of Horazon’s Chains (5 pieces)
 - Charms – Demonology Ranks and any defensive stats or All Stats works wonders for you. Make sure you get 5 of them to be of the same set as your Seal and the last charm should be of
 Paingorger’s Gauntlets for optimal Talismans.
Mercenaries
During the Vessel of Hatred campaign, you will unlock Mercenaries to assist you. While you can choose freely early on, we recommend Raheir as your main merc:




For the reinforcement, stick with Varyana, utilizing her  Bloodlust to trigger when any Skill is cast in combat.
Rotation and Build Mechanics
The main objective is to get as many Tortured Wretch’s out on the field as possible. To do this we need to generate Dominance which we do with Command Fallen. Metamorphosis helps with our Dominance cost and the rest of our abilities are mainly there for scaling damage output. Build is extremely straight simple and easy as we just want to spam out Tortured Wretch.
Rotation and Playstyle
- Metamorphosis – Cast whenever it falls off. Provides survivability and damage scaling but most importantly reduces Dominance cost.
- Tortured Wretch – Our main ability we want to spam at all times possible, it taunts enemies and deals tons of damage.
- Sigil of Subversion – Applies Hex. Use whenever it’s ready to slow enemies and give us a movement speed buff as well as Shadowform.
- Sigil of Summons – Gives our Lesser Demons a damage boost and helps us keep demons actively rolling for the Paragon legendary node “Fathomless” (Each demon summoned within 6 seconds gives 15x damage multiplier up to 105x)
- Command Ae’grom – He should be summoned at all times as he constantly summons minions. His command ability explodes the Lesser Demons for a decent increase of damage output.
- Command Fallen Whenever you run out of Dominance and have casted the above skills this is your to-go-to spam to get things back up to repeat the “rotation”.
Season Updates
There are no bigger changes coming to the Warlock for this season.
For a complete overview of Season 14, mechanics and theme, new leveling activity, and other changes coming, please take a look at our comprehensive season hub here.
Obol Gambling
Obol gambling is a great way to improve chances of finding Legendary Aspects or specific slot Uniques missing from your build. Most efficient obols farming methods can be found here. Check out the new tool guide from Icy Veins for gambling Obols in the link below.
Changelog
- June 26th, 2026: Guide updated for Season 14.
- May 9th, 2026: Big gear optimization for better performance.