Build introduction
The ![]() Fleshrender Druid devastates Nearby Poisoned enemies by using Defensive Skills for a large burst of Poison damage. The Fleshrender Druid is an effective and high-damage build thanks to a few interactions.
Fleshrender Druid devastates Nearby Poisoned enemies by using Defensive Skills for a large burst of Poison damage. The Fleshrender Druid is an effective and high-damage build thanks to a few interactions.
- The
 Petrify Rank 5 effect resets the cooldown on all other skills, including the Defensive Skills that trigger the Fleshrender effect.
 - The
 Xan Rune gives easy uptime to Critically Overpower all damage sources.
  Nature’s Fury triggers of extra Defensive Skills will also trigger extra hits from Fleshrender.
The Fleshrender Druid is sometimes called the Singing, Roaring, or Shout Druid. This version of the Fleshrender Druid is less sing-y, and will primarily use ![]() Earthen Bulwark and
Earthen Bulwark and ![]() Cyclone Armor as its Defensive Skill triggers, with
Cyclone Armor as its Defensive Skill triggers, with ![]() Debilitating Roar and
Debilitating Roar and ![]() Blood Howl as buff maintenance secondary skill triggers.
Blood Howl as buff maintenance secondary skill triggers.
Strengths and Weaknesses
- Wide Area of Effect attack
- Easy to manage Bossing
- Very Button Spam
- High Gearing Requirement
Build Requirements
The following Unique Items are required for build functionality to get started on the Fleshrender Druid:
 Symbiotic Aspect
Cooldown Requirements
- For this build to play smoothly, you will want your
 Petrify cooldown to be below 10 seconds for the smoothest play. This is done with
  Airidah’s Inexorable Will, tempers on Amulet and Jewelry, and other sources. Check out the Petrify Cooldown Management section for more information.
 - You will also want your
 Cyclone Armor and
  Earthen Bulwark cooldowns to be about 6 seconds, so they will reset within one
  Symbiotic Aspect trigger.
This build uses Runewords as a key mechanism for significant damage output multipliers. The ![]() Zan
Zan![]() Xan combination gives high uptime on Critical Overpowers for all damage, including the damage triggers from
Xan combination gives high uptime on Critical Overpowers for all damage, including the damage triggers from ![]() Fleshrender. Access to Runewords requires the Vessel of Hatred expansion. This is an Eternal-friendly build.
Fleshrender. Access to Runewords requires the Vessel of Hatred expansion. This is an Eternal-friendly build.
Quick Navigation
This guide covers everything necessary to get started on your Fleshrender Druid adventure, including Skill Tree points, Paragon, Gearing, and Seasonal updates. Navigate straight to hot topics here:
| Gearing, Gems, and Runes | Paragon Board |
| Rotation and Playstyle | Season Updates |
| Petrify Cooldown Management | Variant Options |
Skill Bar and Skill Tree Points
There are several flex options for Skilling that can change based on the content, like speedfarming or pit-pushing. Check the Variant Options section to optimize for your content.
Eternal players complete Renown events in each zone for additional Skill Points, while Seasonal Players engage with the Season Journey and Rank for these Skill points.
See how these Skills play in the Rotation and Playstyle section.
Druid Class Mechanic – Spirit Boons
Druids unlock powerful Spirit Boon passives, giving offerings to the animal spirits to receive their Blessing. Once fully unlocked, activate the final Boon by Spirit Bonding with one of the four animal spirits to take two passives from that row.
| Boon Name | Animal | Effect |
|---|---|---|
| Wariness | Deer | Take 15% Reduced Damage from Elites. |
| Avian Wrath | Eagle | Gain 40% Critical Strike Damage. |
| Bolster | Wolf | Fortify for 50% of your Maximum Life when you use a Defensive Skill. |
| Overload | Snake | Dealing Storm damage also applies an additional 20% Poisoning damage over 5 seconds. Lucky Hit: Dealing Poison damage has up to a 35% chance to summon a Lightning Bolt on the target dealing 120% damage. |
| Calm Before the Storm | Snake | Lucky Hit: Nature Magic Skills have up to a 10% chance to reduce the Cooldown of your Ultimate Skill by 2 seconds. |
Check the Variant Options section for more ways to fit your preferred playstyle.
Gear, Stats, Gems, and Runes
Check these sections for all important Fleshrender Druid gearing considerations to improve the power of your character in the endgame.
Legendary Aspects
Gear slots with multiple options are listed in recommended priority. Any slot with a non-required Mythic Unique or Unique Item will include a valid alternative legendary power to use while still leveling and gearing. Combine these with the right stat priorities.
| Slot | Aspect | Unique/Legendary Aspect Power |
|---|---|---|
| 1 Handed Mace | Casting a Defensive Skill deals damage to Nearby Poisoned enemies, increased by 50% for every 100 Willpower you have. | |
| Totem |  Aspect of the Rabid Beast Aspect of the Rabid Beast | Deal 40-80% more Poison Damage. While Shapeshifted, your direct damage is converted into Poison damage. |
| Helm | Your Earth Skills are now also Werebear Skills and Fortify you for .2-.5% of your Maximum Health. | |
| Chest | If you haven’t dealt damage in the last 2 seconds, gain Stealth and 40% Movement Speed. | |
| Gloves |  Aspect of Creeping Death Aspect of Creeping Death | Your attacks randomly deal 1% to 200-300% of their normal damage. |
| Pants |  Symbiotic Aspect Symbiotic Aspect | When the Nature’s Fury Key Passive triggers a free Skill, your non-Ultimate Cooldowns of the opposite type are reduced by 2-6 seconds. |
| Boots | Damaging 150-100 Enemies with Nature Magic Skills grants Max Movement Speed and Unhindered for 4-8 seconds. Enemies you run through are Immobilized for 1 second. | |
| Amulet |  Aspect of Natural Balance Aspect of Natural Balance | Casting a Storm Skill grants your Earth Skills 50-70% Critical Strike Damage for 4 seconds. Casting a Earth Skill increases the Critical Strike Chance of Storm Skills by 10-15% for 4 seconds. |
| Ring 1 | Casting an Ultimate Skill Pulls in Distant enemies, dealing Physical damage to them and increasing by 10% for every 1 point of Willpower you have. This effect repeats once more 5 seconds later. | |
| Ring 2 |  Vehement Brawler’s Aspect Vehement Brawler’s Aspect | Casting an Ultimate Skill increases your damage by 10-30% for 8 seconds. Gain 2 additional Ultimate Skill Ranks. |
In early gearing, having your  Symbiotic Aspect on Amulet may be necessary for smoothness of play.
Stat Priority and Tempering Affixes
Each line of affixes is listed in order of importance, with some alternatives given. The bolded affixes are the most important targets for Greater Affixes and Masterwork Critical Increases. Check the Tempering guide and Masterworking guide for more details about these topics.
| Slot | Gear Affixes | Tempering Manual Affixes |
|---|---|---|
| Unique 1 Handed Mace | Willpower Ranks to Defensive Cooldown Reduction Ranks to Defensive Skills | |
| Totem – Legendary Aspect | Cooldown Reduction Willpower Maximum Life Luck Hit Chance | |
| Unique Helm | Maximum Life Willpower% Ranks to Armor | |
| Mythic Chest | All Stats Maximum Life Damage on Next Attack After Entering Stealth Resource Generation | |
| Unique Chest | Maximum Life Ursine Strength’s Bonuses Ranks to Werebear Overpower Damage | |
| Unique Gloves | Lucky Hit Chance Critical Strike Chance Attack Speed Lucky Hit: Chance to Make Enemies Vulnerable for 3 Seconds | |
| Gloves – Legendary Aspect | Willpower Maximum Life Attack Speed Resistance to All Elements | |
| Pants – Legendary Aspect | Willpower Armor Maximum Life Reistance to All Elements | |
| Unique Boots – | Inherent: Attacks Reduce Evade’s Cooldown by 0.5 Seconds Ranks to Crowd Control Duration Nature Magic Cooldown Reduction Ranks to | |
| Amulet – Legendary Aspect | Willpower% Ranks to Ranks to Ranks to | |
| Unique Ring – | Willpower Damage to Close Enemies Lucky Hit Chance Ultimate Skill Cooldown Reduction | |
| Ring – Legendary Aspect | Willpower Maximum Life Attack Speed Resistance to All Elements |
Cooldown Reduction to ![]() Petrify, Nature Skills and to Defensive Skills is high value. Try to target Greater Affix for these Cooldown Reductions on the
Petrify, Nature Skills and to Defensive Skills is high value. Try to target Greater Affix for these Cooldown Reductions on the ![]() Airidah’s Inexorable Will,
Airidah’s Inexorable Will, ![]() Khamsin Steppewalkers, and
Khamsin Steppewalkers, and ![]() Fleshrender.
Fleshrender.
Mastercraft and Greater Affix as available until Petrify cooldown is below 10 seconds, and to get ![]() Earthen Bulwark and
Earthen Bulwark and ![]() Cyclone Armor below 6 seconds to make gameplay smooth with
Cyclone Armor below 6 seconds to make gameplay smooth with  Symbiotic Aspect.
Attack Speed is a minor gain in faster spell queueing for your Skills.
Critical Strike Chance is covered by the ![]() Xan Runeword, so you will not need gear affix investment.
Xan Runeword, so you will not need gear affix investment.
After gearing, look at progression systems like Paragon next.
Uniques and Mythic Uniques
The following Unique Items are required, recommended, or optional for the Fleshrender Druid:
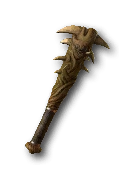 Fleshrender is the primary source of damage for this build, doing a burst of damage to Poisoned Enemies after using a Defensive Skill.
 Vasily’s Prayer makes Earth Skills into Werebear skills. This includes
  Petrify and
  Earthen Bulwark. This also means the Fleshrender burst triggered from
  Earthen Bulwark has both the Earth and Werebear tags for damage multipliers.
- (Before Mythic)
 Insatiable Fury has strong gearing affixes and gives Skill Ranks to all Werebear Skills. With
  Vasily’s Prayer, this includes Earth Skills as well.
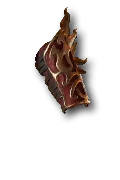 Fists of Fate gives easy Vulnerability application, a moderate damage multiplier average, and is a large source of Lucky Hit. Lucky Hit is a large boost for effects like
  Constricting Tendrils Poison application, and for Lucky Hits like Calm Before The Storm spirit boon.
 - Legendary Gloves are a valid choice as well with options like
 Aspect of Creeping Death. If legendary gloves with high Greater Affixes and strong mastercraft to Willpower can be found, it can be better than
  Fists of Fate.
- Legendary Gloves are a valid choice as well with options like
- (Before Mythic)
 Tibault’s Will is a strong damage multiplier and damage reduction source, and its effect will constantly be active thanks to
  Enhanced Earthen Bulwark. Using this is viable before Mythic Uniques, as
  Symbiotic Aspect can be moved to the chest.
 Khamsin Steppewalkers are a high source of Nature Magic Cooldown for
  Cyclone Armor,
  Earthen Bulwark and
  Petrify.
 Airidah’s Inexorable Will is the primary source of high Ultimate Cooldown Reduction% for
  Petrify, and grips enemies on and after Ultimate cast. Getting a Greater Affix in the Ultimate Cooldown Reduction can be the biggest difference in function for this build.
Mythic Unique Items
 Shroud of False Death – As with nearly all druid builds, Shroud is a strong Mythic Unique item, granting +1 in all Skill Passives and decent Gearing Affixes. The boost to Skill Passives means gains in damage multipliers, damage reduction, fortify, and various utilities.
Check our Unique Item Target-farming guide for information on where to find everything you need.
Gems and Runewords
The following are the recommended Gem and Runeword setups for the Landslide Druid.
Gems
| Weapon Gems | Armor Gems | Jewelry Gems |
|---|---|---|
For increased Willpower | For All Resistances |
Runewords
Use these Runeword combinations for the Fleshrender Druid, placed into Armor Slots.
| Runeword Combination | Effects |
| Zan Xan | |
| Yul Qax |
Runewords use a conditional Rune of Ritual to generate Offering. The Offering is consumed by the Rune of Invocation to trigger its effect. Runes replace Gems in gear with two sockets. Up to two sets of Runeword Pairs can be placed at a time.
![]() Xan will provide a high volume of periodic Critical Overpowers.
Xan will provide a high volume of periodic Critical Overpowers. ![]() Qax will give a strong periodic damage multiplier.
Qax will give a strong periodic damage multiplier.
Situationally ![]() Ahu can be a better trigger than
Ahu can be a better trigger than ![]() Yul; it is better in groups of enemies where you can have multiple targets triggering the Lucky Hit effect, and worse against low amounts of enemies like during a single-target boss.
Yul; it is better in groups of enemies where you can have multiple targets triggering the Lucky Hit effect, and worse against low amounts of enemies like during a single-target boss.
Paragon Board
The following are the preferred Glyphs, Boards, and pathing recommended for making the most of the Fleshrender Druid.
The road to max Paragon is long. The above Paragon tabs show the following:
- The BASE SETUP tab spends 50 fewer points than the max 328 points, taking a stricter pathing to take almost all Legendary, Rare, and Magic Nodes, and activates all Glyph Nodes with their secondary effects.
- The FULL SETUP tab completes the paragon board in its final form, filling in the rest of the board to get the rest of the desired Magic and Rare Nodes, filling out Glyph additives, and then spending the rest of the points on Willpower to scale
 Fleshrender.
Glyphs have two significant breakpoint increases. At Level 15, the glyph grows in radius and gains a special effect. At Level 46, the glyph grows to max radius and gains a strong conditional damage multiplier.
Glyphs are placed as if they are at least Level 15+ in radius. Total Boards placed are now limited to a max of 5; the Starter Board and four Class Boards. Rotate boards as necessary.
Season 12 Mechanics
The Season of Slaughter introduces Bloodied Items, Killstreaks, and Bloodied Sigils.
Killstreaks
Slay enemies to advance your Killstreak. Gain Experience and seasonal reputation after the Killstreak completes. Higher Killstreak count gives more rewards.
Bloodied Items
Bloodied Gear will drop throughout Sanctuary, granting additional. stackable Bloodied Affixes that interact with Killstreaks. There are three categories of Bloodied Affixes:
- Rampage Affixes (Armor Slots) increase in power based on Killstreak Tier.
- Feast Affixes (Weapons) gives its periodic bonus every X kills.
- Hunger Affixes (Jewelry) increases drop rewards, scaling with Killstreak Tier.
Chase the following Bloodied Affixes for the Fleshrender Druid:
- Rampage (Armor): Primary Stat per Killstreak Tier.
- Other affixes, such as Critical Strike Chance if not capped, Attack Speed, or Cooldown Reduction, will also be beneficial. Having at least one Cooldown Reduction affix will be beneficial for
 Earthen Bulwark and
  Petrify management.
- Other affixes, such as Critical Strike Chance if not capped, Attack Speed, or Cooldown Reduction, will also be beneficial. Having at least one Cooldown Reduction affix will be beneficial for
- Feast (Weapons): Every 25 Kills, Gain Berserking.
- Berserking increases damage and movement speed.
- Hunger (Jewelry): Any
- Hunger Affixes are non-combat power reward increases. The power of the rest of the item will be more important. Feel free to tailor the affixes to what you are grinding for. For example, if you want more seasonal reputation, then Increased Reputation from Kill Streaks will be beneficial.
Bloodied Sigils
Bloodied Sigils empower content and increase Bloodied drop reward volume for your Nightmare Dungeons, Infernal Hordes, and Lair Bosses. These are a step up, as the Relentless Butcher Bloodied Affix increases the difficulty of the content by around a full Torment Tier.
Beware of Bloodsoaked Sigils, which are even further empowered, guaranteeing multiple Bloodied Items and scaling the content to about Pit Tier 100. Fleshrender can handle it with higher gearing and paragon, however!
Mercenaries
Once unlocked, Mercenaries are followers that aid the Player in combat. A main mercenary is chosen to fight alongside you, granting strong buffs or perks, and a secondary Mercenary is chosen to Reinforce you under a chosen Opportunity condition periodically.
Main Mercenary – Raheir, the Shieldbearer
- Skills:
 Shield Charge,
  Raheir’s Guard,
  Provoke,
  Mocking Lure
Reinforcement – Aldkin, the Cursed Child
- Reinforcement Ability –
 Field of Languish
 - Opportunity –
 Petrify
Raheir will grant a notable increase to Armor and a small damage bonus, taunting enemies occasionally. Other setups are viable, such as Subo’s ![]() Cover Fire for Critical Strike Damage and minimap marking quality of life.
Cover Fire for Critical Strike Damage and minimap marking quality of life.
Build Mechanics
Rotation and Playstyle
The primary damage cycle for the Fleshrender Druid is:
 Petrify to Stun, apply the Critical Strike Damage debuff, and grip enemies with
  Airidah’s Inexorable Will.
 Cyclone Armor to debuff enemies, apply the Poison via Overload Boon, and trigger
  Fleshrender.
-
 Earthen Bulwark for Barrier, Unstoppable, and to Trigger
  Fleshrender.
Buff Maintenance:
![]() Debilitating Roar and
Debilitating Roar and ![]() Blood Howl are secondary Skills used for Buff Maintenance:
Blood Howl are secondary Skills used for Buff Maintenance:
 Debilitating Roar applies a damage-dealt buff on yourself and damage damage-taken debuff on enemies. Cycle this into your cast rotation at least every 4 seconds.
  Blood Howl gives an attack speed bonus and a boost to
  Toxic Claws. Cycle this in at least every 8 seconds.
Why Earthen Bulwark and Cyclone Armor over Debilitating Roar and Blood Howl?
 Nature’s Fury naturally favors Storm and Earth Skills, and is the target for our
  Symbiotic Aspect resets. As well,
  the Aspect of Natural Balance will affect these two skills.
  Earthen Bulwark has the more favorable Earth + Werebear tags and has a damage trigger for Lucky Hits with
  Innate Earthen Bulwark.
 Cyclone Armor applies Poison with Overload Boon and has a damage trigger for Lucky Hits.
  Debilitating Roar has a favorable Werebear tag, but no damage trigger, and has a longer spellqueue to activate.
  Blood Howl has no damage trigger and no favorable damage Tags.
![]() Storm Strike is the lowest filler, to apply the Poisoned condition to enemies or trigger Lucky Hits.
Storm Strike is the lowest filler, to apply the Poisoned condition to enemies or trigger Lucky Hits.
Skills, Support, and Synergies
![]() Fleshrender is the primary source of damage for this build. Defensive Skills used on Nearby Poisoned enemies trigger its damage. The Fleshrender damage is Poison type, and scales with generic modifiers, with Willpower, and with tags of the attached Defensive Skill. For example, Fleshrender bursts from
Fleshrender is the primary source of damage for this build. Defensive Skills used on Nearby Poisoned enemies trigger its damage. The Fleshrender damage is Poison type, and scales with generic modifiers, with Willpower, and with tags of the attached Defensive Skill. For example, Fleshrender bursts from ![]() Earthen Bulwark will have the Earth Tag, and with
Earthen Bulwark will have the Earth Tag, and with ![]() Vasily’s Prayer, the Werebear tag as well. This makes the Fleshrender damage benefit from passives like
Vasily’s Prayer, the Werebear tag as well. This makes the Fleshrender damage benefit from passives like ![]() Resonance.
Resonance.
The Defensive Skills used in the primary cycle are ![]() Earthen Bulwark and
Earthen Bulwark and ![]() Cyclone Armor:
Cyclone Armor:
 Earthen Bulwark is an Earth and Werebear (thanks to
  Vasily’s Prayer) Skill that gives Barrier, Unstoppable, and a damage trigger with
  Innate Earthen Bulwark.
  Cyclone Armor is a Storm skill that, thanks to Overload Spirit Boon, applies the Poisoned condition to enemies.
Both of these skills have damage instances attached, which is useful for Lucky Hit triggers like ![]() Constricting Tendrils. They are also faster casts than
Constricting Tendrils. They are also faster casts than ![]() Debilitating Roar, which makes them the preferred primary cycle Defensive Skills.
Debilitating Roar, which makes them the preferred primary cycle Defensive Skills.
![]() Petrify is our Ultimate Skill. It stuns, grips enemies, grants Spirit, applies a Critical Strike Damage debuff, and resets all other Skills’ cooldowns. Its Rank 5 effect to reset other Skills is a significant enabler for the Fleshrender damage cycle.
Petrify is our Ultimate Skill. It stuns, grips enemies, grants Spirit, applies a Critical Strike Damage debuff, and resets all other Skills’ cooldowns. Its Rank 5 effect to reset other Skills is a significant enabler for the Fleshrender damage cycle.
What is Nearby
![]() Fleshrender deals Poison-type damage to Nearby Poisoned enemies. Unlike Close, which is melee range and a bit farther, Nearby is a much larger range that will be just about the radius of a standard monitor. You can get a feel for the distance at the training dummies if desired. It is about the distance from the dummies to the doorway of the training room.
Fleshrender deals Poison-type damage to Nearby Poisoned enemies. Unlike Close, which is melee range and a bit farther, Nearby is a much larger range that will be just about the radius of a standard monitor. You can get a feel for the distance at the training dummies if desired. It is about the distance from the dummies to the doorway of the training room.
Applying Poisoning
The Poisoned Condition is necessary for ![]() Fleshrender to deal its damage against a target. How much Poisoning value is not important, just that the enemy is Poisoned. Not all Poison sources apply Poisoning damage over time. We apply Poisoning with:
Fleshrender to deal its damage against a target. How much Poisoning value is not important, just that the enemy is Poisoned. Not all Poison sources apply Poisoning damage over time. We apply Poisoning with:
- Overload Spirit Boon causes our Storm-tagged damage, like from
 Cyclone Armor, to apply Poison.
  Constricting Tendrils is a Lucky Hit chance to apply Poisoning damage over time to enemies.
Key Passive
The Key Passive for Fleshrender Druid is ![]() Nature’s Fury. Skills Autocast from sources like Nature’s Fury mean a high amount of extra triggers of the Fleshrender effect. Between high amounts of Cooldown Reduction, Petrify Cast resets on Skills, and
Nature’s Fury. Skills Autocast from sources like Nature’s Fury mean a high amount of extra triggers of the Fleshrender effect. Between high amounts of Cooldown Reduction, Petrify Cast resets on Skills, and  Symbiotic Aspect, the game flow should be pretty smooth once well geared.
Petrify Cooldown Management
![]() Petrify resets the cooldowns on our other skills at Rank 5. The more we can reset Petrify, the smoother our gameplay. We reduce the Cooldown in a few ways:
Petrify resets the cooldowns on our other skills at Rank 5. The more we can reset Petrify, the smoother our gameplay. We reduce the Cooldown in a few ways:
- General Cooldown Reduction sources, like on Totem.
- Nature Magic Cooldown Reduction like on Khassim Steppewalkers.
- Skill ranks in Petrify reduce cooldown, such as from Skill Points or from
 Vehement Brawler’s Aspect.
 - Kills on enemies affected by
 Petrify reduce the cooldown by one second. In trivial content, this is notable, while in push, it is insignificant.
 - Hitting a Boss with Petrify reduces Petrify by 10 seconds.
- Calm Before the Storm is a lucky hit, reducing Petrify cooldown.
- Ultimate Cooldown Reduction from
 Airidah’s Inexorable Will. Greater Affixing this can be the largest source of Cooldown Reduction for Petrify.
 - Tempers for Cooldown Reduction – Petrify on Jewelry Slots
Variant Options
![]() Petrify,
Petrify, ![]() Cyclone Armor, and
Cyclone Armor, and ![]() Innate Earthen Bulwark are locked in as part of your Primary Gameplay Cycle.
Innate Earthen Bulwark are locked in as part of your Primary Gameplay Cycle.
However, there are a few ways to play this to suit your playstyle preference or attack tempo.
Both passives of ![]() Cyclone Armor are valid to use.
Cyclone Armor are valid to use. ![]() Preserving Cyclone Armor pulls in enemies and gives a defensive boost, while
Preserving Cyclone Armor pulls in enemies and gives a defensive boost, while ![]() Innate Cyclone Armor slows and applies a damage taken debuff. While Innate is taken by default, if you find it disruptive, then try out Preserving.
Innate Cyclone Armor slows and applies a damage taken debuff. While Innate is taken by default, if you find it disruptive, then try out Preserving.
![]() Debilitating Roar and
Debilitating Roar and ![]() Blood Howl are buff maintenance and redundancy skills when you miss or are working on a Petrify Reset. Debilitating Roar is also a tidy Damage Reduction to enemies and Damage Taken Debuff against enemies, and maintains Werebear form, so it is not a large loss to use.
Blood Howl are buff maintenance and redundancy skills when you miss or are working on a Petrify Reset. Debilitating Roar is also a tidy Damage Reduction to enemies and Damage Taken Debuff against enemies, and maintains Werebear form, so it is not a large loss to use. ![]() Blood Howl can provide attack speed, toxic claws boosts, and werewolf form boosts to things like
Blood Howl can provide attack speed, toxic claws boosts, and werewolf form boosts to things like ![]() Heightened Senses.
Heightened Senses.
The final Skill is fully flexible. Either it can just be ignored in favor of having more skill points to move around into damage multipliers or used as filler for various gameplay modifiers. You can try out the following Skills and their adjustments as you prefer for playstyle:
 Storm Strike can be a basic filler to help jumpstart poisoning and applying Vulnerable to enemies.
 - The glove slot can flex to
 Aspect of Impending Deluge if you have well-itemized Legendary Gloves.
- The glove slot can flex to
 Poison Creeper can be another easy way to apply Poisoning, and can allow us to flex off the Overload Boon into Calm Before the Storm.
 - Use Poison Creeper with
 Subterranean Aspect on the gloves to help trigger Lucky Hits like Calm Before the Storm and
  Constricting Tendrils.
 - Put 1 Rank in
 Landslide, and take
  Enhanced Landslide and
  Raging Landslide. More pillars mean more Lucky Hit chances.
- Use Poison Creeper with
 Primal Shred can be used as a Mobility tool.
There’s also the option to take no non-essential skills and just play with the three locked-in skills in a three-button playstyle. Feel free to try it out; it can be the easier playstyle depending on the content and the level of your gear. Spare Skill Points can go to ![]() Defensive Posture and
Defensive Posture and ![]() Vigilance.
Vigilance.
Some other small Spirit Boon flexes are available depending on the content. The Deer and Wolf boons are all relatively low value; you could, for example, take Prickleskin over Wariness for a bit more damage, or Advantageous Beast for speed farm. Then the Wolf could take Calamity for a bit more Petrify Duration when there is intermittent downtime in a run.
Speedfarming
For Speed Content, try out one or more of the following:
- Replace
 Qax with
  Jah for more Mobility.
 - Use Advantageous Beast Spirit Boon if movement speed is not capped.
- Use
 Primal Shred as your filler Skill for Mobility.
Managing Fleshrender APM
This build is a high actions per minute build. It is incredibly spammy both in Skill casts of your Petrify -> Cyclone Armor -> Earthen Bulwark cycle. This is a constant tempo of actions that lasts through the entire run of your content.
Repetitive Stress Injury and Carpal Tunnel are real, and this build may be demanding depending on how you play it. If there are any issues with hand pain, please consider some of the following.
- Relook at your Skills on the Skill Bar and how they are placed. A 321 flow might be easier on your hands than another setup.
- Relook at keybinds. Mouse Buttons, different triggers on the controller, or even the scroll wheel may be better binds.
- For PC, the Numlock trick from Diablo 3 still works for autocasting abilities.
- Secondary Bind your skills to Numlock 1-4
- Have Numlock set to on.
- Press and hold the skills you want to autocast, and turn Numlock off while still holding those skills
- Release these keys, and the skills should autocast whenever they are off cooldown and you are out of town.
- Controller users are more blessed; they can just hold down most skills for autocast as they are available.
- Be wary, as other helpful tech like Mouse or Keyboard Macros to turbocast or sequence cast off one hotkey, or for Console, controller turbo settings, may violate TOS for gameplay automation. Definitely avoid those.
Elixirs, Incense, and Health Potions
The Alchemist offers helpful consumables at the cost of foraged materials found throughout Sanctuary.
- For Elixirs, craft
 Elixir of Advantage II for Attack Speed and Lucky Hit Chance.
 - One of each Incense Category can be used, for a total of three active Incenses at a time. In priority:
- Defensive –
 Reddamine Buzz for Max Life
 - Core Stat –
 Blessed Guide for Willpower.
 - Resistance –
 Soothing Spices for All Resist, All Resist Maximum, and Armor.
- Defensive –
Season Updates
There are not a lot of changes for Druid this season. Expect about the same gameplay and meta as with previous seasons.
Depending on what happens to the new Skill Tree, Uniques, and other changes coming with the expansion, this may be the very last season of Fleshrender. Enjoy while you can!
The following list details the important changes in the Season 12 Patch Updates that are specific to the Fleshrender Druid. For general Season 12 information, check out our Season 12 Hub.
Skills and Stats:
 Thunderstruck
 - Previous: Storm Skills deal increased damage equal to 20% of your Damage vs Close and Damage vs Distant bonuses, up to 60%.
- Now: Storm Skills deal 60% increased damage, and 15% chance to Critically Strike.
Changelog
- 8 March, 2026: Updated for Patch 2.6 and Season 12. Updated recommendations for Mercenaries.
- 6 December, 2025: Updated for Patch 2.5 and Season 11.
- 21 September, 2025: Updated for Patch 2.4 and Season 10. Seasonal Players please note that the Season 10 Mechanics section has setups that include the seasonal Chaos Armors.
- 6 July, 2025: Updated speedfarm variant and horadric arcana options.
- 27 June, 2025: Build created for Season 9 and Patch 2.3.
