Build Introduction
The  Blight Shadowmancer Necromancer build is a very relaxing build, providing lots of layers of control over your enemies and the comfortability of safety behind your darkness skills as your enemies die to your damage over time effects.
This build is similar to the Sever Shadowmancer build which is an excellent choice to use before you have the required gear and/or Unique items to transition to this end-game variant. Or if you’d like, you can try out the Infinimist Build Gude here.
Have questions or feedback on this guide? Join the livestream and ask me!
Build Variants
A build variant is a modified version of an existing build that changes some aspects of it, such as the damage type, specific skills or passives, and even certain items like different Uniques or Legendary Aspects.
Below, you will find any variant that relates to the  Blight Shadowmancer Necromancer:
Strengths and Weaknesses
- Great season starter
- Safe & comfortable to play
- Doesn’t require heavy gear investment or Uniques
- Has a lot of unique requirements for the end-game
- Lacks single-target damage before you get the unique items
To see how this build compares to the other builds on our site, you can check out our build tier lists.
Build Requirements
The build features 4 unique items, all of which are very common drops. The build will function without them but will perform considerably worse until you get them.
Skill Bar and Skill Tree Points
Book of the Dead
Since we are focusing entirely on dealing brutal damage with our shadow skills, we have no interest in bothering our minions, so they will all be sacrificed in the name of Lilith.
- Melee Skeletons: Reapers; by sacrificing these you get tons of extra Shadow damage.
- Mage Skeletons: Cold Mages; these provide increased damage to Vulnerable enemies.
- Golem: Iron; this gives us more Critical Strike damage.
Paragon Board
The Paragon progression system unlocks at Level 50 and provides a vast amount of character power. On the Paragon Board, bonuses range from minor stats on Magic Nodes to more powerful Rare Glyphs and Legendary Nodes.
As you path towards Glyph Sockets and Legendary Nodes, you should prioritize Damage, Intelligence, Resistance, and Life for Normal and Magic Nodes. Glyph radius increases as you level them up. Therefore, if you cannot fulfill Additional Bonus requirements early on, skip allocating extra nodes for now. It’s also important to point out that you might not have the Glyph you want when you reach your first socket; if that’s the case, simply slot in any Glyph providing any beneficial stats for you until you get the correct one.
Listed below are images of the pathing you should take along with the locations of the Glyphs and order you should choose your Paragon Boards past the initial starter board. Note that each Rare Glyph’s information and radius listed below is for the Level 21 version.
1. Starting Board

The Starting Board is very straight forward; we will rush the socket through the right-hand side to put a ![]() Amplify Glyph in. Do keep in mind that we will only ever take the extra attribute nodes if the level of the Glyph is high enough to have enough attributes within radius to provide the bonus modifier; any extra attributes outside of that are only ever taken after every Magic and Rare Node is taken on our entire Paragon Board!
Amplify Glyph in. Do keep in mind that we will only ever take the extra attribute nodes if the level of the Glyph is high enough to have enough attributes within radius to provide the bonus modifier; any extra attributes outside of that are only ever taken after every Magic and Rare Node is taken on our entire Paragon Board!
2. Wither

Start by rotating the board twice to fit the image above. Wither we’ll go through the Magic and Rare Nodes to the right rushing to the socket, in which we put in the ![]() Abyssal Glyph. Similar to the Starter Board, we only take the surrounding attributes if the level of the Glyph allows the radius to include that much Dexterity. Now we pick up the Magic and Rare nodes above the Socket Node, as we move out on the right-hand side. We’ll circle back to this board at the top later for the Legendary Node:
Abyssal Glyph. Similar to the Starter Board, we only take the surrounding attributes if the level of the Glyph allows the radius to include that much Dexterity. Now we pick up the Magic and Rare nodes above the Socket Node, as we move out on the right-hand side. We’ll circle back to this board at the top later for the Legendary Node: ![]() Wither.
Wither.
3. Flesh-Eater

2 Rotations will make the board fit! Bloodbath provides a very linear approach. Start with the Socket for the ![]() Sacrificial Glyph. Once we’ve taken this we want the surrounding Magic and Rare nodes as shown in the image before we move to the Legendary Node
Sacrificial Glyph. Once we’ve taken this we want the surrounding Magic and Rare nodes as shown in the image before we move to the Legendary Node ![]() Flesh-eater. Once done, we head out north for the next board: Bone Graft.
Flesh-eater. Once done, we head out north for the next board: Bone Graft.
4. Bone Graft

No rotation is needed here. Our fourth board is Bone Graft. We are not going to spend a lot of time nor points in here, instead we rush the socket in which we use the ![]() Scourge Glyph. Make sure you grab the attributes within radius if possible to gain the bonus modifier from it as well! Then you head out on the left-side for our 5th Board!
Scourge Glyph. Make sure you grab the attributes within radius if possible to gain the bonus modifier from it as well! Then you head out on the left-side for our 5th Board!
5. Scent of Death

You’ll have to rotate this board twice to fit. Start with the pathing to the Socket Node and use ![]() Darkness Glyph. Grab the Rare node on the left side and also pick up the Legendary Node
Darkness Glyph. Grab the Rare node on the left side and also pick up the Legendary Node ![]() Scent of Death then we move south to re-visit our trusted second board to pick up the Legendary node from there. Once done you go back to this board and grab the remaining Magic and Rare nodes and move out north!
Scent of Death then we move south to re-visit our trusted second board to pick up the Legendary node from there. Once done you go back to this board and grab the remaining Magic and Rare nodes and move out north!
6. Cult Leader

2 Rotations will be needed to fit. The sole purpose of this board is to allow for another Socket Node which we’ll rush to use ![]() Control Glyph. Grab surrounding Intelligence nodes to enable the bonus modifier then move out on the left side.
Control Glyph. Grab surrounding Intelligence nodes to enable the bonus modifier then move out on the left side.
7. Bloodbath

3 Rotations will be required. Similar to the previous board we are only looking to grab the Socket Node and enough Dexterity to enable the bonus modifier of the ![]() Exploit Glyph. Once you reach this point you can fill in any of the missing nodes from the images in this guide!
Exploit Glyph. Once you reach this point you can fill in any of the missing nodes from the images in this guide!
Paragon board images courtesy of d4builds.gg.
Gear, Gems, Elixirs, and Stats
The Season of Loot Reborn brings us an incredible shift in how gear and itemization are done. It is a major and will affect the game beyond Season 4’s confines. For further details, make sure to read our Tempering and Masterworking section below.
Legendary Aspects
Each aspect is listed with its matching gear slot. Do your best to keep each aspect in the assigned slot. Additionally, if you are trying to farm a specific item, we recommend using your Obols to target farm them!
| Gear Slot | Gems | Aspect / Unique | Legendary Aspect / Unique Power |
|---|---|---|---|
| Helm |  Aspect of the Void Aspect of the Void | Blight’s defiled area, when spawned, pulls in enemies around the affected area. | |
| Chest |  Aspect of Shielding Storm Aspect of Shielding Storm | Each time that Bone Storm damages an enemy, gain a Barrier equal to 2-5% of your base Life for 10 seconds. | |
| Gloves | N/A |  Aspect of Ultimate Shadow Aspect of Ultimate Shadow | Bone Storm is now a Darkness Skill, dealing Shadow damage and makes enemies take X Shadow Damage over 2 seconds. |
| Pants | You deal 10-20% increased damage while Unstoppable and for 5 seconds after. When you become Unstoppable, gain 50 of your Primary Resource. | ||
| Boots | N/A |  Aspect of Metamorphosis Aspect of Metamorphosis | When you Evade you turn in to a cloud of bats, becoming Unstoppable for 2.5 seconds. Enemies along your path take x Physical damage and are inflicted with Vampiric Curse. Evades cooldown is increased by 5-10 seconds. |
| Weapon 1H | Corpse Explosion consumes up to 4 additional Corpses around the initial Corpse, dealing x% increased damage and with a x% larger radius per additional Corpse. | ||
| Off-hand (Focus) |  Aspect of the Damned Aspect of the Damned | You deal x35-50% increased Shadow damage to enemies afflicted by any Curse. | |
| Amulet (50% Scaling) | Any Resistance Jewel |  Blighted Aspect Blighted Aspect | You deal 50-12% increased damage for 6 seconds after the Shadowblight Key Passive damages enemies 10 times. |
| Ring | Any Resistance Jewel | You automatically active the following equipped Skills on Corpses around you: Raise Skeleton every 2-1 seconds Corpse Explosion every 2-1 seconds Corpse Tendrils every 16-8 seconds | |
| Ring | Any Resistance Jewel | Lucky Hit: Your damage over time effects have up to a 50% chance to erupt, dealing x damage of the same type to Nearby enemies. |
Gems
See below for a more detailed explanation of the best Gems to socket into your gear for each category.
| Weapon Gems | Armor Gems | Jewelry Gems |
|---|---|---|
For more Critical Strike Damage. | For increased Maximum Life. |
Which Elixirs Should You Use?
Visit the Alchemist and craft an Elixir providing any Resistance you need most, or the Elixir of Advantage to increase Attack Speed. Some Elixirs cannot be crafted and only drop from things like Helltides or Nightmare Dungeons. Additionally, make sure to keep your health potion upgraded!
Stat Priority and Tempering Affixes
Below are the affixes to prioritize on gear. Each line of affixes is listed in order of importance. Tempering Manuals and their recommended affixes are provided in the second column, and the bolded affixes are the most important targets for Masterworking upgrades. To masterwork, you will need rare materials that only drop from The Pit. Be sure to check our Tempering guide, our Masterworking guide, as well as our guide about The Pit for more details about these topics.
| Slot | Targeted Gear Affixes | Tempering Affixes |
|---|---|---|
| Helm | 1. Maximum Life 2. Intelligence 3. Armor | |
| Chest | 1. Armor 2. Maximum Life 3. Intelligence | |
| Gloves | 1. Ranks to Blight 2. Critical Strike Chance 3. Lucky Hit: Chance to make enemies vulnerable | |
| Boots | 1. Maximum Life 2. Movement Speed 3. Intelligence | |
| Amulet | 1. Ranks to Gloom 2. Critical Strike Chance 3. Movement Speed | |
| Off-hand (focus) | 1. Maximum Life 2. Critical Strike Chance 3. Intelligence |
Keep in mind that the maximum Resistance is 70% by default for each element and can be increased to 85% by various sources. Furthermore, Unique items cannot be tempered, only masterworked!
Rotation and Playstyle
It’s all about spam! You want to utilize ![]() Corpse Tendrils to control enemies which is also done via
Corpse Tendrils to control enemies which is also done via ![]() Blight in combination with the legendary aspect
Blight in combination with the legendary aspect  Aspect of the Void to pull enemies in and stunning them.
 ![]() Blood Mist is our panic button should all else fail.
Blood Mist is our panic button should all else fail.
With enemies being cursed by ![]() Decrepify we have a very high uptime of our
Decrepify we have a very high uptime of our ![]() Bone Storm which is also dealing Shadow damage over time. Adding the damage output of both Blight and our
Bone Storm which is also dealing Shadow damage over time. Adding the damage output of both Blight and our ![]() Corpse Explosion we generate a lot of hits to quickly get
Corpse Explosion we generate a lot of hits to quickly get ![]() Shadowblight to trigger for even bigger damage hits.
Shadowblight to trigger for even bigger damage hits.
All of this works wonders in combination with the unique items the build requires. ![]() Black River makes our Corpse Explosions stand up and run at the enemies as well as ramping the dmg whilst
Black River makes our Corpse Explosions stand up and run at the enemies as well as ramping the dmg whilst ![]() X’Fal’s Corroded Signet provides big bursts of damage on lucky hit. The
X’Fal’s Corroded Signet provides big bursts of damage on lucky hit. The ![]() Ring of the Sacrilegious Soul automatically triggers our corpse abilities even if they’re on cooldown to further ramp the insane spam of Shadow damage over time effects.
Ring of the Sacrilegious Soul automatically triggers our corpse abilities even if they’re on cooldown to further ramp the insane spam of Shadow damage over time effects.
Uniques and Uber Uniques
Below you will find information on Uniques and Uber Uniques that are useful for this build. Moreover, if you are interested in target farming Uber Uniques, check out our How to Farm Uber Uniques guide.
Uniques
Since the build is already requiring 4 unique items there simply isn’t enough room to fit more.
Uber Uniques
Some uber unique items can be absolutely insane but comes at the cost of removing a Legendary aspect power which we are already very short on. Below is a list of uber uniques you could use though:
 Harlequin Crest – Replaces
  Aspect of the Void.
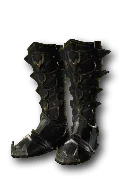 Yen’s Blessing – Replaces
  Aspect of Metamorphosis.
Season 4: Loot Reborn
The following list details the changes in the Season 4 Update (Patch 1.4.0) that may pertain to the Summoner Necromancer build. Check the Changelog for all the other guide updates. As you can see only 1 change affected the build directly and its a good one!
 Blood Mist got the movement speed penalty removed!
 Aspect of the Damned only requires enemies to be cursed instead of having both Iron Maiden and Decrepify.
Advanced Information
Below, you will find every additional piece of information you need to know for a more in-depth look at this build.
Build Mechanics
By creating tons of Shadow damage over time effects on the battle-field we have a long list of effects taking advantage of just that:
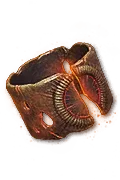 X’Fal’s Corroded Signet has multiple chances to trigger big bursts of damage.
 Black River consumes multiple corpses to create a bigger pool of damage output and ups the damage of it.
 Crippling Darkness triggers to stun the enemies.
 Shadowblight Key Passive triggers for even bigger bursts of damage output.
 Blighted Aspect triggers consistently due to the builds design.
This way of dealing damage is combined with heavy layers of crowd control over the enemies with both our skills, passive-skills and legendary aspects as well as unique items!
Defenses
The build provides a crazy amount of control over the enemies with stuns and slows being reliably on the field at all times. Our ![]() Bone Storm provides a barrier to further enhance our defensive state and should you find yourself in a dangerous spot
Bone Storm provides a barrier to further enhance our defensive state and should you find yourself in a dangerous spot ![]() Blood Mist will save the day!
Blood Mist will save the day!
Offenses
A multitude of Shadow damage over time effects perfectly works in harmony with the build requiring unique items as they will trigger for big bursts of damage output as listed above.
Paragon
The recommended Paragon boards for this build are listed above, and further down below, you can find a more thorough route for allocating the Paragon points, as well as some notes on why specific nodes were chosen and why they are essential for this build.
| Glyphs & Legendary Nodes | Effect |
|---|---|
| – Grants +150% bonus to all Magic Nodes within range. – Additional Bonus is unlocked with 40 intelligence in radius making enemies affected by your Curses take an additional x10% increased damage from you and your minions. | |
| – Paragon nodes within range gain +75% bonus to their Non-physical damage and damage reduction modifiers. – Additional Bonus is unlocked with 25 Dexterity in radius, making you deal x10% increased Non-Physical damage. | |
| – Grants +150% bonus to all Magic nodes within range. – Additional Bonus is unlocked with 40 Intelligence in radius, you deal x10% increased damage while you have no active minions. | |
| – For ever 5 Intelligence purchased within range, you deal +6,54% Increased Shadow damage over time. – Additional Bonus is unlocked with 40 Intelligence in radius, making you deal x10% increased damage to enemies affected by Shadow damage over time effects. | |
| – For every 5 Intelligence purchased within range, you deal 6,6% increased Shadow damage. – Additional Bonus is unlocked with 40 Intelligence in radius, making your Shadow damage cause the enemy to deal 2% reduced damage, up to 10% for 5 seconds. | |
| – For every 5 Intelligence purchased within range, you deal +10% increased damage to Crowd Controlled targets. – Additional Bonus is unlocked with 40 Intelligence in radius, you deal x10% increased damage to Slowed or Chilled enemies or, instead, x20% increased damage to Stunned or Frozen enemies. | |
| – For every 5 Dexterity purchased within range, you deal +8% increased damage to Vulnerable targets. – Additional Bonus is unlocked with 25 Dexterity in radius, when you damage a Vulnerable enemy it will increase your damage by x1% for 6 seconds, up to x10%. | |
| Your Shadow damage over time effects have a x5% chance to deal x50% bonus damage each time they deal damage. This chance is increased by x1% and bonus damage is increased by x4% for each 60 Intelligence you have. | |
| Consuming 5 Corpses grants x40% increased damage for 6 seconds. | |
| With at least 2 Corpses Nearby, you gain 15% Damage Reduction. With no Corpses Nearby, you deal x15% increased damage. |
Let’s take it one step further and break down each of the beneficial nodes we spend our Paragon Points on.
Starting Board
 Amplify Only grab the needed Intelligence if you have enough in radius, the Glyph will get a bigger radius with levels.
- Life nodes on the left isn’t needed till World Tier 4.
Wither
- Rush the Socket node first.
- Grab all the Magic and Rare nodes before leaving to the right.
Flesh-Eater
- We rush the Socket here as well.
- Grab the Magic and Rare nodes near the Socket
- Get the Legendary Node
 Flesh-eater
 - Now we move out north!
Bone Graft
- Same as before, rush the Socket node first!
- Pick up the defensive nodes beneath the Socket before leaving on the left.
Scent of Death
- Rushing the Socket node is the name of the game!
- Make sure to pick up Magic and Rare on both the left and right side of the Socket node
- Move north and grab the Legendary Node
 Scent of Death.
 - Exit on the south side first to re-visit the Wither board
- In the Wither board you rush the Legendary Node
 Wither
 - Now you take the remaining Magic and Rare node on the Wither Board
- Back on the Scent of Death board we are now heading out on the north side!
Cult Leader
- Same as before, rush the Socket node first!
- Head out on the left.
Bloodbath
- This boards purpose is literally only to allow for yet another Glyph.
Obol Gambling
Obol gambling is a great way to potentially find item upgrades or items missing from your build. Check out the new tool from Icy Veins for gambling Obols in the link below:
Obol Gambling Optimization ToolChangelog
- May 31st, 2024: Fixed a minor Paragon Board route miss.
- May 16th, 2024: Gem updates.
- May 13th, 2024: Guide updated for Season 4 Loot Reborn.
- January 22nd, 2024: Guide updated for Season 3 Season of the Construct.
- October 21st, 2023: Updated Paragon Boards.
- October 15th, 2023: Guide updated for Season 2 Season of Blood, Patch 1.2.
- August 7th, 2023: Guide updated for Patch 1.1.1.
- July 19th, 2023: Guide updated for Season 1 including Malignant Hearts.
