Build Introduction
Welcome to the build guide for one of the most iconic Barbarian builds across multiple Diablo titles, the ![]() Whirlwind Barbarian! Beloved by many, this simple playstyle will have you moving with ease through hordes of demons across the open world and nightmare dungeons, slicing through anything in your way as you become an unstoppable hurricane of steel. We will also be spawning some mighty tornadoes to help us mow down demons even faster. If you like simple but fun playstyles and tons of screen-clearing potential, this may be the build for you.
Whirlwind Barbarian! Beloved by many, this simple playstyle will have you moving with ease through hordes of demons across the open world and nightmare dungeons, slicing through anything in your way as you become an unstoppable hurricane of steel. We will also be spawning some mighty tornadoes to help us mow down demons even faster. If you like simple but fun playstyles and tons of screen-clearing potential, this may be the build for you.
Strengths and Weaknesses
- Great Damage For AoE and Helltides
- Great Mobility
- Good Defensive Layers
- Huge screen sized whirlwinds through tempering
- Fury management
- Cooldown management
- Low single target damage
Build Requirements
 Vehement Brawler’s Aspect
 Dust Devil’s Aspect
 Bold Chieftain’s Aspect
 Aspect of Limitless Rage
Quick Navigation
Want to skip ahead? Use the table below to jump to the sections you are looking for.
Skill Bar and Skill Tree Points
Follow the points allocated in the image above for the complete 71 point build. The additional 12 skill points are completed using the Renown system.
Barbarian Class Mechanic – The Arsenal System
The Barbarian can wield four weapons simultaneously as well as choose a weapon expertise to use as their Technique allowing them to gain that weapon’s bonus even if they’re wielding another weapon type. Finally, the Barbarian can assign its skills to use different weapon types shuffling between Two-Handed Bludgeoning Weapons, Two-Handed Slashing Weapons, and Dual-Wield Weapons.
For the Whirlwind build, we will be focused on using the expertise of Two-Handed Axe for bonus damage against Vulnerable Enemies as our Technique of choice.
We will want to assign our ![]() Whirlwind skill to our Two-Handed Slashing Weapon in order to trigger our bleed from
Whirlwind skill to our Two-Handed Slashing Weapon in order to trigger our bleed from ![]() Furious Whirlwind for the extra damage and triggering bleeds which our paragon nodes care about.
Furious Whirlwind for the extra damage and triggering bleeds which our paragon nodes care about.
Gear, Stats, Gems, and Runes
The following sections will cover all systems that are critical if you want to improve the power of your character and move towards the highest difficulties in the endgame of Diablo 4.
Legendary Aspects
Below you will find all of the best-in-slot Aspects found on Legendary items that are important for this build. Remember that all Legendary powers can be added into your Codex of Power once you salvage or extract the item. You can still find some aspects through dungeons though they will always be at the minimum power level. To get the most out of this system, combine these Aspects with the right stats.
| Gear Slot | Gems/Runes | Aspect / Unique | Aspect / Unique Power |
|---|---|---|---|
| Helm | – Casting | ||
| Chest | – Luck Hit: Inflicting Bleeding on an enemy has up to a [20-60%] chance to reduce the Cooldown of your Skills by 1 second. | ||
| Gloves | N/A | – | |
| Pants | – You deal [10-20%] increased damage while Unstoppable and for 5 seconds after. When you become Unstoppable you gain 50 of your Primary Resource | ||
| Boots | N/A |  Ghostwalker Aspect Ghostwalker Aspect | – While Unstoppable and for 4 seconds after, you gain [10-30%] increased Movement Speed and are Unhindered |
| Amulets |  Aspect of Limitless Rage Aspect of Limitless Rage | – Each point of Fury you generate while at Maximum Fury grants your next Core Skill within 5 seconds x[1-3%] increased damage up to 15 times. | |
| Ring 1 |  Bold Chieftain’s Aspect Bold Chieftain’s Aspect | – Whenever you cast a Shout Skill, its active Cooldown is reduced by [10-30%] per nearby enemy, up to a maximum of 50% | |
| Ring 2 |  Aspect of Vocalized Empowerment Aspect of Vocalized Empowerment | – Your Shout Skills generate [5-12] Primary Resource per second while active | |
| Two-Handed Bludgeoning Weapon | OR |  Aspect of the Dire Whirlwind Aspect of the Dire Whirlwind | – |
| Two-Handed Slashing Weapon | OR |  Devilish Aspect Devilish Aspect | – After generating 100 Fury your next direct damage creates 2 Dust Devils that deal [X] damage to enemies along their path |
| Dual-Wield Weapon 1 |  Dust Devil’s Aspect Dust Devil’s Aspect | – | |
| Dual-Wield Weapon 2 |  Vehement Brawler’s Aspect Vehement Brawler’s Aspect | – Casting an Ultimate Skill increases your damage by [10-30%] for 8 seconds. Gain 2 additional Ultimate Skill ranks. |
To see how this build compares to the others on our site, you can check out our Endgame Build Tier list.
Stat Priority and Tempering Affixes
Below are the affixes to prioritize on gear. Each line of affixes is listed in order of importance. Tempering Manuals and their recommended affixes are provided in the second column, and the bolded yellow affixes are the most important targets for Masterworking upgrades. Be sure to check our Tempering guide and Masterworking guides for more details about these topics.
| Slot | Gear Affixes | Tempering Affixes |
|---|---|---|
| Helm | 1. Cooldown Reduction 2. Maximum Resource 3. Strength | 1. Dust Devil Size 2. |
| Chest | 1. Strength 2. Maximum Life 3. Needed Resistance | 1. Dust Devil Size 2. |
| Gloves | 1. Critical Strike Chance 2. Strength 3. Attack Speed | 1. Damage While Berserking 2. Dust Devil Size |
| Pants | 1. Strength 2. Maximum Life 3. Needed Resistance | 1. Dust Devil Size 2. |
| Boots | 1. Strength 2. +Ranks to 3. Movement Speed | 1. Movement Speed 2. |
| Amulet | 1. +Ranks to 2. + Ranks to 3. Strength% | 1. 2. |
| Rings | 1. Critical Strike Chance 2. Strength 3. Resistance To All Elements (If needed) 4. Attack Speed (If Resistances are fine) | 1. Damage While Berserking 2. |
| Two-Handed Bludgeoning Weapon | 1. Strength 2. Fury on Kill 3. Maximum Life | 1. Chance for 2. Damage While Berserking |
| Two-Handed Slashing Weapon | 1. Strength 2. Critical Strike Damage 3. Maximum Life | 1. Chance for 2. Damage While |
| Dual-Wield Weapons | 1. Strength 2. Maximum Life 3. Critical Strike Damage | 1. Chance for 2. Damage While |
Uniques and Mythic Uniques
Below, you will find information on Uniques and Mythic Uniques that are useful for this build. Moreover, if you are interested in target farming Mythic Uniques, check out our How to Farm Mythic Uniques guide.
Uniques
Below, you will find the useful uniques for this build. Let’s dive in.
 Ugly Bastard Helm – Though changed in the latest patch to require
  Wrath of the Berserker to be active to gain its damage bonus, builds that still use Wrath as their ultimate of choice still gain powerful benefits from this helm including the damage conversion and fire based buffs. An excellent helm for this setup
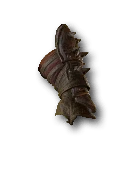 Gohr’s Devastating Grips – The Whirlwind gloves that had been nerfed in the pre-seasons is now back with a huge damage bonus and revamp to how its damage is done making a direct damage whirlwind setup possible once again. These gloves take a direct whirlwind, a fan favorite setup, to new heights
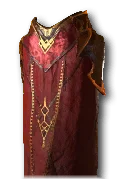 Tibault’s Will – These pants grant us a huge multiplier whenever we’re unstoppable which thanks to our
  Wrath of the Berserker and
  Rallying Cry we should be with alarming regularity. These also help smooth our resources out giving us 50 fury every time we become unstoppable which should help us keep spinning.
Mythic Uniques
 Ring of Starless Skies – This Mythic Unique ring provides an amazing source of damage and resource management and will skyrocket the build even further. If you are lucky enough to acquire one replace the ring with
  Bold Chieftain’s Aspect.
  Heir of Perdition – With the changes to
  Ugly Bastard Helm this Mythic helm is now the most powerful helm option for this build granting us a permanent 60% multiplicative damage increase as well as a lot of quality of life in the movement speed and crit and lucky hit chances. If you’re lucky enough to snag one, equip it over your
  Ugly Bastard Helm without hesitation as it doesn’t require the condition of being in
  Wrath of the Berserker to gain its benefits and provides more core skill ranks for
  Whirlwind
Gems and Runewords
Listed below are the best gems to socket into gear for each slot type.
Gems
| Weapon Gems | Armor Gems | Jewelry Gems |
| Horadric Jewels or |
For your jewelry, it may be necessary to change the ![]() Grand Diamond for another gem of a specific type such as
Grand Diamond for another gem of a specific type such as ![]() Grand Sapphire or
Grand Sapphire or ![]() Grand Skull to ensure all of your resistances are capped at 70% and your Armor is at 1000. For more information about the Horadric Jewels, check out our section below on Horadric Spells.
Grand Skull to ensure all of your resistances are capped at 70% and your Armor is at 1000. For more information about the Horadric Jewels, check out our section below on Horadric Spells.
Runes
Runewords return from Diablo 2 in Vessel of Hatred! You are limited to two Runewords across your gear, and it requires two sockets in the same item. So, this limits creating Runewords by combining two Runes to either Helm, Chest, Pants, or Two-Handed Weapons. We generally recommend them in both of your Two-Handed Weapons for Barbarian. Let’s jump in.
| Runes | Rune Effects |
| Gain 50 Offering: Travel 5 Meters | |
| Requires 100 Offering, Cooldown 5 seconds: Gain +1 ranks to all skills for 10 seconds | |
| Gain 15 Offering: Lucky Hit – Up to a 100% chance against Non-Healthy Enemies | |
| Requires 400 Offering: Casting a Skill other a Basic or Defensive spends all of your Primary Resource to increase your damage by up to 100% for 1 second. |
Paragon Board
We recommend using the following Legendary nodes and Glyphs to truly take this build into the endgame. Note that each Glyph’s information and radius listed below is for the Level 100 version. Note that glyph’s reach their maximum radius and legendary bonuses at level 46. Let’s take a look!
Horadric Spell (Season 9)
Season 9 brings a new complex mechanic that modifies your skills by attaching an ancient Horadric Catalyst to one of them, which you can then modify further with spells and infusions, causing some very potent combos. For this build, we recommend the following setup:
| Type | Power | Description |
| Catalyst | Awaken an Oracular Rune that pulls in all surrounding enemies. A torrent of stars follow that randomly strike the area 20 times for 1288% damage each. At Rank 10+: Stars periodically fall around you and are guaranteed to crash around a nearby enemy for the same damage | |
| Arcana | Your Catalyst applies Vulnerable for 8 seconds | |
| Arcana | Your Catalyst deactivates monster damage resistance aura effects for 5 seconds, but you take 15% more damage for the same duration | |
| Arcana | Your Catalyst gains a specialized Execute effect for Non-Boss enemies with 20% or less life. Bloody Charm creates the following effect: (Celestial Surge): The Moon’s impact executes non-boss enemies with 20% or less life. Successful Executions reduce your cooldowns by 2 seconds | |
| Infusion | Your Catalyst now deals Fire and/or Burning damage. It destroys enemy structures and has a 10% chance to ignite the ground beneath enemies dealing 1215% burning damage over 5 seconds. While equipped, your Fire Damage Bonus is equal to that of your highest damage type bonus. Rank 5+: Deactivates monster Chilling Winds effects for 5 seconds. |
Assign your Catalyst to ![]() Whirlwind
Whirlwind
Horadric Jewels
Additionally, Season 9 brings back new special gems for your Amulets and Rings called Horadric Jewels. We recommend the following gems for this build:
-
 Scornful Light – You deal x20% and take x10% more Elemental Damage
 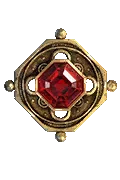 Elemental Brand – Your Catalytic Skill deals 33% damage of your Infusion’s element over 3 seconds. Lucky Hit: Dealing damage of your Infusion’s element has up to a 33% chance to trigger its secondary effects.
 Idol From Below – You gain x6% Primary Stat, x6% Maximum Life, and are always Unhindered. However, you will be hunted in Sanctuary’s darkest places by Jewel Guardians who were entombed to protect this relic
Mercenaries
We hire Raheir, the Shieldbearer:
- Core Skill:
 Ground Slam
 - Core Skill Passive:
 Raheir’s Aegis
 - Iconic Skill:
 Bastion
 - Iconic Skill Passive:
 Inspiration
Our Reinforcement Mercenary will be Varyana, The Berserker Crone:
- Opportunity Skill:
 War Cry
 - Reinforcement Skill:
 Bloodthirst
Build Mechanics
Rotation and Playstyle
The extremely popular Spin2Win playstyle remains intact in Diablo 4 for the Barbarian class. Let’s do a quick pass over our skills and how we use them in this straight forward but powerful build where ![]() Whirlwind when combined with
Whirlwind when combined with ![]() Gohr’s Devastating Grips does the majority of our damage
Gohr’s Devastating Grips does the majority of our damage
- Generate resources via
 Rallying Cry and
  War Cry
  Whirlwind through enemies to apply bleeding thanks to
  Furious Whirlwind
- Cast
 Rupture regularly, not for the damage it does but because it is a guaranteed Overpower to trigger the extra bonus from the
  Bone Breaker Legendary Paragon Node
 - Maintain
 Wrath of the Berserker to gain the benefits of
  Ugly Bastard Helm for both of their massive multipliers and unstoppable status
 - Cast
 Challenging Shout for survival in tough spots
Runeword Synergy
Let’s take a moment to review our runes and how they interact with this build.
 Bac grants us 50 offering every 5 meters we travel, which isn’t terribly far and since we’re always spinning and on the move, this should be fairly easy to maintain
 Vex takes the offering granted by Bac and converts it into +Ranks to all skills including
  Whirlwind for even more damage and which helps convert the blasts from
  Gohr’s Devastating Grips to be even stronger
 Ahu builds up offering for us every time we Lucky Hit an enemy that isn’t Healthy (meaning below 80%) which should happen extremely frequently as we spin through packs
 Qax spends all of our resource, which we shouldn’t have an issue getting back, to give us a powerful damage boost that helps our ancients and dust devils do even more damage
Which Elixir Should You Use?
Visit the Alchemist in any main town to craft helpful Elixirs that increase stats, and experience gain for 30 minutes. Make sure to forage plants and pick up the necessary crafting materials during your adventures; they randomly spawn around the world. Use an Elixir providing any Resistance you need most, or the new ![]() Elixir of Resource (Resource cost reduced by 10-20%). Maximum resource increased by 10-25) for more efficient spins!
Elixir of Resource (Resource cost reduced by 10-20%). Maximum resource increased by 10-25) for more efficient spins!
Return to the Alchemist again every 5 to 10 levels to upgrade your potion. The extra healing is essential to survival.
Season 9 Updates
For a comprehensive look at what’s new in Season 9, please check out our Season Hub.
Here is a quick list of the changes this season that are relevant to this build:
 Whirlwind movement speed penalty while channeling is now additive instead of multiplicative
 Wrath of the Berserker no longer interrupts channeling and now grants 10 seconds of Berserking and Unstoppable rather than 5 seconds with another 5 from basic skills
 Ugly Bastard Helm damage bonus reduced from 80-100% to 40-60% and now requires
  Wrath of the Berserker to be active to gain this bonus
Obol Gambling
A final point on acquiring gear is using your Obols to target farm specific slots instead of randomly spending them on random drops. Similar to Kadala in Diablo 3, you can use Obol vendors in town to try and get what you’re missing. With the expansion when a level 60 Character spends Obols, all gear from that vendor will be 750 item power, the highest non-ancestral power allowing you to fill out gear with the affixes or Legendary Aspects you need while also having a small chance to grant Ancestral item power 800 gear.
Changelog
- June 28th 2025: Build updated for post campfire chat changes for Season 9
- June 17th 2025: Build updated for season 9
- May 19th 2025: Updated Unique recommendations
- May 2nd 2025: Gear and rune recommendations updated
- April 25th 2025: Reformatted and updated for Season 8
- March 31st 2025: Skill tree recommendations updated
- February 6th 2025: Unique section and build mechanics updated
- January 19th 2025: Tooltips and Seasonal section updated for Season 7
- January 16th 2025: Updated for Season 7.
- November 27th 2024: Aspects and Mythic Unique section updated for mid-season patch.
- October 24th 2024: Paragon section updated for post-launch boards.
- October 3rd 2024: Guide updated for Season 6 and Vessel of Hatred.
- August 2nd 2024: Guide updated for Season 5 and Patch 1.5.0.
- June 13th 2024: Updated stat priority.
- May 4th 2024: Updated guide format and added Season 4 information.
- May 2nd 2024: Updated for Season 4 and Patch 1.4.0, ownership of page transferred, guide restructured.
- March 5th 2024: Updates for Patch 1.3.3.
- February 5th 2024: Marshal Glyph changed to Seething.
- January 30th 2024: Marshal Glyph changes.
- January 21st 2024: Season 3 speculative changes.
- October 23rd 2023: Build revamped for Season 2.
- October 13th 2023: Build Adjusted to prepare for Season 2 launch.
- September 6th, 2023: New format and updates.
- August 2nd, 2023: Patch 1.1.1 section added with build specific changes.
- July 20, 2023: Guide updated for Season 1.


