Build Introduction
The Shred Druid is a fast and mobile build, ambushing foes and overwhelming them with ferocious attacks! Dash and cleave enemies down with ![]() Shred and use your
Shred and use your ![]() Poison Creeper for lethal Area of Effect Poisons. Supporting abilities help keep up Spirit, heal, and apply debuffs to enemies.
Poison Creeper for lethal Area of Effect Poisons. Supporting abilities help keep up Spirit, heal, and apply debuffs to enemies.
After clearing the Capstone Dungeon Cathedral of Light to unlock World Tier 3, or upon reaching level 50, continue your ![]() Shred adventure with the Shred Druid Endgame Guide, or choose any of our Endgame Builds!
Shred adventure with the Shred Druid Endgame Guide, or choose any of our Endgame Builds!
For general tips and information about leveling a Druid in Diablo 4, check out our Druid Leveling Page!
Skill Tree Points and Skill Bar
The table below outlines the recommended order for allocating Skill Points. 48 Points are gained from leveling, and the remaining 10 are from completing Renown events in each zone, for a total of 58 Skill Points.
Spirit Boons – The Druid Class Specialization
Druids unlock powerful Spirit Boon passives, giving offerings to the animal spirits to receive their Blessing. Once fully unlocked, activate the final Boon by Spirit Bonding with one of the four animal spirits to take two passives from that row. To access Spirit Boons:
- Reach Level 15, accepting the quest chain beginning with Druid: Spirits of the Lost Grove.
- Clear the Túr Dúlra Stronghold scenario in Scosglen.
- Complete the quest chain to gain access to the Animal Spirits.
| Boon Name | Animal | Effect |
|---|---|---|
| Advantageous Beast | Deer | Gain 15% Movement Speed and 15% Impairment Reduction. |
| Scythe Talons | Eagle | Gain +10% increased Critical Strike Chance. |
| Packleader | Wolf | Lucky Hit: Critical Strikes have up to a 20% chance to reset the Cooldowns of your Companion Skills. |
| Energize | Wolf | Lucky Hit: Dealing damage has up to a 15% chance to restore 30 Spirit. |
| Masochistic | Snake | Lucky Hit chance of 75%. Critical Strikes with Shapeshifting Skills Heal you for 5% Maximum Life. |
Prioritize your first 25 Spirit Offerings to unlock the Wolf’s Packleader; ![]() Poison Creeper is a significant source of our damage so cooldown resets go a long way!
Poison Creeper is a significant source of our damage so cooldown resets go a long way!
Legendary Aspects and Codex of Power
The Codex of Power has updated for Patch 1.4.0. All Salvaged Legendary Powers will update within your Codex. Legendary Items with Aspect powers can be found across all content in Diablo 4. Random dropped Legendary Aspects can have a specific range of power on them. For example,  Stormclaw’s Aspect can roll between 20%-30% for the effect. Salvaging a higher rank will improve the Aspect’s rank within your Codex from then on.
Aspects gained from Dungeons will enter the Codex of Power at rank 1. This makes Dungeons a great way to get started when putting together a build, without having to rely on random drops. For example, to access  Stormclaw’s Aspect directly without needing a random drop, you can clear Anica’s Claim in Fractured Peaks.
The highest priority Legendary Aspects to get started with the Shred Leveling Druid build are available from the following dungeons:
| Legendary Aspect | Aspect Power | Dungeon Location | Recommended Slot |
|---|---|---|---|
 Stormclaw’s Aspect Stormclaw’s Aspect | Critical Strikes with Shred deal 20 – 30% of the damage dealt as Lightning damage to the target and surrounding enemies. | Anica’s Claim, Fractured Peaks | Amulet |
 Aspect of the Unsatiated Aspect of the Unsatiated | After killing an enemy with Shred, you gain 20 Spirit. Your Werewolf Skills deal 20-35x increased damage when cast above 50 Spirit. | Tormented Ruins, Fractured Peaks | Ring |
 Aspect of the Umbral Aspect of the Umbral | Restore 1 – 5 of your Primary Resource when you Crowd Control an enemy. | Champion’s Demise, Dry Steppes | Ring |
 Stormclaw’s Aspect makes
  Shred Critical Strikes splash for extra Lightning damage in a small area. An Amulet is recommended for the higher multiplier. It can be placed on a 2 handed weapon as well, but while leveling, weapons are replaced often so it can get expensive in Gold and Crafting Materials.
  Aspect of the Unsatiated grants Spirit on Kill when killed with
  Shred.
- The Wolf’s Spirit Boon Energize has a Lucky Hit chance to give 20 Spirit.
 Aspect of the Umbral is useful for Spirit Generation. Crowd-Controls are applied in a variety of ways. For this build, it is through ways like:
  Neurotoxin and
  Toxic Claws interacting when Werewolf skills Critically Strike to apply a poison to the enemy.
 Poison Creeper‘s passive attack applying Poison and the Active Skill’s Immobilize and Poison.
Other useful Aspects from the Codex are the following, sorted by type:
| Legendary Aspect | Aspect Type | Aspect Power | Dungeon Location |
|---|---|---|---|
 Aspect of Disobedience Aspect of Disobedience | Defensive | You gain [0.6 – 1.1]%[+] increased Armor for 4 seconds when you deal any form of damage, stacking up to [36.0 – 66.0]%[+]. | Halls of the Damned, Kehjistan |
 Aspect of Might Aspect of Might | Defensive | Basic Skills grant 20% Damage Reduction for [2.0 – 6.0] seconds. | Dark Ravine, Dry Steppes |
 Skinwalker’s Aspect Skinwalker’s Aspect | Defensive | When you use a Shapeshifting Skill that changes your form, gain [184 – 315] Life. If you are at full Life, gain the same amount as Fortify. | Fading Echo, Kehjistan |
 Aspect of the Protector Aspect of the Protector | Defensive | Damaging an Elite enemy grants you a Barrier absorbing up to [1,967 – 3,933] damage for 10 seconds. This effect can only happen once every 30 seconds. | Lost Archives, Fractured Peaks |
 Aspect of the Changeling’s Debt Aspect of the Changeling’s Debt | Offensive | You deal 25-55% increased damage while hitting a Poisoned enemy as a Werebear or a Crowd Controlled enemy as a Werewolf. | Conclave, Kejistan |
 Aspect of Retaliation Aspect of Retaliation | Offensive | Your Core Skills deal up to [20 – 30]%[x] increased damage based on your amount of Fortify. | Seaside descent, Dry Steppes |
 Edgemaster’s Aspect Edgemaster’s Aspect | Offensive | Skills deal up to [10 – 20]%[x] increased damage based on your available Primary Resource when cast, receiving the maximum benefit while you have full Primary Resource. | Oldstones, Scosglen |
 Aspect of the Expectant Aspect of the Expectant | Offensive | After attacking enemies with a Basic Skill, increase the damage of your next Core Skill cast within 5 seconds by [5 – 10]%[x], up to 30%[x]. | Underroot, Scosglen |
 Ghostwalker Aspect Ghostwalker Aspect | Mobility | While Unstoppable and for 4 seconds after, you gain [10 – 25]%[+] increased Movement Speed and can move freely through enemies. | Broken Bulwark, Scosglen |
 Eluding Aspect Eluding Aspect | Utility | Becoming Injured while Crowd Controlled grants you Unstoppable for 4 seconds. This effect has a [40 – 20] second Cooldown. | Oblivion, Hawezar |
Check our Legendary Aspect and Codex of Power Guide for general Codex information.
Gear Affix and Stat Priority while Leveling
Below are the recommended Gear Affixes for each slot for the Shred Leveling Build. Gear Affixes are listed by importance. Affixes in Bold are the most important for the build, and alternatives are added as well.
| Slot | Gem | Stats |
|---|---|---|
| 2 Handed Axe | Resource Cost Reduction Willpower Max Life Spirit on Kill Critical Strike Damage | |
| Helm | Ranks in Ranks to Companion Skills Willpower Max Life Spirit Per Second | |
| Chest | Max Life Spirit Per Second Willpower Armor | |
| Gloves | N/A | Ranks in Critical Strike Chance Attack Speed Willpower Critical Strike Damage |
| Pants | Max Life Armor Willpower Dodge Chance | |
| Boots | N/A | Movement Speed Spirit Per Second Willpower Dodge Chance |
| Amulet | Movement Speed Ranks to Critical Strike Chance Ranks in Companion Skills Resource Cost Reduction | |
| Rings | Critical Strike Chance Attack Speed Maximum Life Resource Generation Critical Strike Damage |
Critical Strike is important for several parts of the build, including:
- Packleader Spirit Boon to reset
 Poison Creeper
  Toxic Claws to help apply Slow with
  Neurotoxin for more Spirit from
  Aspect of the Umbral.
 - Critical Strike Damage Multipliers from
 Primal Shred,
  Petrify and
  Envenom.
Remember to pick up and check all those Rare items! There are many combinations of gear affix rolls possible. Going from two favorable gear affixes to three will help focus and optimize the build.
Tempering
Tempering manuals are found across Sanctuary. The Blacksmith is able to apply extra affixes on items. While leveling, non-Sacred items found in World Tier I and II and Sacred items found in World Tier III can have one Temper affix on the item. This increases to two Tempers on the Ancestral quality items found in World Tier IV. Manuals are divided by types similar to Legendary Aspect Powers; a Resource manual like Druid Mobility has Resource type tempers, and can only be placed on rings.
When tempering at the Blacksmith, the item will randomly select one of the listed affixes from the chosen Tempering Manual. For example, the Offensive Manual Shapeshifting Finesse can give Werewolf Attack Speed, or give something utterly useless to the build like Werebear Overpower Damage. There is a limit to the number of times a temper can be rerolled to try to get the desired affix. This means the item can get ruined for the build, and you must try again with a new item. Unique Items cannot be Tempered. Here’s a list of Useful tempers to look out for, sorted by type.
| Manual Type | Manual Name | Manual Effect |
|---|---|---|
| Weapon | Werewolf Augments | |
| Offensive | Shapeshifting Finesse | Werewolf Attack Speed Werewolf Critical Strike Chance |
| Offensive | Natural Finesse | Damage to Close Enemies |
| Offensive | Companion Finesse | Poison Creeper Damage |
| Utility | Worldly Fortune | Lucky Hit: Chance to Immobilize Lucky Hit: Chance to Stun Lucky Hit: Chance to Slow |
| Defensive | Worldly Endurance | Total Armor% |
| Mobility | Natural Motion | Movement Speed |
| Resource | Worldly Stability | Resource Generation |
Gems
See below for the best Gems to socket into your gear for each category:
- Weapon:
 Emerald for Critical Strike Damage
 - Armor:
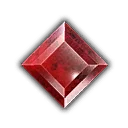 Rubies for Maximum Life
 - Jewelry:
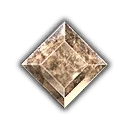 Diamonds for All Resistances
Elixirs, Incense and Health Potions
The Alchemist offers helpful consumables at the cost of foraged materials found throughout Sanctuary.
- Craft the highest
 Elixir of Precision for Critical Strike Chance, Critical Strike Damage and bonus Experience. Or
 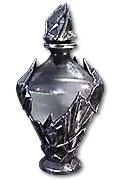 Iron Skin Elixir can help push the Capstone Dungeons earlier and easier.
 - Remember to upgrade your potion as you level, increasing the instant healing of the potion. Upgrades are available when you reach Level 20, 30, 45, 60, 70, 80 and 90.
Unique Items
Unique Items that previously dropped in World Tier III now also drop in World Tier I and II! Here’s a list of useful ones from World Tiers I-III for the Shred Bear to look out for while leveling:
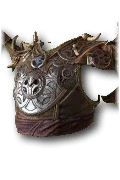 Mad Wolf’s Glee, with strong gear affixes and extra ranks in all Werewolf Skills.
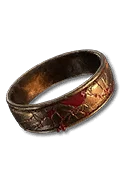 Hunter’s Zenith, with strong gear affixes and an easy way to reset your
  Trample or
  Debilitating Roar.
Damage Rotation
- Use
 Shred to close distance or to help gather enemies.
 - Use
 Poison Creeper on gathered enemies for lethal Poison damage.
  Petrify to apply Stun and Critical Strike Damage multipliers to significant enemies like Bosses and Elites.
  Shred your enemies, fishing for resets of
  Poison Creeper from Spirit Boon Packleader.
  Blood Howl and
  Trample for Spirit generation.
 Storm Strike as filler to generate Spirit and to apply Vulnerable status.
Advanced Information
It is time to start your Shred journey!
Or see below for further information on how the build works, patch and hotfix information, Spirit Generation explanations, Skill and gameplay options, and what to do after level 50, including a starter Paragon board to help you transition to the Endgame Shred build
Season 4: Loot Reborn
- The Attacks Reduce Evade’s Cooldown affix has been increased from .8 to 1.5 seconds.
- Physical Damage against Damage Reduction now caps at level 100. Note: this means Armor only needs to be 9230 to cap Armor against enemies level 100 and above.
 Aspect of the Changeling’s Debt redesigned – You deal 25-55% increased damage while hitting a Poisoned enemy as a Werebear or a Crowd Controlled enemy as a Werewolf.
 Shepherd’s Aspect now includes Wrath Skills.
 Aspect of the Unsatiated redesigned – After killing an enemy with Shred, you gain 20 Spirit. Your Werewolf Skills deal 10-25% increased damage when cast above 50 Spirit.
Skills and Stats:
- Druid Companions now receive 100% of Player Attributes.
- Damage Reduction from Fortify is now 15%, from 10%.
- Energize Spirit Boon Spirit Restoration increased from 10 to 20.
- Wariness Spirit Boon damage reduction from Elites increased to 15%.
- Masochistic Critical Strike Healing increased from 3% to 5%.
 Shred damage increased by 10%
 Enhanced Shred healing increased from 2% to 4%.
 Debilitating Roar is now a Shout skill.
  Wolves
 - Wolves now gain Unstoppable when the Skill is cast.
- Health increased by 200%.
- Respawn reduced from 10 seconds to 5 seconds.
 Petrify
  Prime Petrify now grants 50 Spirit when cast and its effect durations are increased by 1s.
  Supreme Petrify – Killing an enemy affected by Petrify reduces its Cooldown by 1 second. Hitting a Boss with Petrify reduces its Cooldown by 10 seconds.
 Quickshift redesigned. When Shapeshifting into a new animal form, you deal 1% increased damage for 3 seconds, up to 6%.
 Heightened Senses redesigned – When Shapeshifting into an animal form, Werebear grants 2% Damage Reduction and Werewolf grants 2% Movement Speed, each for 6 seconds. Bonuses are doubled while both are active.
 Digitigrade Gait Movement Speed increased from 3% to 4%.
Bug Fixes:
 Wild Impulses bonus damage is now correctly Multiplicative instead of Additive.
 - Fixed an issue where Shred could target invisible enemies.
Patch 1.4.3
- Scythe Talons – Critical Strike Chance increased from 5% to 10%.
- Energize – Spirit restored increased from 20 to 30.
- Advantageous Beast – Now gives 15% movement Speed and 15% Control Impairment Reduction.
 Quickshift – Maximum damage bonus increased from 6/12/18%[x] to 8/16/24%[x].
 Toxic Claws – Poisoning amount increased from 8/15/23% to 12/24/36% of the Skill’s Base damage.
 Aspect of the Unsatiated damage when cast above 50 Spirit increased from 10-25% to 20-35%.
Mechanics and Playstyle
The primary sources of damage for the Shred Leveling Druid are ![]() Shred and
Shred and ![]() Poison Creeper.
Poison Creeper.
![]() Shred dashes to enemies, dealing a three-hit combo in a cleave, with the third cast doing more damage in a wider arc.
Shred dashes to enemies, dealing a three-hit combo in a cleave, with the third cast doing more damage in a wider arc.  Stormclaw’s Aspect allows Shred Critical Strikes to explode in a small area to the target and nearby enemies.
 Enhanced Shred makes Shred cast faster and heal on attack.
 Primal Shred increases Shred’s Critical Strike Damage, and you will now dash towards enemies if they are not already in range for the second and third hit of Shred’s 3-hit combo.
![]() Poison Creeper is a Companion that passively attacks to apply a small Poison. The Active Skill deals significant Poison damage over time in a wide area around the player and Immobilizes enemies.
Poison Creeper is a Companion that passively attacks to apply a small Poison. The Active Skill deals significant Poison damage over time in a wide area around the player and Immobilizes enemies.
 Enhanced Poison Creeper increases the Immobilize duration.
 Brutal Poison Creeper gives extra Critical Strike Chance when enemies are Immobilized by the Creeper.
The active cast of ![]() Poison Creeper, especially in early levels, is lethal damage to all but the toughest enemies, making it very efficient to use on most leveling builds. We take Packleader boon to reset the Companion Active Skill, and
Poison Creeper, especially in early levels, is lethal damage to all but the toughest enemies, making it very efficient to use on most leveling builds. We take Packleader boon to reset the Companion Active Skill, and ![]() Shred‘s improved attack speed helps reset this faster.
Shred‘s improved attack speed helps reset this faster.
Supporting abilities for the build include ![]() Storm Strike,
Storm Strike, ![]() Blood Howl,
Blood Howl, ![]() Trample and
Trample and ![]() Petrify.
Petrify.
 Storm Strike is our Basic Skill to generate spirit, apply Vulnerable status, gain Damage Reduction.
 Blood Howl is a handy heal and with
  Innate Blood Howl, a Spirit Generator.
  Trample is a damage and mobility tool, knockback, and source of Unstoppable for Crowd Control prevention or removal. With
  Savage Trample it is another Spirit Generator. Trample also upkeeps Werebear Shapeshifting buffs like
  Heightened Senses and
  Quickshift.
 Petrify is an Ultimate ability in a wide area. This is used as a Stun, significant Critical Strike Damage multiplier to all affected enemies, and with
  Aspect of the Umbral helps generate Spirit when the Stun is applied.
Our Key Passive is ![]() Ursine Strength. The Damage and Overpower multipliers are active in any form as long as the player is in the Healthy Status, which is 80% Life or higher. The additional Max Life can be triggered from
Ursine Strength. The Damage and Overpower multipliers are active in any form as long as the player is in the Healthy Status, which is 80% Life or higher. The additional Max Life can be triggered from ![]() Trample.
Trample.
Spirit Generation
This build has a few sources of Spirit Generation to keep Shredding. These include:
- Our Basic Skill
 Storm Strike generates Spirit when hitting enemies.
  Innate Blood Howl and
  Trample generate Spirit on Active Skill use.
  Aspect of the Unsatiated grants Spirit when
  Shred kills an enemy.
  Aspect of the Umbral restores Spirit when enemies are Crowd Controlled. This includes:
 - Stuns from
 Petrify.
 - Immobilizes from
 Poison Creeper and
  Storm Strike.
 - Knockbacks from
 Trample.
 - Slows applied from Werewolf skills and Poison sources from the combination of
 Toxic Claws and
  Neurotoxin.
- Stuns from
Druids Have Options!
Any of the supporting skills ![]() Blood Howl,
Blood Howl, ![]() Trample, or
Trample, or ![]() Petrify can be substituted for another desirable supporting Skill depending on looted Legendary Aspects, playstyle, leveling content, or preference. Some examples to try can include:
Petrify can be substituted for another desirable supporting Skill depending on looted Legendary Aspects, playstyle, leveling content, or preference. Some examples to try can include:
- Want another Single Target option and Fortify Generation? Take
 Wolves up to
  Ferocious Wolf Pack.
 - Want the whole Companion Zoo? Sure! Take
 Wolves and
  Ravens. Use them with
  Shepherd’s Aspect from Bloodsoaked Crag in Dry Steppes.
 - This build recommends the Spirit Generation on
 Blood Howl and
  Trample for smoothness of play, but the other passives, such as
  Enhanced Blood Howl for Attack Speed and
  Natural Trample for Fortify Generation, work too!
 - Want an additional Defensive?
 Earthen Bulwark can provide Barrier, Unstoppable, and Fortify.
 - Interested in other Ultimates? The newly changed
 Lacerate can be an effective shorter cooldown buff.
Looking at the other Basic Attacks? ![]() Storm Strike gives great Damage Reduction and can apply Vulnerable status. The other Basic Attacks are usable as well!
Storm Strike gives great Damage Reduction and can apply Vulnerable status. The other Basic Attacks are usable as well! ![]() Fierce Wind Shear gives some nice movement speed. Grab
Fierce Wind Shear gives some nice movement speed. Grab  Aspect of the Calm Breeze for some extra damage!
The Key Passive ![]() Ursine Strength is used for the reliable passive damage multiplier and Max Life when casting
Ursine Strength is used for the reliable passive damage multiplier and Max Life when casting ![]() Trample.
Trample. ![]() Bestial Rampage can be more total damage but is disruptive, requiring 2 seconds in Werebear form each cast of
Bestial Rampage can be more total damage but is disruptive, requiring 2 seconds in Werebear form each cast of ![]() Trample to maintain the damage multiplier.
Trample to maintain the damage multiplier. ![]() Lupine Ferocity is less reliable damage than either but can burst damage higher, and the guaranteed Critical Strike chance is useful for things like Spirit Boon Packleader or
Lupine Ferocity is less reliable damage than either but can burst damage higher, and the guaranteed Critical Strike chance is useful for things like Spirit Boon Packleader or  Stormclaw’s Aspect.
Roadmap at Level 50
Once level 50 has been reached, it’s time to start those Endgame Activities, including clearing the Cathedral of Light and unlocking World Tier 3.
Paragon
After Level 50, you gain no more Skill Points, and instead start progressing in the Paragon Board. Allocate Paragon Points into nodes along the path to gain further power.
Here is a simple 100 point early board setup to get you started. It prioritizes Damage Reduction Glyphs and Spirit Generation nodes from the ![]() Lust for Carnage and
Lust for Carnage and ![]() Ancestral Guidance boards. Remember to rotate the boards as necessary! This will get you ready for that transition to the Shred Endgame Guide or other Endgame Druid Builds.
Ancestral Guidance boards. Remember to rotate the boards as necessary! This will get you ready for that transition to the Shred Endgame Guide or other Endgame Druid Builds.
Starting Board
From the Starting Board, path up, placing the ![]() Territorial glyph in the Glyph Socket.
Territorial glyph in the Glyph Socket.

Lust for Carnage
For the second board, choose Lust for Carnage, placed against the starting board, and not rotated. Take the ![]() Lust for Carnage Legendary Node, and place the
Lust for Carnage Legendary Node, and place the ![]() Werewolf glyph into the Glyph Socket.
Werewolf glyph into the Glyph Socket.

Ancestral Guidance
For the third board, choose Ancestral Guidance, placed against the Lust for Carnage board, and rotated once. Take the Legendary Node ![]() Ancestral Guidance and then take the Spirit nodes
Ancestral Guidance and then take the Spirit nodes ![]() Reclamation and
Reclamation and ![]() Natural Attunement.
Natural Attunement.

Paragon Board images courtesy of d4builds.gg.
Thanks so much for reading and good luck on leveling!
Changelog
- 17 June, 2024: Updated for mid-season patch 1.4.3.
- May 15, 2024: Small changes in gear affixes to adjust for season launch changes from PTR.
- 10 May, 2024: Guide updated for 1.4.0 and Season 4. Information about new gearing system and Unique Items added. Paragon board displayed.
- 21 March, 2024: Guide Created, fully replacing previous guide.
- Ownership of page transferred
- Page restructured for improved readability, explanations and options.
