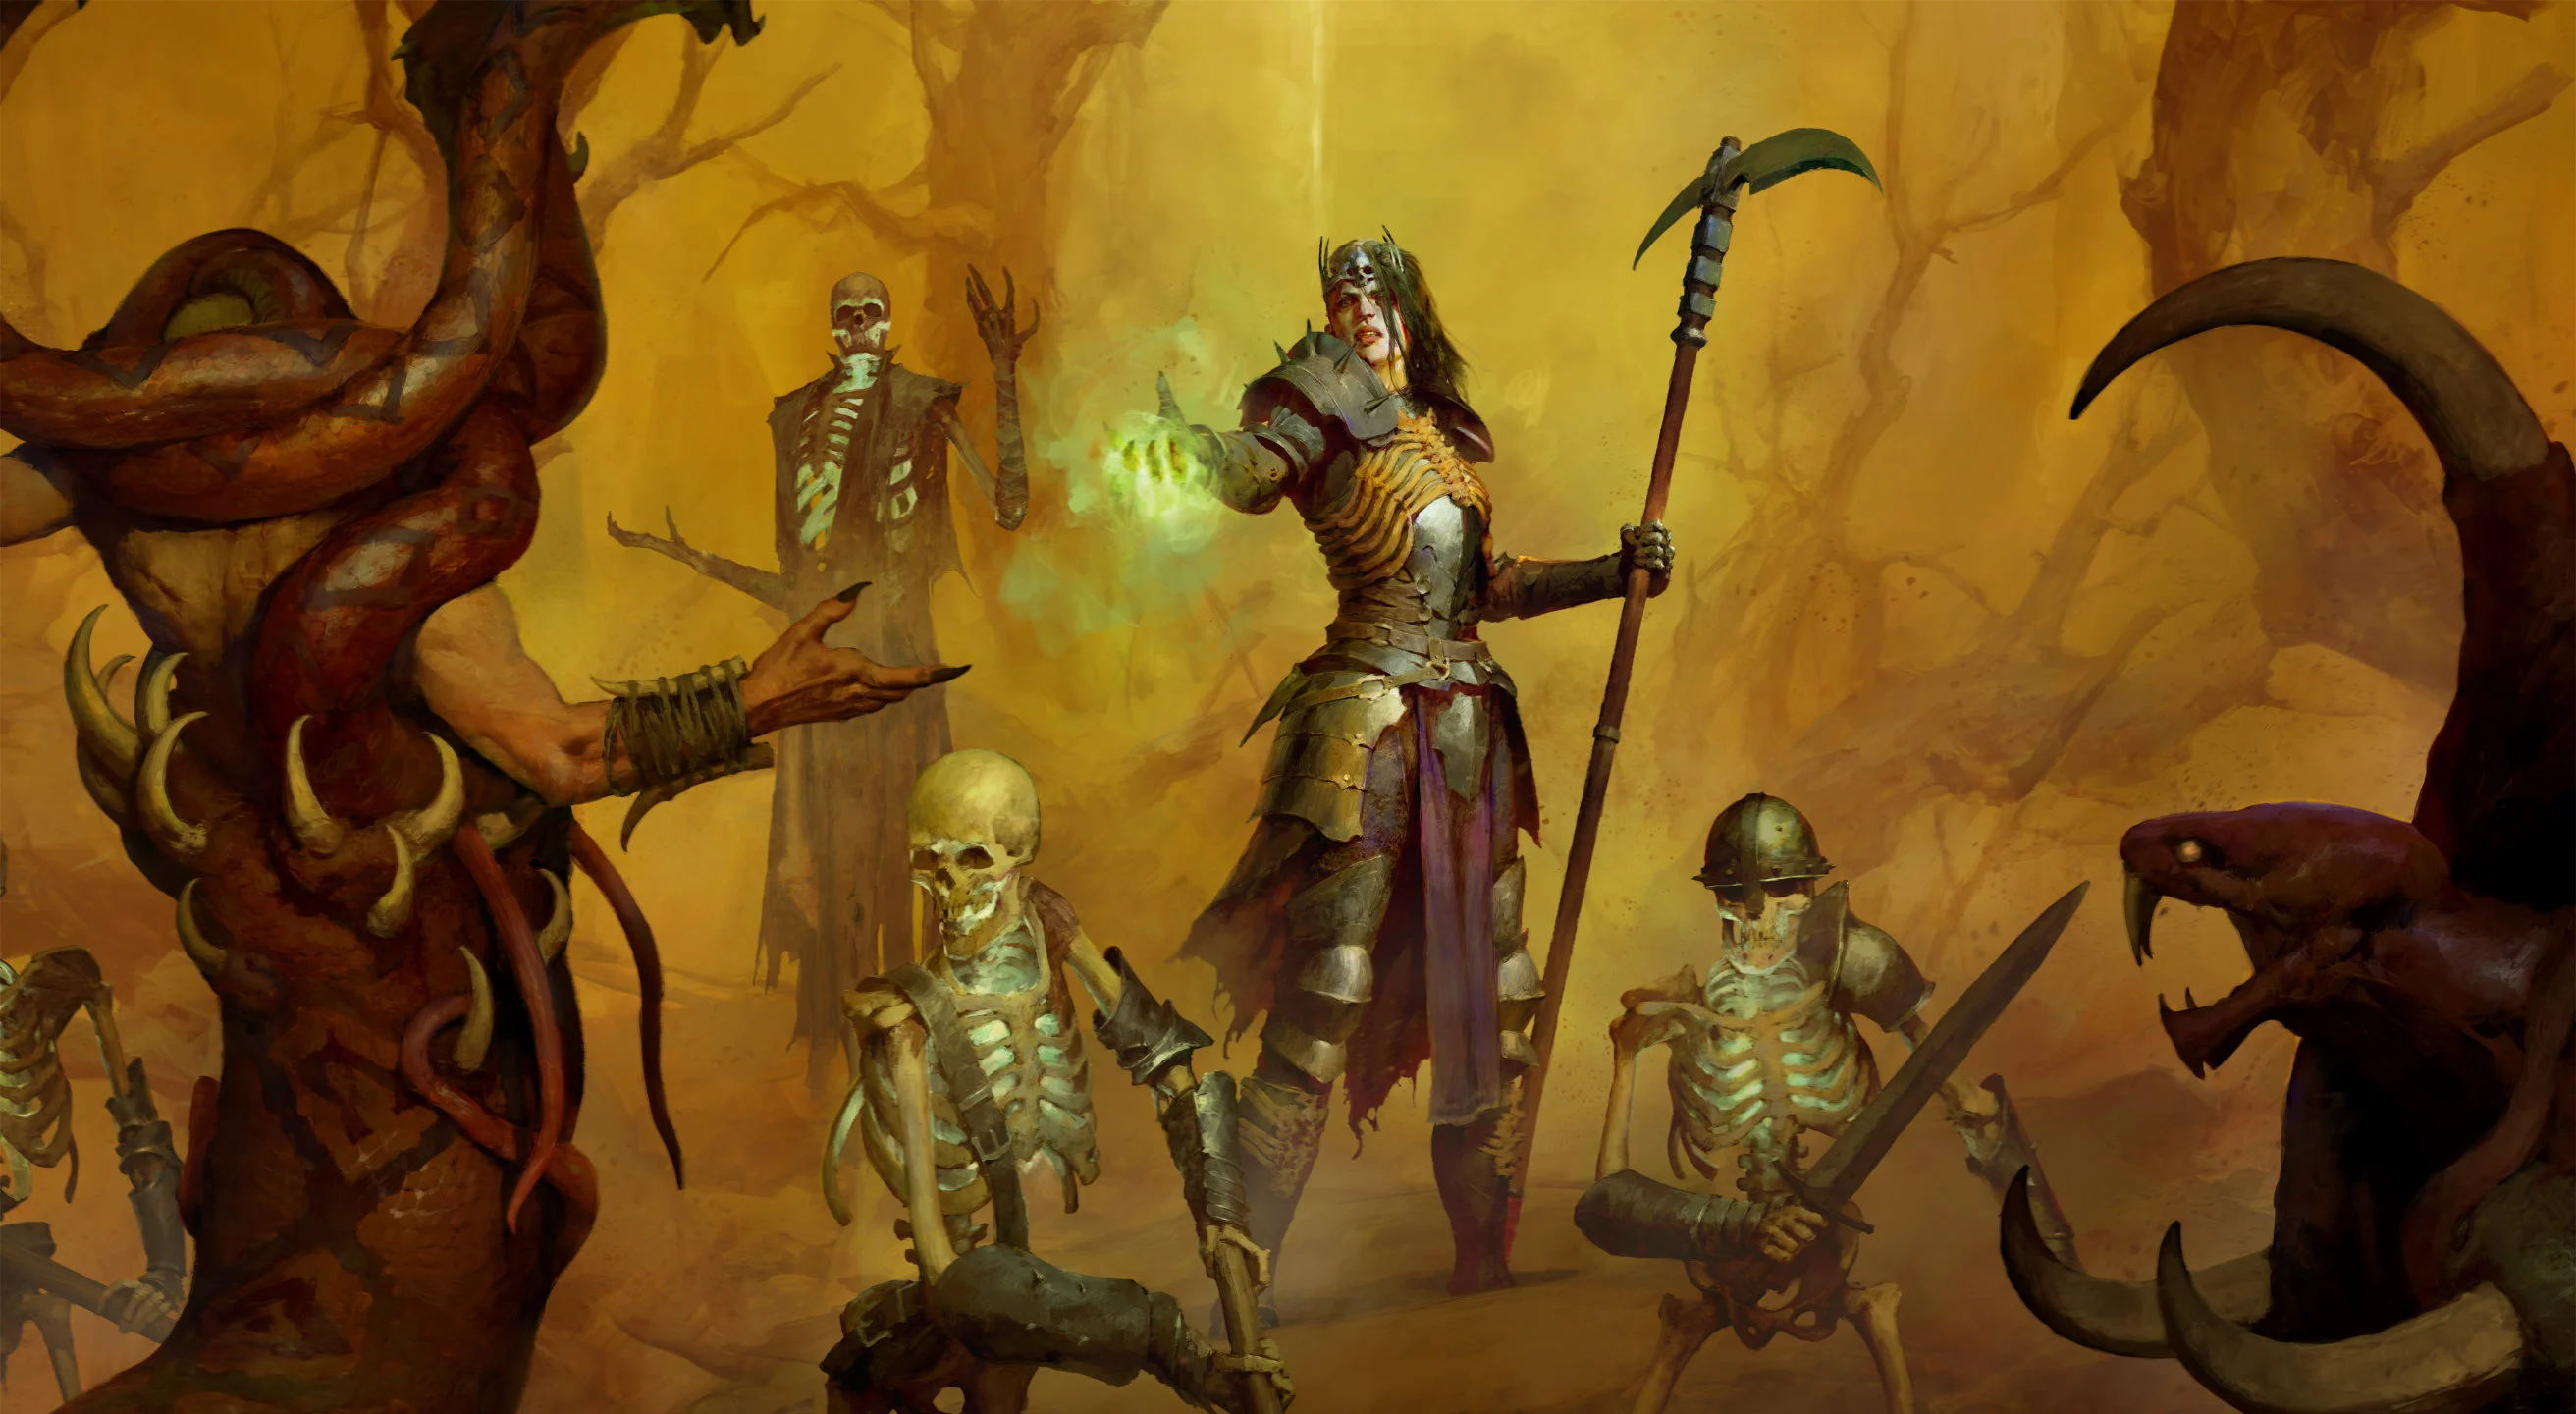


Build Introduction
![]() Affliction is the cheapest and the strongest Necromancer leveling build. The progression starts with minions, and after a short journey to the
Affliction is the cheapest and the strongest Necromancer leveling build. The progression starts with minions, and after a short journey to the ![]() Affliction keystone, you’ll sacrifice them, reset your skill points and enjoy the ride. This build is capable not only of power-leveling to 60 but also of comfortably farming gear for your endgame build in Torment difficulty content.
Affliction keystone, you’ll sacrifice them, reset your skill points and enjoy the ride. This build is capable not only of power-leveling to 60 but also of comfortably farming gear for your endgame build in Torment difficulty content.
This build shines with  Aspect of the Cursed Aura automating
 ![]() Affliction trigger conditions, but until one is obtained, it can be operated manually just fine.
Affliction trigger conditions, but until one is obtained, it can be operated manually just fine.
Recommended World Tier to start in: Hard
Quantity over quality is the road to success in leveling. Stay at difficulty level where Elites and Seasonal content pose little threat and can be killed quickly – this nets the most experience. Move up through World Tiers only when you no longer struggle in Helltides and Seasonal content in the next tier.
Check the Leveling Guide Overview for a comparison of Necromancer starter builds on Icy Veins.
Have questions or feedback on the guide? Join the livestream and ask me!
Quick Navigation
Allocation of Skill Points
Follow the points allocation order for the complete 71-point build. 12 skill points are locked behind the Season Rank System.
Early leveling (Level 1 – 35)
| Order | Skill | Cluster |
|---|---|---|
| 1 | Basic Skill | |
| 2 | Core Skilll | |
| 3 | Corpse & Macabre Passive | |
| 4 | Corpse & Macabre Passive | |
| 5 | Corpse & Macabre Passive | |
| 6 | Corpse & Macabre Skill | |
| 7 | Basic Skill | |
| 8 | Basic Skill | |
| 9 | Core Skilll | |
| 10 | Core Skilll | |
| 11 | Core Skilll | |
| 12 | Core Skilll | |
| 13 | Curse Skill | |
| 14 | Curse Skill | |
| 15 | Curse Passive | |
| 16 | Curse Passive | |
| 17 | Curse Passive | |
| 18 | Corpse & Macabre Skill | |
| 19 | Corpse & Macabre Skill | |
| 20 | Macabre Passive | |
| 21 | Macabre Passive | |
| 22 | Core Skilll | |
| 23 | Core Skilll | |
| 24 | Ultimate Skill | |
| 25 | Ultimate Passive | |
| 26 | Ultimate Passive | |
| 27 | Ultimate Passive | |
| 28 | Ultimate Passive | |
| 29 | Ultimate Skill | |
| 30 | Ultimate Skill | |
| 31 | Corpse & Macabre Passive | |
| 32 | Corpse & Macabre Passive | |
| 33 | Corpse & Macabre Passive | |
| 34 | Key Passive |
Skill Reset (Level 35+)
If the Aspect of the Cursed Aura is obtained before ![]() Abhorrent Decrepify is leveled, prioritize leveling it as soon as possible before continuing with the recommended order.
Abhorrent Decrepify is leveled, prioritize leveling it as soon as possible before continuing with the recommended order.
| Order | Skill | Cluster |
|---|---|---|
| 1 | Basic Skill | |
| 2 | Basic Skill | |
| 3 | Basic Skill | |
| 4 | Core Skill | |
| 5 | Core Skill | |
| 6 | Core Skill | |
| 7 | Corpse Skill | |
| 8 | Corpse Skill | |
| 9 | Corpse Skill | |
| 10 | Corpse Passive | |
| 11 | Corpse Passive | |
| 12 | Corpse Passive | |
| 13 | Curse Skill | |
| 14 | Curse Skill | |
| 15 | Curse Passive | |
| 16 | Curse Passive | |
| 17 | Curse Passive | |
| 18 | Macabre Skill | |
| 19 | Macabre Skill | |
| 20 | Macabre Skill | |
| 21 | Macabre Passive | |
| 22 | Macabre Passive | |
| 23 | Macabre Passive | |
| 24 | Ultimate Skill | |
| 25 | Ultimate Skill | |
| 26 | Ultimate Skill | |
| 27 | Macabre Passive | |
| 28 | Macabre Passive | |
| 29 | Macabre Passive | |
| 30 | Curse Skill | |
| 31 | Corpse & Macabre Passive | |
| 32 | Corpse & Macabre Passive | |
| 33 | Corpse & Macabre Passive | |
| 34 | Key Passive | |
| 35 | Ultimate Passive | |
| 36 | Ultimate Passive | |
| 37 | Ultimate Passive | |
| 38 | Ultimate Passive | |
| 39 | Ultimate Passive | |
| 40 | Ultimate Passive | |
| 41 | Macabre Passive | |
| 42 | Macabre Passive | |
| 43 | Macabre Passive | |
| 44 | Macabre Passive | |
| 45 | Macabre Passive | |
| 46 | Macabre Passive | |
| 47 | Curse Passive | |
| 48 | Curse Passive | |
| 49 | Curse Passive | |
| 50 | Curse Passive | |
| 51 | Curse Passive | |
| 52 | Curse Passive | |
| 53 | Core Passive | |
| 54 | Core Passive | |
| 55 | Core Passive | |
| 56 | Ultimate Skill | |
| 57 | Ultimate Skill | |
| 58 | Ultimate Skill | |
| 59 | Ultimate Skill | |
| 60 | Curse Skill | |
| 61 | Curse Skill | |
| 62 | Curse Skill | |
| 63 | Ultimate Passive | |
| 64 | Ultimate Passive | |
| 65 | Ultimate Passive | |
| 66 | Corpse Passive | |
| 67 | Corpse Passive | |
| 68 | Corpse Passive | |
| 69 | Corpse Passive | |
| 70 | Corpse Passive | |
| 71 | Corpse Passive |
Skill Bar and Skill Tree Points
Follow the points allocated in the Skill Tree above for the complete 71-point build. 12 skill points are locked behind the Season Rank System.
To prepare for what happens after level 60, head over to our Necromancer Builds page to choose your weapon! If you don’t yet meet the requirements, follow this post-60 progression strategy to push up to Torment II/III while farming gear for your endgame build of choice.
Class Mechanic – Book of the Dead
The Necromancer’s class-specific ability is the Book of the Dead, which provides three different types of minions unlocked at different levels. This build is designed around using some of your minions during the early stages of leveling and eventually sacrificing them all.
Before you reach the ![]() Affliction keystone and reset your skills:
Affliction keystone and reset your skills:
 Skeletal Warriors: Defenders [Upgrade #2] – These skeletons are effectively invincible.
- Skeletal Mages: Cold Mages [Upgrade #1] – Great early source of essence.
 Golem: Any
After leveling ![]() Affliction and resetting your skills:
Affliction and resetting your skills:
- Skeletal Warriors: Reapers [Sacrifice] – Increased Shadow Damage.
- Skeletal Mages: Cold Mages [Sacrifice] – Increases Damage to Vulnerable.
- Golem: Iron [Sacrifice] – Increased Critical Strike Damage.
Gear, Stats, Gems and Runes
Always prioritize the highest base damage possible when upgrading your weapon. After leveling the ![]() Affliction passive, a 2-handed Sword is preferable for this build to greatly benefit from its implicit Critical Strike Damage bonus, unless other weapon has significantly better base damage.
Affliction passive, a 2-handed Sword is preferable for this build to greatly benefit from its implicit Critical Strike Damage bonus, unless other weapon has significantly better base damage.
Make sure you keep an eye for the Legendary Aspects to research through salvaging. An Amulet is recommended for early imprinting important Aspects, since it provides a +50% bonus effect and is replaced less often than weapons. Check dedicated in-depth Aspect and Codex of Power guide for more information.
For this build particulary, high roll Aspect of the Cursed Aura of 0.5 seconds or less is the most important. By automatically cursing everything in range with ![]() Decrepify – it automates Crowd Controlled
Decrepify – it automates Crowd Controlled ![]() Affliction trigger condition and unlocks the build’s full potential. You can gamble
Affliction trigger condition and unlocks the build’s full potential. You can gamble ![]() Murmuring Obols at the Purveyor of Curiosities for boots to try to obtain one.
Murmuring Obols at the Purveyor of Curiosities for boots to try to obtain one.
Imprinting aspects costs ![]() Veiled Crystal, which are easily acquired in Helltides or from salvaging Rare gear and above. Prioritize salvaging gear for materials and aspects over selling it during leveling.
Veiled Crystal, which are easily acquired in Helltides or from salvaging Rare gear and above. Prioritize salvaging gear for materials and aspects over selling it during leveling.
The table below lists the Legendary Aspects you should be looking for:
| Aspect Name | Legendary Aspect Power | Source |
| Aspect of the Cursed Aura (Utility) | A dark aura surrounds you, inflicting Decrepify and Iron Maiden on enemies who touch it. Curses inflicted this way spread to surrounding targets every x seconds and last 4 seconds outside the aura. | Random Drop |
 Aspect of Slaughter Aspect of Slaughter(Mobility) | You gain 20% Movement speed. Lose this bonus for 5-2 seconds after taking damage from a Close Enemy. | Random Drop |
 Aspect of the Damned Aspect of the Damned(Offensive) | You deal 55%[x] increased Shadow damage to enemies afflicted by any Curse. | Uldur’s cave in Kehjistan (lowest roll) Random Drop |
| Sacrificial Aspect (Offensive) | Your Sacrifice bonuses are increased by 55% [35 – 55]%. (Necromancer Only) | Ruins of Eridu in Hawezar (lowest roll) Random Drop |
| Aspect of Grasping Veins (Offensive) | Gain [5 – 25]%[+] increased Critical Strike Chance for 6 seconds when you cast Corpse Tendrils. You deal [10 – 50]%[x] bonus Critical Strike Damage to enemies for 6 seconds after they are damaged by Corpse Tendrils. (Necromancer Only) | Corrupted Grotto in Kehjistan (lowest roll) Random Drop |
| Torturous Aspect (Utility) | Iron Maiden is now also a Darkness Skill and deals Shadow damage. Enemies have a 30% [10 – 30]% chance to be Stunned for 1 second when they take damage from Iron Maiden. (Necromancer Only) | Deserted Underpass in Kehjistan (lowest roll) Random Drop |
 Aspect of Hardened Bones (Defensive) Aspect of Hardened Bones (Defensive) | You gain 30% [10 – 30]% increased Damage Reduction. (Necromancer Only) | Random Drop |
Priority order for Offensive Legendary Aspects on your 2-handed weapon (200% effect) and amulet (150% effect) is listed below:
Stats Priority and Tempering Affixes
Keep in mind that Tempering Affixes are unlocked by Tempering Manuals you find as you progress. Be sure to check our Tempering guide for more details about this topic.
One of the regular affixes on gear piece can be re-rolled repeatedly until desired outcome. This is covered in our Occultist guide for more details.
There are not many modifiers worth bothering with during the leveling stage, but for this particular build, always apply whenever possible:
-
 Shadow Augments — Decay #% Affliction to deal Double Damage
 - Worldly Finesse – #% Vulnerable Damage or temporary #% Critical Strike Damage if its much higher
- Vulnerable Damage affix
These are extremely valuable because of how ![]() Affliction scaling is designed. Enchanting or tempering those affixes will bring out the most from this build.
Affliction scaling is designed. Enchanting or tempering those affixes will bring out the most from this build.
Generally, you will be looking for the following stats in descending order of priority:
| Slot | Gear Affixes | Tempering Affixes |
| 2H Weapon (Sword) | 1. Vulnerable Damage 2. Intelligence, Maximum Life 3. Lucky Hit: Chance to Restore Primary Resource on hit 4. Lucky Hit: Chance to make enemies Vulnerable on hit (one in total) | |
| Helm | 1. Maximum Life, Armor 2. Intelligence, any Resistances | |
| Chest | 1. Essence per Second 2. Maximum Life, Armor 3. Intelligence, any Resistances | |
| Gloves | 1. Vulnerable Damage 2. Lucky Hit: Chance to make enemies Vulnerable on hit (one in total) 3. Attack Speed, Critical Strike Chance 4. Maximum Life, Intelligence | |
| Pants | 1. Essence per Second 2. Maximum Life, Armor 3. Intelligence, any Resistances | |
| Boots | 1. Movement Speed 2. Essence per Second 3. Resistance to all Elements, Maximum Life, Armor 4. Intelligence | |
| Amulet | 1. + Ranks to Terror, Gloom, Coalesced Blood or Amplify 2. Attack Speed, Critical Strike Chance 3. Intelligence 4. Maximum Life | |
| Amulet | 1. Ranks to Gloom 2. Ranks to Reapers Pursuit | n/a |
| Rings | 1. Vulnerable Damage 2. Attack Speed, Critical Strike Chance 3. Lucky Hit: Chance to make enemies Vulnerable on hit (one in total) 4. Maximum Life, Intelligence |
![]() Ebonpiercer is a great option for your early amulet of choice, not only because of the ranks to passive skills that scale Shadow Damage, but also because of the extra
Ebonpiercer is a great option for your early amulet of choice, not only because of the ranks to passive skills that scale Shadow Damage, but also because of the extra ![]() Blight projectiles.
Blight projectiles.
Each extra ![]() Blight projectile allows you to prime enemy for
Blight projectile allows you to prime enemy for ![]() Affliction trigger conditions more easily from a safer range and to trigger Lucky Hit effects (like
Affliction trigger conditions more easily from a safer range and to trigger Lucky Hit effects (like ![]() Abhorrent Decrepify or
Abhorrent Decrepify or ![]() Hewed Flesh) with fewer casts.
Hewed Flesh) with fewer casts.
Lucky drop of ![]() Wendigo Brand for survivability or
Wendigo Brand for survivability or ![]() Ring of the Sacrilegious Soul for crowd control will greatly improve your quality of life during the leveling phase, until you acquire Rings with recommended stats or Legendary Aspects.
Ring of the Sacrilegious Soul for crowd control will greatly improve your quality of life during the leveling phase, until you acquire Rings with recommended stats or Legendary Aspects.
Gems and Runewords
Generally, we don’t recommend socketing items until level 45+ due to material cost and the fact that you’ll be replacing your gear too frequently, especially weapon. Due to the importance of Vulnerable damage to ![]() Affliction scaling – the weapon is the exception and should contain the recommended gems whenever possible:
Affliction scaling – the weapon is the exception and should contain the recommended gems whenever possible:
| Weapon | Armor | Jewelry |
(scaling | Appropriate Gem for your lowest Resistance. |
When it comes to Runewords, the most beneficial combinations are:
| Runeword | Priority | Comments |
| Very High | Effectively doubles every other curse cast, improving rotation and damage output, supplements lack of Aspect of the Cursed Aura | |
| High (during leveling) | Helps with Essence management, allowing you to spam | |
| High (post leveling) | Often casts | |
| Optional | If you become Injured or Crowd Controlled you invoke the Rogue’s |
You get runes back for free, when salvaging item or Jeweler can extract them for you.
Season of Slaughter (Season 12)
Season of Slaughter (S12) introduces Butcher-themed content: Bloodsoaked Sigils to “juice” the content, a Killstreak system with new Bloodied gear affixes that rely on it, and even a temporary transformation into The Butcher himself.
Killstreak
Chain-slay enemies to keep your Killstreak active and climb to harder-to-reach tiers. Each tier streghtens Bloodied gear effects and provide greater rewards, experience, and seasonal reputation upon completion.
Bloodied gear
Bloodied gear provides variety of power-based or drop-rate buffs based on your Killstreak tier or kill rate. While equipped with multiple useful pieces of Bloodied gear, focus on character mobility and stay in World Tier where killing enemies takes an insignificant amount of time, to maximize the benefits.
Types of Bloodied gear affixes:
- Rampage (Armor) increases in power based on Killstreak tier
- Feast (Weapons) provide a periodic bonus after a certain amount of kills
- Hunger (Jewelry) increase drop rewards based on Killstreak tier or kill streak accumulation
The Verdict: in the long run, unless you’re lucky, Bloodied gear has little chance of meaningfully impacting the leveling process, since gear is replaced too often and its benefits must be accumulated. The inconsistent impact of Bloodied gear buffs makes overall gear stats, especially weapon level – the top priority
Most impactful leveling Bloodied gear affect movement and casting speed:
- Feast: Every 25 Kills, gain Berserking for 4 seconds
- Rampage: +9% Movement Speed per Kill Streak Tier
- Rampage: +8% Attack Speed per Kill Streak Tier
Relatively useful Bloodied gear:
- Rampage: +125 Maximum Life per Kill Streak Tier
- Rampage: +5% Critical Strike Chance per Kill Streak Tier
- Hunger: X% increased chance for Runes / Gold / Rampage affixes during your Kill Streaks
Bloodsoaked Sigils
Bloodsoaked Sigils increase the rewards of Nightmare Dungeons, Infernal Hordes, and Lair Bosses at the cost of increased difficulty by almost entire World Tier and looming threat of the Relentless Butcher.
The Butcher
This build neither affects nor is affected by transformation into The Butcher directly, leaving it at the player’s discretion as a part of general gameplay.
For a complete overview of Season 12, mechanics and theme, new leveling activity, and other changes coming, please take a look at our comprehensive season hub here.
Mercenaries
Mercenaries are unlocked during the main questline in the Vessel of Hatred expansion. Follow this guide on how to acquire each Mercenary and benefits they provide.
The recommendation for this build is to hire Aldkin as soon as possible, for ![]() Haunt and
Haunt and ![]() Terrify synergy with
Terrify synergy with ![]() Affliction trigger conditions.
Affliction trigger conditions. ![]() Condemned will be helpful with maintaining killstreak against tougher enemies:
Condemned will be helpful with maintaining killstreak against tougher enemies:
Use the Reinforcement slot to level up all your remaining mercenaries to get ![]() Pale Marks and all possible caches for extra loot:
Pale Marks and all possible caches for extra loot:
- Raheir (defensive): Cast
 Bastion when the player becomes Injured.
 - Raheir (offensive): Cast
 Ground Slam when the player casts any skill in combat.
 - Varyana : Cast
 Bloodthirst or
  Shockwave when the player casts any skill in combat.
 - Subo: Cast
 Wire Trap when the player casts any skill in combat.
Build Mechanics
How it works?
Any interaction with ![]() Corpse Tendrils,
Corpse Tendrils, ![]() Soulrift or
Soulrift or ![]() Blight causes enemies to become Crowd Controlled, Vulnerable or take Corruption damage – and as a result, primes them to trigger
Blight causes enemies to become Crowd Controlled, Vulnerable or take Corruption damage – and as a result, primes them to trigger ![]() Affliction via curse while the effect is active.
Affliction via curse while the effect is active.
A high-roll Aspect of the Cursed Aura speeds up the process by applying ![]() Decrepify curse, which either provides priming with Crowd Control (Slow) or the first tick of damage to already primed enemies. If the target cannot be cursed (e.g., structures), use
Decrepify curse, which either provides priming with Crowd Control (Slow) or the first tick of damage to already primed enemies. If the target cannot be cursed (e.g., structures), use ![]() Blight to prime for
Blight to prime for ![]() Affliction.
Affliction.
The spammable curse trigger of choice is the free-to-cast ![]() Enhanced Iron Maiden.
Enhanced Iron Maiden.
Rotation and Playstyle
Shared skills rotation:
- If you are in danger, use
 Blood Mist and move away. All negative effects will be removed from you, and you will become Unstoppable for 3 seconds. Blood Mist can be interrupted by pressing the same button again.
 - Tip: To keep enemy swarm at bay, it is most effective to cast
 Corpse Tendrils on any available corpse (or one produced by Ghastly Blood Mist) immediately after leaving Blood Mist form
- Tip: To keep enemy swarm at bay, it is most effective to cast
- Use
 Reap on enemies to gain Damage Resistance, Attack Speed on Kill buffs, and to generate a corpse every 4 seconds. Cast it a few extra times if need to restore some Essence.
 - Use Corpse Tendrils on cooldown to group up and stun enemies for 3 seconds. Position yourself near grouped enemies.
- Against numerous or dangerous enemies, activate
 Soulrift to increase damage, gain Essence and apply the Vulnerable debuff.
Early leveling skills rotation ![]() Raise Skeleton /
Raise Skeleton / ![]() Blood Surge:
Blood Surge:
- Follow the [Shared skill rotation] from above.
- Keep renewing Raise Skeleton buff using corpses available to increase your minions damage and heal them. You can track the buff duration under the skill icon.
- Keep casting
 Blood Surge, combined with occasional Reap, near grouped enemy.
 - Use
 Abhorrent Iron Maiden on freshly engaged enemy groups to restore some essence – once per each cursed enemy, if needed.
 - Start over from [Shared skill rotation].
![]() Affliction skills rotation:
Affliction skills rotation:
- Follow the [Shared skill rotation] from above.
- Place
 Blight pools under enemies to increase damage and prime them for
  Affliction while Corruption lasts.
 - Spam free Iron Maiden curses on enemies primed for Affliction for 3-5 seconds.
- Start over from [Shared skill rotation]
Which Elixirs Should You Use?
To gain an edge in your adventures, head to the Alchemist in any major town, and craft any helpful Elixirs that cover lacking stats or resistances, but more importantly, provide increased experience gain for 30 minutes. Remember to gather the ![]() Bundled Herbs by foraging plants outdoors.
Bundled Herbs by foraging plants outdoors.
Return to the Alchemist every 10 levels or so to upgrade your healing potion. With far fewer potion charges now, extra healing is essential for survival.
Murmuring Obols Gambling
![]() Murmuring Obols gambling at the Purveyor of Curiosities is a great alternative way to find Legendary Aspects or specific-slot Uniques required to start playing your build. The most efficient
Murmuring Obols gambling at the Purveyor of Curiosities is a great alternative way to find Legendary Aspects or specific-slot Uniques required to start playing your build. The most efficient ![]() Murmuring Obols farming methods can be found here.
Murmuring Obols farming methods can be found here.
Check out the new gambling optimization tool guide from Icy Veins to maximize your chances.
Season Updates
There are no effective changes to the build besides the minor impact of seasonal mechanics. The current seasonal mechanics, being underwhelming compared to previous ones, result in a general net performance loss for every build.
For a complete overview of Season 12, including the mechanics and theme, new leveling activity, and other changes coming, please take a look at our comprehensive season hub here.
Post-leveling strategy
This guide is designed to get you to level 60 in a smooth and enjoyable way. Once there, you’ll want to look at a proper endgame-designed build guide and start making required preparations. Make sure you pick one of our recommended ones!
Preparations for an endgame build usually take some time to acquire the required gear and often result in your character reaching level 60 and unlocking the Paragon Board well before you’re done. To continue progressing and farm gear more efficiently – follow the ![]() Affliction-tailored Paragon Board below.
Affliction-tailored Paragon Board below.
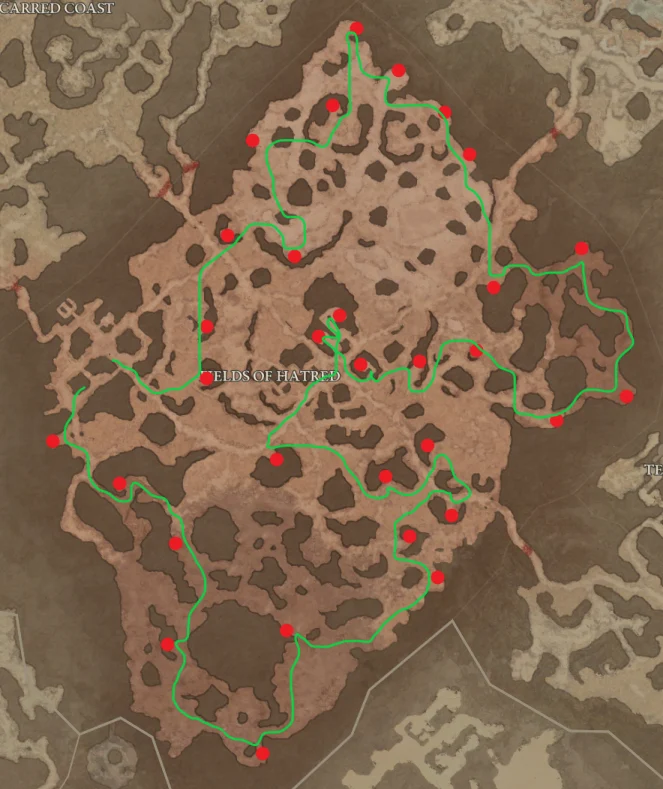
One of the sneaky ways to get some easy gear is to open Baleful Chests in the Fields of Hatred. This method is especially effective right after ascending into Torment tiers to get first Ancestral Legendary weapon, which makes a world difference. Results may vary, depending on PvP activity and other players farming the chests too, but rewards usually worth the time spent. If other players activity bothers you, its always worth to try change server layer by relogging or adjusting cross-play settings.
To open Baleful Chests, you must be Bloodmarked (PvP enabled) via the Emote Wheel (default bind ‘E’ for PC or ‘D-Pad Up’ for controller). Locations of Baleful Chests can be found on third-party interactive maps, and routes can be planned accordingly – something like this:
If luck isn’t on your side and endgame prep takes longer than expected, this build’s progression should still comfortably handle Torment III content and even go a bit further.
Changelog
- March 7th, 2026: Guide updated for Season 12.
- December 19th, 2025: Added
 Ebonpiercer, Aldkin mercenary setup, extra runewords recommendations for better performance; minor optimizations;
 - December 14th, 2025: Adjusted recommended stats to survive past 60 in World Tier 3; adjusted rotation expectations for bad Aspect of the Cursed Aura roll.
- December 13th, 2025: Changed pre-reset 35 levels to Blood Surge /w Minions; earlier
 Necrotic Carapace Fortify heal access as result of Expert difficulty testing; polished rotation explanation
 - December 9th, 2025: Reworked to full Affliction for Season 11.
- October 5th, 2025: General visual improvements on the guide.
- September 30th, 2025: Guide updated – Skill-tree and stat modifiers changed.
