Garrosh Build Guide “This will prove useful.”
Welcome to our guide for Garrosh, a Tank in Heroes of the Storm. Within these pages, you will find everything required to understand how best to play this hero, in both different map styles and team compositions.
Garrosh's Overview
Garrosh is a Tank who becomes more difficult to kill
the closer he is to death because of how his Trait, ![]() Armor Up, works.
Arguably, one of Garrosh's strongest mechanics is his ability to displace
enemy Heroes over relatively large distances via
Armor Up, works.
Arguably, one of Garrosh's strongest mechanics is his ability to displace
enemy Heroes over relatively large distances via ![]() Wrecking Ball,
something that will immensely impact the outcome of a team fight
and put a lot of pressure on the enemy team while laning.
Wrecking Ball,
something that will immensely impact the outcome of a team fight
and put a lot of pressure on the enemy team while laning.
Garrosh's Strengths and Weaknesses
Incredibly durable via
 Armor Up, becomes harder to kill the closer he is to death
Can reposition enemies or allies with
 Wrecking Ball and
  Into the Fray
Very strong playmaker
Provides a reliable frontline, with excellent damage mitigation
Very high skill ceiling
Rather poor damage output, especially during the late game
Can be easily kited, particularly by Ranged Assassins
Absolutely no method of increasing mobility; relies entirely on Abilities and crowd-control to reach his desired target
Very complex Hero, requires mastery of many subtle nuances to be most effective
Garrosh's Talent Build Cheatsheet
Bloodthirst Build
RecommendedGarrosh's Bloodthirst Build provides various improvements which allow him
to shine in most situations: additional damage, more survivability,
and utility to help teammates. Just keep in mind that,
due to going ![]() Decimate, you will not have
any tool to deal with high-mobility Heroes
(for example Zeratul) who will try to dive.
Decimate, you will not have
any tool to deal with high-mobility Heroes
(for example Zeratul) who will try to dive.
The extra damage comes from ![]() Decimate
and the utility is given by its upgrade,
Decimate
and the utility is given by its upgrade, ![]() Deadly Calm.
With it, you can debuff multiple enemy Heroes
in order to Slow them and, after upgrading it
in the late game, reduce their damage.
Deadly Calm.
With it, you can debuff multiple enemy Heroes
in order to Slow them and, after upgrading it
in the late game, reduce their damage.
Groundbreaker Build
AdvancedGarrosh's Groundbreaker Build gives him more crowd control at the cost of survivability, allowing for powerful plays to enable his teammates and giving him the ability to deal with high-mobility Heroes.
![]() Warlord's Challenge is great for locking enemy Heroes in place
for your team to damage them, a strategy that is extremely powerful when your team
features one or more Heroes who can follow up
with burst damage.
Warlord's Challenge is great for locking enemy Heroes in place
for your team to damage them, a strategy that is extremely powerful when your team
features one or more Heroes who can follow up
with burst damage.
Wrecking Ball Build
AdvancedGarrosh's Wrecking Ball Build gives him more crowd control at the cost of survivability, allowing for powerful plays to enable his teammates and giving him the ability to deal with high-mobility Heroes.
![]() Warlord's Challenge is great for locking enemy Heroes in place
for your team to damage them, a strategy that is extremely powerful when your team
features one or more Heroes who can follow up
with burst damage.
Warlord's Challenge is great for locking enemy Heroes in place
for your team to damage them, a strategy that is extremely powerful when your team
features one or more Heroes who can follow up
with burst damage.
When you have ![]() Mortal Combo at Level 16
and
Mortal Combo at Level 16
and ![]() Titanic Might at Level 20,
when catching 2 enemy Heroes with
Titanic Might at Level 20,
when catching 2 enemy Heroes with ![]() Wrecking Ball
and hitting them with
Wrecking Ball
and hitting them with ![]() Groundbreaker right after,
you will be able to throw them on the spot 2 more times.
Groundbreaker right after,
you will be able to throw them on the spot 2 more times.
![]() Unrivaled Strength at Level 1 increases the damage done this way.
Unrivaled Strength at Level 1 increases the damage done this way.
Basic Attacks Build
SituationalGarrosh's Basic Attacks Build gives him more survivability while also reducing the damage and healing done by enemy Heroes, allowing him to easily out-trade the enemy team.
The survivability comes in the form of healing when hitting enemy Heroes
with ![]() Bloodthirst empowered with multiple Talents,
including
Bloodthirst empowered with multiple Talents,
including ![]() Seasoned Soldier at Level 16
that increases your maximum Health as well.
Seasoned Soldier at Level 16
that increases your maximum Health as well.
The damage reduction, which will help your whole team to survive for longer,
comes from ![]() Oppressor at Level 7
and
Oppressor at Level 7
and ![]() Deadly Calm at Level 20.
Deadly Calm at Level 20.
The healing reduction comes from ![]() Body Check at Level 1
when you hit the target of healing (i.e., who is going to be healed or self-healed)
and from
Body Check at Level 1
when you hit the target of healing (i.e., who is going to be healed or self-healed)
and from ![]() Oppressor at Level 7
when you hit the healing source (who is going to heal or self-heal).
Oppressor at Level 7
when you hit the healing source (who is going to heal or self-heal).
ARAM Build
ARAMGarrosh's ARAM Build provides various improvements which allow him
to shine in most situations: additional damage, more survivability,
and utility to help teammates. Just keep in mind that,
due to going ![]() Decimate, you will not have
any tool to deal with high-mobility Heroes
(for example Zeratul) who will try to dive.
Decimate, you will not have
any tool to deal with high-mobility Heroes
(for example Zeratul) who will try to dive.
The extra damage comes from ![]() Decimate
and the utility is given by its upgrade,
Decimate
and the utility is given by its upgrade, ![]() Deadly Calm.
With it, you can debuff multiple enemy Heroes
in order to Slow them and, after upgrading it
in the late game, reduce their damage.
Deadly Calm.
With it, you can debuff multiple enemy Heroes
in order to Slow them and, after upgrading it
in the late game, reduce their damage.
Garrosh's Synergies and Counters
If you want to get more value from Garrosh, pair him with Heroes who can follow up his engage with crowd control (such as Deckard Cain) and/or burst damage (for example Kael'thas).
Garrosh does not have a strong engage from the distance,
so he likes to play in team with Heroes who have access to powerful Abiliities to help him engage
(like Hanzo with ![]() Dragon's Arrow).
Dragon's Arrow).
Compensate his lack of mobility (for example with ![]() Speed Barrier
by Zarya) and Garrosh will become even more scary to play against
as he will be able to just walk towards enemy Heroes for
catching them with
Speed Barrier
by Zarya) and Garrosh will become even more scary to play against
as he will be able to just walk towards enemy Heroes for
catching them with ![]() Wrecking Ball.
Wrecking Ball.
Garrosh does not like to face Heroes who have access to
on-demand Unstoppable effects
(such as Johanna) because ![]() Wrecking Ball
will not target them but the second nearest target in range.
If these Heroes get thrown instead of an ally to peel for them,
then they can use that defensive Ability to walk out uncontested,
unless crowd controlled to death.
Wrecking Ball
will not target them but the second nearest target in range.
If these Heroes get thrown instead of an ally to peel for them,
then they can use that defensive Ability to walk out uncontested,
unless crowd controlled to death.
Heroes who can kite him away from their team (for example Lunara)
are great Garrosh's counters, however, keep in mind that he can occasionally mitigate this
by activating ![]() Indomitable at Level 4.
Indomitable at Level 4.
Considering that Garrosh relies on Armor to mitigate incoming damage,
he is weak to percent-based damage (like Leoric) and
effects that reduce Armor (for example Sylvanas with
![]() Overwhelming Affliction at Level 1).
Overwhelming Affliction at Level 1).
Another way to counter Garrosh is using tools to help allied Heroes
survive burst damage (such as ![]() Force of Will by Medivh)
and/or move them out of danger (like
Force of Will by Medivh)
and/or move them out of danger (like ![]() Leap of Faith by Anduin).
Leap of Faith by Anduin).
Garrosh's Maps





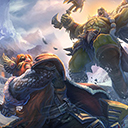


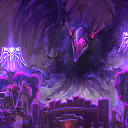
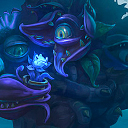



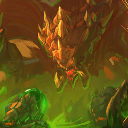
Garrosh thrives in situations where his enemies are forced to
clump together in groups. This is because most of his Abilities,
(notably ![]() Groundbreaker and
Groundbreaker and ![]() Warlord's Challenge)
gain value when they are able to strike
more than one target. Maps with many narrow choke points
provide Garrosh a playground of opportunities to catch out his enemies.
Warlord's Challenge)
gain value when they are able to strike
more than one target. Maps with many narrow choke points
provide Garrosh a playground of opportunities to catch out his enemies.
![]() Wrecking Ball is a lot of fun on Maps with lots of
terrain as Garrosh can use it to completely isolate an enemy Hero away from their allies
by flipping them over impassable terrain or Structure into his team.
Wrecking Ball is a lot of fun on Maps with lots of
terrain as Garrosh can use it to completely isolate an enemy Hero away from their allies
by flipping them over impassable terrain or Structure into his team.
Garrosh's Tips and Tricks
 Armor Up gives Garrosh an impressive amount of damage mitigation while at low Health, allowing him to stay in combat longer than most other Heroes.
 Groundbreaker can be used to Stun an enemy Hero before or after throwing them with
  Wrecking Ball.
 Bloodthirst's self-sustain is most effective after Garrosh has suffered damage as it heals for a percentage of his missing Health.
- Remember that
 Wrecking Ball is not a targeted Ability and will automatically target the closest non-Unstoppable Hero (including Misha), Clone, Minion, or Mercenary within range. Summons and Monsters are invalid targets.
 - Due to the small radius of
 Warlord's Challenge, it will sometimes be difficult to strike multiple Heroes with it. It will often times be worth using Warlord's Challenge on a single Hero should it help secure a kill and ensure a numbers advantage for Garrosh's team.
 - To play around Abilities that give mobility or Unstoppable, you can use
 Wrecking Ball and immediately cast
  Warlord's Challenge before the target enemy Hero lands.
Garrosh's Role in the Current Meta
Garrosh is a great Hero choice for teams that are in need of a strong frontline and happen to lack a reliable source of crowd control. As a consequence, he works best with Heroes who are able to follow up on his engage with additional crowd control and especially large amounts of burst damage.
Changelog
- 16 Dec. 2023 (talents page): Guide reviewed.
- 16 Dec. 2023 (this page): Guide reviewed.
- 20 Sep. 2023 (talents page): ARAM Build added.
- 20 Sep. 2023 (this page): ARAM Build added.
- 16 Sep. 2023 (talents page): Guide reviewed.
- 16 Sep. 2023 (this page): Guide reviewed.
- 13 Jul. 2022 (this page): Builds updated.
- 07 Jul. 2022 (talents page): Builds updated.
- 06 May 2022 (talents page): Builds updated.
- 06 May 2022 (this page): Builds updated.
- 16 Jun. 2021 (talents page): Guide reviewed for the latest Balance Update.
- 16 Jun. 2021 (abilities page): Guide reviewed for the latest Balance Update.
- 16 Jun. 2021 (this page): Guide reviewed for the latest Balance Update.
- 18 May 2021 (this page): Updated Overview and Role in the Current Meta.
- 05 May 2021 (talents page): Bloodthirst Build's Description improved.
- 05 May 2021 (this page): Bloodthirst Build's Description updated.
- 24 Apr. 2021 (talents page): Builds updated.
- 24 Apr. 2021 (this page): Builds updated.
- 14 Apr. 2021 (abilities page): Tips and Tricks updated.
- 14 Apr. 2021 (this page): Tips and Tricks updated.
- 14 Mar. 2021 (this page): Synergies and Counters fixed.
- 27 Feb. 2021 (talents page): Build Tags updated.
- 27 Feb. 2021 (this page): Build Tags updated.
- 25 Feb. 2021 (talents page): New layout.
- 16 Feb. 2021 (talents page): Builds updated.
- 16 Feb. 2021 (this page): Builds updated.
- 24 Oct. 2020 (talents page): Builds updated.
- 24 Oct. 2020 (this page): Builds updated.
- 16 Jul. 2020 (talents page): Builds and Descriptions changed according to the latest Balance Update.
- 16 Jul. 2020 (this page): Builds and Descriptions changed according to the latest Balance Update.
- 11 Apr. 2020 (talents page): Talent Build partially revised to match new standards.
- Talent Build and Talent Build Cheatsheet modified to reflect the current metagame.
- Talent Descriptions modified to better describe when to pick them.
- 11 Apr. 2020 (abilities page): Ability and Strategy partially revised to match new standards.
- 11 Apr. 2020 (this page): Introduction partially revised to match new standards.
- Talent Build Cheatsheet updated to reflect the current metagame.
- Role in the Current Meta modified to remove the unnecessary part about the now fixed Experience Globes.
- 12 Dec. 2019 (this page): Added an entry about the current Anomaly to the guide.
- 10 Jun. 2019 (talents page): Revised the Garrosh guide and fixed minor issues. The guide is, overall, up-to-date.
- 25 May 2019 (talents page): Updated Garrosh's talents and builds due to a major overhaul of the guide.
- 24 Dec. 2017 (talents page): Talents page updated to reflect the Dec. 20 balance patch notes, particularly the Groundbreaker Ability changes.
- 24 Dec. 2017 (abilities page): Ability page updated to reflect the Dec. 20 balance patch notes, particularly the Groundbreaker Ability changes.
- 24 Dec. 2017 (this page): Guide updated to reflect the Dec. 20 balance patch notes, particularly the Groundbreaker Ability changes.
- 17 Oct. 2017 (talents page): The increased duration of Warlord's Challenge by the Level 20 Talent Death Wish has been removed.
- 17 Oct. 2017 (abilities page): The increased duration of Warlord's Challenge by the Level 20 Talent Death Wish has been removed.
- 01 Sep. 2017 (talents page): Full Descriptions have been added to Talent page.
- 01 Sep. 2017 (abilities page): Duration of Warlord's Challenge has been increased from 1.5 to 2 seconds.
- 08 Aug. 2017 (this page): Added Garrosh guide.
More Tank Guides
Elitesparkle is a multiple times Master player in Europe who plays Heroes of the Storm since its release. He is an active member of the community who likes to teach new and veteran players all he knows about his favorite game.
- No BlizzCon in 2024
- Heroes of thre Storm PTR Patch Notes: April 16th
- Blizzard Games Return to China: New Agreement Signed With NetEase
- Blizzard Reportedly Reuniting with NetEase to Bring Back WoW in China
- Ex-Activision Blizzard CEO Bobby Kotick Shows Interest in Buying TikTok
- Heroes of the Storm Collection Update: February 6th
- Heroes of the Storm Live Patch Notes: February 6th
- Timeline of Blizzard Presidents
- Heroes of the Storm Gul'dan
- Heroes of the Storm Master Tier List
- Heroes of the Storm Tier List Hub
- Heroes of the Storm Probius
- Heroes of the Storm General Tier List
 Free Hero Rotation


