Halls of Origination Dungeon Guide
The Halls of Origination in Cataclysm is a sprawling Titan facility located in Uldum, filled with traps, puzzles, and guardians, where players uncover ancient secrets and confront the evil forces inhabiting the temple.
Halls of Origination Entrance Location
Halls of Origination is found in the Southeastern side of Uldum in a large pyramid structure in the middle of the land. You can enter this pyramid from the Eastern side, and the dungeon entrance will be just on the inside.

Overview of Bosses in Halls of Origination
Here we will give you a full rundown of what you can expect from each of the bosses found here on both Normal and Heroic difficulties as well as the items they drop.
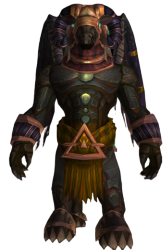
Temple Guardian Anhuur
-
 Burning Light
  Divine Reckoning
 Shield of Light
 Reverberating Hymn
- Pit Viper
 Poison-tipped Fangs

Avoid the ![]() Burning Light blue light on the ground and dispel
the
Burning Light blue light on the ground and dispel
the ![]() Divine Reckoning debuffs to prevent
Temple Guardian Anhuur from healing. When Temple Guardian Anhuur
reaches either 66% or 33% health he will become immune to damage
with
Divine Reckoning debuffs to prevent
Temple Guardian Anhuur from healing. When Temple Guardian Anhuur
reaches either 66% or 33% health he will become immune to damage
with ![]() Shield of Light, and begin casting
Shield of Light, and begin casting
![]() Reverberating Hymn, dealing damage to all enemies. This damage
increases with ever tick, eventually wiping your party.
Reverberating Hymn, dealing damage to all enemies. This damage
increases with ever tick, eventually wiping your party.
To counter this shield and stop the cast, you must have at least 2 players
jump off to either side of the boss and deal with the nearby
Pit Vipers. After killing the snakes, activate the nearby lever
with an 8 second cast. When the levers on both sides have been activated,
Temple Guardian Anhuur will lose ![]() Shield of Light and
become attackable again. Quickly interrupt the
Shield of Light and
become attackable again. Quickly interrupt the ![]() Reverberating Hymn
to stop the damage, and rinse and repeat till the boss falls.
Reverberating Hymn
to stop the damage, and rinse and repeat till the boss falls.
Loot from Normal
| Item | Required Level | Item Type |
|---|---|---|
| 83 | Trinket | |
| 83 | Leather Feet | |
| 83 | Mail Waist | |
| 83 | Neck | |
| 83 | Leather Wrist |
Loot from Heroic
| Item | Required Level | Item Type |
|---|---|---|
| 85 | Trinket | |
| 85 | Leather Feet | |
| 85 | Mail Waist | |
| 85 | Neck | |
| 85 | Leather Wrist |
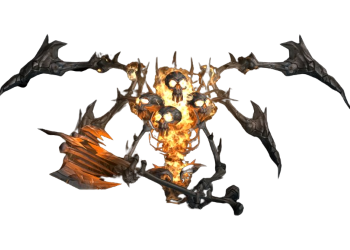
Earthrager Ptah
-
 Flame Bolt
  Earth Spike
 Raging Smash
- Tumultuous Earthstorm
 Quicksand
- Dustbone Horror
 Smash
Smash- Jeweled Scarab

Hop on the nearby camels to move 50% faster during the fight. Keep
Earthrager Ptah faced away from the group to avoid anyone taking damage
from ![]() Raging Smash. At 50% health, Earthrager Ptah
will break apart, summoning a handful of Dustbone Horrors and
Jeweled Scarabs. Simply let the tank pick these up and AoE them
down quickly. After the last add dies, Earthrager Ptah will reform
together and the fight will continue.
Raging Smash. At 50% health, Earthrager Ptah
will break apart, summoning a handful of Dustbone Horrors and
Jeweled Scarabs. Simply let the tank pick these up and AoE them
down quickly. After the last add dies, Earthrager Ptah will reform
together and the fight will continue.
Loot from Normal
| Item | Required Level | Item Type |
|---|---|---|
| 83 | Plate Chest | |
| 83 | Shield | |
| 83 | Neck | |
| 83 | Staff | |
| 83 | Leather Waist |
Loot from Heroic
| Item | Required Level | Item Type |
|---|---|---|
| 85 | Plate Chest | |
| 85 | Shield | |
| 85 | Neck | |
| 85 | Staff | |
| 85 | Leather Waist |
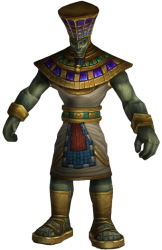
Anraphet
-
 Nemesis Strike
  Alpha Beams
 Omega Stance
 Crumbling Ruin

Anraphet will frequently cast ![]() Alpha Beams on a random
target, spawning a void zone at the players location; move out of these quickly.
After casting
Alpha Beams on a random
target, spawning a void zone at the players location; move out of these quickly.
After casting ![]() Alpha Beams, Anraphet will cast
Alpha Beams, Anraphet will cast
![]() Crumbling Ruin, decreasing the maximum health of all enemies by
10% per stack. This acts as a soft-enrage mechanic, giving you a time
limit for killing the boss. Anraphet will sometimes use
Crumbling Ruin, decreasing the maximum health of all enemies by
10% per stack. This acts as a soft-enrage mechanic, giving you a time
limit for killing the boss. Anraphet will sometimes use
![]() Omega Stance, dealing high Shadow damage to all enemies. Lastly,
the tank will often get hit with
Omega Stance, dealing high Shadow damage to all enemies. Lastly,
the tank will often get hit with ![]() Nemesis Strike, debuffing them
with a dispellable shadow damage over time debuff.; dispel this as soon as
possible.
Nemesis Strike, debuffing them
with a dispellable shadow damage over time debuff.; dispel this as soon as
possible.
Loot from Normal
| Item | Required Level | Item Type |
|---|---|---|
| 83 | Plate Wrist | |
| 83 | Cloth Chest | |
| 83 | Mail Feet | |
| 83 | Leather Shoulder | |
| 83 | Plate Chest |
Loot from Heroic
| Item | Required Level | Item Type |
|---|---|---|
| 85 | Plate Wrist | |
| 85 | Cloth Chest | |
| 85 | Mail Feet | |
| 85 | Leather Shoulder | |
| 85 | Plate Chest |
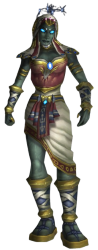
Isiset
-
 Supernova
 - Mirror Images
 Astral Rain
 Celestial Call
- Celestial Familiar
 Arcane Barrage
 Veil of Sky

When Isiset casts ![]() Supernova everyone must face away
from her before the cast ends or you will be disoriented for 4 seconds. At
60% health, Isiset will split into 3 "mirror image"
forms,
Supernova everyone must face away
from her before the cast ends or you will be disoriented for 4 seconds. At
60% health, Isiset will split into 3 "mirror image"
forms, ![]() Astral Rain,
Astral Rain, ![]() Celestial Call, and
Celestial Call, and
![]() Veil of Sky. Simply focus one of them down to cause the others to
despawn and for Isiset to reappear. At 30% she will split again
into these images, only this time it will only be the 2 images that you did not
previously kill. Simply kill 1 more and Isiset will reappear again,
allowing you to finally finish her off.
Veil of Sky. Simply focus one of them down to cause the others to
despawn and for Isiset to reappear. At 30% she will split again
into these images, only this time it will only be the 2 images that you did not
previously kill. Simply kill 1 more and Isiset will reappear again,
allowing you to finally finish her off.
Loot from Normal
| Item | Required Level | Item Type |
|---|---|---|
| 83 | Plate Wrist | |
| 83 | Trinket | |
| 83 | Cloth Legs | |
| 83 | Finger | |
| 83 | Finger |
Loot from Heroic
| Item | Required Level | Item Type |
|---|---|---|
| 85 | Plate Wrist | |
| 85 | Trinket | |
| 85 | Cloth Legs | |
| 85 | Finger | |
| 85 | Finger |
Ammunae
-
 Wither
  Consume Life Energy
- Seedling Pod
 Energize
 Rampant Growth
- Bloodpetal Blossom
 Thorn Slash
- Spore
 Noxious Spores

Ammunae can be killed very easily by quickly killing any
Seedling Pods that appear. Be sure to interrupt or dispel the
![]() Wither debuffs that go out on random players. Ammunae
will occasionally spawn Spores during the fight; kill these quickly
and move out of the
Wither debuffs that go out on random players. Ammunae
will occasionally spawn Spores during the fight; kill these quickly
and move out of the ![]() Noxious Spores cloud they leave behind.
Noxious Spores cloud they leave behind.
Loot from Normal
| Item | Required Level | Item Type |
|---|---|---|
| 83 | Finger | |
| 83 | Mail Shoulder | |
| 83 | Cloth Chest | |
| 83 | Neck | |
| 83 | Thrown |
Loot from Heroic
| Item | Required Level | Item Type |
|---|---|---|
| 85 | Finger | |
| 85 | Mail Shoulder | |
| 85 | Cloth Chest | |
| 85 | Neck | |
| 85 | Thrown |
Setesh
-
 Chaos Bolt
  Reign of Chaos
- Chaos Blast
 Seed of Chaos
- Chaos Portal
- Void Sentinel
 Void Barrier
 Charged Fists
- Void Seeker
 Anti-Magic Prison
- Void Wurm

Setesh can not be tanked, instead he will attack random targets
with mainly ![]() Chaos Bolt.
Chaos Bolt. ![]() Reign of Chaos and
Reign of Chaos and
![]() Chaos Blast will target the location of a random enemy and deal
damage to anyone in that area after a brief moment; quickly move away if you are
targeted by either spell. Setesh will also spawn a few
Chaos Blast will target the location of a random enemy and deal
damage to anyone in that area after a brief moment; quickly move away if you are
targeted by either spell. Setesh will also spawn a few
![]() Seed of Chaos during the fight; when these are walked on they
explode, dealing damage to everyone nearby and causing players to deal extra
damage with attacks and spells. Try to maintain this buff as much as possible to
make this fight much easier.
Seed of Chaos during the fight; when these are walked on they
explode, dealing damage to everyone nearby and causing players to deal extra
damage with attacks and spells. Try to maintain this buff as much as possible to
make this fight much easier.
The main part of this fight is the Chaos Portals created
periodically. These have a health bar and can, and should, be attacked quickly
before they can summon in too many adds. These will summon
Void Wurms, Void Sentinels, and
Void Seekers, which all need to be dealt with in different ways.
The Void Wurms have very little health and no real threats, simply
kill them quickly. Void Sentinels can be hard to kill as they
frequently buff themselves with ![]() Void Barrier, reducing all damage
taken by 90%. Lastly, Void Seekers can be entirely avoided
if the Chaos Portal is killed quick enough; however if one does
spawn, be sure to interrupt the
Void Barrier, reducing all damage
taken by 90%. Lastly, Void Seekers can be entirely avoided
if the Chaos Portal is killed quick enough; however if one does
spawn, be sure to interrupt the ![]() Anti-Magic Prison cast or your tank
can not be healed. Deal with the Chaos Portals and adds quickly
and the boss will fall shortly after.
Anti-Magic Prison cast or your tank
can not be healed. Deal with the Chaos Portals and adds quickly
and the boss will fall shortly after.
Loot from Normal
| Item | Required Level | Item Type |
|---|---|---|
| 83 | Mail Legs | |
| 83 | Plate Head | |
| 83 | Cloth Head | |
| 83 | Leather Chest | |
| 83 | Main-Hand Mace |
Loot from Heroic
| Item | Required Level | Item Type |
|---|---|---|
| 85 | Mail Legs | |
| 85 | Plate Head | |
| 85 | Cloth Head | |
| 85 | Leather Chest | |
| 85 | Main-Hand Mace |
Rajh
-
 Sun Strike
 - Summon Sun Orb
- Inferno Leap
 Solar Winds
- Solar Fire
 Blessing of the Sun

Rajh starts the fight with 100 energy, requiring 20 energy to use
each of his spells. When he reaches 10 or less energy, he will cast
![]() Blessing of the Sun, dealing AoE damage to all players, but increasing
their damage dealt by 100% while he regenerates energy for 8 seconds.
Rajhs will often cast
Blessing of the Sun, dealing AoE damage to all players, but increasing
their damage dealt by 100% while he regenerates energy for 8 seconds.
Rajhs will often cast ![]() Summon Sun Orb, summoning a Fire
Orb above a random targets that crashes into the ground, knocking back nearby
targets. He also uses
Summon Sun Orb, summoning a Fire
Orb above a random targets that crashes into the ground, knocking back nearby
targets. He also uses ![]() Inferno Leap, choosing a random players
location to leap to after 3 seconds, dealing fatal Fire damage to anyone still
in the area. Players in the target area of
Inferno Leap, choosing a random players
location to leap to after 3 seconds, dealing fatal Fire damage to anyone still
in the area. Players in the target area of ![]() Inferno Leap will gain
a 50% movement speed buff and must quickly leave the area. Both
Inferno Leap will gain
a 50% movement speed buff and must quickly leave the area. Both
![]() Summon Sun Orb and
Summon Sun Orb and ![]() Inferno Leap can and should be
interrupted as much as possible.
Inferno Leap can and should be
interrupted as much as possible.
![]() Sun Strike deals high Fire damage to everyone and places an
undispellable DoT on the tank; this must simply be healed through. Lastly,
Rajh will often use
Sun Strike deals high Fire damage to everyone and places an
undispellable DoT on the tank; this must simply be healed through. Lastly,
Rajh will often use ![]() Solar Winds, creating a Fire
tornado that will move around the room in random directs and damage any nearby
enemies; avoid these tornados as much as possible.
Solar Winds, creating a Fire
tornado that will move around the room in random directs and damage any nearby
enemies; avoid these tornados as much as possible.
Loot from Normal
| Item | Required Level | Item Type |
|---|---|---|
| 83 | Finger | |
| 83 | Main-Hand Sword | |
| 83 | Plate Hands | |
| 83 | Cloth Feet | |
| 83 | Trinket | |
| 83 | Plate Legs | |
| 83 | Leather Waist | |
| 83 | Trinket | |
| 83 | Back | |
| 83 | One-Hand Sword |
Loot from Heroic
| Item | Required Level | Item Type |
|---|---|---|
| 85 | Finger | |
| 85 | Main-Hand Sword | |
| 85 | Plate Hands | |
| 85 | Cloth Feet | |
| 85 | Trinket | |
| 85 | Plate Legs | |
| 85 | Leather Waist | |
| 85 | Trinket | |
| 85 | Back | |
| 85 | One-Hand Sword |
Halls of Origination Quests
Halls of Origination is one of the few dungeons in Cataclysm that has prerequisite quests required to unlock the dungeon quests. Complete these quests in Uldum first:
- Uldum Prerequisite Quests
- Sullah's Gift
- Fire From the Sky
- See You on the Other Side!
- Fortune and Glory
- Harrison Jones and the Temple of Uldum
- Put That Baby in the Cradle!
- Three if by Air
- The Coffer of Promise
After completing the prerequisite quests, you will be able to complete these 3 quests for Halls of Origination:
- The Heart of the Matter
- Penetrating Their Defenses
- Doing it the Hard Way
In addition to the dungeon quests, there is also a daily
![]() Archaeology quest you
can do inside, granting your group a temporary buff while inside the dungeon.
Archaeology quest you
can do inside, granting your group a temporary buff while inside the dungeon.
- Map of the Architects
Halls of Origination Achievements in Cataclysm
| Achievement | Description |
|---|---|
| Complete the Vault of Lights within 5 minutes of entering in the Halls of Origination on Heroic Difficulty. | |
| Defeat Temple Guardian Anhuur without allowing him to sing Reverberating Hymn for more than 15 seconds in Halls of Origination on Heroic Difficulty. | |
| Defeat Earthrager Ptah while mounted on a camel in the Halls of Origination on Heroic Difficulty. | |
| Defeat Rajh before he completes an entire recharging phase in the Halls of Origination on Heroic Difficulty. | |
| Defeat Rajh in Halls of Origination. | |
| Defeat Rajh in Halls of Origination on Heroic Difficulty. | |
| Defeat Rajh in Halls of Origination on Heroic difficulty while in a guild group. |
Changelog
- 30 Jul. 2024: Page reviewed for phase two.
- 20 May 2024: Added page.
This guide has been written by Abide, TBC veteran for nearly a decade. Abide is a Warrior tank and multi-class expert currently playing on Faerlina as Horde. You can find him in the the Icy Veins Discord. You can also see him live on Twitch.
- Burning Crusade Classic Phase 2 Now Live: Here’s What to Expect
- Did Blizzard Just Quietly Invite Creators to Play WoW Classic’s Next Chapter?
- WoW Weekly Returns: Patch 12.0.5, Twitch Drops & Classic Updates
- WoW BCC Anniversary Edition: Overlords of Outland – Everything Coming May 14
- Battleground Honor Significantly Increased
- Limited-Time Mount Alert: Get the Voidfeather Dragonhawk for TBC Classic Servers Now!
- Could WoW Be Added to Xbox Game Pass Ultimate?
- MoP Classic Escalation PTR Update Details New Content