Recommended Posts
-
Recently Browsing 0 members
No registered users viewing this page.
-
Similar Content
-
 By Staff
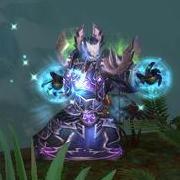
Another season arrives to the venerable Diablo 3! We're all the way up at 39, with the return of Season 22's theme. The big power buff for the season comes from an additional slot in Kanai's Cube. We won't be able to stack the same power twice, but do get an extra one to play with, increasing our power (and build options) considerably. Pylons will also be spawning shadow clones of the player's class. There's plenty of cosmetics to grab as well, from old Season 15 ones to a severed-hand-wielding-a-dagger-wielding-dog.
Check the full post below for even more information, including the Haedrig's Gift sets available this season.
Season 39 (Source)
Sanctuary needs you to answer its call for aid in Season 39: Shades of the Nephalem. Starting on June 26 at 5 p.m. PDT/CEST/KST, Nephalem can harness the power of the Shades of the Nephalem theme, which first debuted with Season 22. For an in-depth look at what’s coming, take a gander below.
Seasonal Journey
Season Theme
Season Cosmetic Rewards
Season Journey Rewards
Seasonal Conquest
Haedrig’s Gift
Season Theme
The shadows, they are moving, and they seem… animated. Like they have a will of their own. Whatever this trickery is, perhaps you can use it to your advantage. Let’s see what the demons say when you fight side by side with your own shadow!
Shadows of the Past: Activating a Shrine/Pylon will spawn in a shadow clone of your class, who will come with a randomly chosen 1 of 3 predetermined builds. This clone's power will scale with your character and will last for 1 minute (unless your character dies). See this article for the shadow clone variations that can spawn when activating.
Kanai’s Cube: Kanai’s Cube will have a fourth slot this season. This fourth slot will have the choices of the first 3 slots but will not stack with any of them, providing additional flexibility to your build.
Return to Top
Season Cosmetic Rewards
For Season 39, this means awards originally available from Season 15 are returning. In addition to the Chest and Glove slots of the exclusive Conqueror Set, a series of portrait frames themed around the struggle of the Eternal Conflict will be available. For the eager cosmetic pet collectors, Belphegor is keen to keep a grip on your coin as it accompanies you on your adventures across Sanctuary!
As in past seasons, two new End of Journey cosmetic rewards will be obtainable during Season 39. Stand hand-in-hand against demonic threats with the Corvus Cadaverous pet and emphasize your cerebral nature with the Laurels of Knowledge portrait.
Return to Top
Season Journey Rewards
If you’ve been diligently slaying demons for the past few Seasons and reached Conqueror in the Season Journey each time, you’ve surely accrued a few extra stash tabs by now. But players who have not yet earned a total of five stash tabs via the Season Journey can still unlock an additional one by completing the following tasks at the Conqueror tier:
Finish a level 70 Nephalem Rift on Torment XIII difficulty within five minutes. Level three Legendary Gems to level 55. Complete two Conquests this Season. Kill Malthael at level 70 in one minute and 30 seconds on Torment XIII difficulty. Slay Greed on Torment XIII difficulty. Reach Greater Rift level 60 Solo. Use Kanai’s Cube to augment an Ancient Legendary item with a level 50+ gem. Use Kanai’s Cube to reforge a Legendary item. Return to Top
Seasonal Conquest
Speaking of Conquests, we’re rotating those, too! Returning for Season 39 is Sprinter/Speed Racer, where you’re challenged to complete all of Diablo III’s campaign from Act I to Act V at level 70 in under one hour! Next, we have Avarice/Avaritia, where all that glitters is gold—that is, if you can complete a 50 million gold streak outside of The Vault or its Inner Sanctum. Boss Mode/Worlds Apart is a different kind of race; destroy all the bosses in Diablo III at max level on Torment X before your 20-minute timer ends! A fan-favorite for those who enjoy unconventional builds, The Thrill/Superhuman requires completion of a Greater Rift level 45 to be completed Solo, but without any Set items equipped. Finally, Masters of the Universe/Masters of Sets stretches your class set knowledge by requiring a Mastery Rank completion of eight different Set Dungeons; get ready to start collecting!
Return to Top
Haedrig’s Gift
Finally, the Class Sets available for completing certain chapters in the Season Journey courtesy of Haedrig’s Gift have rotated once more. We’ve listed the available Sets below. For those new to Seasons, here’s how it works:
Completing Chapters 2, 3, and 4 of the Season Journey will reward you with three of Haedrig’s Gifts. Each Gift contains a few pieces from one of your Class Sets. Players can only unlock one Class Set in this manner per Season across Hardcore and Non-Hardcore, so choose wisely!
The set you will receive depends on the Class of the character you’re playing when you open each Haedrig’s Gift. To collect a full Class Set, you’ll need to open all three on the same character.
Here are the sets granted by Haedrig’s Gift in Season 39:
Barbarian: Wrath of the Wastes Crusader: Roland’s Legacy Demon Hunter: Unhallowed Essence Monk: Raiment of a Thousand Storms Necromancer: Bones of Rathma Witch Doctor: Helltooth Harness Wizard: Tal Rasha’s Elements Crush the bones of your enemies into dust, Nephalem.
—The Diablo III Team
Return to Top
-
By Staff
Diablo 3's Season 38 is going live on March 27. Find out what to expect!
(Source)
Season 38 will begin on March 27, at 5PM (PDT/CET/KST). Read on to learn more about the season theme.
Seasonal Journey
Season 38: Ethereal Memory
Season Cosmetic Rewards
Season Journey Rewards
Seasonal Conquest
Haedrig’s Gift
Season 38: Ethereal Memory
As the Nephalem reflect on Sanctuary's history, instruments of power from a bygone era resurface. These ethereal memories will grant those persistent enough to search for them unimaginable power. Legends of the past will manifest once more in the present, and you must decide how to best use these gifts—for ethereal power is fugacious by nature, and will soon return to being no more than a myth.
Season 38 features Ethereals, a weapon-type that players will be able to acquire and hunt for in their upcoming seasonal journey. Ethereals will roll a powerful set of affixes, a random Class Weapon Legendary Power and a random Class Passive Power. Ethereals will have unique icons, names, item types, and sounds originally found in Diablo II. For additional details on Ethereals, check out the list below:
Ethereals are account bound and can only be dropped by monsters, chests, and destructibles, but do not require your character to be Level 70 in order to drop. Ethereals cannot be acquired through Kanai's Cube or from Kadala. Ethereal rarity drop rate is set between Ancient and Primal items. There are 3 unique Ethereals per class. Each Ethereal has fixed affixes and rolls one random Legendary Weapon power and one random Class Passive Skill. Only one Ethereal can be equipped at a time. Ethereals ignore item durability loss. Legendary Powers and Class Passive Skills rolled on Ethereals do not stack with the same power equipped through Kanai's Cube, Items or Skills. Ethereals cannot be Enchanted, Transmogrified, Dyed, Reforged, or traded. Ethereals can be augmented. Collecting all 21 Ethereals during the season will reward players with the Feat of Strength, Ethereal Recollection. Players who accomplish this will have all Ethereal transmogrify options available for future seasonal and non-seasonal play. Ethereals only drop in Seasonal play and will not transfer to your non-seasonal character when the season ends. Return to Top
Season Cosmetic Rewards
Beginning with Season 17, we began reintroducing previous rewards to make them available to players who may have missed them the first time around. For Season 38, this means awards originally available from Season 14 and Season 26 are returning. In addition to the Boots and Pants slots of the exclusive Conqueror Set, a series of portrait frames themed around the enigmatic Tal Rasha will be available. For the nephalem hero who wants to embody the spirit of Justice, a pennant dedicated to everyone’s favorite archangel will also be available. Just remember—you cannot judge Justice itself!
However, we know it’s nice to have something new to aim for if you’ve participated in previous Seasons. We’re continuing to provide new End of Journey rewards as introduced in Season 17, with two new cosmetic ones for those who complete the entirety of the Season journey. Endure The Fall of the Nephalem and complete the Season 26 Guardian Journey to earn the Rakkis’ Remembrance portrait and the Toothsome Trooper pet.
Return to Top
Season Journey Rewards
If you’ve been playing the past few Seasons diligently and reached Conqueror in the Season Journey each time, you’ve accrued a few extra stash tabs. Players who have not yet earned a total of five stash tabs via the Season Journey can still unlock an additional one by completing the following tasks at the Conqueror tier:
Guardian of Sanctuary: Finish a level 70 Nephalem Rift on Torment XIII difficulty within five minutes. A Little More: Reach Greater Rift Level 60 Solo. Money Ain’t a Thang: Slay Greed on Torment XIII difficulty. Treasure Goblins outside of Nephalem Rifts will sometimes open portals to Greed’s domain, The Vault. Just Lose It: Kill the Butcher at level 70 in Torment XIII in under 30 seconds Cubic Reconfiguration: Use Kanai’s Cube to reforge a Legendary item. Power Amplification: Use Kanai’s Cube to augment an Ancient Legendary item with a level 50+ gem. Gem of My Life: Level three Legendary Gems to level 55. All I Do is Win: Complete 2 Conquests this Season. Return to Top
Seasonal Conquest
Speaking of Conquests, we’re rotating those, too! Returning for the Season of Greed is Avarice and Avarita, where every gold piece you find will count! Speed Demon and Need for Speed will ask you to kick it into full gear in your Nephalem Rift runs. On a Good Day and I Can’t Stop will congratulate high ranking Legendary Gems. Finally, for the solo crowd, Divinity and Lionhearted will ask you to climb Greater Rift heights by your lonesome, while Years of War and Dynasty challenge your game mastery of at least six classes.
Return to Top
Haedrig’s Gift
Finally, just as before, you’ll get a shiny new Class Set courtesy of Haedrig’s Gift for completing certain chapters in the Season Journey. We’ve listed the available Sets below. For those new to Seasons, here’s how it works:
Completing Chapters 2, 3, and 4 of the Season Journey will reward you with three Haedrig’s Gifts. Each Gift contains a few pieces from one of your Class Sets. Players can only unlock one Class Set in this manner per Season across Hardcore and Non-Hardcore, so choose wisely!
The set you will receive depends on the Class of the character you’re playing when you open each Haedrig’s Gift. To collect a full Class Set, you’ll need to open all three on the same character.
Here are the sets granted by Haedrig’s Gift in Season 38:
Barbarian: The Legacy of Raekor Crusader: Armor of Akkhan Demon Hunter: Embodiment of the Marauder Monk: Inna’s Reach Necromancer: Pestilence Master’s Shroud Witch Doctor: Zunimassa’s Haunt Wizard: Delsere’s Magnum Opus
Return to Top
-
By Staff
Diablo 3 Season 37 starts on December 5 and Blizzard has posted an official preview with what to expect.
Highlights
In Season 37, the slots in Kanai's Cube let you equip 3 more Legendary powers that aren't restricted to their usual categories. The rewards available in Season 37 are the same as during Seasons 13 and 25. Rewards include Pane of Tristram Portrait and The Dark Lordling Pet, previously available during Season 25. Seasonal Conquests and Haedrig's Gift sets can be found below in the official post by Blizzard. (Source)
Season 37 will begin on December 5, at 5PM (PST/CST/KST) shortly after our next Diablo III update. Read on to learn more about the season theme, which we expect to be released on December 5.
Seasonal Journey
Season 37: The Forbidden Archives
Season Cosmetic Rewards
Season Journey Rewards
Seasonal Conquest
Haedrig’s Gift
Season 37: The Forbidden Archives
Season 37 is the Season of the Forbidden Archives. Many adventurers have come to learn the power that dwells within the ancient nephalem artifact, Kanai’s Cube. However, none understands this power better than the equally celebrated and reviled Horadrim, Zoltun Kulle. Kulle was able to unlock and harness the power of the Cube like none before, leveraging its power to siphon and archive the energies of powerful items. With Season 37, we explore the power Kulle might lend to your fingertips if his experiments went unchecked.
For the duration of Season 37, the slots in Kanai’s Cube that allow you to equip three additional Legendary powers will not be restricted to their usual categories. While normally a player can equip one power each from the Weapon, Armor, and Jewelry categories, Season 37 players can mix and match between all three! This might allow you to run two Weapon powers with one Armor power. Or perhaps you might choose to run three Amulet powers instead. The choice is yours, and we’re as eager as you are to experiment with the new build opportunities this creates!
Return to Top
Season Cosmetic Rewards
Beginning with Season 17, we began reintroducing previous rewards to make them available to those who may have missed them the first time around. For Season 37, this means awards originally available from Season 13 and Season 25 are returning. In addition to the Helm and Shoulders slots of the exclusive Conqueror Set, portraits themed around Imperius will be available. Those who enjoy collecting pets will also be pleased to see the return of—Blaine’s Bear! While traveling together, you may be tempted to ask him why he’s covered in blood, or try removing the sharp objects he carries around. We strongly advise against this.
Additionally, two elusive cosmetics return from Season 25 return for those intrepid Nephalem who complete the entirety of the Season journey. Survive The Lords of Hell and complete the Season 37 Guardian Journey to earn the Pane of Tristram Portrait and The Dark Lordling Pet.
Return to Top
Season Journey Rewards
If you’ve been playing the past few Seasons diligently and reached Conqueror in the Season Journey each time, you’ve accrued a few extra stash tabs. Players who have not yet earned a total of five stash tabs via the Season Journey can still unlock an additional one by completing the following tasks at the Conqueror tier:
Complete a Torment XIII Rift in under 5 minutes Complete Greater Rift Level 60 solo Kill Greed on Torment XIII Kill Cydaea on Torment XIII in under 15 seconds Reforge a Legendary or Set item Augment an Ancient item with a Level 50 or greater Legendary Gem Level three Legendary Gems to 55 Complete two Conquests Return to Top
Seasonal Conquest
Speaking of Conquests, we’re rotating those, too! Love going fast? Sprinter and Speed Racer will be making a return. Enjoy testing your mettle in Greater Rifts? Divinity and Lionhearted are also coming back. If you’d rather max out your kill count with Cursed Chests, Curses! and Stars Align will be right up your alley. Those who enjoy seeing how far they can go without Set Items will get a kick out of The Thrill and Super Human. Finally, if you’re keen to show off your mastery of Set Dungeons, Masters of the Universe and Masters of Sets will be available once more.
Return to Top
Haedrig’s Gift
Just as before, you’ll get a shiny new Class Set courtesy of Haedrig’s Gift for completing certain chapters in the Season Journey. We’ve listed the available Sets below. For those new to Seasons, here’s how it works.
Completing Chapters 2, 3, and 4 of the Season Journey will reward you with three Haedrig’s Gifts. Each Gift contains a few pieces from one of your Class Sets. You can only unlock one Class Set in this manner per Season across Hardcore and Non-Hardcore, so choose wisely!
The set you will receive depends on the Class of the character you’re playing when you open each Haedrig’s Gift. To collect a full Class Set, you’ll need to open all three on the same character.
Here are the sets granted by Haedrig’s Gift in Season 37:
Barbarian: Might of the Earth Crusader: Thorns of the Invoker Demon Hunter: The Shadow’s Mantle Monk: Monkey King’s Garb Necromancer: Grace of Inarius Witch Doctor: Raiment of the Jade Harvester Wizard: Firebird’s Finery
Return to Top
-
 By Stan
Find out everything you need to know about Diablo 3's upcoming Season 36!
Highlights
Season 36 starts on September 12 at 5 p.m. PDT/CEST/KST. Players can utilize the powers of the Prime and Lesser Evils in the upcomng season. You will equip 1 of 3 Prime Evil Soul Shard in your Helm slot and 1 of 4 Lesser Evil Soul Shard in your Weapon slot, each offering game-changing bonuses that scale up as you upgrade them using Hellforge Embers. Soul Shards drop from anywhere. Haedrig's Gift sets for Season 36 are as follows: Monk: Uliana’s Stratagem Demon Hunter: Natalya’s Vengeance Crusader: Seeker of the Light Wizard: Vyr’s Amazing Arcana Barbarian: Immortal King’s Call Witch Doctor: Spirit of Arachyr Necromancer: Trag’Oul’s Avatar Seasonal cosmetic rewards include Chest and Gloves slots of the Conqueror Set, portraits themed after the High Heavens. The Guardian journey will earn you the Terror Resurrected Portrait and the Lesser Mummy Pet. For more details about the upcoming season, don't forget to check out Blizzard's official preview linked below.
(Source)
Sanctuary needs you to answer its call for aid in Season 36: The Lords of Hell. Starting on September 12 at 5 p.m. PDT/CEST/KST, Nephalem can harness the power of The Lords of Hell Season, which first debuted with Season 25. For an in-depth look at the now-permanent Rites of Sanctuary and Visions of Enmity themes and more, take a look below.
Seasonal Journey
Season 36: The Lords of Hell
Season Cosmetic Rewards
Season Journey Rewards
Seasonal Conquest
Haedrig’s Gift
Season 36: The Lords of Hell
Though the Black Soulstone has been destroyed, lingering fragments of The Lords of Hell once contained therein still persist in Sanctuary. These Soul Shards hold immense power—power that once belonged to the Prime and Lesser Evils. Cunning Nephalem who find and wield these Soul Stones must exercise caution. Power can be alluring, and the road to the Burning Hells is paved with good intentions...
First seen in Season 25, you can embrace evil by infusing yourself with the essences of Hell’s Lords using Soul Shards. Embark on your Season Journey to discover and upgrade demonic Soul Shards based on the seven Lords of Hell. By embodying a Prime and Lesser Evil, you will inflict new forms of pain and suffering on the demons of Sanctuary. We can't wait for you to get your hands on Soul Shards and start unlocking your true power.
Nephalem can find seven unique Soul Shards (based on the seven Lords of Hell), which give you new demonic powers. One of three Prime Evil Soul Shards can be equipped into Helms and one of four Lesser Evil Soul Shards can be equipped into Weapons. Each Soul Shard can be upgraded three times using a new seasonal-exclusive consumable, the Hellforge Ember.
Soul Shards and Hellforge Embers can drop from anywhere in Sanctuary, but Soul Shards have a higher chance to drop from Bosses. Soul Shards cannot be traded, but can be salvaged or utilized in Caldesann’s Despair. You may only equip one Prime Evil Soul Shard and one Lesser Evil Soul Shard at a time. Lastly, Soul Shards and Hellforge Embers only drop in Seasonal play, and will not transfer to your non-seasonal character when the season ends. Keep reading for a look into the capabilities for each of the Soul Shard powers.
Prime Evil Soul Shards
Sliver of Terror
Base Power: Your cooldowns are increased by 25%. For every skill on cooldown, you take 12.5% reduced damage and deal 12.5% increased damage. Additional Powers: Your attack speed and critical hit chance are increased by 5% for each skill on cooldown. You cast a devastating Ring of Fire after killing 100 enemies. If three or more skills are on cooldown, your lightning and fire skill damage are increased by 50%. Shard of Hatred
Base Power: You deal 15% reduced damage while you have 3 or fewer enemies within 25 yards. If more than 3 enemies are within the same distance, you deal 5% increased damage per enemy (to a maximum of 50%). Additional Powers: Killing an elite enemy pulls all enemies within 40 yards to where the elite died. Your Movement speed is increased by 50%. Each enemy within 25 yards reduces your movement speed by 10% up to 70%. You now deal 10% increased damage for every enemy instead of 5% (to a maximum of 100%). Fragment of Destruction
Base Power: You move unhindered through enemies. Each enemy you pass through receives Mark of Destruction for 7 seconds. Each marked enemy that dies removes 1 second from one of your skills on cooldown. If the Mark of Destruction expires before the enemies die you lose 2% of your maximum health as damage. Marks are not applied if you are below 35% health. Additional Powers: You have a 25% Chance to restore 5% health when an enemy dies with Mark of Destruction active. When you apply Mark of Destruction to an enemy, you increase your movement speed by 5% for 7 seconds. Max 10 Stacks. You now leave a trail of fire in your wake that slays enemies with the Mark of Destruction and are below 10% health. Lesser Evil Soul Shards
Stain of Sin
Base Power: You deal 25% less damage. When you kill 50 enemies, you spawn a pool of blood that increases the damage done to elite enemies by 150% and lasts 15 seconds. Additional Powers: The pool of blood now negates Elite affixes within its area. You gain an additional Rift Progress Orb when you kill and elite pack. The pool of blood now collects Rift Progress Orbs. Dregs of Lies
Base Power: You deal 25% less damage. Your pets deal 25% increased damage. Additional Powers: Killing an elite enemy reduces all your active cooldowns by 5 seconds. On receiving fatal damage, spawn a shadow that prevents your death, restores your health to 35%, and grants +225 All Resist to all party members while it is active. The shadow only lasts 15 seconds. Each time your pet hits an enemy, your damage is increased by 0.5% for 5 seconds. This stacks up to 100 times. When you reach 100 stacks, the stacks quickly reset to 0. Remnant of Pain
Base Power: Your Critical Hit Chance is reduced by 15%. Attacks against Incapacitated enemies are automatically critical hits. Additional Powers: Hitting enemies with cold damage has a 50% chance to freeze them. Cold skill damage is increased to frozen targets by 20%. Gain passability while your movement speed bonus is over 50%. When you move through enemies you knock them back and stun them for 2 seconds. When you critically hit an enemy you increase the attack speed all players by 5% for 5 seconds. Max 10 stacks. Essence of Anguish
Base Power: Every time you deal poison damage to an enemy you increase your cooldown reduction and movement speed by 2.5% while your damage received is increased by 5% for 10 seconds. Max 10 stacks. Additional Powers: Your movement speed and cooldown reduction can be increased up to 15 times by dealing poison damage to an enemy. When you deal poison damage to an enemy they receive 50% increased poison damage from all sources for 10 seconds. Killing an enemy deals the damage done by the death blow to all enemies within 25 yards. Return to Top
Season Cosmetic Rewards
In Season 36, cosmetics fit for Nephalem of the highest order will be yours to collect. In addition to the Chest and Gloves slots of the exclusive Conqueror Set, portraits themed around the High Heavens will be available. Those who enjoy collecting cosmetic wings will also be pleased to see the return of Fiacla-Géar, which gives your character a distinctly angelic look.
Relive Ethereal Memory and complete the Season 36 Guardian Journey to earn the Terror Resurrected Portrait and the Lesser Mummy Pet.
Return to Top
Season Journey Rewards
If you’ve been diligently slaying demons for the past few Seasons and reached Conqueror in the Season Journey each time, you’ve surely accrued a few extra Stash tabs. You’ll earn one additional tab each Season by finishing the Conqueror tier, up to a maximum of five Stash tabs:
Guardian of Sanctuary: Finish a level 70 Nephalem Rift on Torment XIII within five minutes. Gem of My Life: Level three Legendary Gems to level 55. All I Do Is Win: Complete two Conquests this Season. Money Ain’t A Thang: Slay Greed on Torment XIII difficulty. Power Amplification: Use Kanai’s Cube to augment an Ancient Legendary item with a level 50+ gem. Cubic Reconfiguration: Use Kanai’s Cube to reforge a Legendary item. A Little More: Reach Greater Rift Level 60 Solo Arachnophobia: Kill Queen Araneae on Torment XIII in under 30 seconds. Return to Top
Seasonal Conquest
Speaking of Conquests, we’re rotating those, too! Love going fast while killing things? Boss Mode and Worlds Apart will be making a return. On A Good Day and I Can’t Stop are also available, if leveling Legendary Gems is more your thing. If you’d rather max out your kill count with Cursed Chests, Curses! and Stars Align will be right up your alley. Those who enjoy seeing how far they can go without Set Items will get a kick out of The Thrill and Super Human. Finally, if you’re keen to show off your mastery of various Class Sets, Years of War and Dynasty will be available for you to attempt once more.
Return to Top
Haedrig’s Gift
Finally, the Class Sets rewarded for completing certain chapters in the Season Journey courtesy of Haedrig’s Gift have rotated once more. We’ve listed the available Sets below. For those new to Seasons, here’s how it works:
Completing Chapters 2, 3, and 4 of the Season Journey will reward you with three of Haedrig’s Gifts. These contain a few pieces from one of your Class Sets. Players can only unlock one Class Set in this manner per Season across Hardcore and Non-Hardcore, so choose wisely! The set you receive depends on the class of the character you’re playing when you open each Haedrig’s Gift. To collect a full Class Set, you’ll need to open all three on the same character. Here are the sets granted by Haedrig’s Gift in Season 24:
Monk: Uliana’s Stratagem Demon Hunter: Natalya’s Vengeance Crusader: Seeker of the Light Wizard: Vyr’s Amazing Arcana Barbarian: Immortal King’s Call Witch Doctor: Spirit of Arachyr Necromancer: Trag’Oul’s Avatar
Return to Top
-
By Staff
Blizzard has posted an official preview of Diablo 3's upcoming Season 35 which begins on June 6!
Season 35 borrows the Seasonal theme debuted in Season 27 that revolves around a stacking buff that has various effects depending on the number of enemies you kill.
Check out the official preview below for more details!
(Source)
Sanctuary needs you to answer its call for aid in Season 35: Eternal Conflict. Starting on June 6 at 5 p.m. PDT/CEST/KST, Nephalem can harness the power of the Eternal Conflict theme, which first debuted with Season 27. For an in-depth look at what’s coming, take a gander below. Also, Season 34 will officially come to an end on June 1.
Seasonal Journey
Season Theme
Season Cosmetic Rewards
Season Journey Rewards
Seasonal Conquest
Haedrig’s Gift
Season Theme
Season 35 is the Season of Eternal Conflict and with it come an awesome array of killstreak rewards! Inspired by the war waged between the High Heavens and the Burning Hells, you‘ll earn increasingly powerful effects as you unleash destruction upon your foes. So rack up those kills and clear the battlefields in the name of Sanctuary!
All players will benefit from the Pandemonium bonus during Season 35. For each stack of this buff, you’ll receive a small boost to movement speed and bonus damage, ultimately capping out at 50% movement speed and 100% damage at 1000 stacks. In addition, reaching certain killstreak goals will trigger a special effect and cause even more mayhem on the battlefield:
15 Kills: Exploding Chickens seek and destroy 30 Kills: A wide Frost Nova freezes enemies 50 Kills: Corpses rain from the sky 100 Kills: Five massive Energy Twisters are unleashed 150 Kills: Dark Geysers form beneath enemies 200 Kills: Treasure chests fall from the sky 300 Kills: A ring of fire engulfs everything 400 Kills: Meteors hail from above 500 Kills: Angels descend upon the battlefield to fight for your cause 1000 Kills: ????? This Season, we’re taking action on the great feedback we received from the community about Season 35’s Triune buff. With the killstreak mechanic, we can make sure the benefit is always traveling with you and something you won’t have to constantly reposition for. There’s still more room for exploration and innovation in the future, and in the meantime, we challenge you to push these killstreaks to their limits and discover its ultimate reward! We think you’ll find it devilishly delightful.
Return to Top
Season Cosmetic Rewards
Beginning with Season 17, we began reintroducing previous rewards to make them available to players who may have missed them the first time around. For Season 35, this means awards originally available from Season 11 are returning. Pet collectors will be pleased to see the return of the Emerald Dragon. . .and, in addition to the Pant and Boot slots of the exclusive Conqueror Set, the Treasure Goblins portraits will be available.
However, we know it’s nice to have something new to aim for if you’ve participated in previous Seasons. We’re continuing to provide new End of Journey rewards as introduced in Season 17, with two new cosmetic ones for those who complete the entirety of the Season journey. Prove your worth by completing the Season 35 journey to earn the Lacuni Cub pet and the Chopping Block portrait.
Return to Top
Season Journey Rewards
If you’ve been diligently slaying demons before and reached Conqueror in the Season Journey each time, you’ve surely accrued a few extra stash tabs. You’ll earn one additional tab each Season by finishing the Conqueror tier, up to a maximum of 5:
Far Away: Kill the Siegebreaker Assault Beast at level 70 in under 30 seconds on Torment X difficulty. Money Ain't a Thang: Slay Greed on Torment X difficulty. Treasure Goblins outside of Nephalem Rifts will sometimes open portals to Greed's domain, The Vault. A Little More: Reach Greater Rift Level 60 Solo. 4 Minutes to Save the World: Finish a level 70 Nephalem Rift on Torment X difficulty within 4 minutes. Gem of My Life: Level three Legendary Gems to level 55. All I Do is Win: Complete 2 Conquests this Season. Return to Top
Seasonal Conquest
Speaking of Conquests, we’re rotating those too! Do you love collecting lots of gold as fast as possible? You’ll be set with Avarice and Avaritia. Want to go fast while killing things? Speed Demon and Need for Speed will serve your purposes. Want to go fast while killing big things? Boss Mode and Worlds Apart are right up your alley. Divinity and Lionhearted are also making a return, if challenging Greater Rifts are more your style. Finally, if you’re keen to prove your mastery of various Class Sets, Masters of the Universe and Masters of Sets will also be returning.
Return to Top
Haedrig’s Gift
Finally, the Class Sets rewarded for completing certain chapters in the Season Journey courtesy of Haedrig’s Gift have rotated once more. We’ve listed the available Sets below. For those new to Seasons, here’s how it works:
Completing Chapters 2, 3, and 4 of the Season Journey will reward you with three of Haedrig’s Gifts. These contain a few pieces from one of your Class Sets. Players can only unlock one Class Set in this manner per Season across Hardcore and Non-Hardcore, so choose wisely! The set you receive depends on the class of the character you’re playing when you open each Haedrig’s Gift. To collect a full Class Set, you’ll need to open all three on the same character. Here are the sets granted by Haedrig’s Gift in Season 35:
Monk - Raiment of a Thousand Storms Demon Hunter - Unhallowed Essence Crusader - Roland’s Legacy Wizard - Tal Rasha’s Elements Barbarian - Wrath of the Wastes Witch Doctor - Helltooth Harness Necromancer - Bones of Rathma
Return to Top
-