
Band of Brave Bangboo Event Guide for Zenless Zone Zero
The Band of Brave Bangboo Event is a Bangboo fighting event in Zenless Zone Zero. Find out how to participate, how to make it through each stage, and get the amazing rewards!
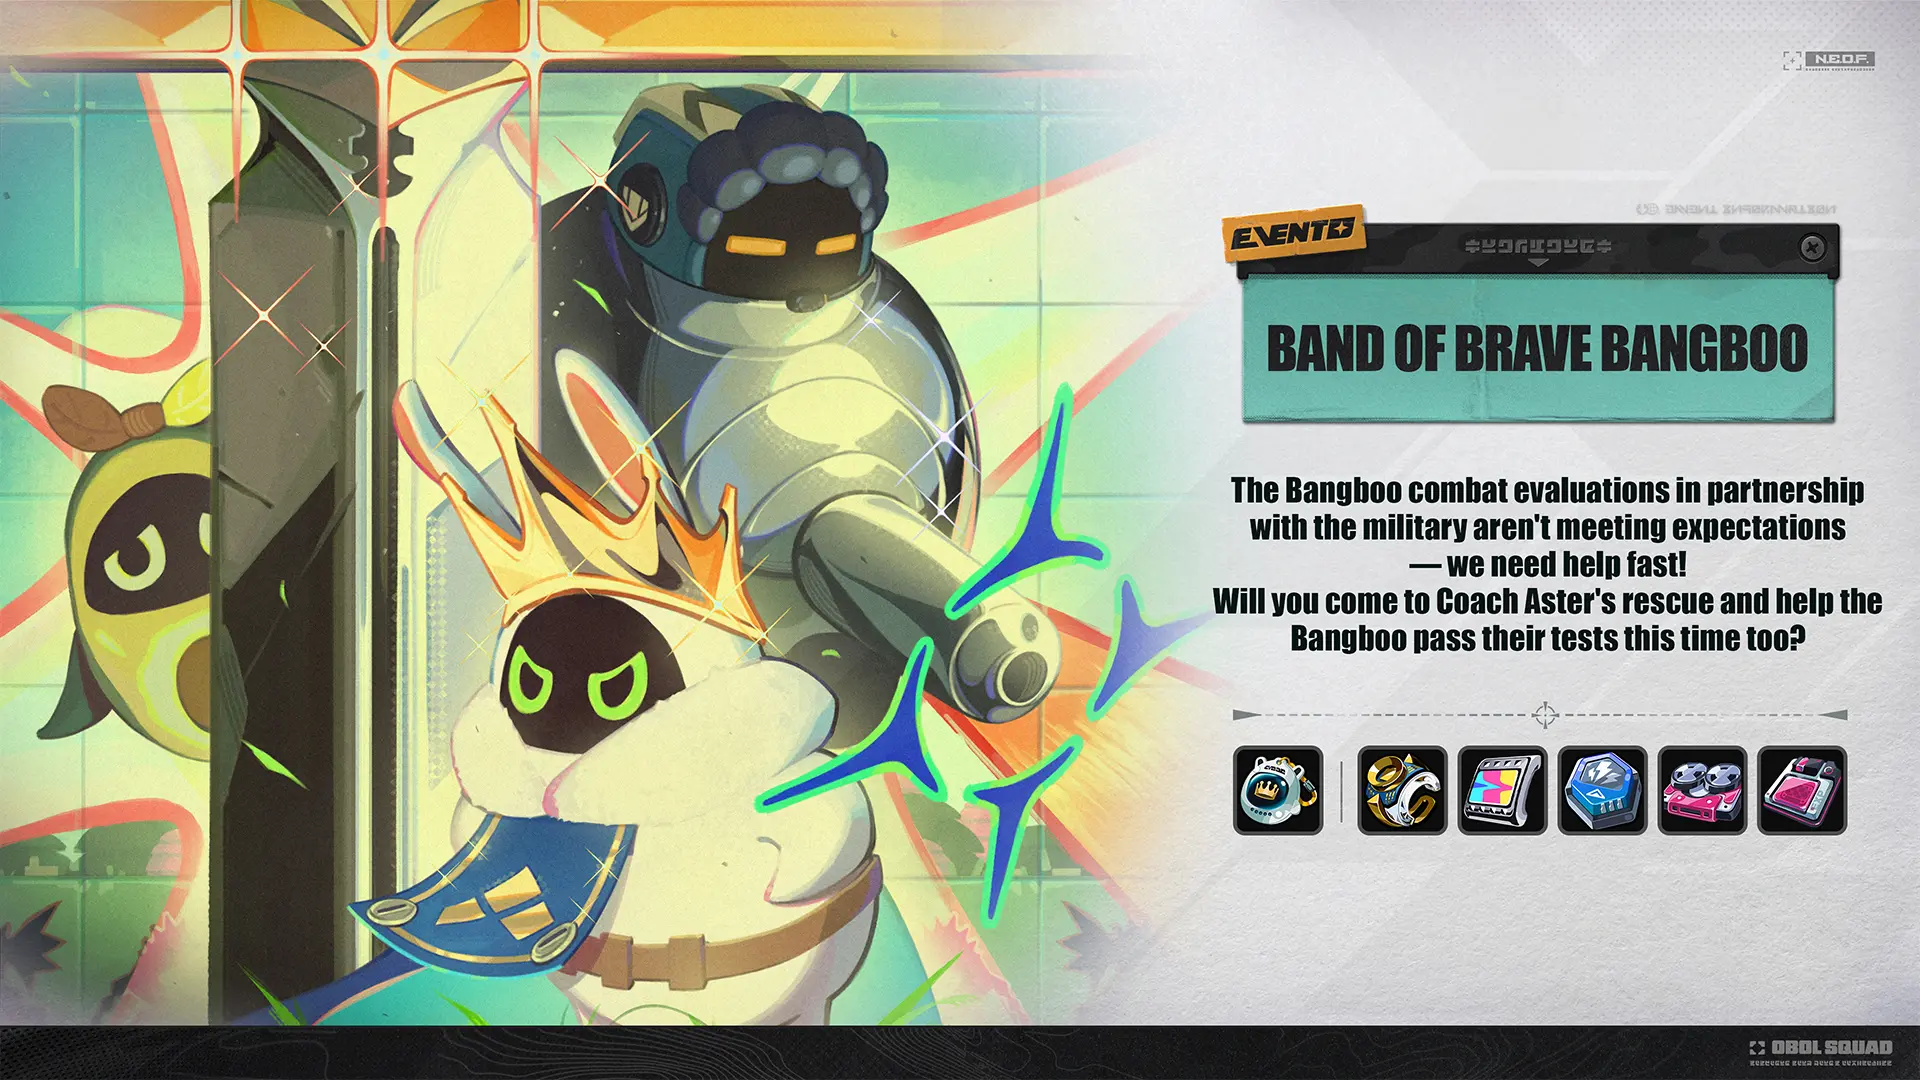
Band of Brave Bangboo Event
This event will take place during version 2.2 of the game, from September 05, 20025 until October 13, 2025.
Band of Brave Bangboo Event Calendar for Zenless Zone Zero
What is the Band of Brave Bangboo Event About?
The Bangboo combat evaluations in partnership with the military are not really meeting expectations, and they need the help of an experienced Proxy! You have to coach Aster's rescue and help the Bangboo pass their tests.
How do you Participate in Band of Brave Bangboo?
In order to participate you will need to reach Inter-Knot level 15 and complete Agent Story Mole in the Hole.
This event is similar to a previous one! Your goal is to pick and place your Bangboo in order to keep enemies from reaching the goal. However, this time you get even more Bangboo to choose from, with new powers, buffs, and more!
The assessments will also be much more challenging and complex than before. Expect new maps, enemies, ambushes, miasma, and more!
In order to start the event you need to head to Scott's Outpost and talk to coach Asher

It turns out that Seed has been training the Bangboo, but it is not really going as planned, and she is missing a few important steps! It is up to the Proxy to take over and teach the Bangboo how to fight!
Once the discussion over, you get access to the Event menu! On there you can find:
- Student Info: Lists the combat Bangboo you currently own, they stats and skills
- Assessment Level: Showcases your current level, and the next bonuses you can get from leveling up. The more you complete Bangboo Battles, the more you will increase your assessment level and unlock new perks
- Go to Battle: This is where you can start your next Battle

There are 4 days in total, and each day unlocks a total of 6 Battles. During the exams, Ethereals will appear one by one and attempt to break into the base. Your role is to pick up the Bangboo and place them on the field to stop the Ethereals from reaching the base.

The enemies will enter from one side, and progress to the other side. You want to place your Bangboo in between in order to stop them. If enemies make it past the base, it will loose durability. if your base reaches zero, you fail. Once all enemies are dead, the assessment is completed.
In order to place Bangboo on the field you can simply drag and drop them. They auto-attack enemies once in place.
You need a certain amount of assessment points in order to deploy your Bangboo. If you place multiple Bangboo of the same type, the assessment point cost will get gradually higher each time.
If it goes too fast, you can pause or slow down to arrange your lineup.
Most Bangboo can either be place on high grounds, or directly on the ground to block the way. However, one Bangboo can only block two enemies max, and they will take damage when placed on the ground.
You can also level up your Bangboo during battle with Assessment Points. Simply select the Bangboo on the field, and pick upgrade. This will help them deal more damage, or gain various bonuses.
Band of Brave Bangboo Solution
Anti-Infiltration Assessment 01
The first few stages are rather simple. You can start with any Bangboo, but ![]() Snap is
a good starting choice. As soon as possible place
Snap is
a good starting choice. As soon as possible place ![]() Plugboo. You can place a third one
if you want, but 2 are plenty enough for this one.
Plugboo. You can place a third one
if you want, but 2 are plenty enough for this one.

Anti-Infiltration Assessment 02
During this stage, some Ethereals hide in Illusory Bushes. You have to place ![]() Mercury strategically as
he is the only one who can intercept those.
Mercury strategically as
he is the only one who can intercept those.
Star with ![]() Mercury on the ground, and
Mercury on the ground, and ![]() Snap on top.
once you can, add
Snap on top.
once you can, add ![]() Plugboo at the top, and another
Plugboo at the top, and another ![]() Mercury in the Bushes
to help out. You can complete with another
Mercury in the Bushes
to help out. You can complete with another ![]() Snap or
Snap or ![]() Plugboo
in the middle once it is possible.
Plugboo
in the middle once it is possible.

Anti-Infiltration Assessment 03
Place ![]() Mercury in the bushes first, and an
Mercury in the bushes first, and an ![]() Exploreboo right on top of it.
The
Exploreboo right on top of it.
The ![]() Exploreboo will most likely die after a while, just replace it. In third
position, place
Exploreboo will most likely die after a while, just replace it. In third
position, place ![]() Snap all the way down. he immobilizes, so he is really good
against those fast enemies. After that, place
Snap all the way down. he immobilizes, so he is really good
against those fast enemies. After that, place ![]() Snap and
Snap and ![]() Plugboo
where needed to help out.
Plugboo
where needed to help out.

Anti-Infiltration Assessment 04
This stage can be a bit more tricky, as the flying enemies pass bye ![]() Mercury.
Start with placing a
Mercury.
Start with placing a ![]() Mercury and
Mercury and ![]() Avocaboo to support it.
Then we recommend placing
Avocaboo to support it.
Then we recommend placing ![]() Snap all the way to the left near the entrance, with an
Snap all the way to the left near the entrance, with an
![]() Exploreboo. You will want to place another
Exploreboo. You will want to place another ![]() Mercury to
catch any enemy that would pass by the first one. After that, place
Mercury to
catch any enemy that would pass by the first one. After that, place ![]() Plugboo to
help out
Plugboo to
help out ![]() Snap. The first
Snap. The first ![]() Mercury you place might die, replace it
directly with a new one.
Mercury you place might die, replace it
directly with a new one.

Anti-Infiltration Assessment 05
Pick your first buff: Pre-emptive Tactical Chip.
place ![]() Mercury top right first with an
Mercury top right first with an ![]() Exploreboo and
Exploreboo and
![]() Avocaboo for support. Secure the exit with
Avocaboo for support. Secure the exit with ![]() Snap and
Snap and
![]() Plugboo. Place another
Plugboo. Place another ![]() Mercury in the middle left
to block the progression on this side.
Mercury in the middle left
to block the progression on this side.

Anti-Infiltration Assessment 06
Pick your buff: Pre-emptive Tactical Chip. If you struggle with Assessment Points, you can pick the Cost Reduction one instead.
The first enemies are those flying once that bypass ![]() Mercury, so
start by placing a
Mercury, so
start by placing a ![]() Snap instead. After that, place
Snap instead. After that, place ![]() Mercury
and
Mercury
and ![]() Avocaboo near the enemy entrance. Add a
Avocaboo near the enemy entrance. Add a ![]() Mercury on top in the middle,
and some
Mercury on top in the middle,
and some ![]() Plugboo (or
Plugboo (or ![]() Snap) near the exit. Once the Big enemy
arrives, you will want to keep an eye on your
Snap) near the exit. Once the Big enemy
arrives, you will want to keep an eye on your ![]() Mercury and replace them when they die.
Mercury and replace them when they die.

Territory Control Assessment 01
Pick your buff: Cost Reduction & Efficiency Resource Chip.
Make sure you do not block enemies on charger tiles, otherwise they get an ATK boost.
Place ![]() Mercury on top first, and a second one as soon as possible on the first charger tile down.
Next add
Mercury on top first, and a second one as soon as possible on the first charger tile down.
Next add ![]() Snap down to help out killing enemies, and
Snap down to help out killing enemies, and ![]() Avocaboo to
support Mercury. Add another
Avocaboo to
support Mercury. Add another ![]() Snap or
Snap or ![]() Plugboo at the top.
Plugboo at the top.

Territory Control Assessment 02
Pick your buff: Cost Reduction & Efficiency Resource Chip.
Place down ![]() Mercury and
Mercury and ![]() Avocaboo at the top first,
before securing the passage down with another one. Add
Avocaboo at the top first,
before securing the passage down with another one. Add ![]() Snap and
Snap and ![]() Plugboo
on top to help out as a lot of enemies will enter from there towards the end.
Plugboo
on top to help out as a lot of enemies will enter from there towards the end.

Territory Control Assessment 03
Pick your buff: Charge Suppression Tactical Chip. It will the Bangboo who are placed on the charger.
Block the passage on top first with ![]() Mercury and add an
Mercury and add an ![]() Exploreboo
down left in order to swap the charger tiles and heal Mercury. Add
Exploreboo
down left in order to swap the charger tiles and heal Mercury. Add ![]() Snap next to
Snap next to ![]() Mercury
on top, and right after block the passage down with another
Mercury
on top, and right after block the passage down with another ![]() Mercury.
Add a
Mercury.
Add a ![]() Plugboo on top and one down. You might have to replace your
Plugboo on top and one down. You might have to replace your ![]() Mercury
on top at some point.
Mercury
on top at some point.

Territory Control Assessment 04
Pick your buff: Charge Suppression Tactical Chip.
Place ![]() Excaliboo first on top. After that put
Excaliboo first on top. After that put ![]() Snap on the first tile down, in order to swap the
charger and heal Excaliboo. As soon as you can, upgrade the
Snap on the first tile down, in order to swap the
charger and heal Excaliboo. As soon as you can, upgrade the ![]() Excaliboo so it attacks
all enemies in range. Add
Excaliboo so it attacks
all enemies in range. Add ![]() Mercury right in front of Excaliboo. Snap easily holds the ground alone down,
so just take care of the top line and replace the Bangboo as needed.
Mercury right in front of Excaliboo. Snap easily holds the ground alone down,
so just take care of the top line and replace the Bangboo as needed.

Territory Control Assessment 05
Pick your buff: Charge Suppression Tactical Chip and Cost Reduction & Efficiency Resource Chip.
Place ![]() Excaliboo down, and
Excaliboo down, and ![]() Devilboo right next to it.
Block the passage on top with
Devilboo right next to it.
Block the passage on top with ![]() Mercury and add
Mercury and add ![]() Snap to help
with DPS on top. You can upgrade Excaliboo so it attacks more enemies.
Snap to help
with DPS on top. You can upgrade Excaliboo so it attacks more enemies.

Territory Control Assessment 06
Pick your buff: Charge Suppression Tactical Chip and War-Sustaining Charge Chip.
Place ![]() Excaliboo down to block the passage, with a
Excaliboo down to block the passage, with a ![]() Devilboo nearby.
Add
Devilboo nearby.
Add ![]() Snap and another
Snap and another ![]() Devilboo in the middle squares.
Once the big enemy appears, it will smash through all the Bangboo on the ground. We recommand you add an
Devilboo in the middle squares.
Once the big enemy appears, it will smash through all the Bangboo on the ground. We recommand you add an
![]() Avocaboo on the middle, and swap between
Avocaboo on the middle, and swap between ![]() Mercury and
Mercury and ![]() Excaliboo
in order to stop the big guy.
Excaliboo
in order to stop the big guy.

Hollow Adaptivity Assessment 01
Pick your buff: War-Sustaining Charge Chip and Cost Reduction & Efficiency Resource Chip.
You will have to watch out for Miasma. You can not deploy your Bangboo in there. Enemies get an ATK boost when standing in Miasma, so make sure to not block them right on it.
Place down ![]() Excaliboo on the right path first, right before the Miasma,
and
Excaliboo on the right path first, right before the Miasma,
and ![]() Mercury on the path left, after the Miasma (but make sure enemies will not
stop ON the miasma, so put it down a couple of tiles after). Add
Mercury on the path left, after the Miasma (but make sure enemies will not
stop ON the miasma, so put it down a couple of tiles after). Add ![]() Devilboo in the middle,
and
Devilboo in the middle,
and ![]() Avocaboo to provide some support. Finish with
Avocaboo to provide some support. Finish with ![]() Snap and
Snap and
![]() Plugboo for more DPS, and upgrade
Plugboo for more DPS, and upgrade ![]() Mercury and
Mercury and ![]() Excaliboo
as soon as possible.
Excaliboo
as soon as possible.

Hollow Adaptivity Assessment 02
Pick your buff: War-Sustaining Charge Chip and Cost Reduction & Efficiency Resource Chip.
Miasma Tumours will appear during this stage. Attack it by placing a Bangboo nearby and it will destroy the surrounding Miasma tiles.
Deploy ![]() Boollseye down the kill the right Tumour and intercept the enemies coming in from down there.
Place
Boollseye down the kill the right Tumour and intercept the enemies coming in from down there.
Place ![]() Mercury down to block the way for the ones coming from on top.
Place an
Mercury down to block the way for the ones coming from on top.
Place an ![]() Avocaboo to heal Boollseye, and add
Avocaboo to heal Boollseye, and add ![]() Devilboo for
more DPS, followed by
Devilboo for
more DPS, followed by ![]() Excaliboo and
Excaliboo and ![]() Snap. You can add another
Snap. You can add another
![]() Avocaboo if needed on the left.
Avocaboo if needed on the left.

Hollow Adaptivity Assessment 03
Pick your buff: Cost Reduction & Efficiency Resource Chip and Purification Charge Chip.
This stage you want to focus on the Ahriman first, so pay attention to those.
Deploy ![]() Devilboo on top-right to kill the Tumour before enemies enter.
Add
Devilboo on top-right to kill the Tumour before enemies enter.
Add ![]() Boollseye on the left and another
Boollseye on the left and another ![]() Devilboo on top.
Deploy
Devilboo on top.
Deploy ![]() Avocaboo for support and upgrade
Avocaboo for support and upgrade ![]() Boollseye.
Put down
Boollseye.
Put down ![]() Excaliboo and
Excaliboo and ![]() Mercury near the exists in case anyone slips through.
Mercury near the exists in case anyone slips through.

Hollow Adaptivity Assessment 04
Pick your buff: Cost Reduction & Efficiency Resource Chip and Purification Charge Chip.
Place ![]() Devilboo down so it starts getting rid of the Tumour before enemies arrive.
Deploy
Devilboo down so it starts getting rid of the Tumour before enemies arrive.
Deploy ![]() Excaliboo on the right path, and then another on the left.
Support them with
Excaliboo on the right path, and then another on the left.
Support them with ![]() Miss Esme in the middle and upgrade her. Place another
Miss Esme in the middle and upgrade her. Place another
![]() Boollseye on the right to help out, and upgrade
Boollseye on the right to help out, and upgrade ![]() Excaliboo.
Excaliboo.

Hollow Adaptivity Assessment 05
Pick your buff: Cost Reduction & Efficiency Resource Chip and Purification Charge Chip.
Deploy ![]() Boollseye and
Boollseye and ![]() Excaliboo on top, and
Excaliboo on top, and ![]() Mercury
down left. Place
Mercury
down left. Place ![]() Miss Esme and
Miss Esme and ![]() Devilboo in the middle,
and upgrade Miss Esme as soon as possible. Add another
Devilboo in the middle,
and upgrade Miss Esme as soon as possible. Add another ![]() Boollseye and
upgrade
Boollseye and
upgrade ![]() Excaliboo.
Excaliboo.

Hollow Adaptivity Assessment 06
Pick your buff: Purification Charge Chip and Massive Offensive Tactical Chip.
Deploy ![]() Boollseye on the left and
Boollseye on the left and ![]() Devilboo on the right.
Support them with
Devilboo on the right.
Support them with ![]() Miss Esme and add
Miss Esme and add ![]() Excaliboo and
Excaliboo and
![]() Mercury all the way down to block the passage. Add another
Mercury all the way down to block the passage. Add another ![]() Mercury, and
support the one who is down right with an
Mercury, and
support the one who is down right with an ![]() Avocaboo. Upgrade
Avocaboo. Upgrade ![]() Miss Esme
as soon as you can, and keep an eye on the boss. he will deal DMG to everyone, and you will want to replace the Bangboo that
die.
Miss Esme
as soon as you can, and keep an eye on the boss. he will deal DMG to everyone, and you will want to replace the Bangboo that
die.

Cumulative Assessment 01
Pick your buff: Cost Reduction & Efficiency Resource Chip and Limit Release Resource Chip.
Deploy ![]() Boollseye in the middle, then
Boollseye in the middle, then ![]() Devilboo on top.
After that, place
Devilboo on top.
After that, place ![]() Snap down, and another
Snap down, and another ![]() Devilboo on the right.
Add
Devilboo on the right.
Add ![]() Miss Esme in the middle and upgrade her. You can also upgrade
Miss Esme in the middle and upgrade her. You can also upgrade ![]() Boollseye.
Boollseye.

Cumulative Assessment 02
Pick your buff: Charge Suppression Tactical Chip and Limit Release Resource Chip.
This stage you can only deploy three Bangboo, so you will have to place, destroy and swap!
Place ![]() Boollseye in the middle and upgrade it. So you have an overview of both sides.
Place
Boollseye in the middle and upgrade it. So you have an overview of both sides.
Place ![]() Excaliboo on top on the boosted tile. Add
Excaliboo on top on the boosted tile. Add ![]() Miss Esme on top.
Miss Esme on top.
Once the big enemy enters, remove ![]() Boollseye and deploy
Boollseye and deploy ![]() Paperboo down
in order to block the boss. Remove
Paperboo down
in order to block the boss. Remove ![]() Miss Esme and place a new one near Parperboo to
support it. Remove
Miss Esme and place a new one near Parperboo to
support it. Remove ![]() Excaliboo and place any damage dealing Bangboo near enough to shoot at the
boss.
Excaliboo and place any damage dealing Bangboo near enough to shoot at the
boss.

Cumulative Assessment 03
Pick your buff: Cost Reduction & Efficiency Resource Chip and War-Sustaining Charge Chip.
This stage is a bit weird as enemies will stop from time to time, but you can use that to
your advantage. Place ![]() Boollseye on top right and bottom right. Deploy
Boollseye on top right and bottom right. Deploy
![]() Excaliboo at the exit in case anyone slips through. Place
Excaliboo at the exit in case anyone slips through. Place ![]() Mercury to
block the enemies in the middle. Add
Mercury to
block the enemies in the middle. Add ![]() Miss Esme
on top for support, and
Miss Esme
on top for support, and ![]() Devilboo down. Upgrade all the DPS Bangboo, and
add another
Devilboo down. Upgrade all the DPS Bangboo, and
add another ![]() Boollseye.
Boollseye.

Cumulative Assessment 04
Pick your buff: Cost Reduction & Efficiency Resource Chip and War-Sustaining Charge Chip.
During this stage, you can only use ![]() Excaliboo and
Excaliboo and ![]() Snap.
Place them in a square with 4
Snap.
Place them in a square with 4 ![]() Excaliboo and 4
Excaliboo and 4 ![]() Snap first. Upgrade them all.
They will hold the formation until the big guy enter. Once they do, keep replacing the
Snap first. Upgrade them all.
They will hold the formation until the big guy enter. Once they do, keep replacing the ![]() Excaliboo
as they die.
Excaliboo
as they die.

Cumulative Assessment 05
Pick your buff: Limit Release Resource Chip and Massive Offensive Tactical Chip.
The last two stage are quite harder than the previous ones. Place one ![]() Snap
down and one on top. Upgrade them. Add
Snap
down and one on top. Upgrade them. Add ![]() Boollseye on the left, and
Boollseye on the left, and ![]() Mercury
near the exit. Deploy
Mercury
near the exit. Deploy ![]() Miss Esme next to the Snap on top, and
Miss Esme next to the Snap on top, and ![]() Avocaboo
near the other one down. Once the two bosses will enter, some of the Bangboo will die.
Replace them when needed.
Avocaboo
near the other one down. Once the two bosses will enter, some of the Bangboo will die.
Replace them when needed.

Cumulative Assessment 06
Pick your buff: Purification Charge Chip and Massive Offensive Tactical Chip.
This stage will put you to the test. Place ![]() Boollseye middle left, he will take
down the Miasma Tumors. Add
Boollseye middle left, he will take
down the Miasma Tumors. Add ![]() Snap on top. Upgrade both. Add
Snap on top. Upgrade both. Add ![]() Excaliboo down to
block the passage. Add two
Excaliboo down to
block the passage. Add two ![]() Miss Esme if possible, or one Esme and one
Miss Esme if possible, or one Esme and one ![]() Avocaboo.
You will need them. make sure to place them toward the middle, and to keep your other Bangboo nearby, as you will need them.
Upgrade your healers as soon as you can. Add
Avocaboo.
You will need them. make sure to place them toward the middle, and to keep your other Bangboo nearby, as you will need them.
Upgrade your healers as soon as you can. Add ![]() Devilboo and
Devilboo and ![]() Mercury in the middle.
Fill the remaining spots with Snap to slow them down. Once the bosses enter, they will deal
DMG to everyone. Replace your Bangboo as they die.
Mercury in the middle.
Fill the remaining spots with Snap to slow them down. Once the bosses enter, they will deal
DMG to everyone. Replace your Bangboo as they die.

What are the Band of Brave Bangboo Rewards?
During the event, you can earn the following rewards:
- 800 Polychrome
- 12 Senior Investigator Log
- 12 W-Engine Energy Module
- 14 Specialized Shock Chip
- 12 Bangboo System Widget
- 1 Hamster Cage Pass
- 240 000 Denny
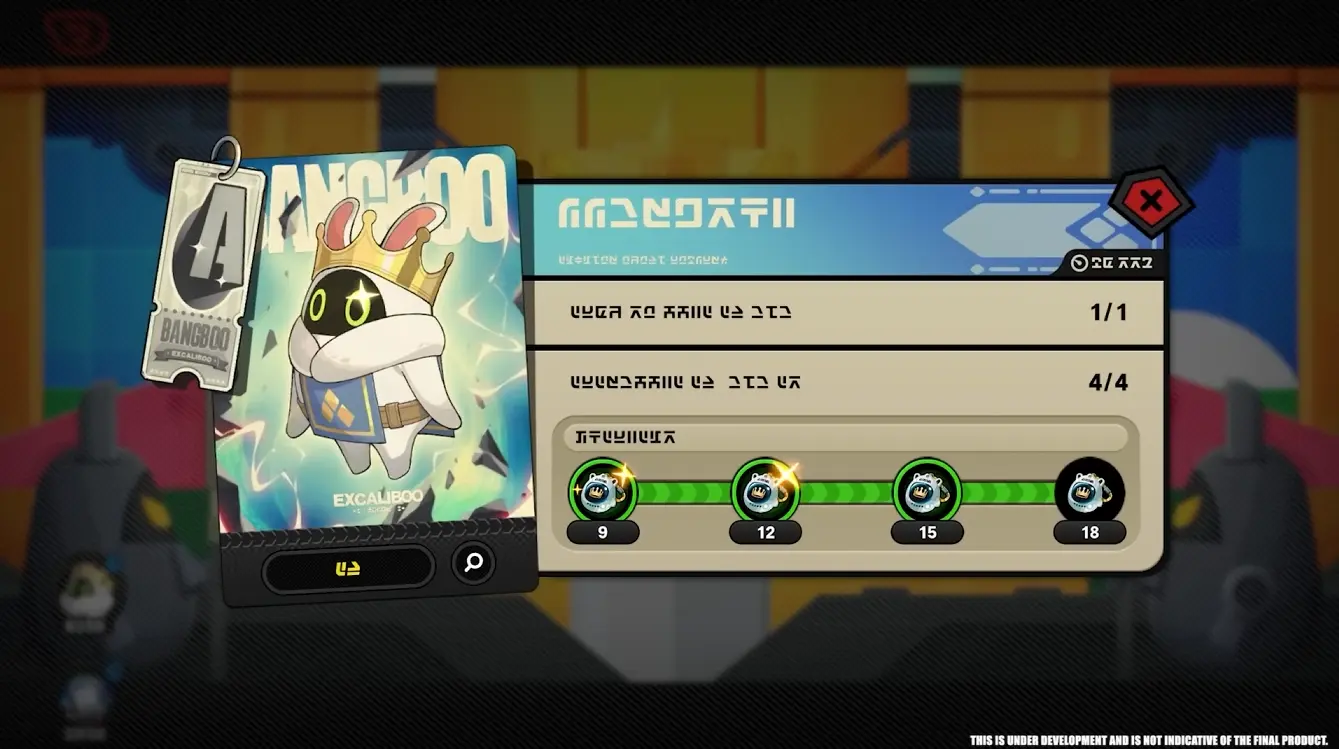
On top of that, this event rewards you with a new A-Rank Bangboo: ![]() Excaliboo!
Excaliboo!
Changelog
- 08 Sep. 2025: Event updated.
- 07 Sep. 2025: Event updated.
- 06 Sep. 2025: Event updated.
- 05 Sep. 2025: Event updated.
- 23 Aug. 2025: Guide added.
Written by Jaymo, a longtime gamer who spends way too many hours exploring open worlds, grinding in MMOs, and pulling for his favorite gacha characters. He covers news and guides for all kinds of games, and just likes helping people enjoy them more. You can find him hanging out on Twitch or chatting in Discord (jaym0).
- Celebrate ZZZ’s 2nd Anniversary With Free Polychromes Before 3.1
- Zenless Zone Zero’s Norma is Pure Bangboo Chaos in a Nutshell
- ZZZ Players Are Already Comparing Norma to Dialyn Before Her Release
- ZZZ’s Norma Trailer Gives Eous a Horror-Comedy Nightmare Before July 8
- ZZZ’s New Detective Event Sends Players After Polychromes on July 3
- ZZZ Players Found a Surprisingly Strong Velina Team That Ignores Her Biggest Synergy
- Zenless Zone Zero Season 3 Pre-Download Is Live
- Zenless Zone Zero Season 3 Is Giving Away Free Pre-Anniversary Rewards