Trace 'n' Drift Event Guide for Honkai: Star Rail
Trace 'n' Drift is a Version 3.3 Limited-Time Event. Follow our guide to learn more about the Trace 'n' Drift Event, how to complete it, and the rewards you can obtain from it!
Trace 'n' Drift Event Guide for Honkai: Star Rail
This event ran from June 11th to June 30th, 2025 at 03:59:00 (Server Time).
Trace 'n' Drift is a limited-time event. This means all of the event rewards are available for a limited-time only, and are not obtainable anymore after the event ended.
Trace 'n' Drift Event Calendar for Honkai: Star Rail
What is the Trace 'n' Drift Event About?
Trace 'n' Drift is a limited-time event. Co-hosted by the IPC and The Family from Penacony, the "Speed Cup" Spheroid Speed Tournament is now officially open for registration! Race against other competitive drivers in your shiny Spheroid racers and win the Grand Finale!
How do you Participate in the Trace 'n' Drift Event?
In order to participate in the Trace 'n' Drift event, you need to reach Trailblaze Level 21 and complete the Trailblaze Mission: Seabiscuit located in Penacony.
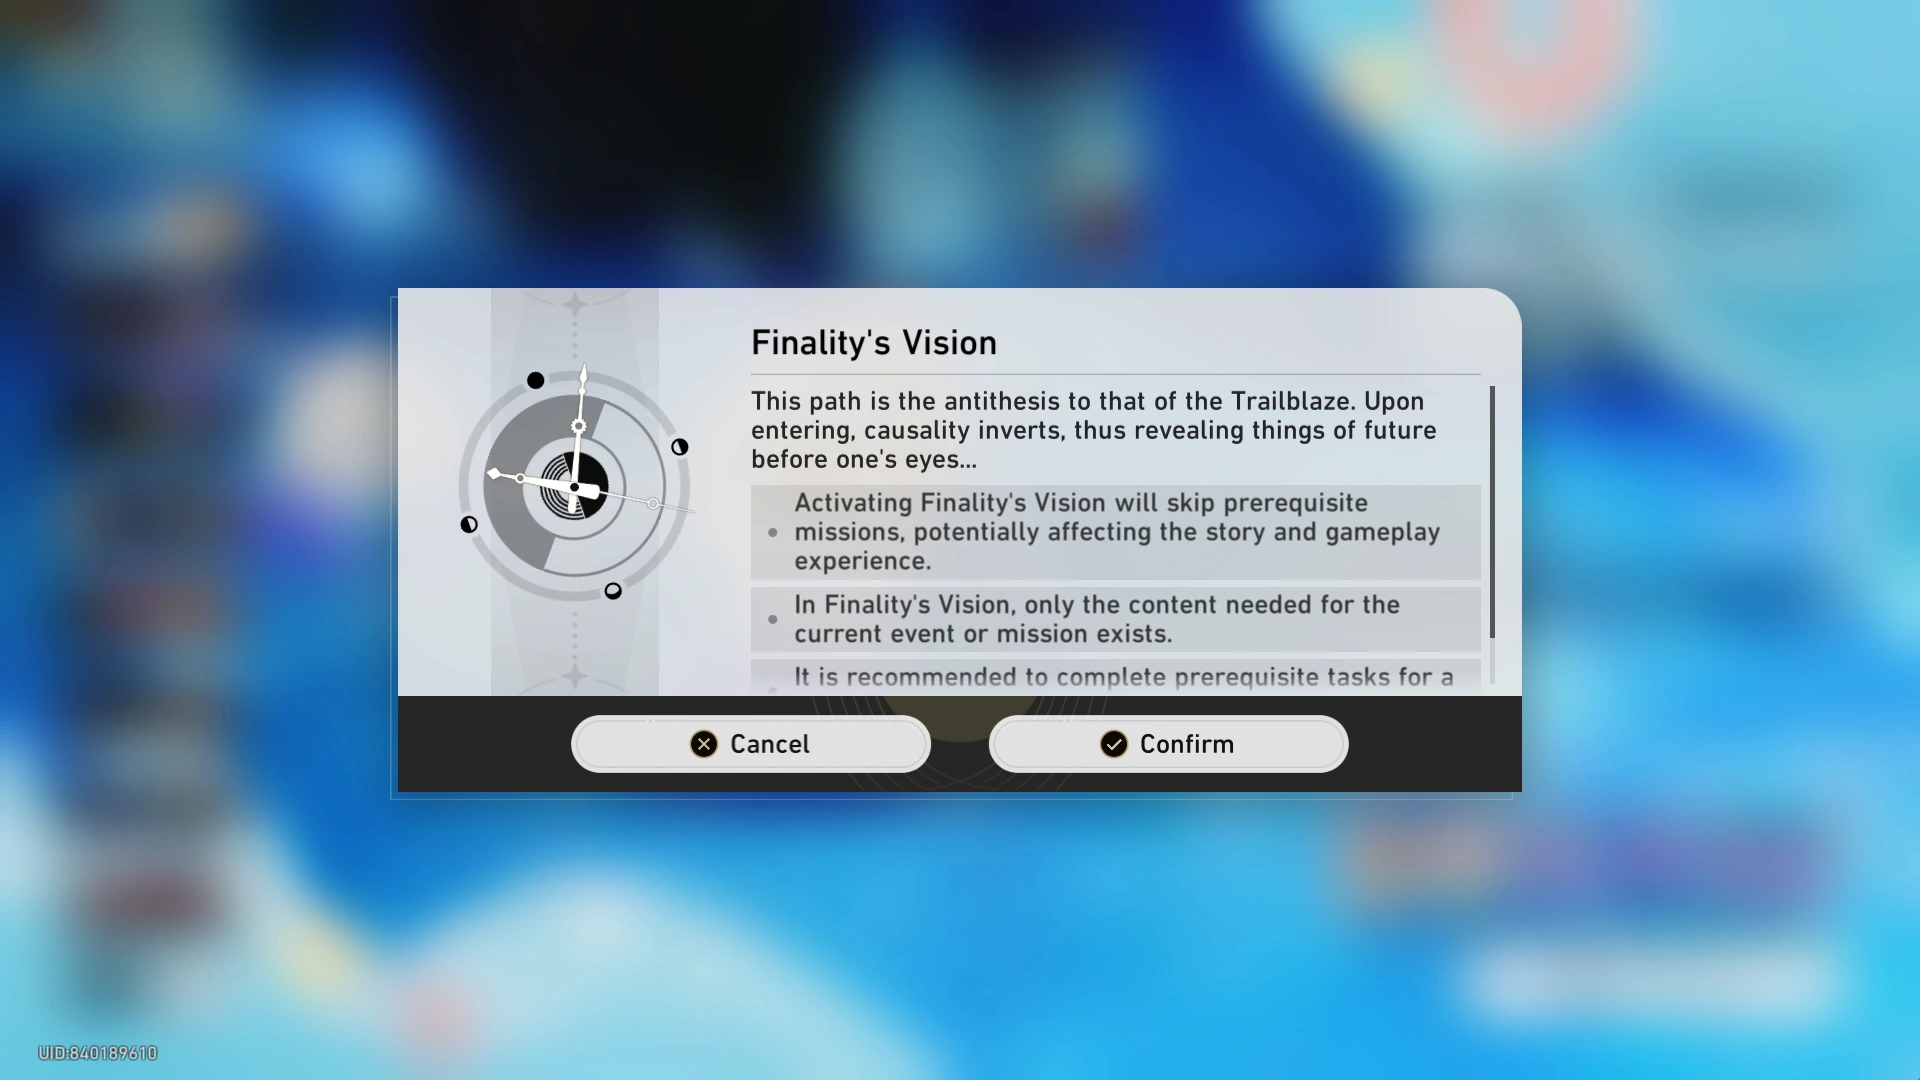
During the limited-time period, players may activate Finality's Vision in order to play the event early. However, you may encounter story spoilers, so it is highly recommended to only do so if you feel like you will not complete the event before the limited-time rewards expire.
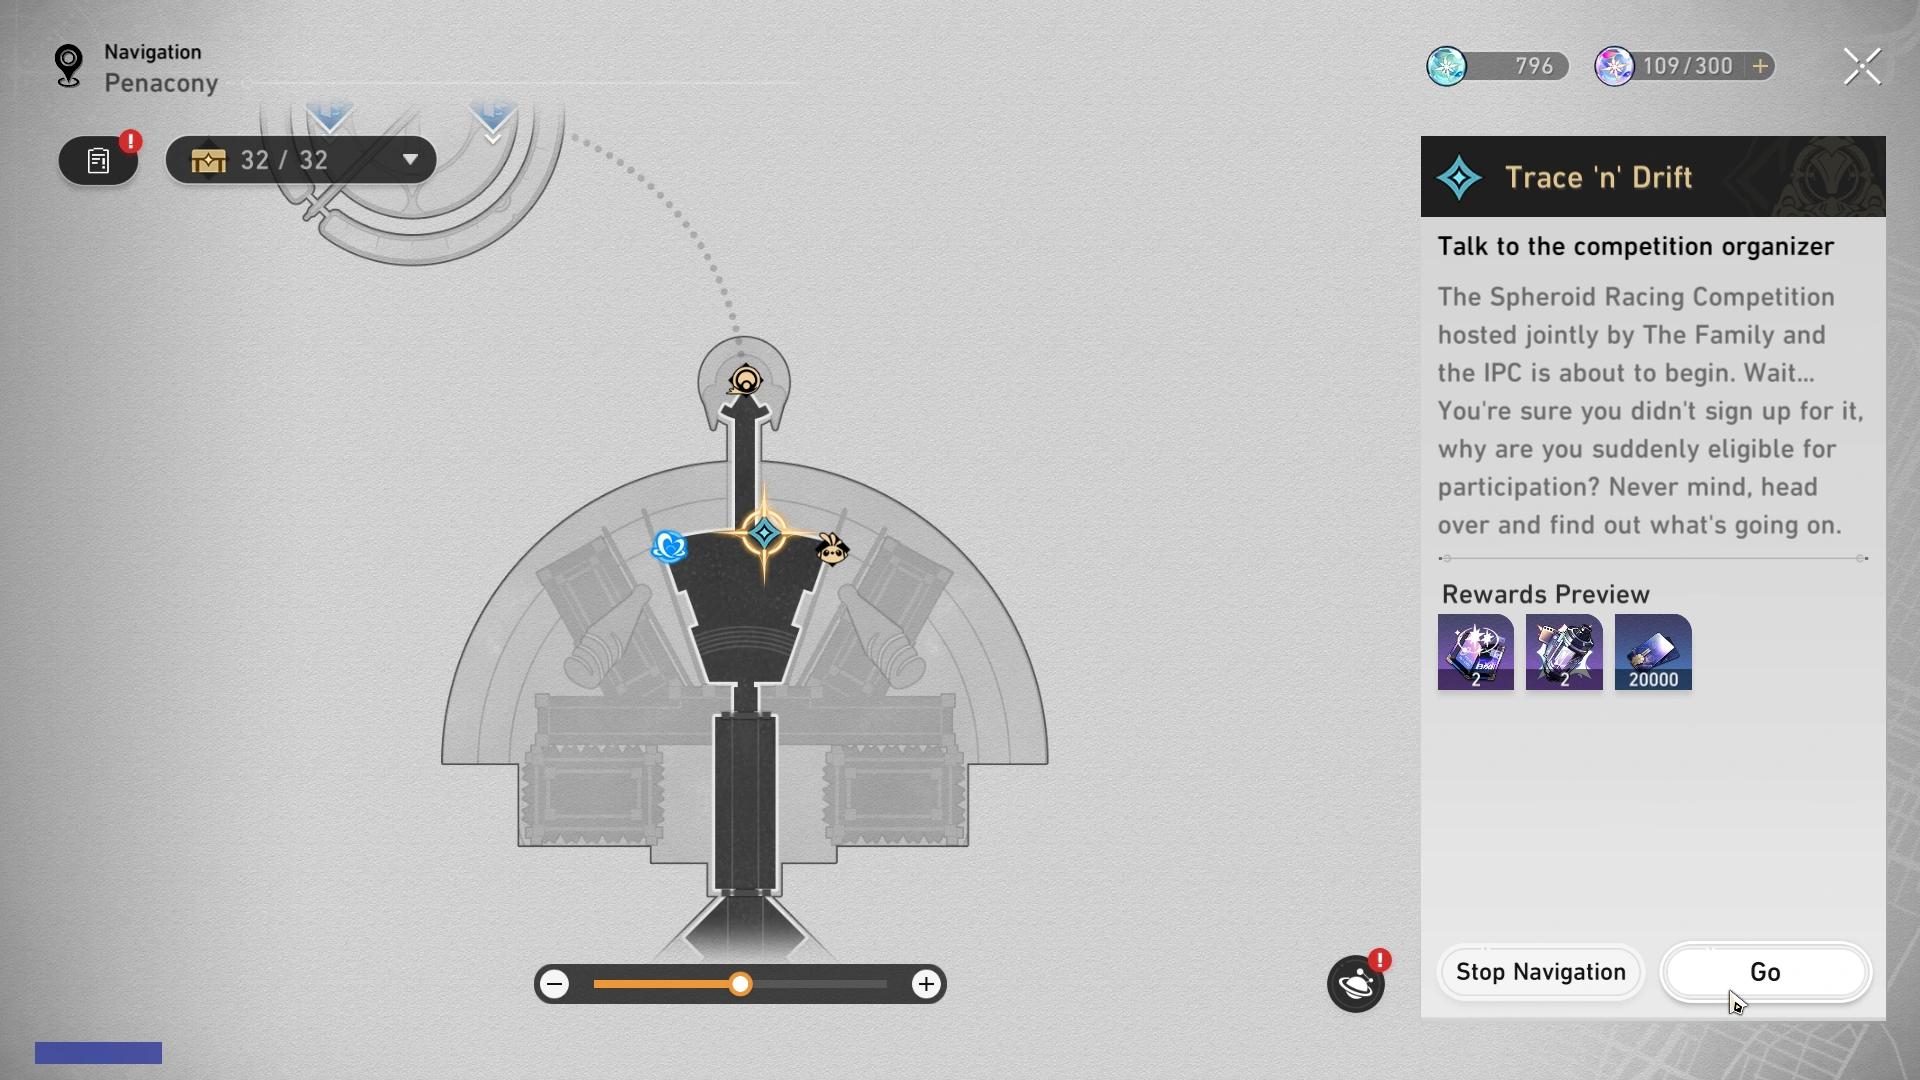
To get started, teleport directly to Penacony via the Trace 'n' Drift quest, or navigate to the SoulGlad Scorchsand Audition Venue's Bud of The Hunt Crimson Calyx. From there, speak with the nearby Competition Organizer NPC to begin the tutorial.
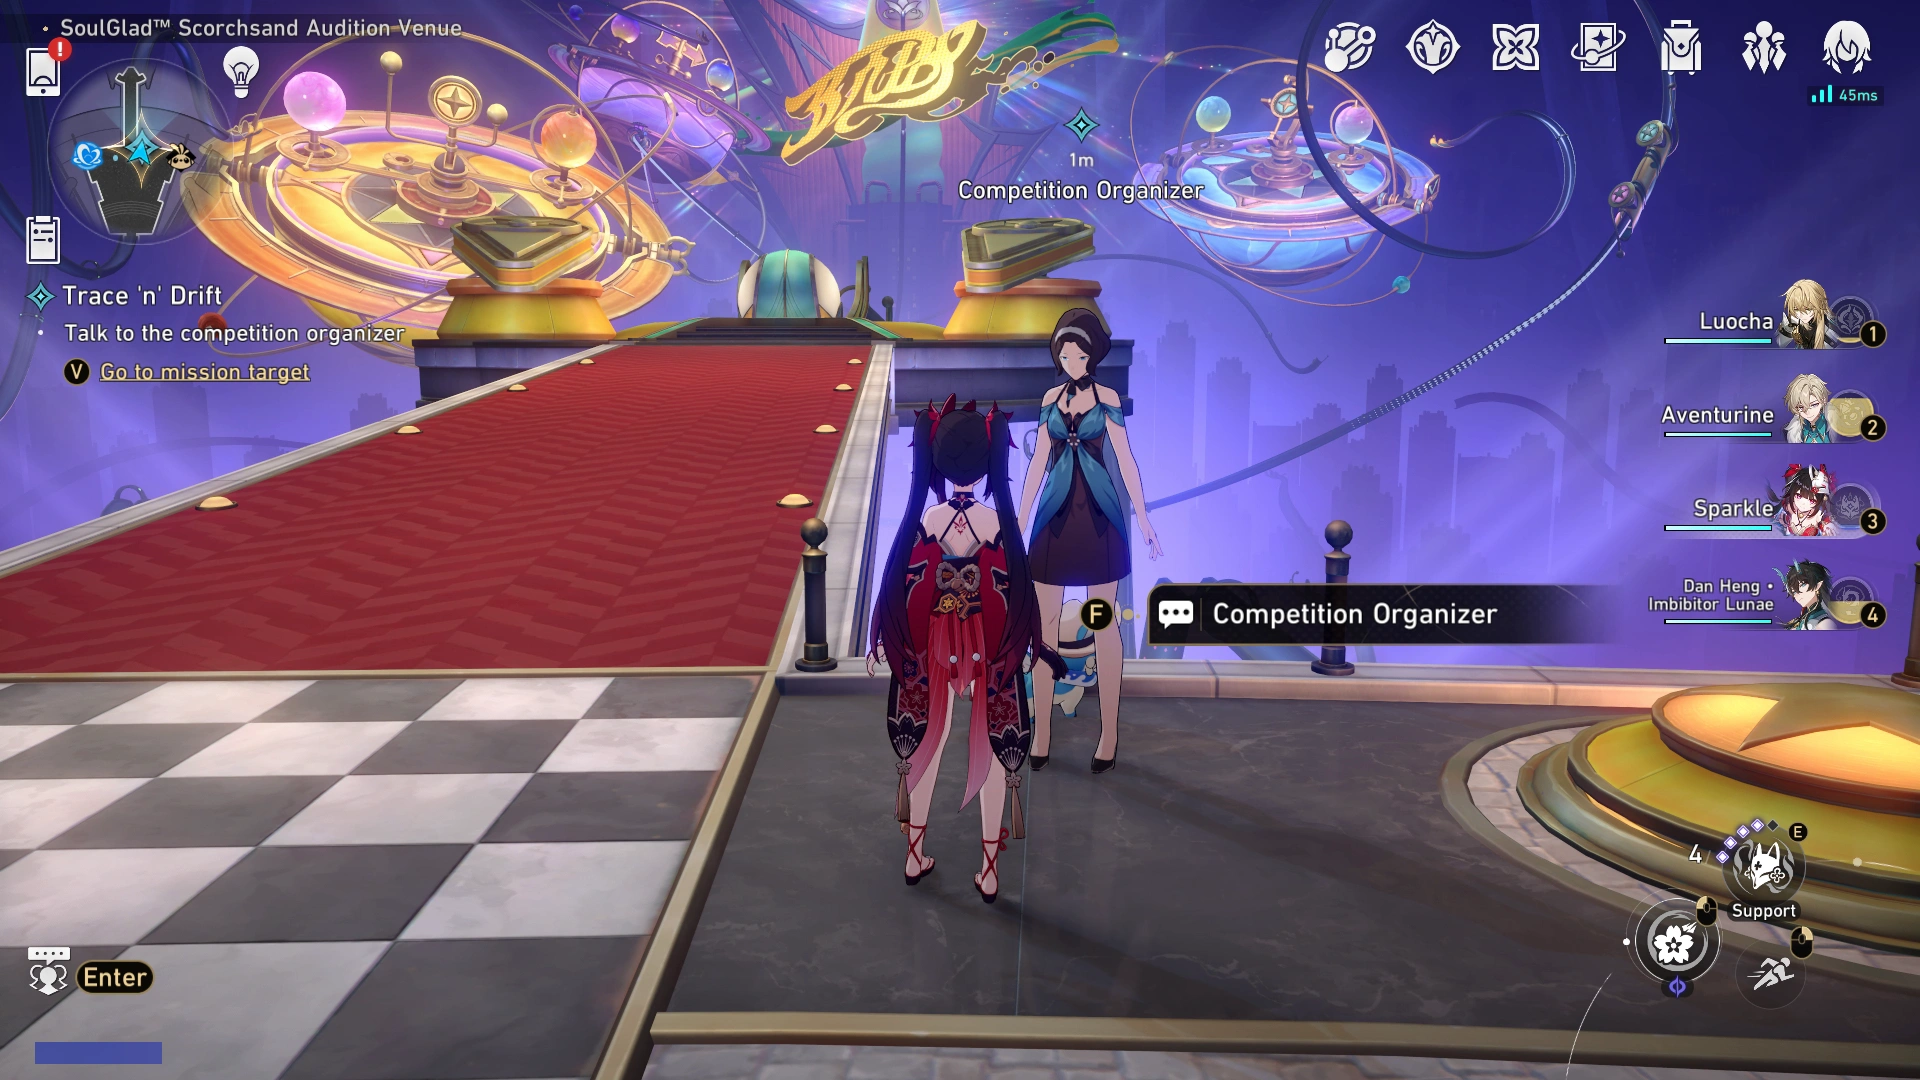
Progress through the quest for a tutorial on how to play. When you are done, interact with the Competition Organizer again to begin the Event. See the How to Play section for any additional clarifications.
Trace 'n' Drift Guide
Gameplay Overview
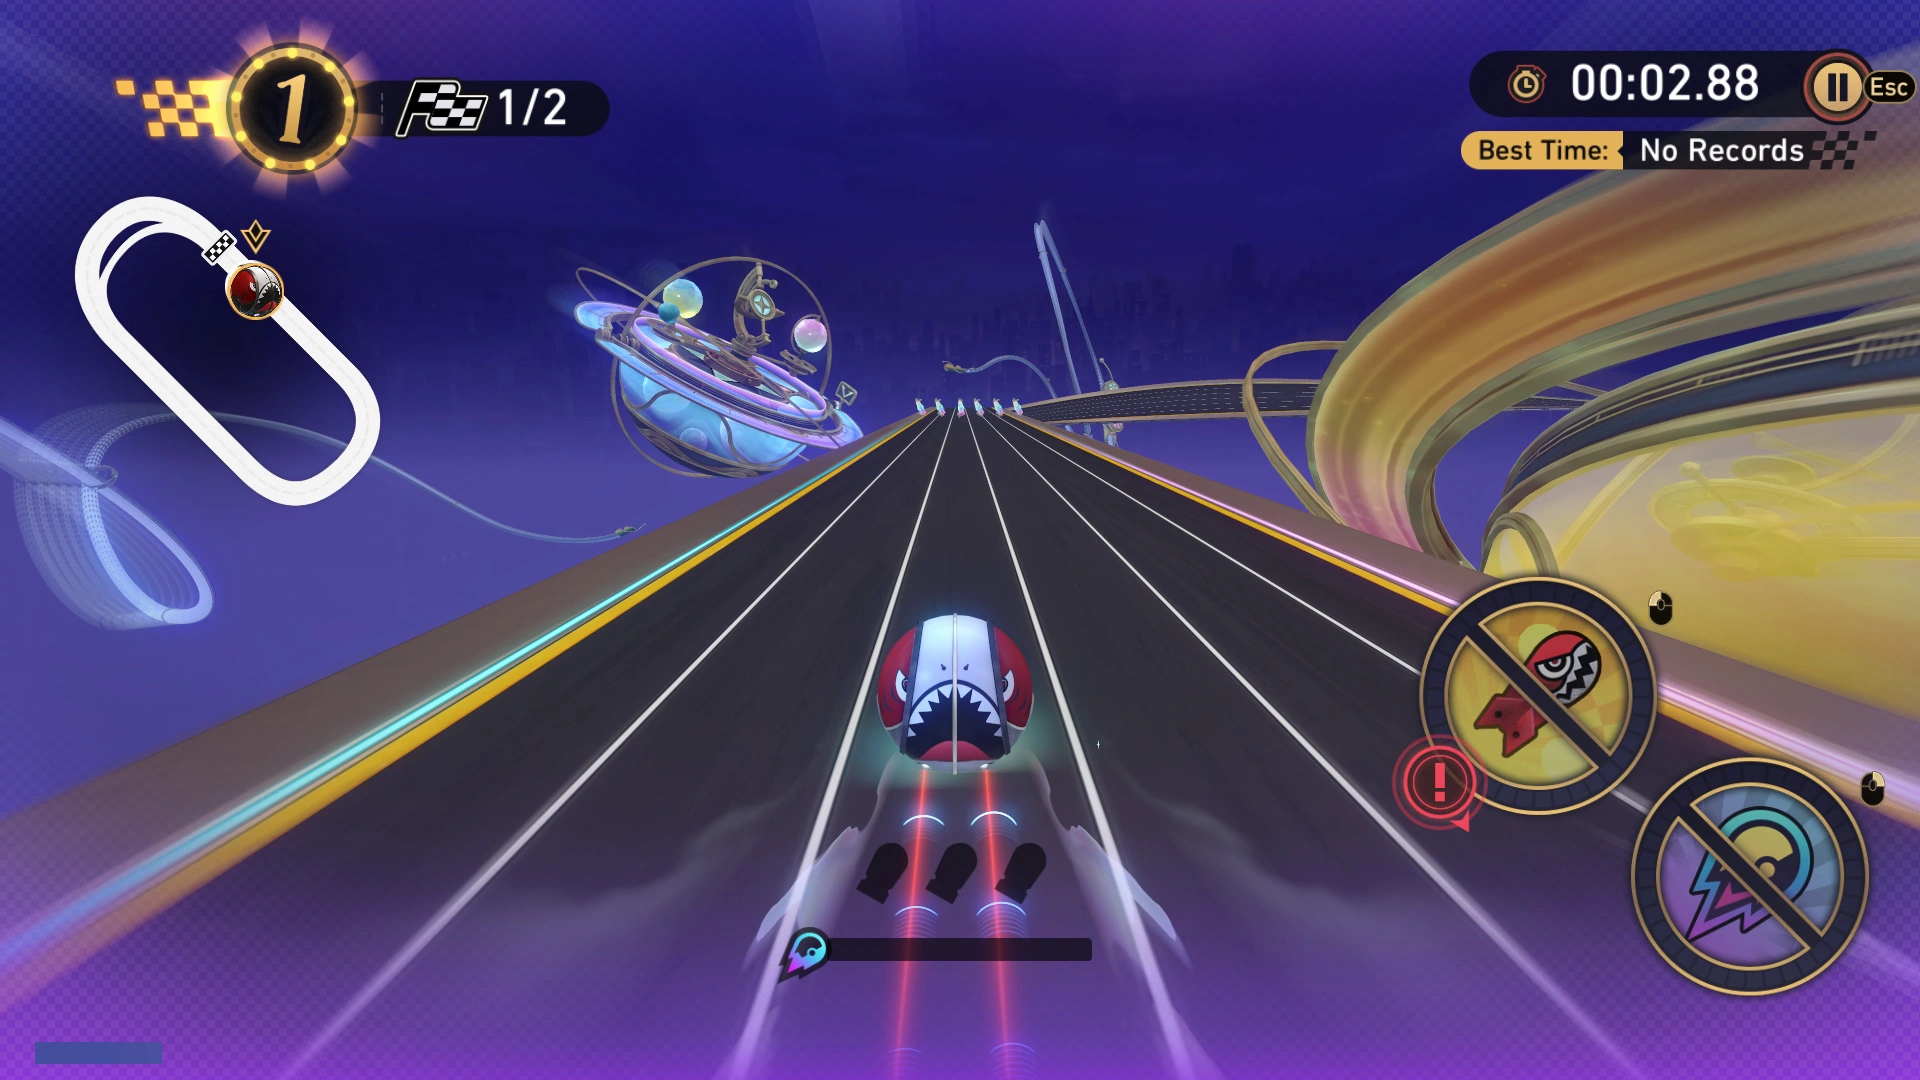
Your goal in each race is to finish all of the laps in the fastest time possible. The key to winning is knowing what parts of the racetrack will help your Spheroid racer succeed.
To control the Spheroid race car, you can swap track lanes left and right. The race car cannot manually accelerate, but there are ways to boost your speed or stability listed below.
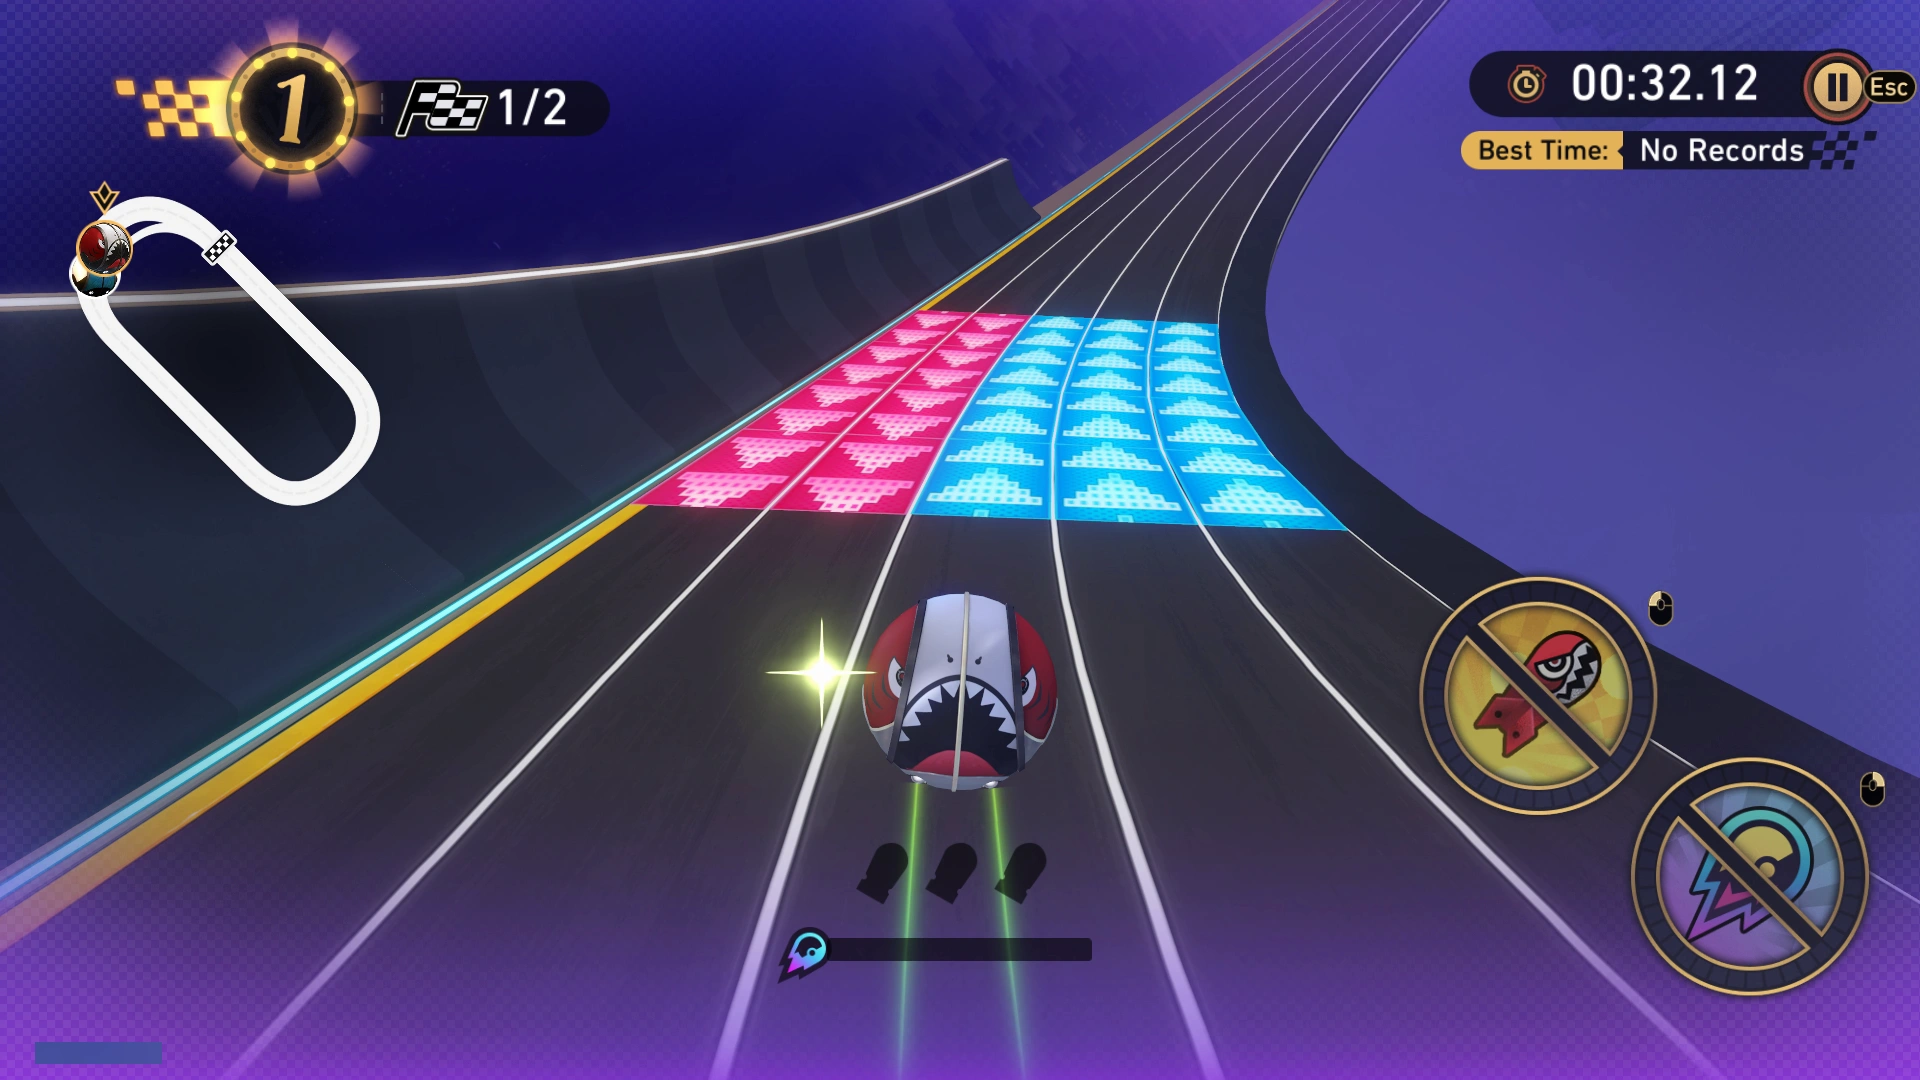
As you race, you will encounter blue Acceleration Zones and red Deceleration Zones. Passing through an Acceleration Zone will temporarily increase your Speed, while the Deceleration Zones will decrease it instead.
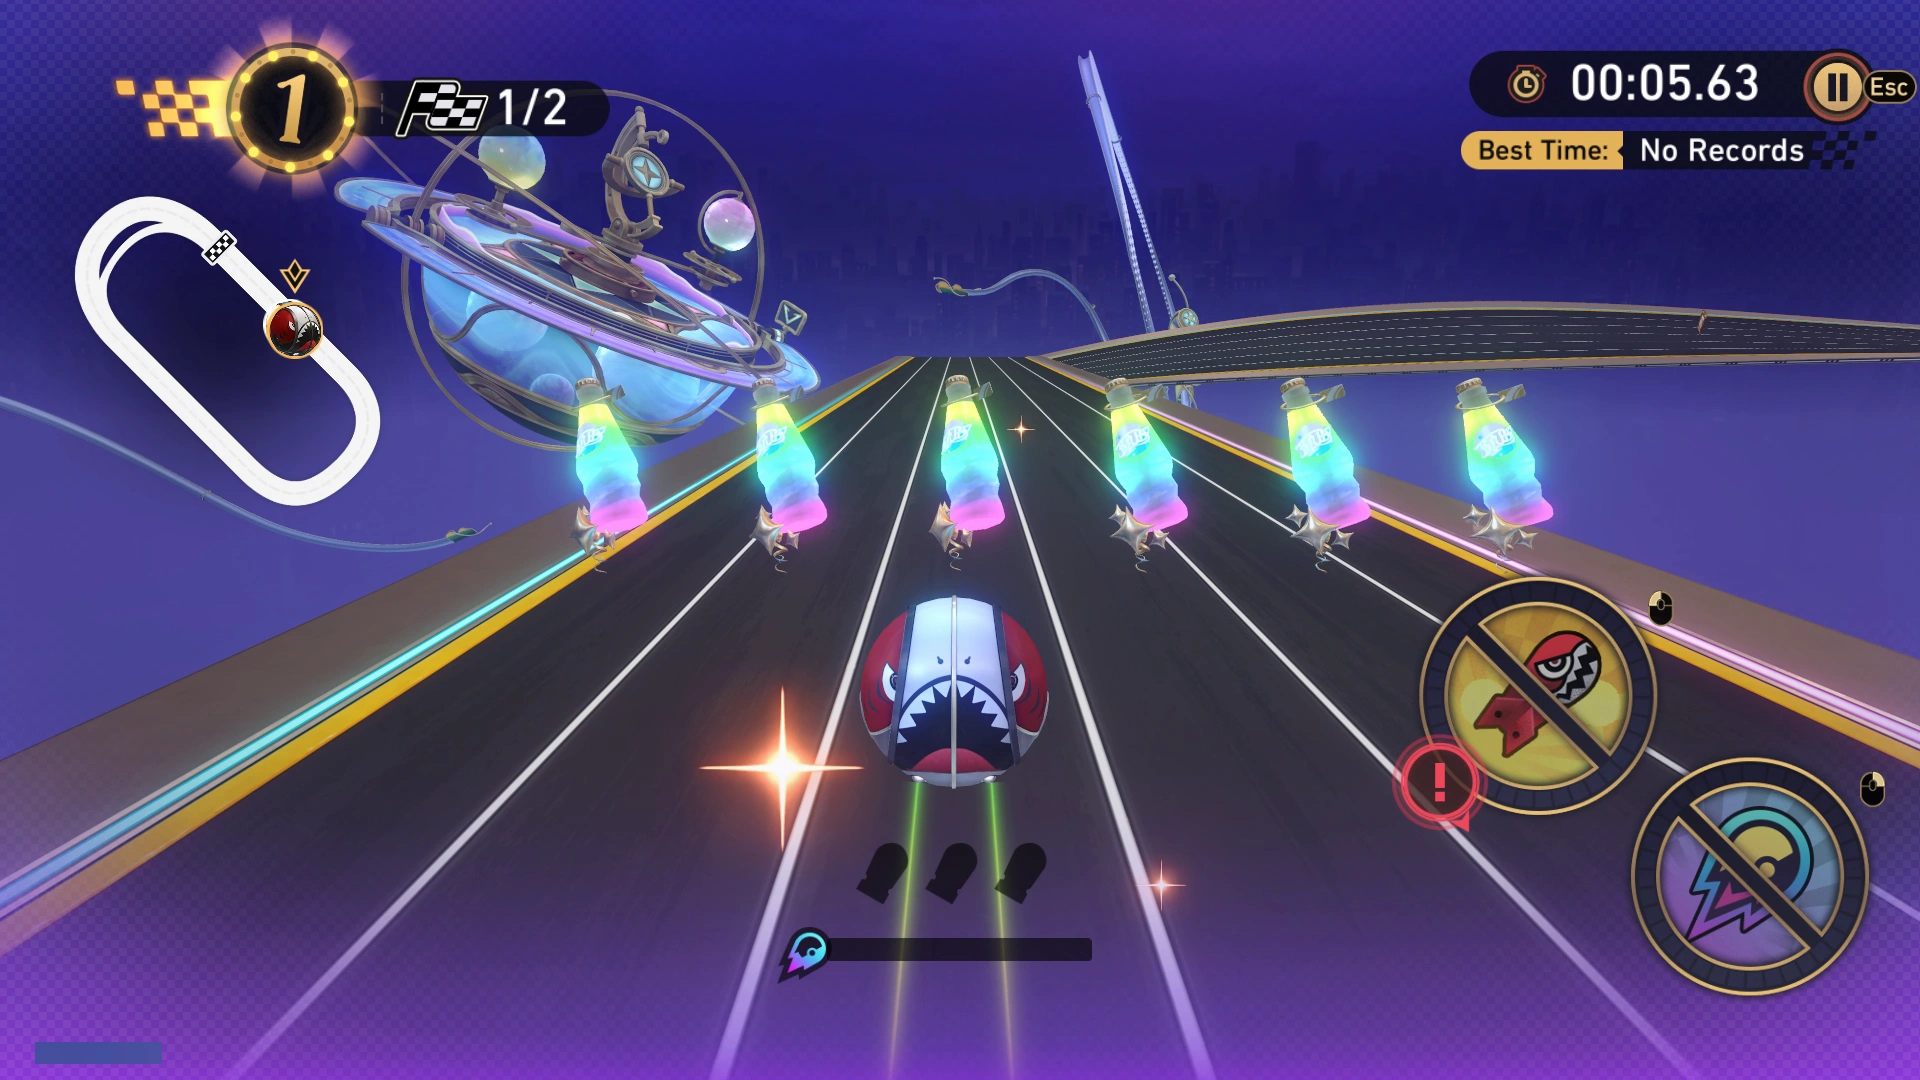
These are Speed Boost Bottles; when used, they can increase your speed for a short period. They will fill your Speeding Energy Gauge at the bottom of the screen, which indicates how long the speed boost will last.
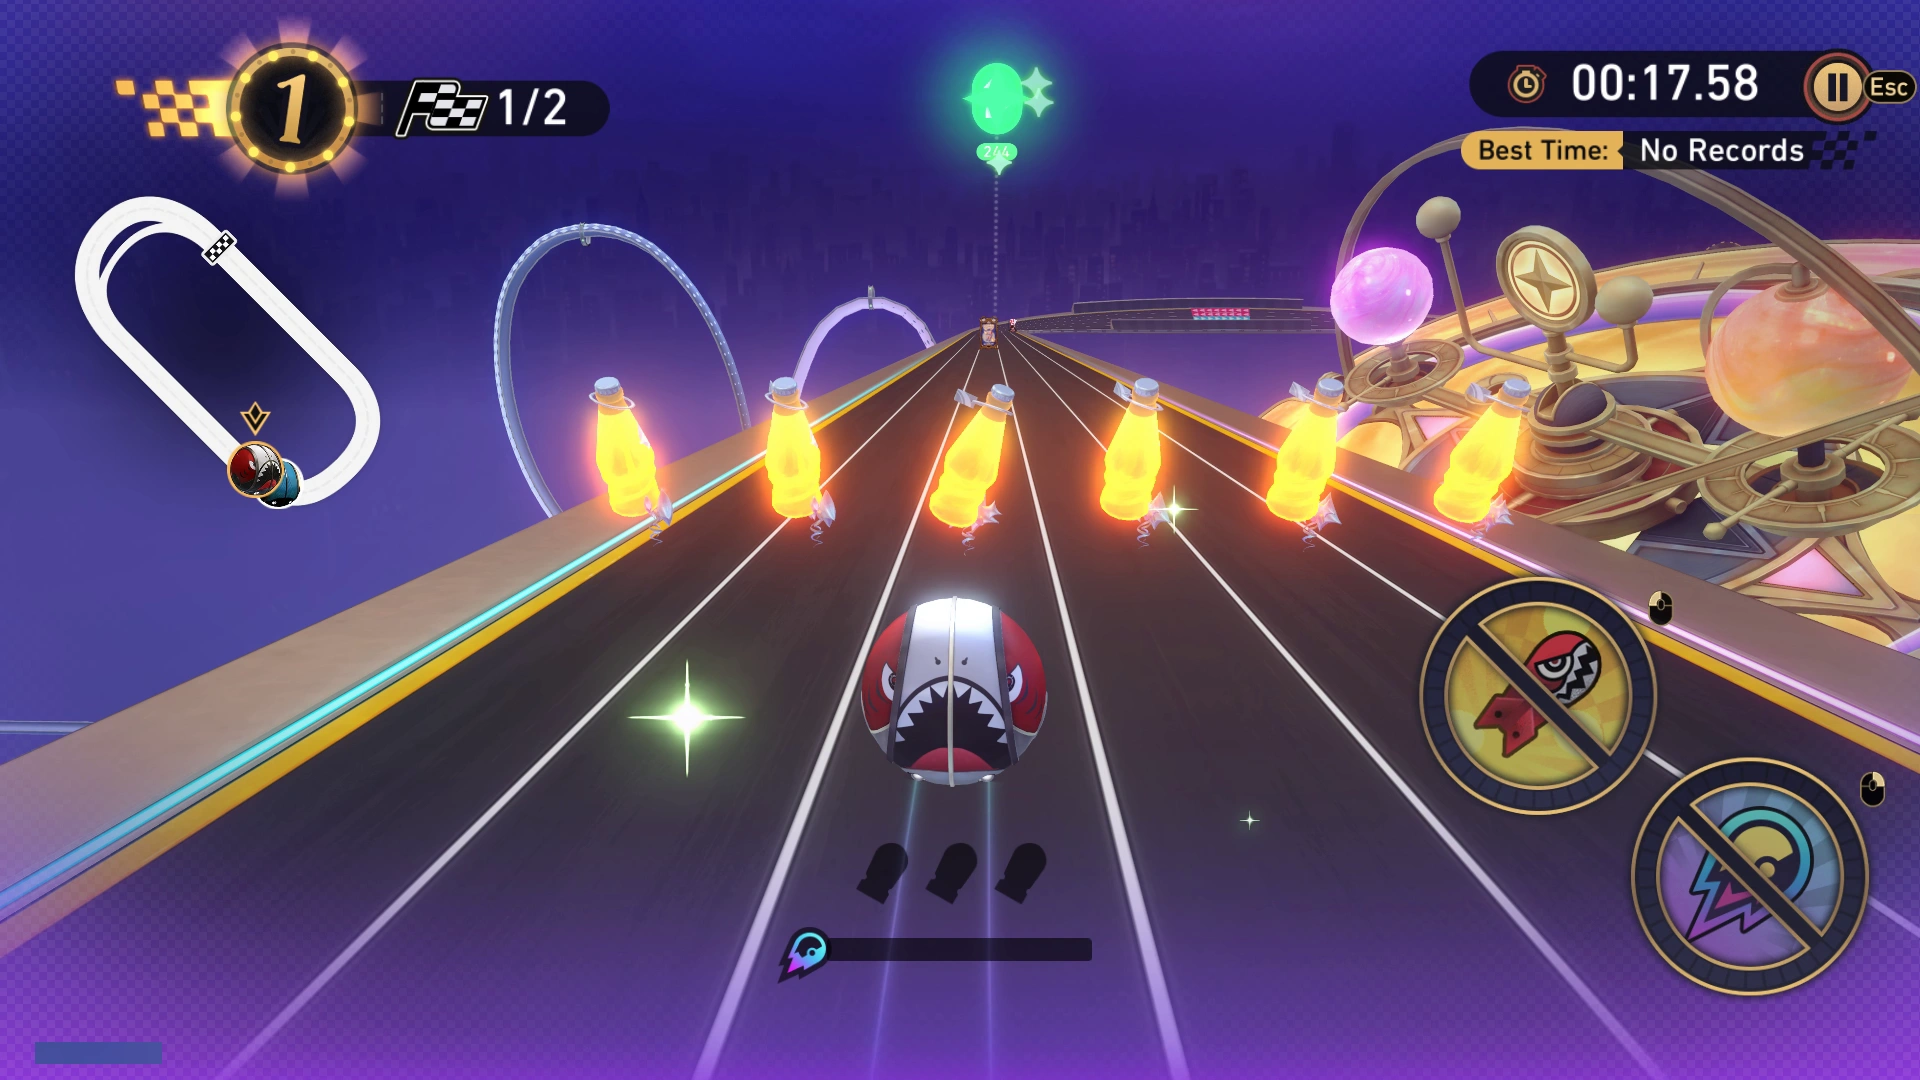
These are Skill Bottles; when used, they add one Skill Point for you to use. Every Spheroid racer can save up to three Skill Bottles before the Skill Bar cannot hold anymore. Each Spheroid racer has different Skills to use, so try them out when you can!
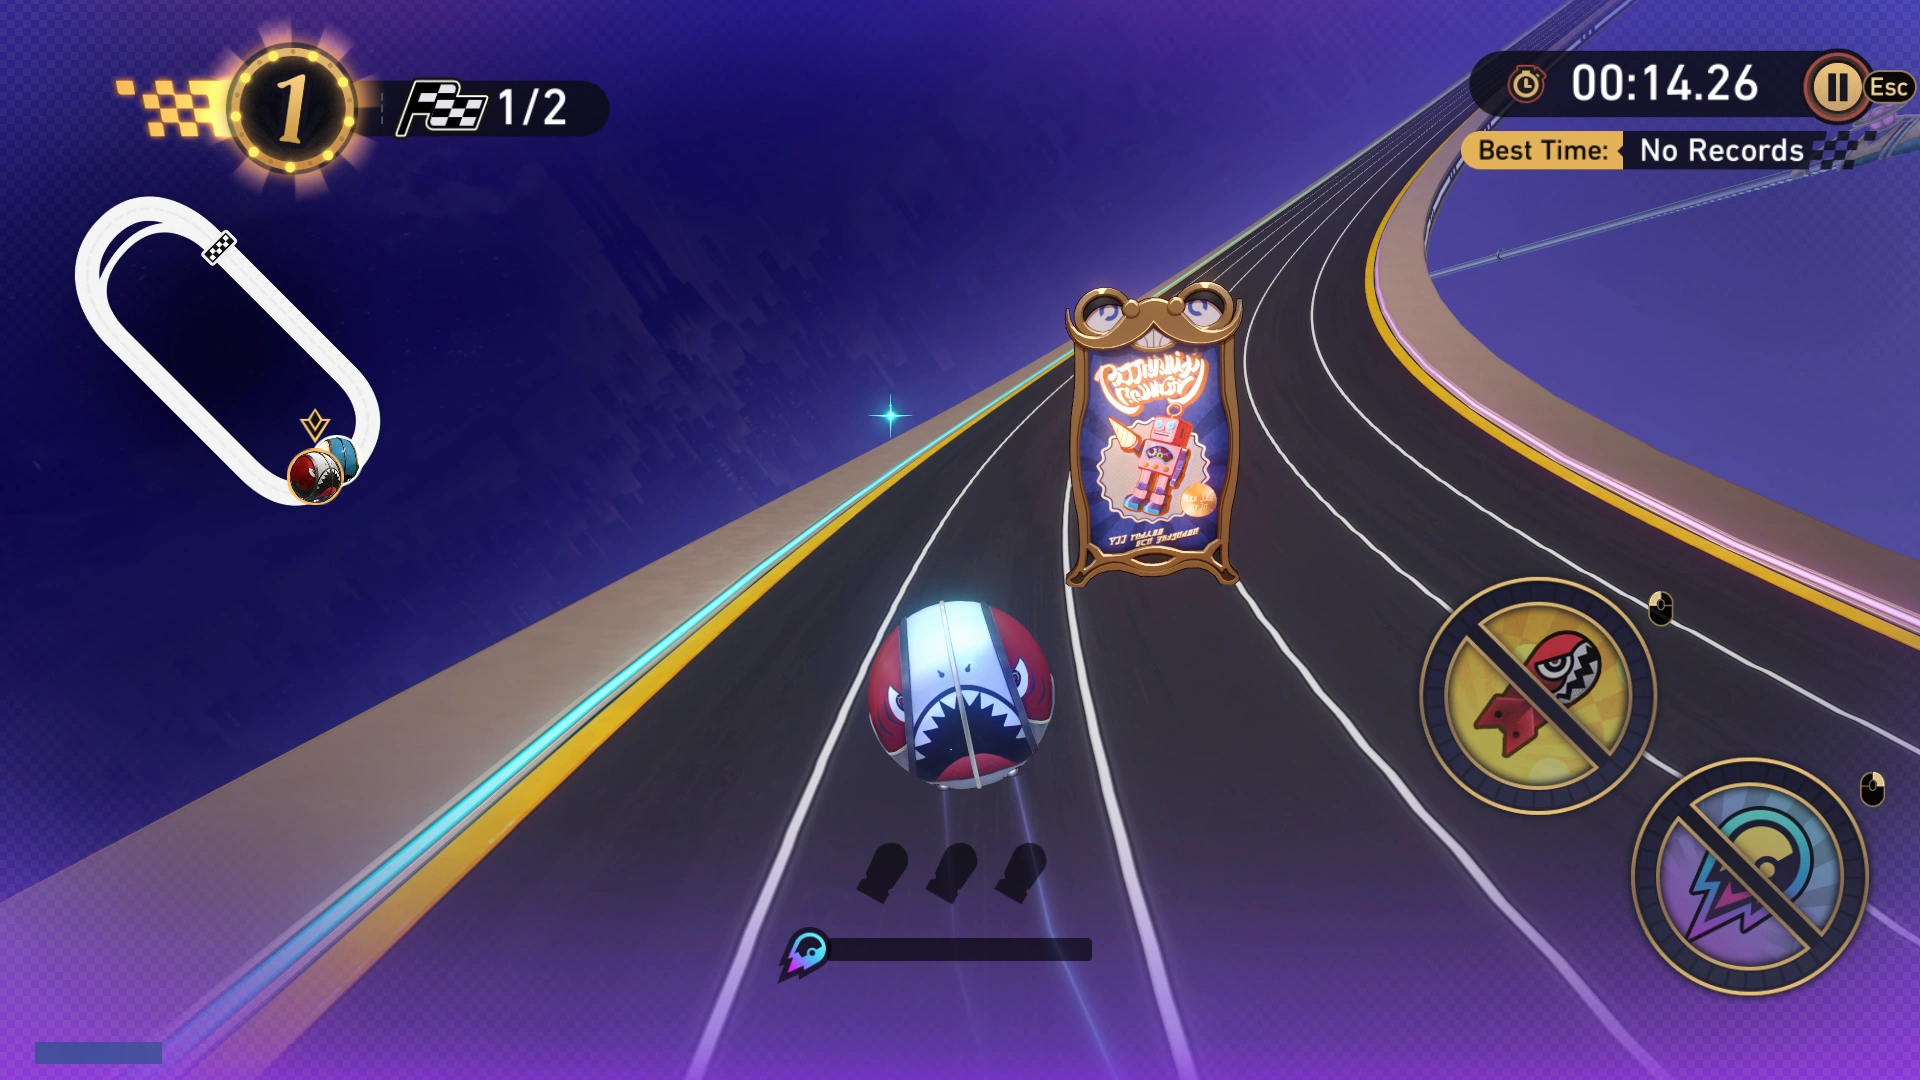
Billboards can move across different lanes. If your Spheroid racer drives into a Billboard, you will be temporarily Slowed and need to ramp up the speed again. They can be knocked down temporarily.
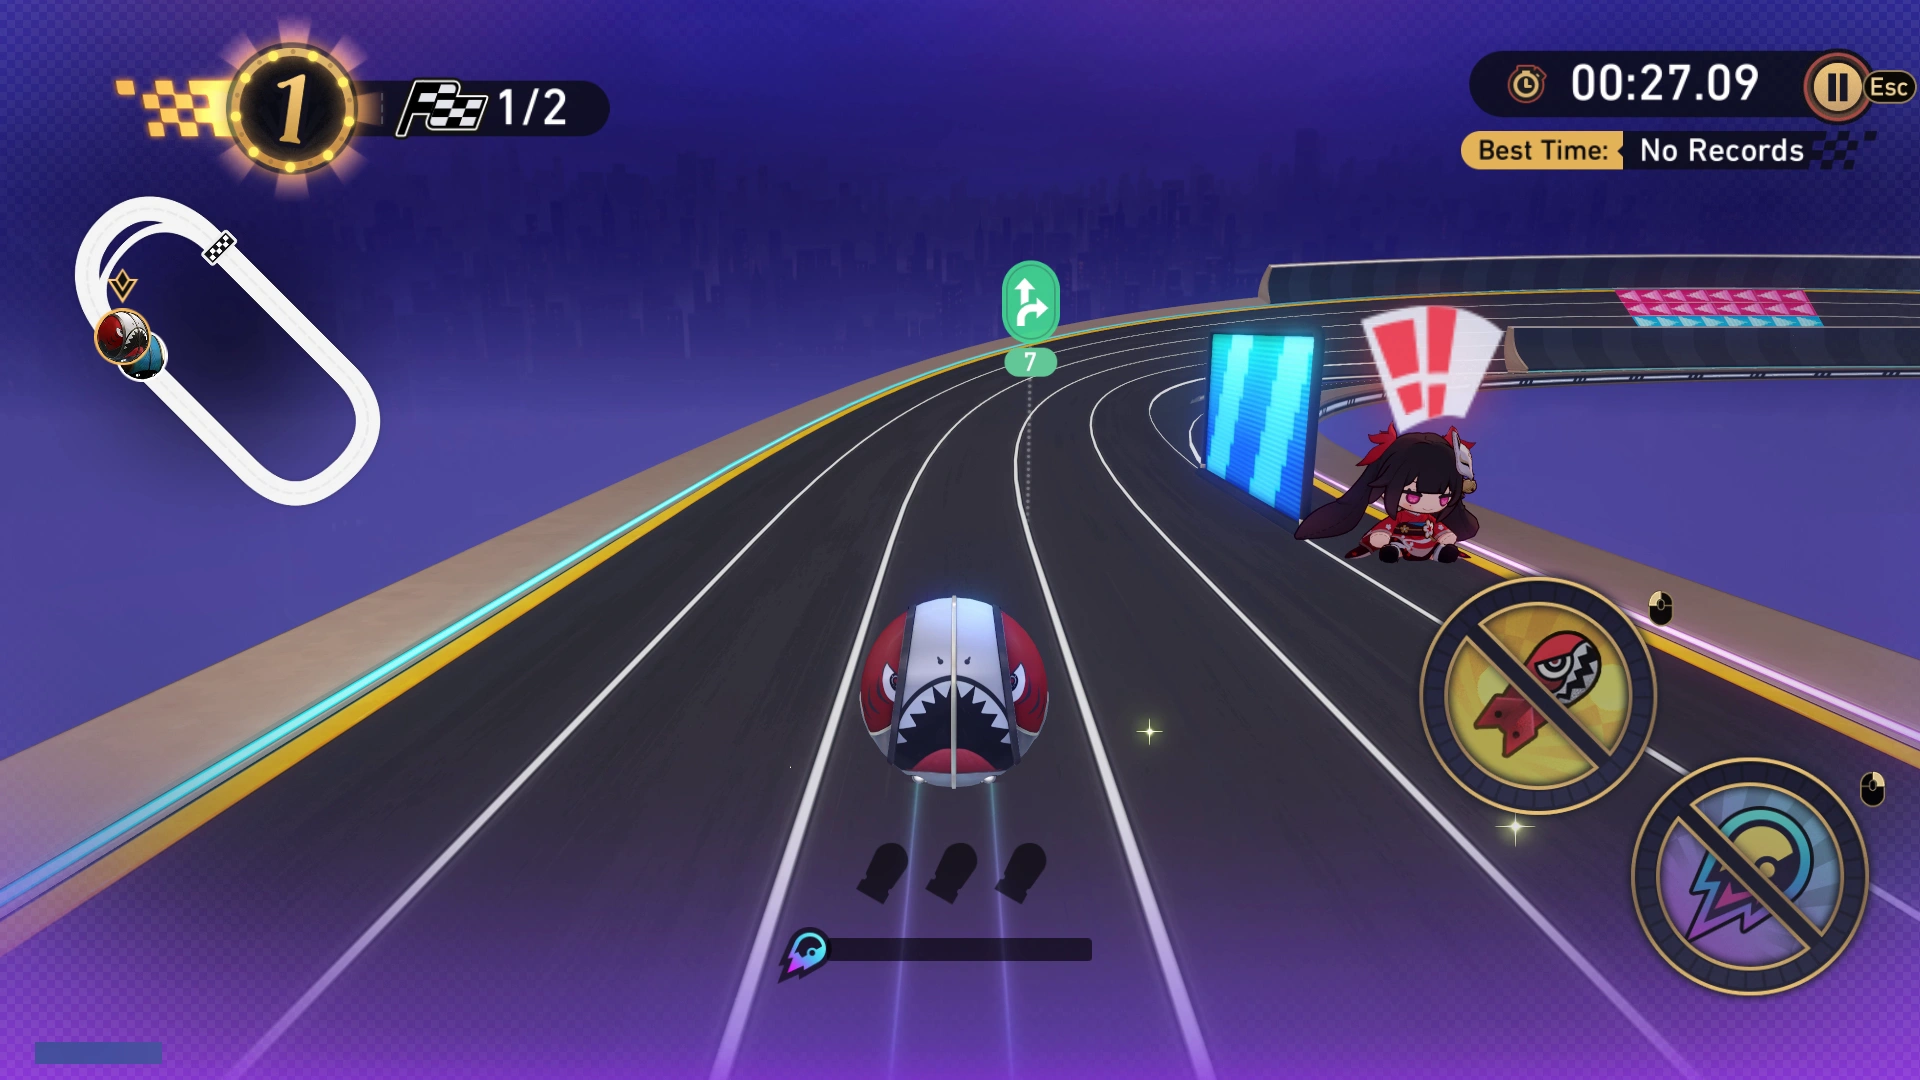
In addition, there are also Unidentified Dolls placed on the racetrack. If you run into them, the Spheroid racer will lose control and become Stunned. However, these Unidentified Dolls may be hiding a secret shortcut or Acceleration Zone, so it may be good to destroy them...
Your ultimate goal on each racetrack is to meet the Challenge Goal by placing in the top ranks. The faster the time you took to finish the race, the better your rank will be. You can always challenge the racetrack again for a better time!
Types of Spheroid Racers
As you compete in the Speed Cup Tournament, you will progressively gain access to various Spheroid racer models to drive in. When you have won the Grand Finale, you will be able to race with any of the models below:
| Model Name | Parameters | Skill | How to Unlock |
|---|---|---|---|
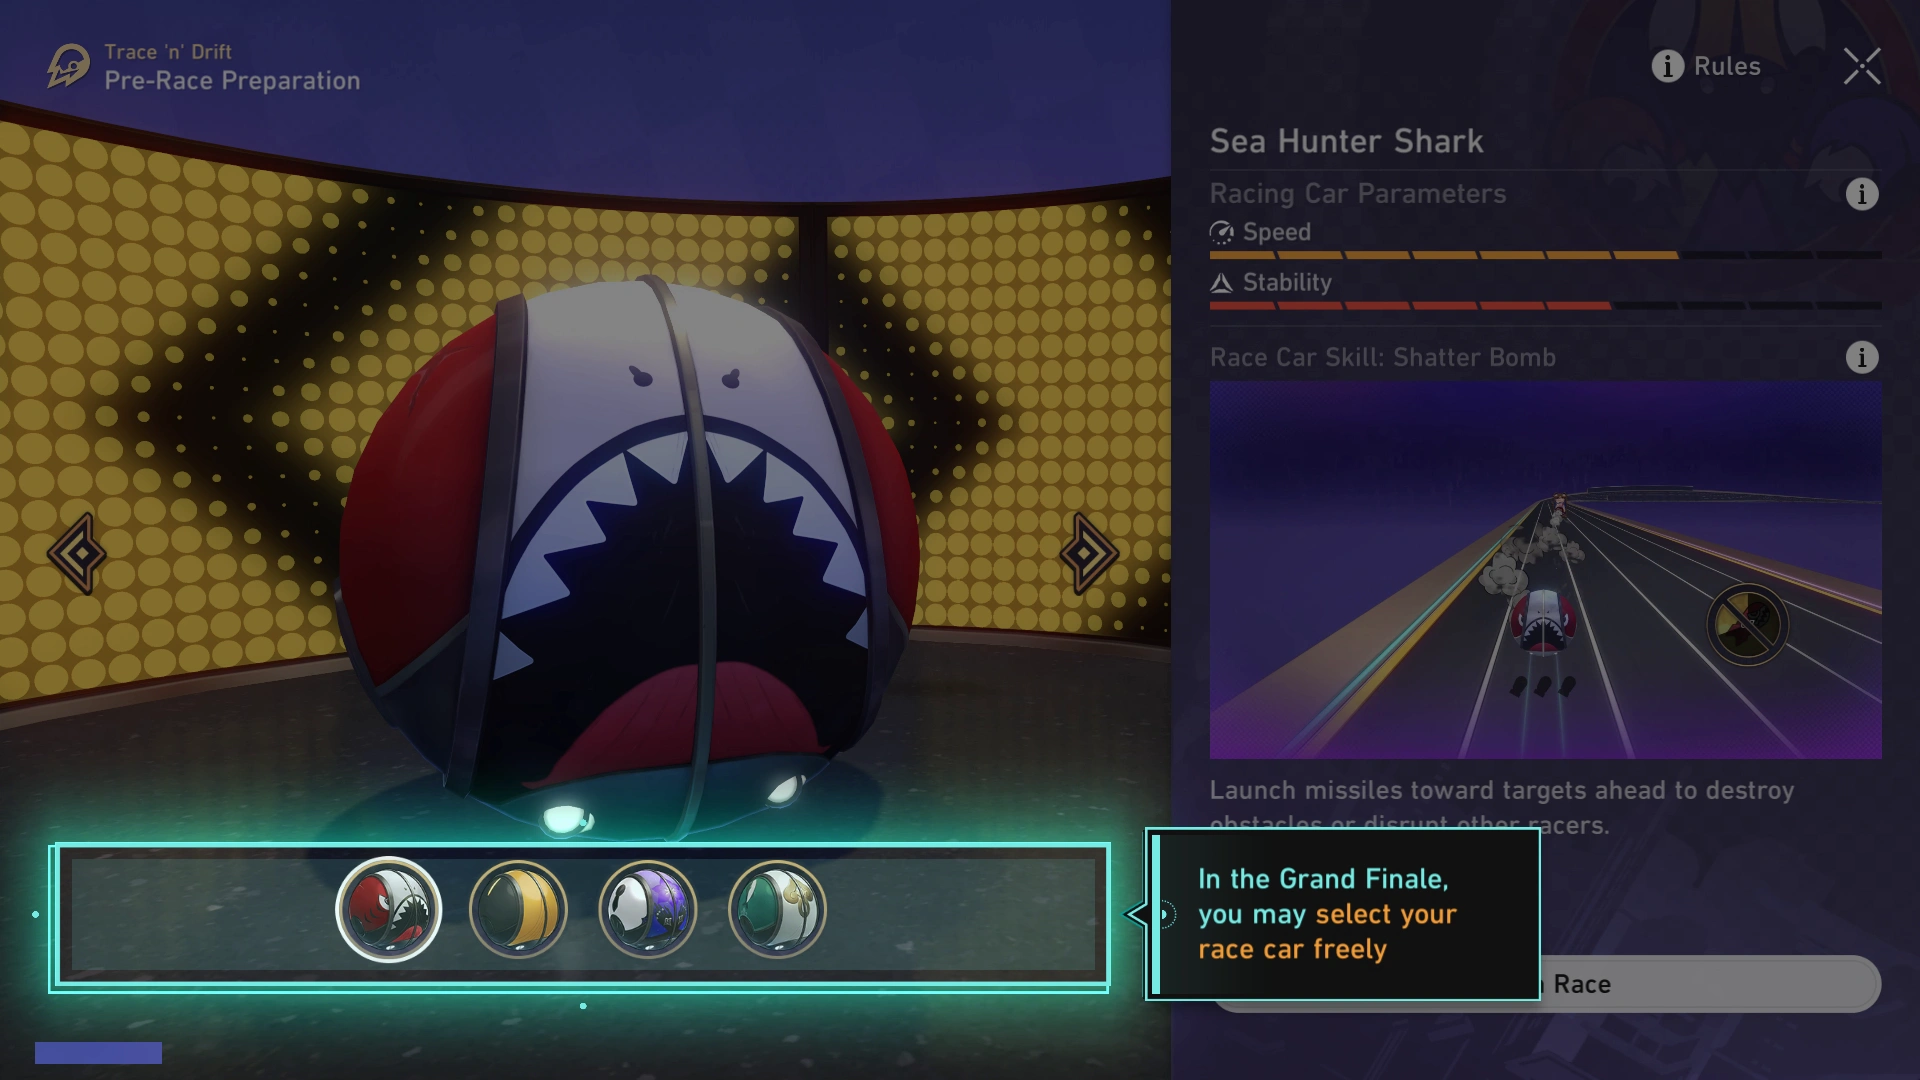
| Sea Hunter Shark |
|
Launch Shatter Bomb missiles to destroy obstacles or stun other racers. | Clear the Trial Tutorial |
| Trailblazer |
|
Increases Speed and maintains Maximum Speed for a period of time. | Place Top 3 in Qualifier Round 1 - II |
| "The Hertadore" (Abbr.) |
|
Becomes invincible and gains Speed for a period of time. Duration extends when colliding into obstacles or race cars. | Place Top 3 in Qualifier Round 2 - II |
| Thirteen Orphans |
|
Randomly picks one of the following effects: No Effect, Invincible, Speed Boost, and Invincible with Speed Boost. | Place Top 3 in Qualifier Round 3 - II |
| Trailblazer (Epic-Grade) |
|
Increases Speed and maintains Maximum Speed for a period of time. Replaces the original race car model. | Place First in Grand Finale Round 3 |
As a note on what the Spheroid racer parameters mean:
- The higher the race car's Speed, the faster it can race.
- The higher the race car's Stability, the faster it recovers from being Slowed.
Challenge Races
After clearing the Grand Finale racetracks for the Tournament, you can enter the Challenge Races to place on the Challenge Leaderboard.
The Challenge Races will use the same racetracks from the Grand Finale, including the locations for Obstacles, Bottles, and Zones. In addition, players can also choose which Spheroid racer model they want to place with. However, the easiest race car to place First is the Exclusive Trailblazer Model due to its maximum Speed parameter.
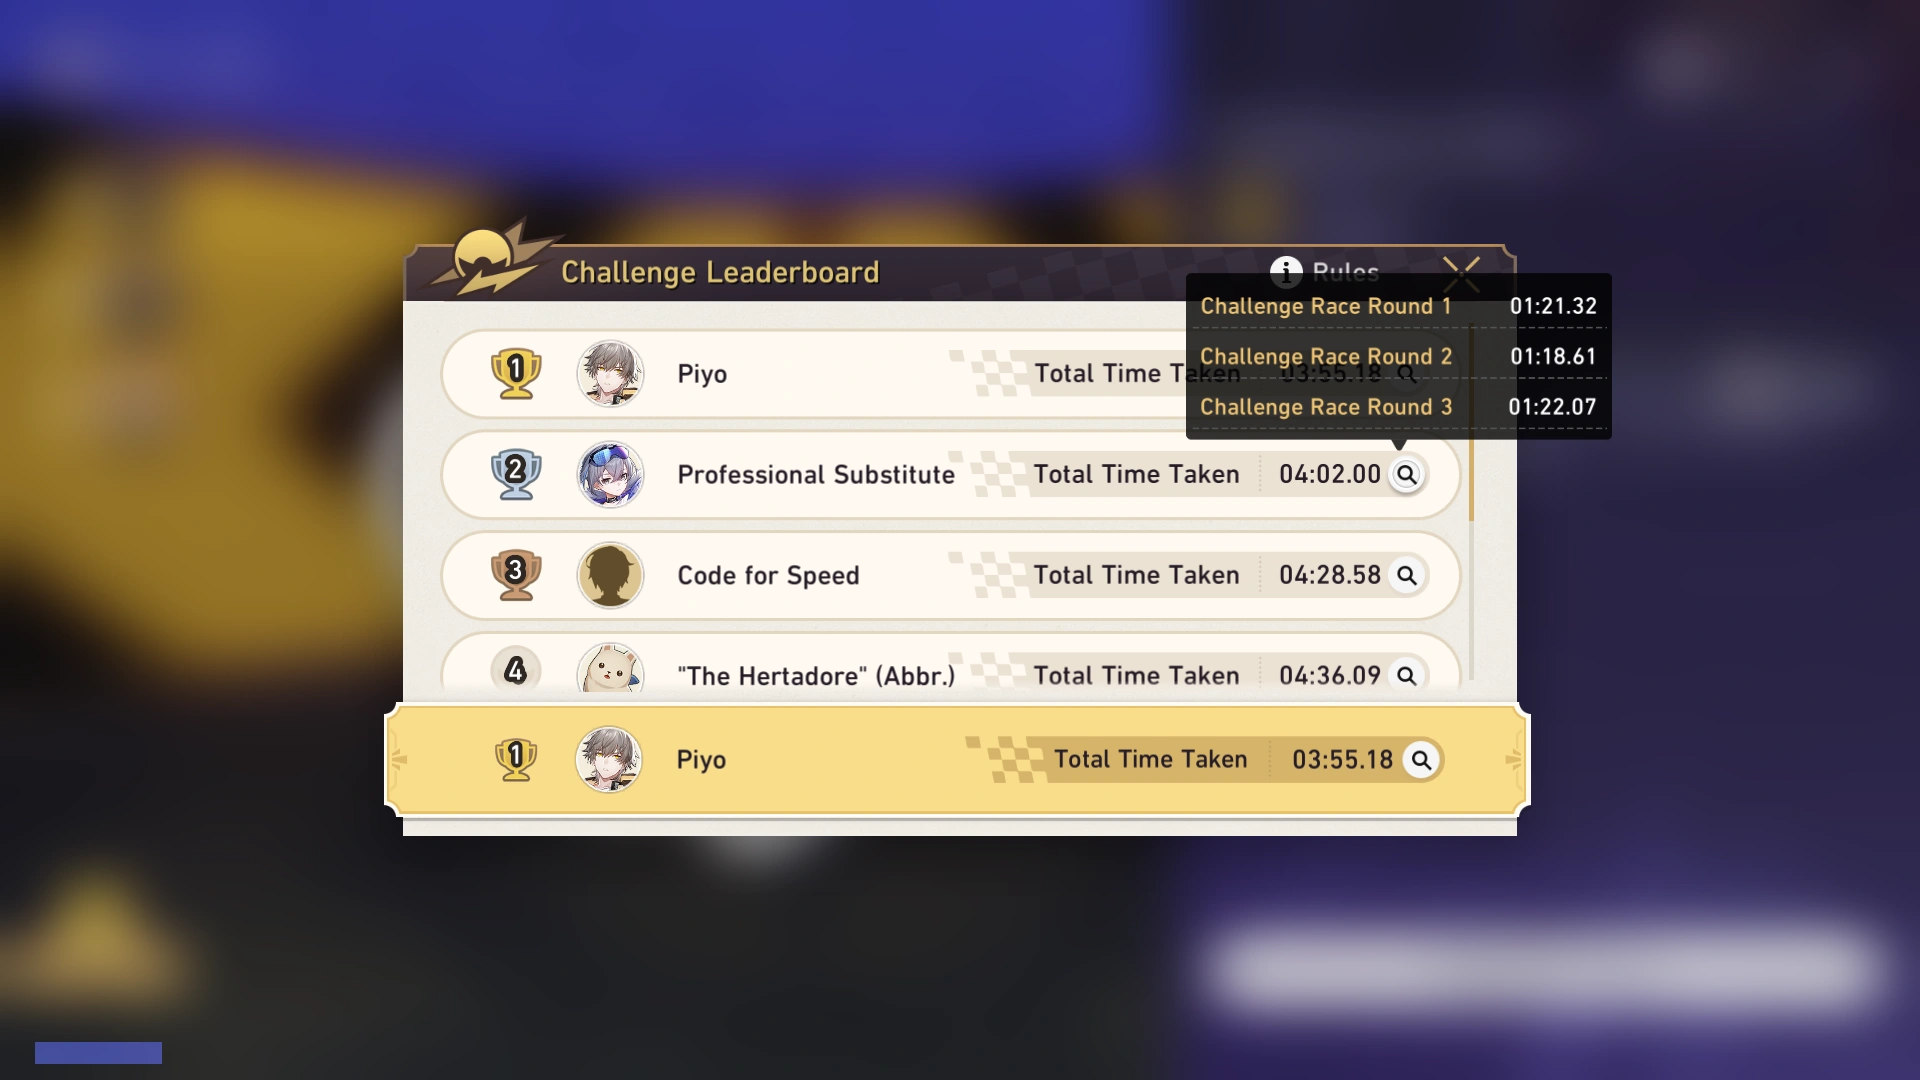
How Do I Best Silver Wolf's Scores?
Silver Wolf's Best Scores in the Challenge Races are as follows:
| Round 1 | Round 2 | Round 3 | Total Time |
|---|---|---|---|
| 01:21.32 | 01:18.61 | 01:22.07 | 04:02.00 |
In order to reach No. 1 on the Challenge Leaderboard, you will need to best her Total Time by 00.01 seconds or faster (04:01.99). The Total Time is a sum of all times across the three racetracks available.
On any other race car model, you will likely be unable to beat her scores, as none of them have a base Speed parameter at 10/10 except the Exclusive Trailblazer Model. In addition, its skill Nitrous Burst can maintain the maximum speed almost permanently throughout each of the racetracks. This is due to the convenient locations of where Bottles are placed.
However, the largest issue with the race car is that its Stability is lower than average at 3/10. As a result, your time will significantly change if you collide too much with obstacles or Deceleration Zones.
As long as you keep at it, you will eventually be able to reach No. 1 on the Challenge Leaderboard. The reward for placing No. 1 are special Text Messages from a few people you know!
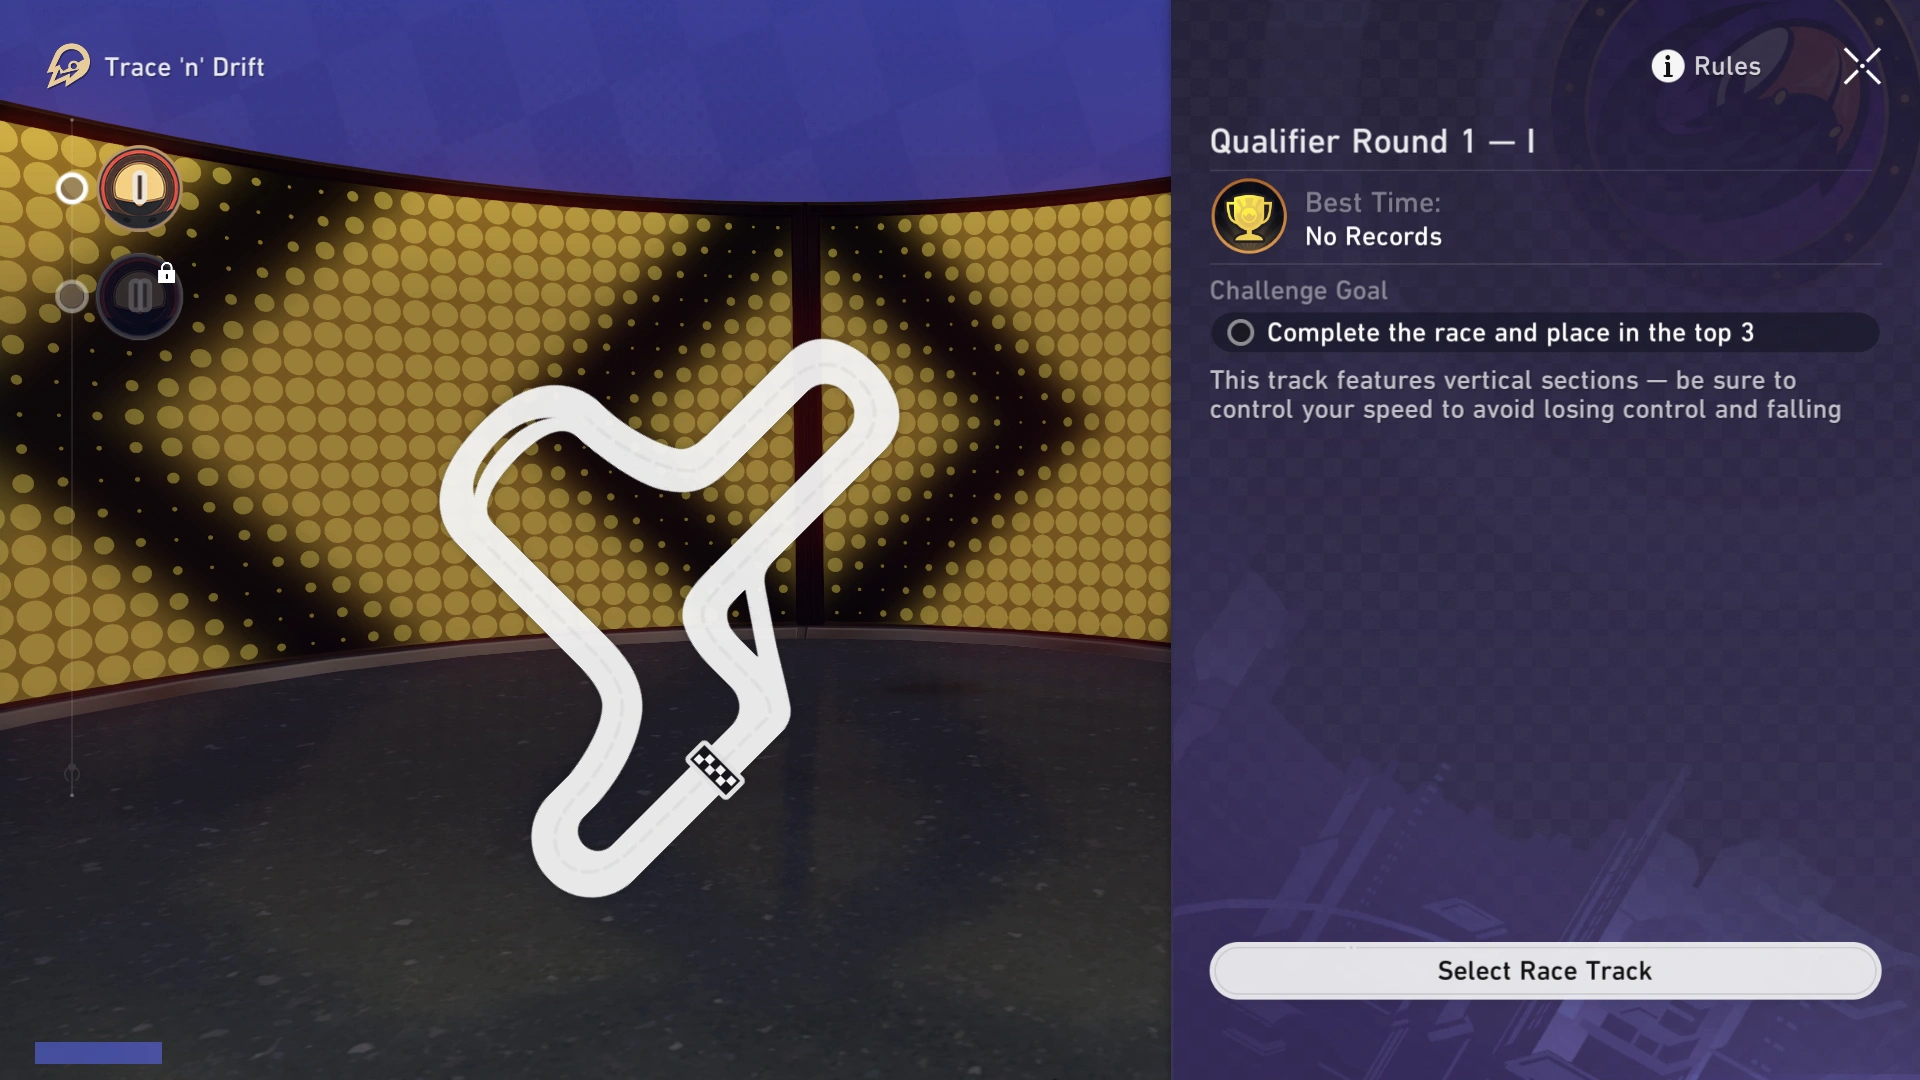
Qualifier Round 1 - I
| Challenge Goal | Race Car Model |
|---|---|
| Place in Top 3 | Sea Hunter Shark |
For your first match, you must complete 3 laps on the racetrack. The Sea Hunter Shark model's parameters are above average, so make sure you take advantage of its Shatter Bombs if you are about to run into a Billboard or Unidentified Doll.
The primary advice to clearing this racetrack faster is to take all of the possible shortcuts available. There are two shortcuts hidden behind Unidentified Dolls, so save Shatter Bombs until you approach them.
In addition, try to memorize where the Acceleration Zones and Speed Boost Bottles are located, as they can help increase (or decrease) distance with other racers.
If you have fulfilled the Challenge Goal for Round 1 - I, you can proceed to the next track.
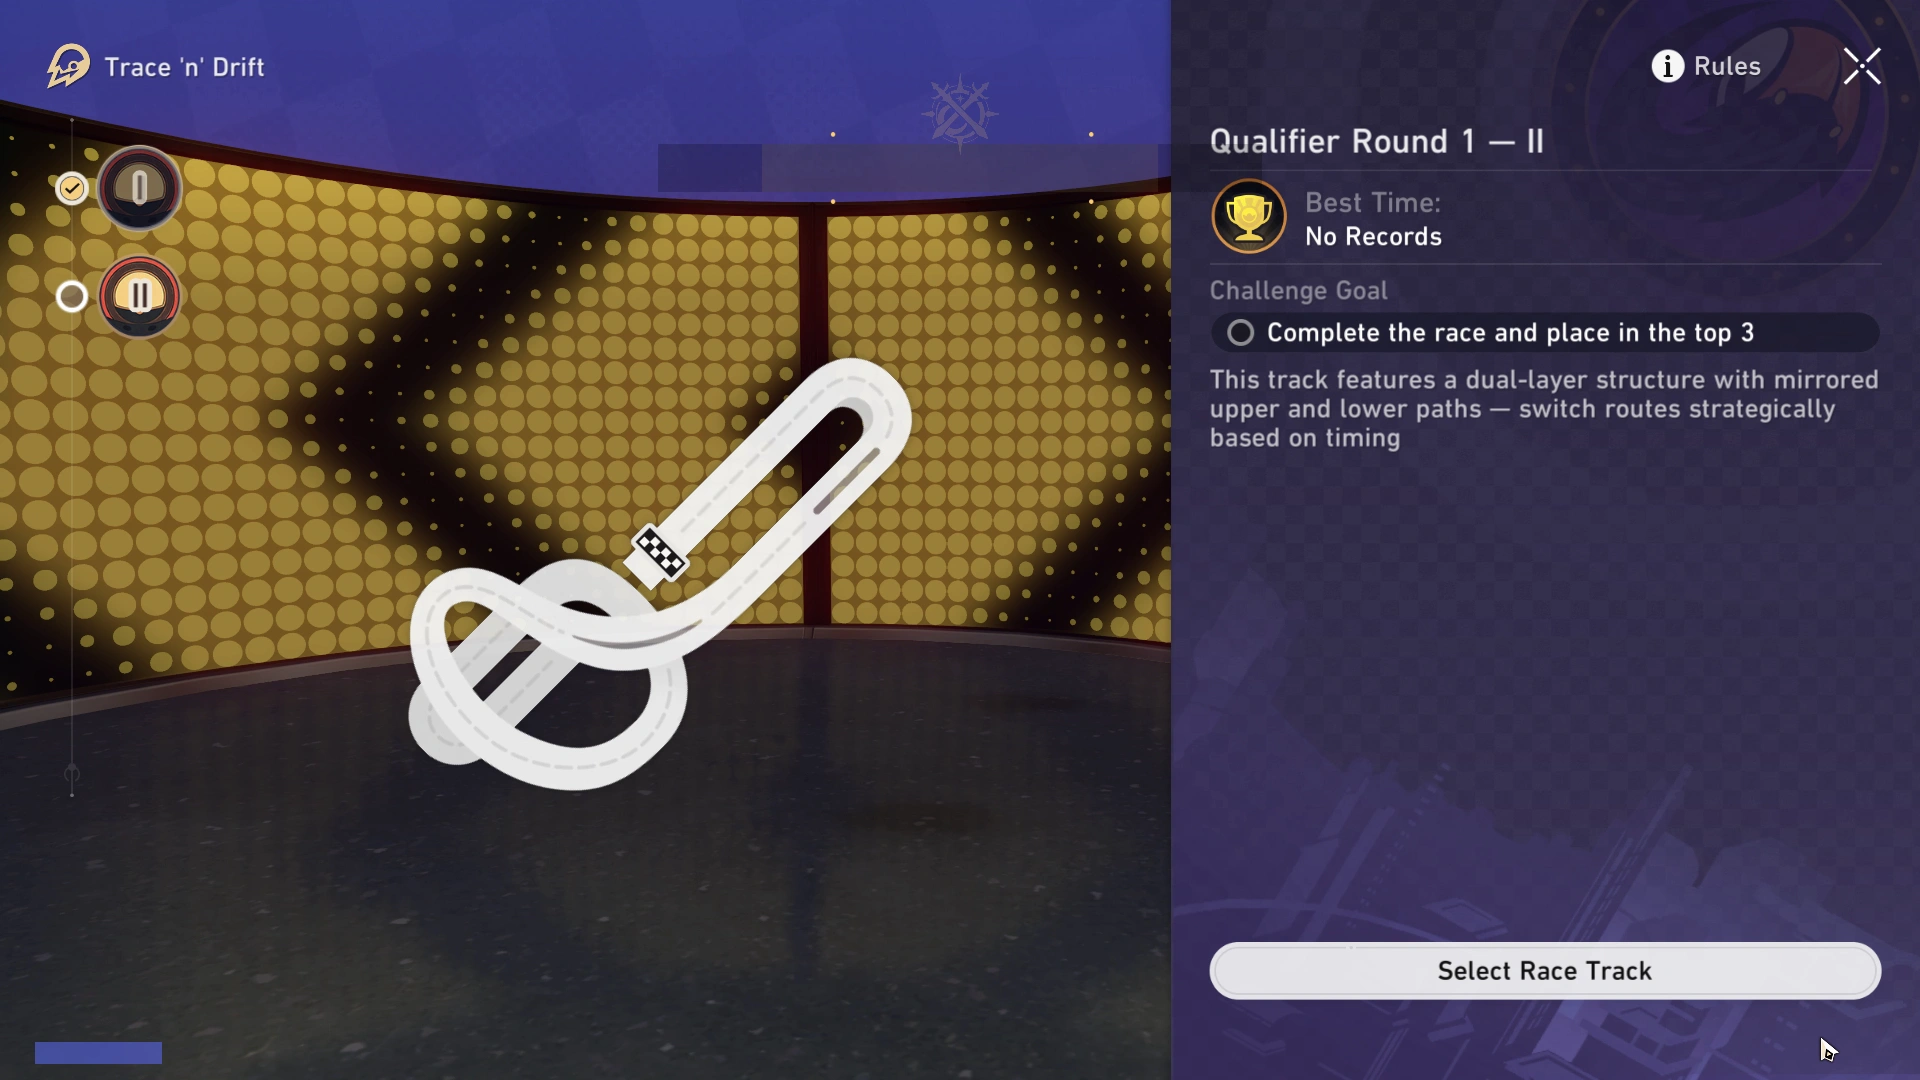
Qualifier Round 1 - II
| Challenge Goal | Race Car Model |
|---|---|
| Place in Top 3 | Sea Hunter Shark |
You must complete 3 laps on this racetrack to finish the match.
This racetrack features both upper and lower paths, allowing you to switch between them when appropriate. Same as before, you can make use of the Sea Hunter Shark's Shatter Bombs to destroy any Unidentified Dolls. If there are any racers slightly ahead of you, use the Shatter Bombs to stun them long enough for you to surpass.
There are not that many Billboards on this track, and the upper paths are not that different in length with the lower paths. As such, the best use for Shatter Bombs is to sabotage other racers. Just avoid any Billboards by changing lanes instead.
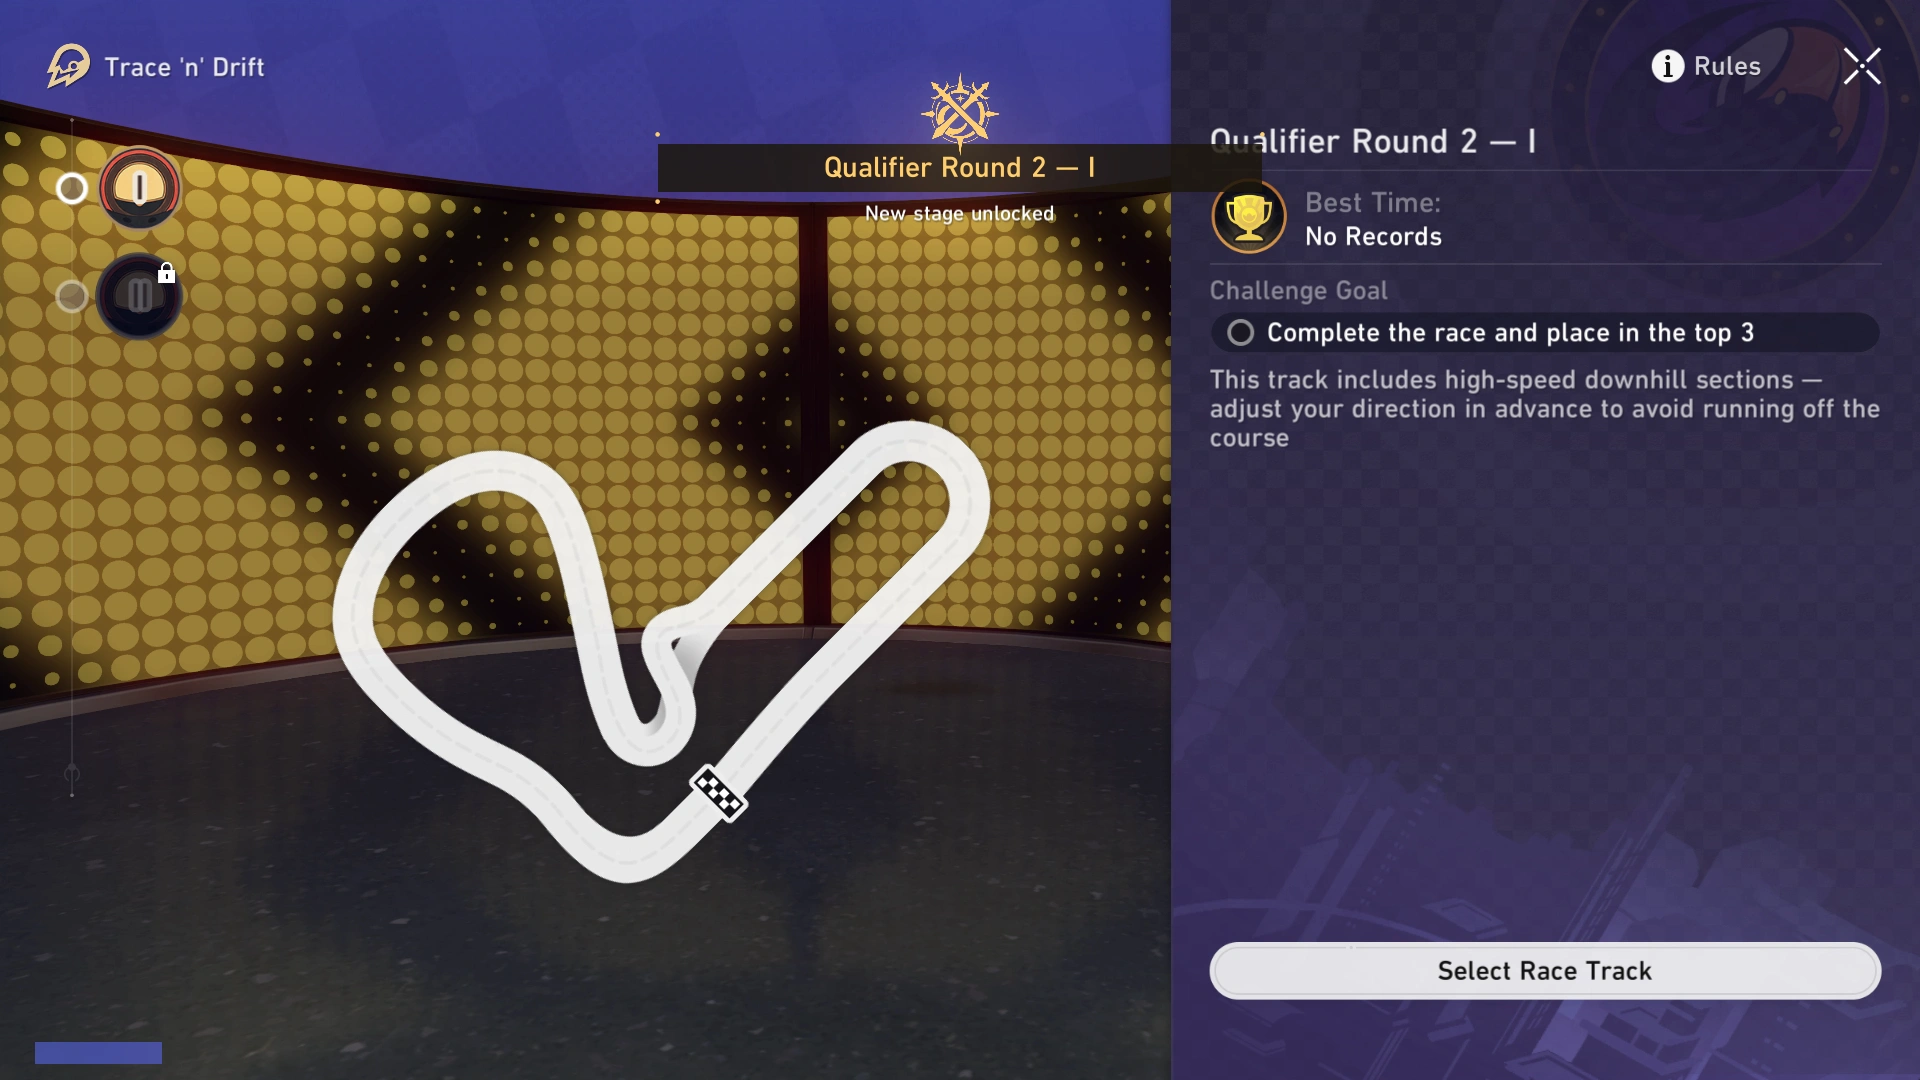
Qualifier Round 2 - I
Before beginning the next Qualifier Round, you will obtain a new Spheroid racer model: one that is named after you.
| Challenge Goal | Race Car Model |
|---|---|
| Place in Top 3 | Trailblazer |
As your Exclusive Trailblazer Model cannot destroy obstacles, be careful of running into anything that may slow or stun. In addition, the race car has High Speed but Low Stability, so it will be difficult to recover from bad situations. If you find yourself in a predicament, the race car's Nitrous Burst skill may help you make up for any shortcomings.
This racetrack features 3 Laps to clear, as well as a plethora of both Acceleration Zones and Billboards. As your race car's skill will put you at maximum Speed, be careful about running into any Billboards during that timeframe.
If you have fulfilled the Challenge Goal for Round 2 - I, you can proceed to the next track.
Qualifier Round 2 - II
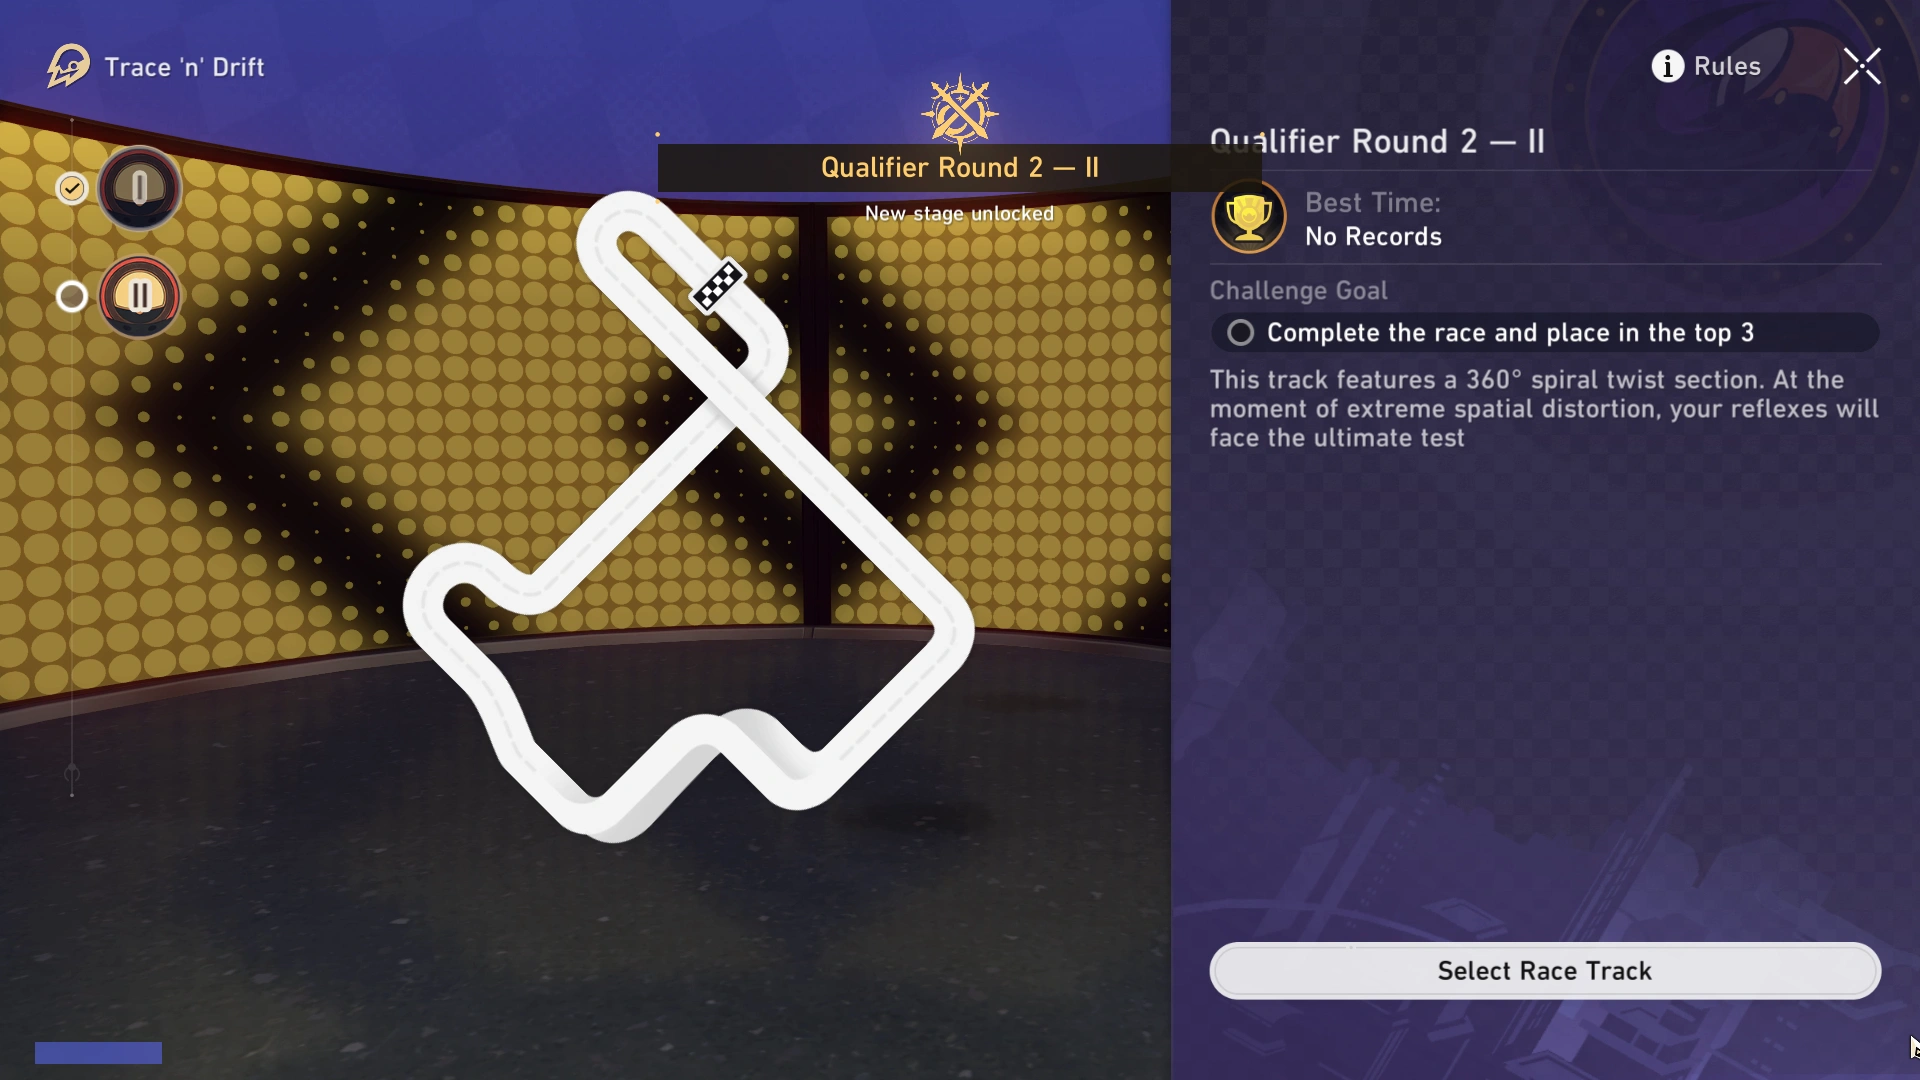
| Challenge Goal | Race Car Model |
|---|---|
| Place in Top 3 | Trailblazer |
You must complete 3 laps on this racetrack to finish the match.
Compared to the last racetrack, this one will feature Unidentified Dolls along with both moving and stationary Billboards. As your race car is fairly fast at a base Speed of 9/10, you should get into the habit of switching lanes within a short period of time. Otherwise, you may run into consecutive obstacles and have a hard time recovering.
As your race car cannot destroy obstacles, if there are any nearby racers who have knocked out any Billboards, take advantage of the situation to pass by without issues.
Qualifier Round 3 - I
Before beginning the next Qualifier Round, you will obtain a new Spheroid racer model: "The Hertadore" (Abbr.). Originally driven by Peppy, Asta gifts it to you for the upcoming races.
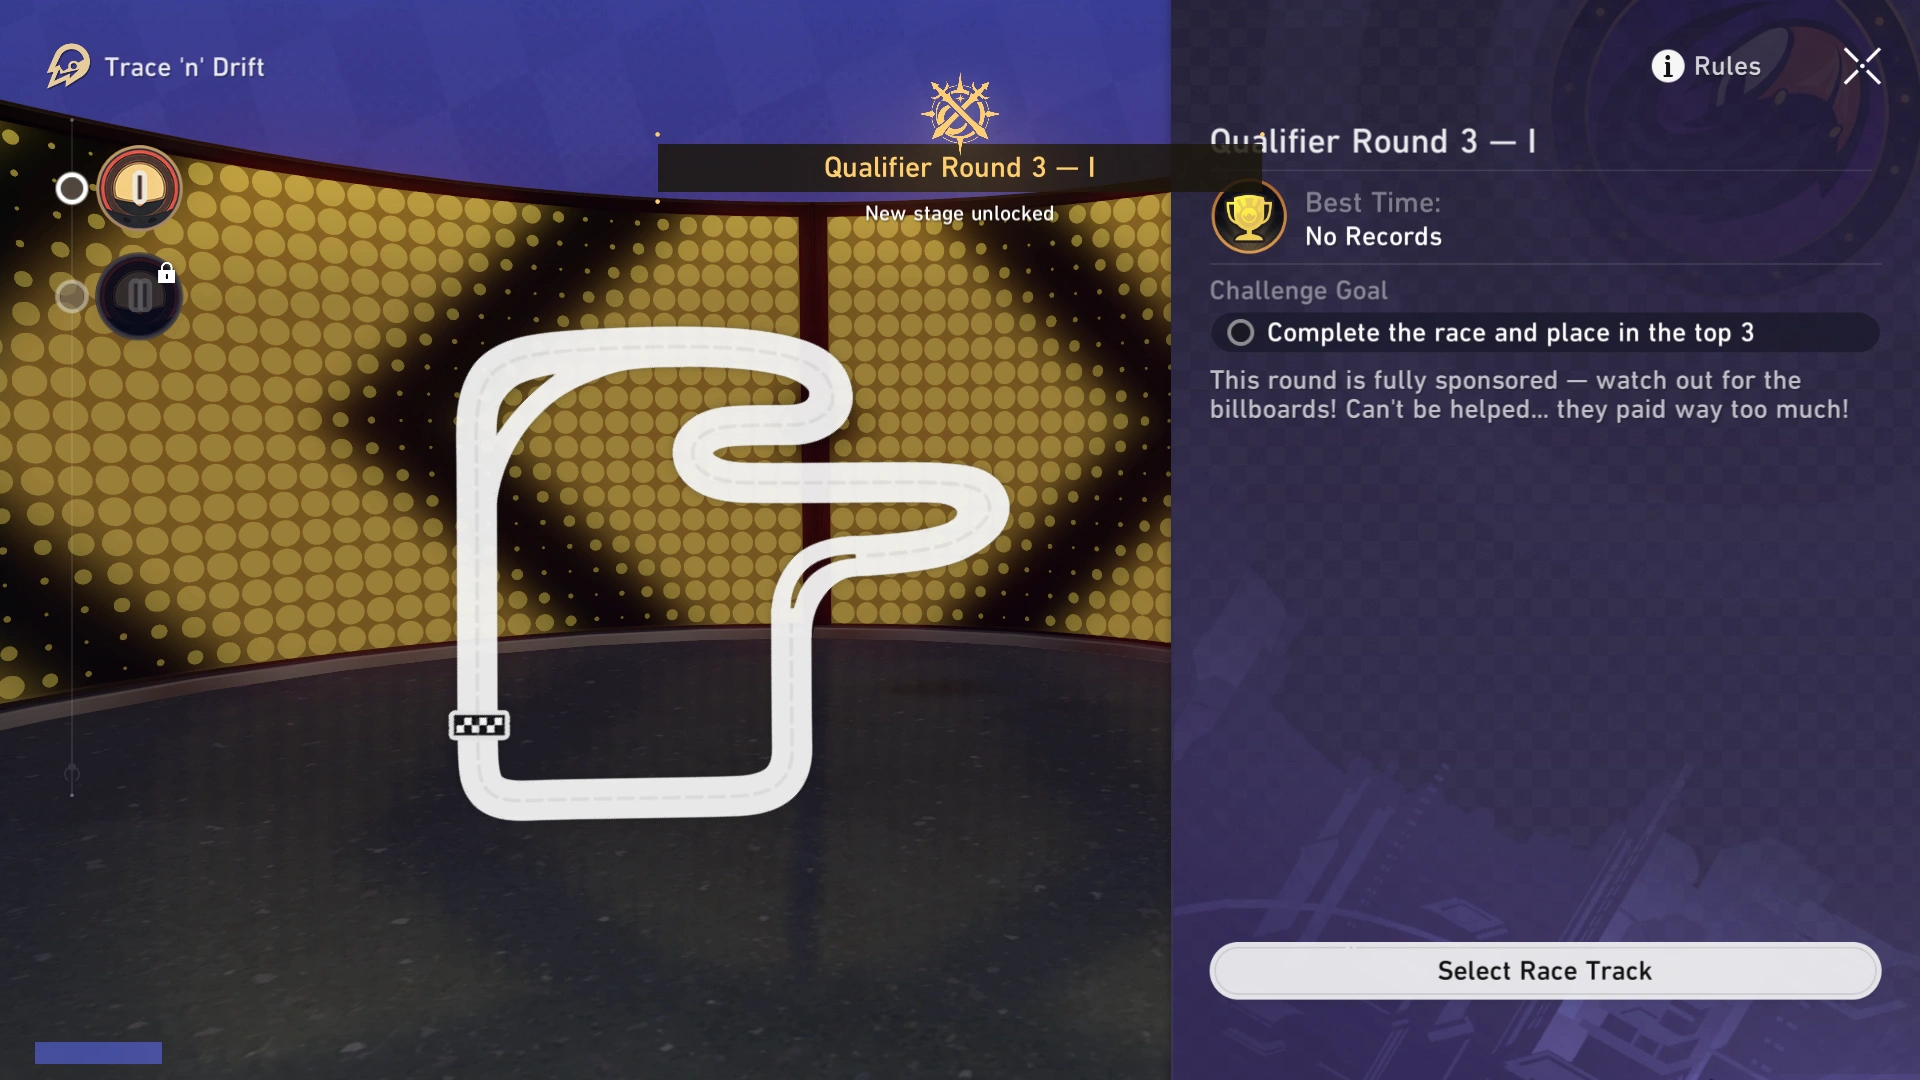
| Challenge Goal | Race Car Model |
|---|---|
| Place in Top 3 | "The Hertadore" (Abbr.) |
"The Hertadore" (Abbr.) is a great Spheroid racer to use if you often collide into obstacles and other race cars. Its skill, Invincible Mode, will allow you to be invincible, gain Speed, and extend the skill duration whenever you have a collision. Unfortunately, the race car's base Speed is very average at 5/10, so you cannot overtake many racers.
As a result, you want to use the race car's skill if there are many obstacles ahead, extending the duration as long as possible.
This racetrack features 3 Laps to clear, as well as many Billboards. For example, it is possible for the Billboards to all line up across all the lanes. "The Hertadore" (Abbr.) should take advantage of any obstacles you see by using the race car's skill appropriately.
If you have fulfilled the Challenge Goal for Round 3 - I, you can proceed to the next track.
Qualifier Round 3 - II
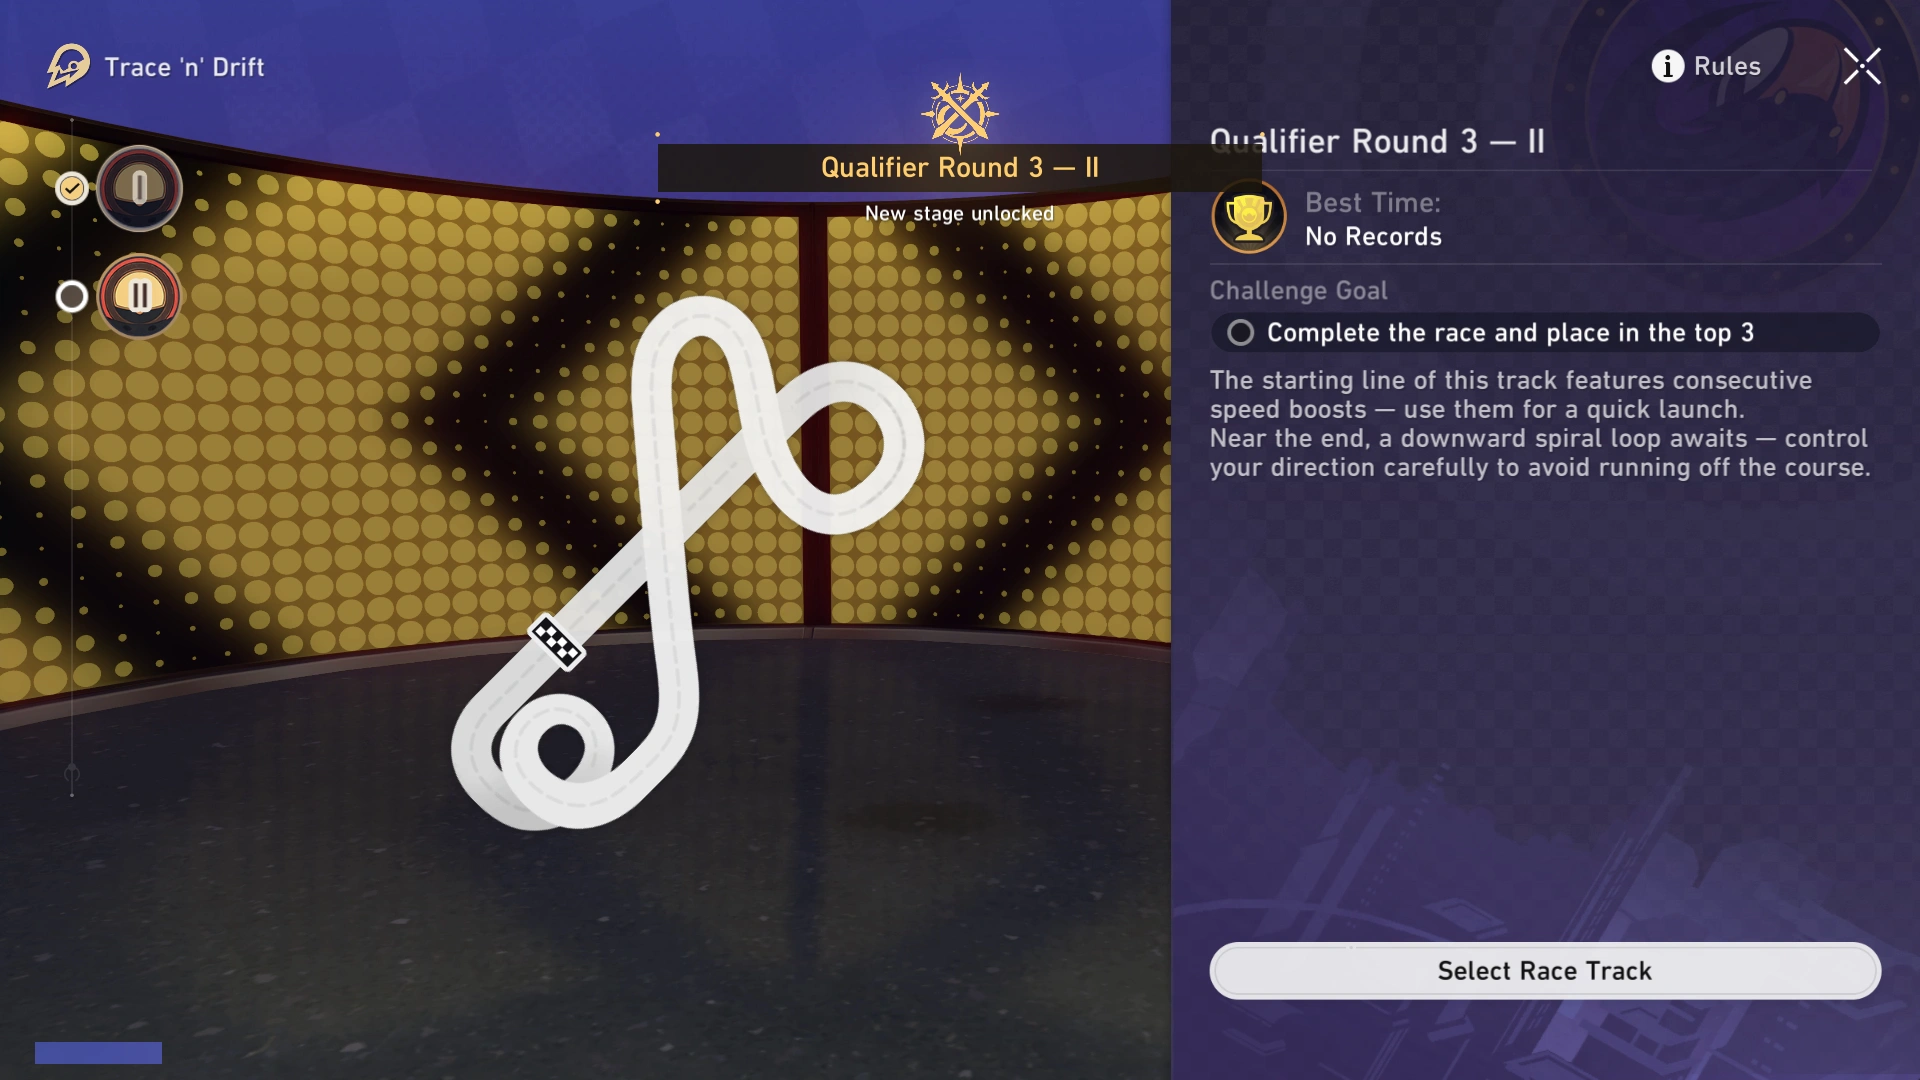
| Challenge Goal | Race Car Model |
|---|---|
| Place in Top 3 | "The Hertadore" (Abbr.) |
You must complete 3 laps on this racetrack to finish the match.
The beginning of this racetrack features a significant amount of Acceleration Zones and Speed Boost Bottles. As "The Hertadore" (Abbr.) has a fairly low to average base Speed, it will help a lot to use them whenever you are about to start a new lap.
In addition, there are also several shortcuts and Acceleration Zones hidden behind the Unidentified Dolls on the racetrack. Remember to use your skill before colliding into the Unidentified Dolls so you can gain speed rather than stun yourself.
Semifinals, Round 1
The next Spheroid race car you will be given is known as Thirteen Orphans. Qingque was originally participating in the Qualifiers, but had to drop out of the race, leaving you behind with her beloved racer model.
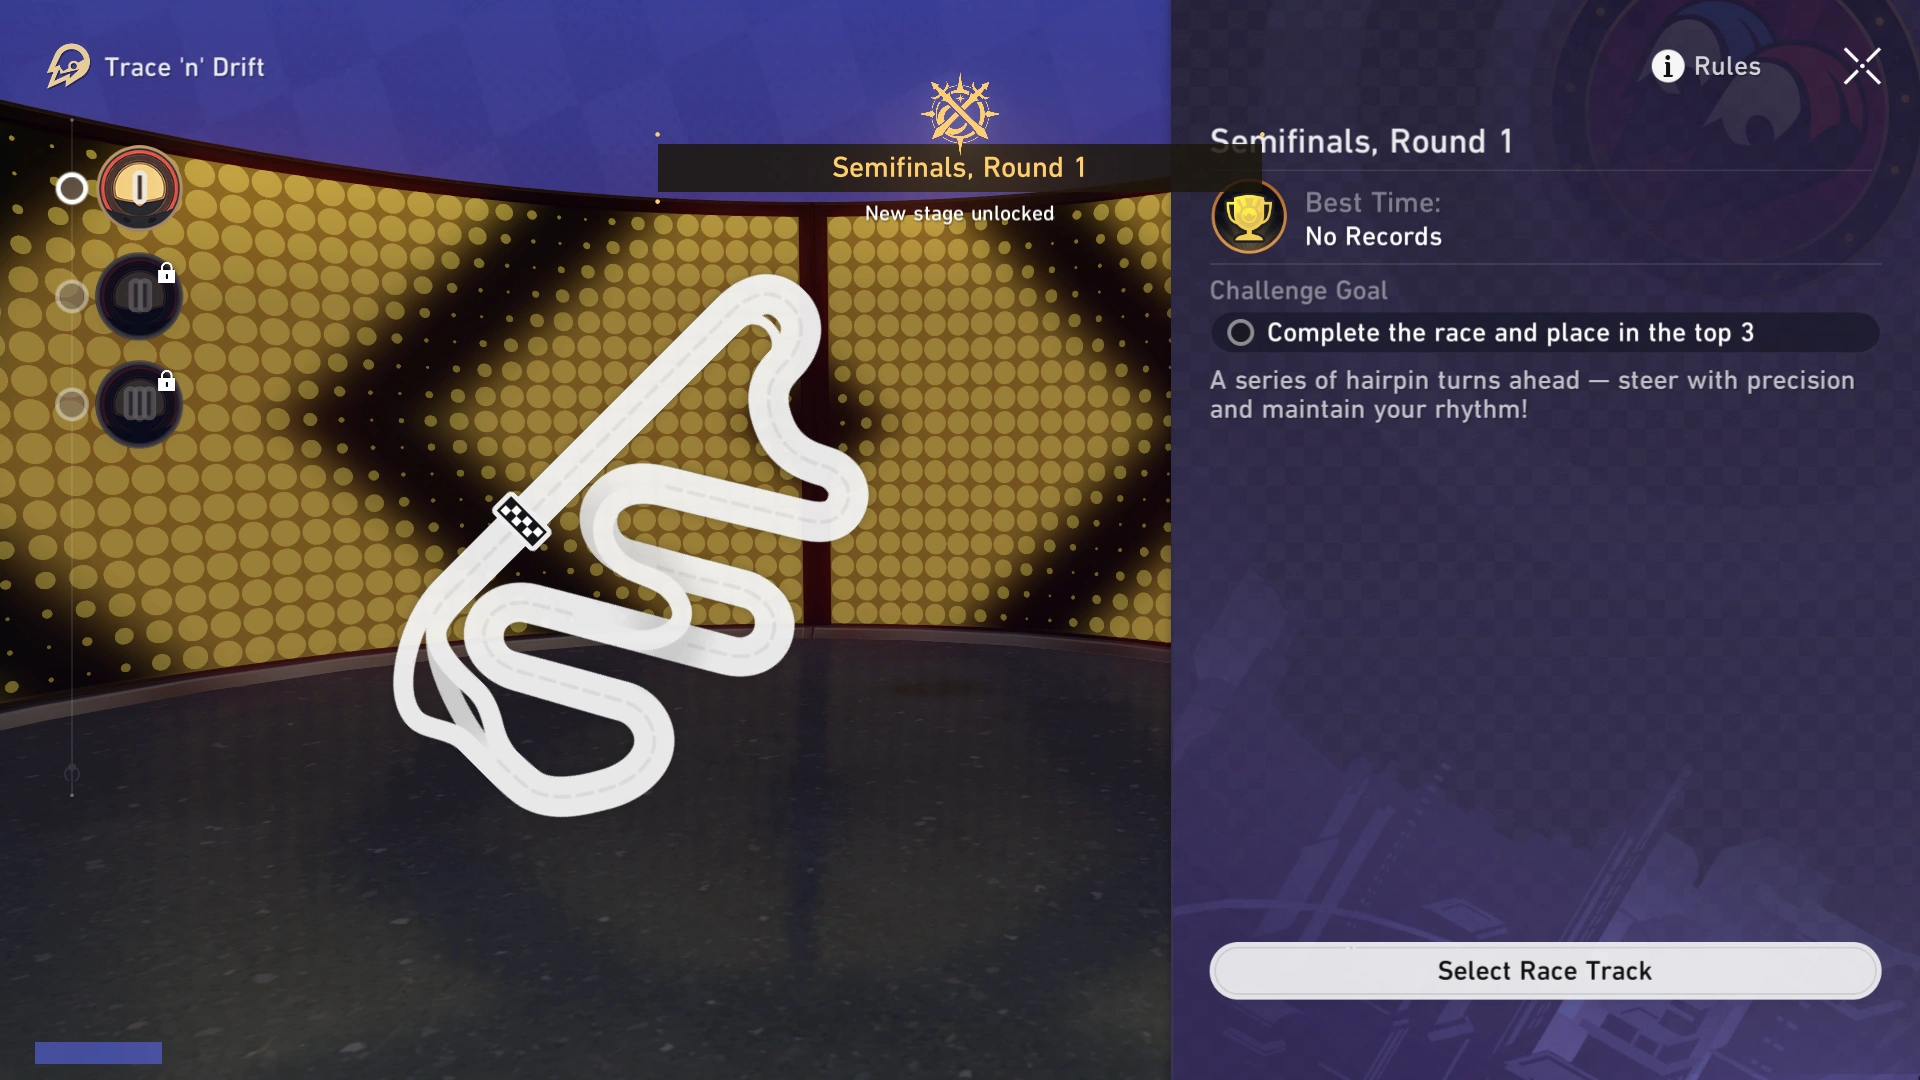
| Challenge Goal | Race Car Model |
|---|---|
| Place in Top 3 | Thirteen Orphans |
The Spheroid racer Thirteen Orphans is kind of unique, in that any skill you get is randomized across four different effects:
- No effect at all
- Invincibility
- Speed Boost
- Invincibility and Speed Boost
The ideal random skill to get would be both Invincibility and Speed Boost, but because there is a chance to 'fail' by getting No Effect, you cannot completely rely on this race car to solve all your issues on the racetrack.
If you have multiple Skill Points to use, the next skill becomes randomized upon using a skill. As such, if you happen to get an Invincibility skill, you can hold onto it for some strategic uses, such as intentionally colliding with an Unidentified Doll hiding a secret path.
This racetrack features 3 Laps to clear.
If you have fulfilled the Challenge Goal for Round 1, you can proceed to the next track.
Semifinals, Round 2

| Challenge Goal | Race Car Model |
|---|---|
| Place in Top 3 | Thirteen Orphans |
Using Thirteen Orphans for a second time, this is a rather simple racetrack that challenges your endurance with 7 laps to clear. There are a significant number of obstacles on this racetrack, so you should be getting as many of the Skill Bottles you can possibly get.
One useful tip: if you happen upon two Skill Bottles side-by-side in adjacent lanes, you can quickly switch to the adjacent lane while picking up one of the Skill Bottles. In doing so, the Spheroid racer will end up actually picking both Bottles together.
Doing this will allow you more skill uses than just taking only one Bottle. In addition, you can do this with Speed Boost Bottles too, but you cannot use this trick if the Spheroid racer is mid-air.
If you have fulfilled the Challenge Goal for Round 2, you can proceed to the next track.
Semifinals, Round 3
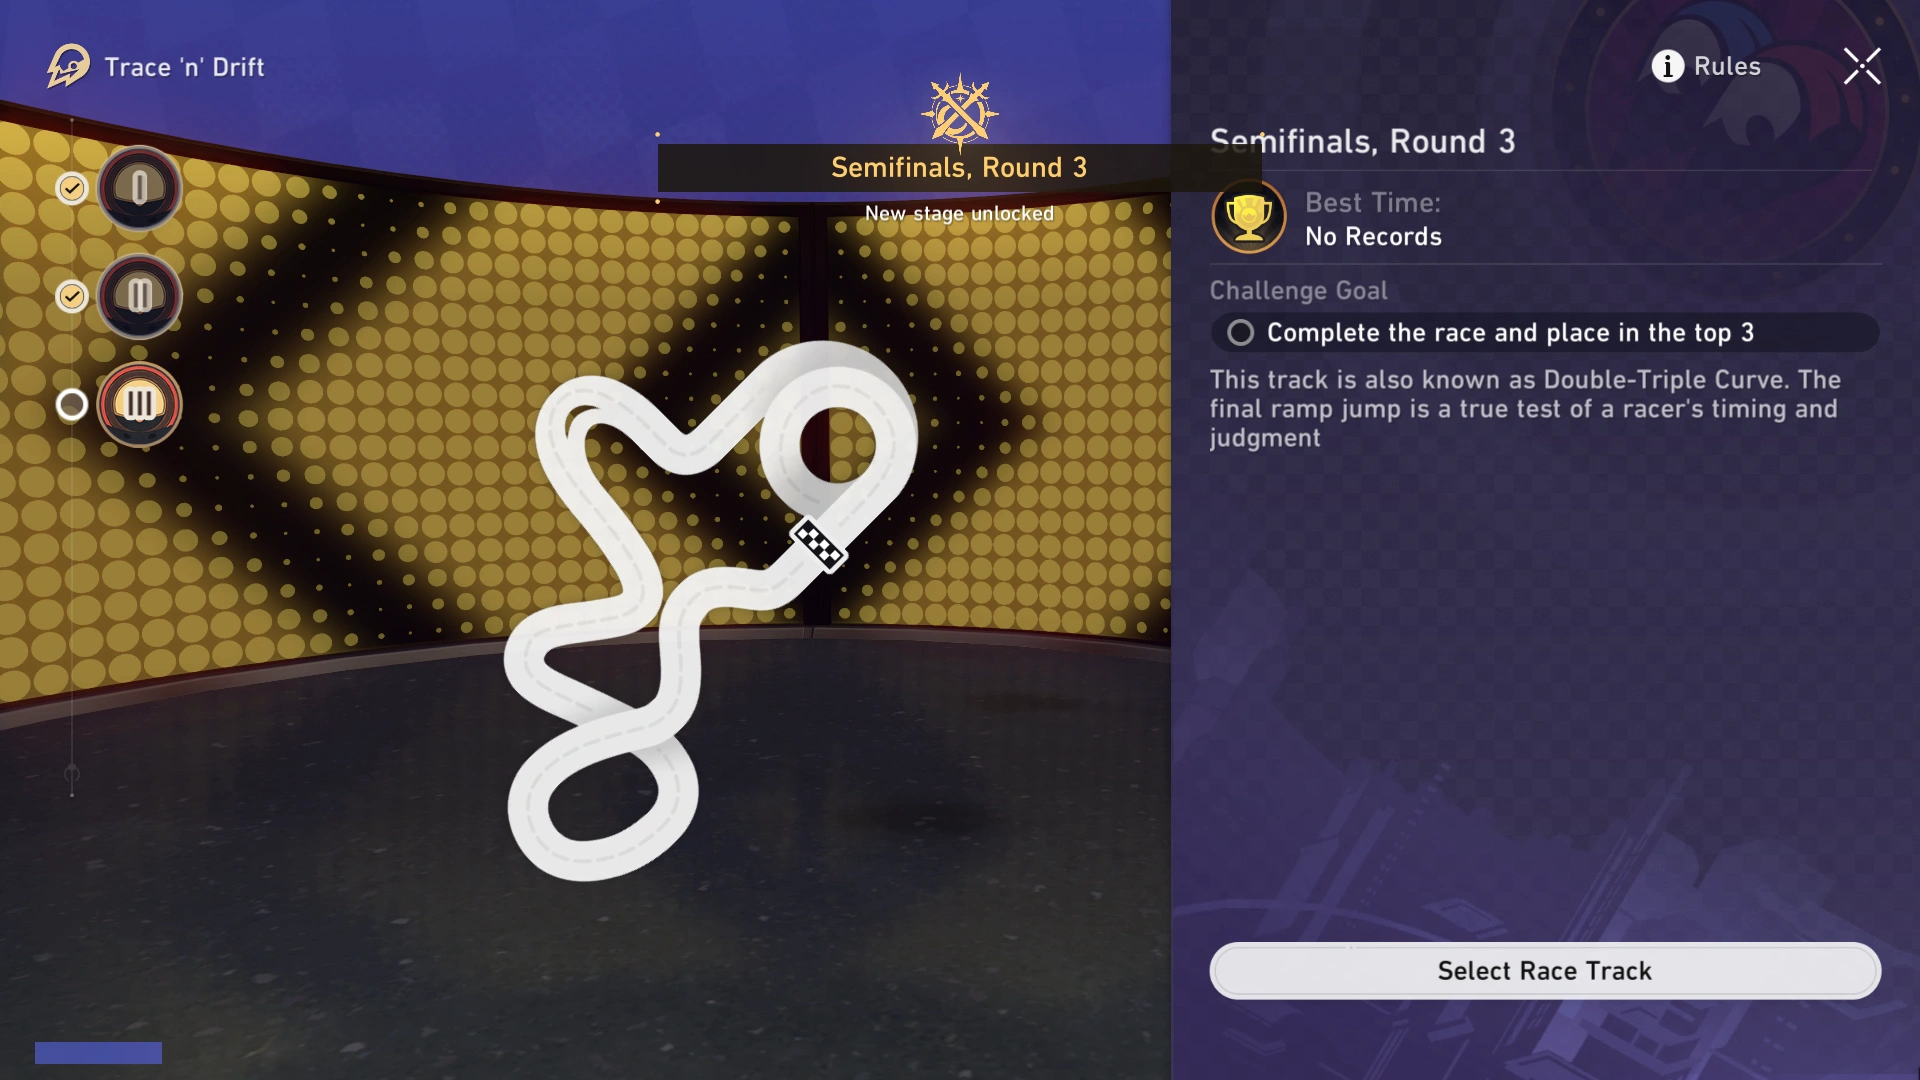
| Challenge Goal | Race Car Model |
|---|---|
| Place in Top 3 | Thirteen Orphans |
Featuring a "Double-Triple Curve" racetrack, you will thankfully not have to complete as many laps as you did last match. However, with only 3 Laps to clear and one shortcut you can use, the rest of the racetrack will be highly dependent on your ability to navigate various obstacles while racing.
One thing to note about mid-air jumps: you can get the most air time if you are at the highest Speed right before jumping. This is possible with Acceleration Zones at the edge of a track, but you can also mimic this with both your Speed Boost gauge and, if you are lucky, with your skill from Thirteen Orphans.
If you have fulfilled the Challenge Goal for Round 3, you can proceed to the final part of the Tournament: the Grand Finale!
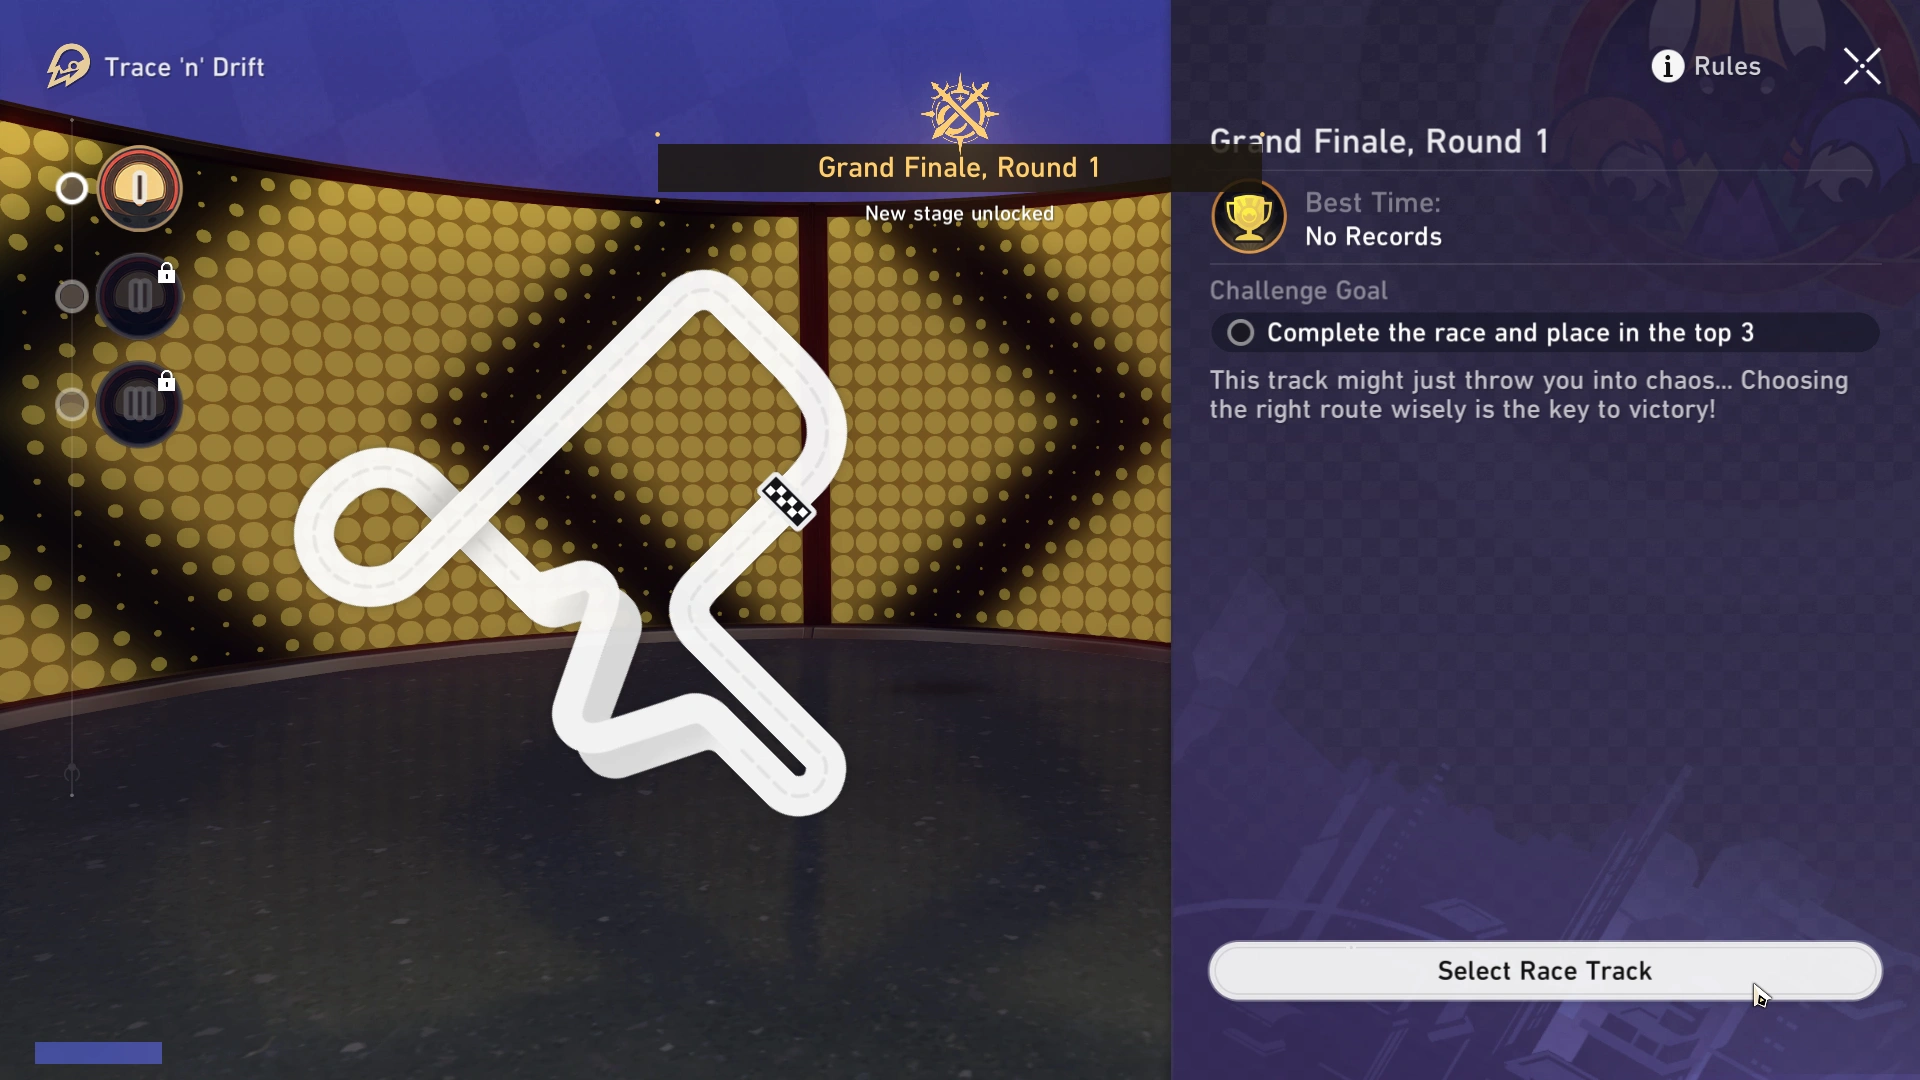
Grand Finale, Round 1
Welcome to the Grand Finale! As a reward for making it this far, you can select any race car to use on the racetracks.
| Challenge Goals | Recommended Model |
|---|---|
|
|
For all Grand Finale matches, there will be a recommendation for both First-Time Racers and those looking to improve their times.
Your first-time goal for Round 1 is to place in the Top 3, so you should go with either "The Hertadore" (Abbr.) or a race car you are comfortable with. The Exclusive Trailblazer Model is not recommended due to its low Stability, as there are several obstacles and long stretches between Acceleration Zones.
However, if you are looking to improve your racetrack times and have beaten Round 3 of the Grand Finale, you should go with the Exclusive Trailblazer Model, as it has the fastest Speed parameter at 10/10. This is thanks to its post-story upgrade, but the low Stability may be an issue if you are unfamiliar with the racetrack.
You will need to clear 3 laps to finish this racetrack.
If you have fulfilled the Challenge Goal for Round 1, you can proceed to the next track.
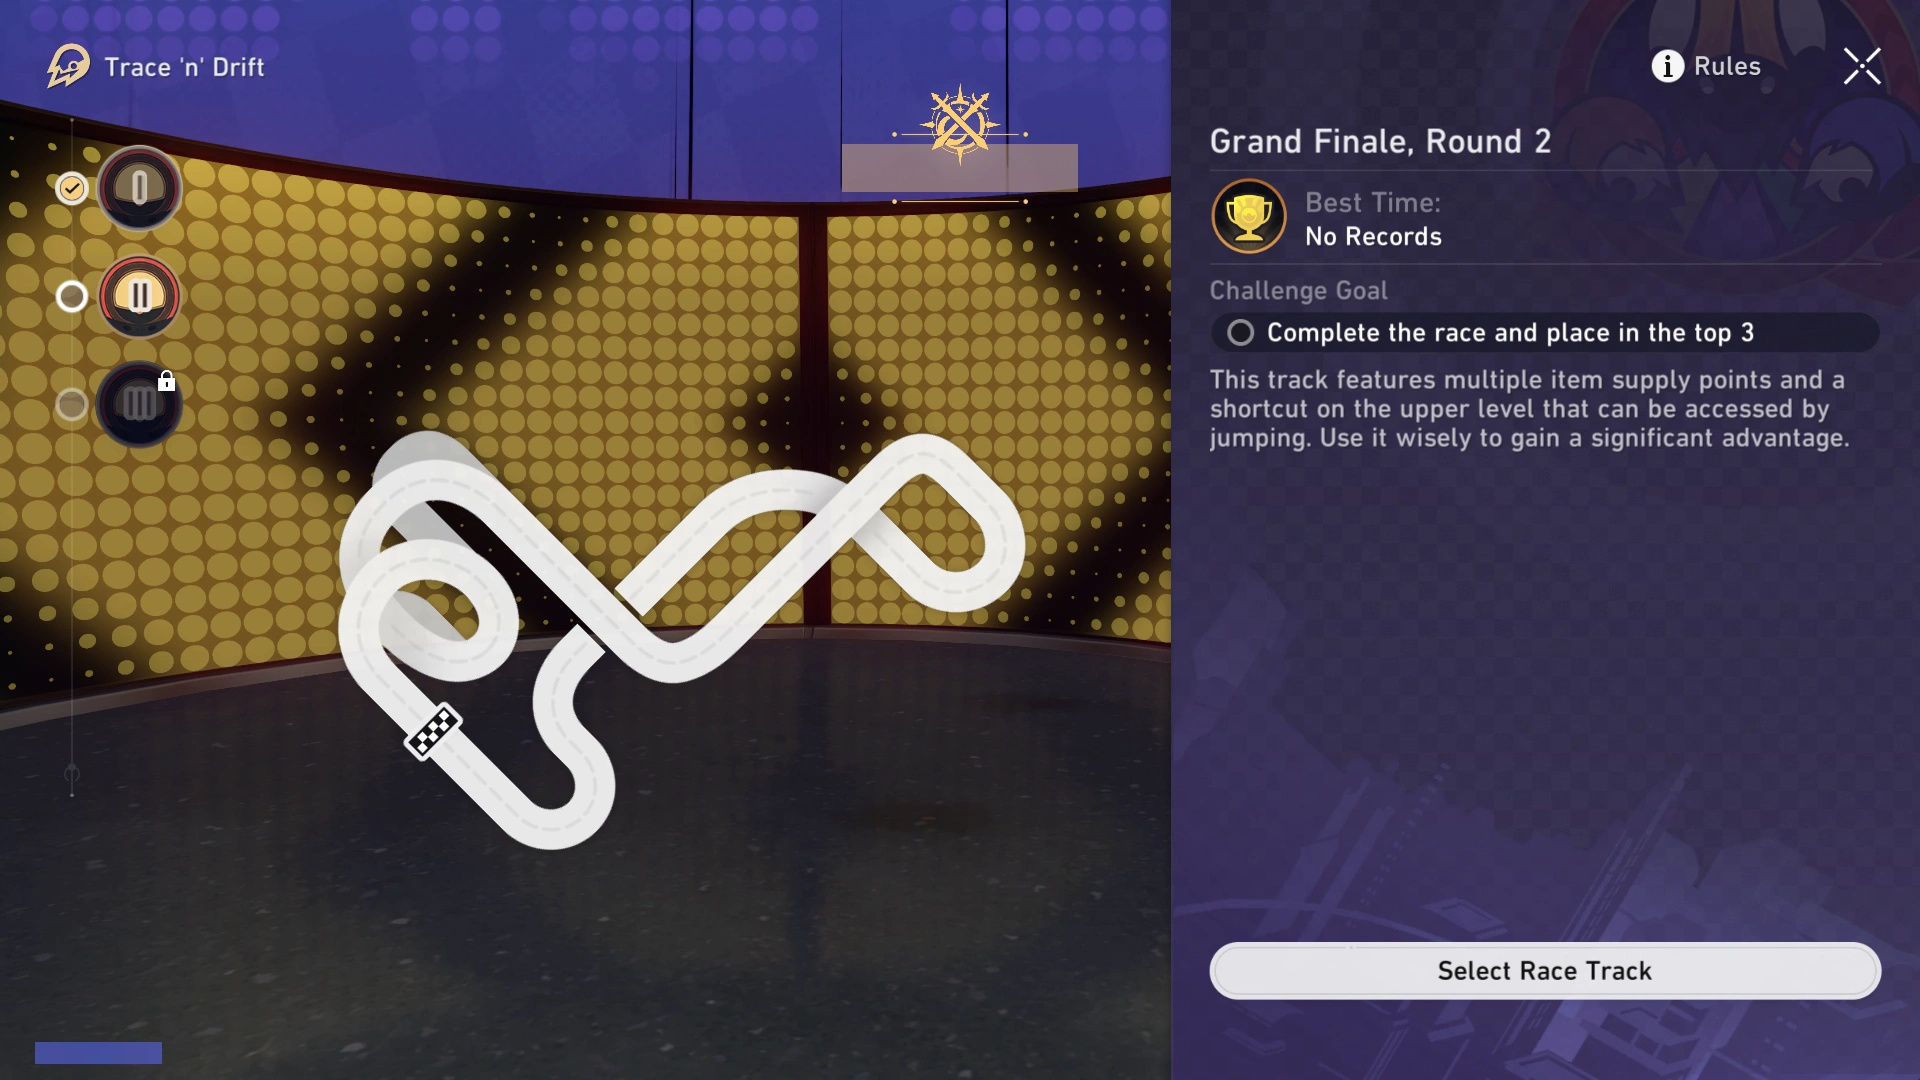
Grand Finale, Round 2
Similar to the previous track, you can select any race car to use.
| Challenge Goals | Recommended Model |
|---|---|
|
|
For all Grand Finale matches, there will be a recommendation for both First-Time Racers and those looking to improve their times.
Your first-time goal for Round 2 is to place in the Top 3 again. If you were comfortable with Round 1, you can easily go with a faster race car model such as the Thirteen Orphans. This racer is a little easier to recommend than the Sea Hunter Shark, as the Speed Boost benefits are worth more than what Shatter Bomb can give you.
Otherwise, most race cars will generally be fine to place in Top 3, as long as you keep your wits around the many obstacles you will face. With how many obstacles and Skill Bottles there are, you could theoretically have 100% skill uptime on "The Hertadore" (Abbr.).
Similar to the previous racetrack, if you are going for speed, the race car that will make this job the easiest will be the Exclusive Trailblazer Model when upgraded post-story.
You will need to clear 3 laps to finish this racetrack.
If you have fulfilled the Challenge Goal for Round 2, you can proceed to the next track.
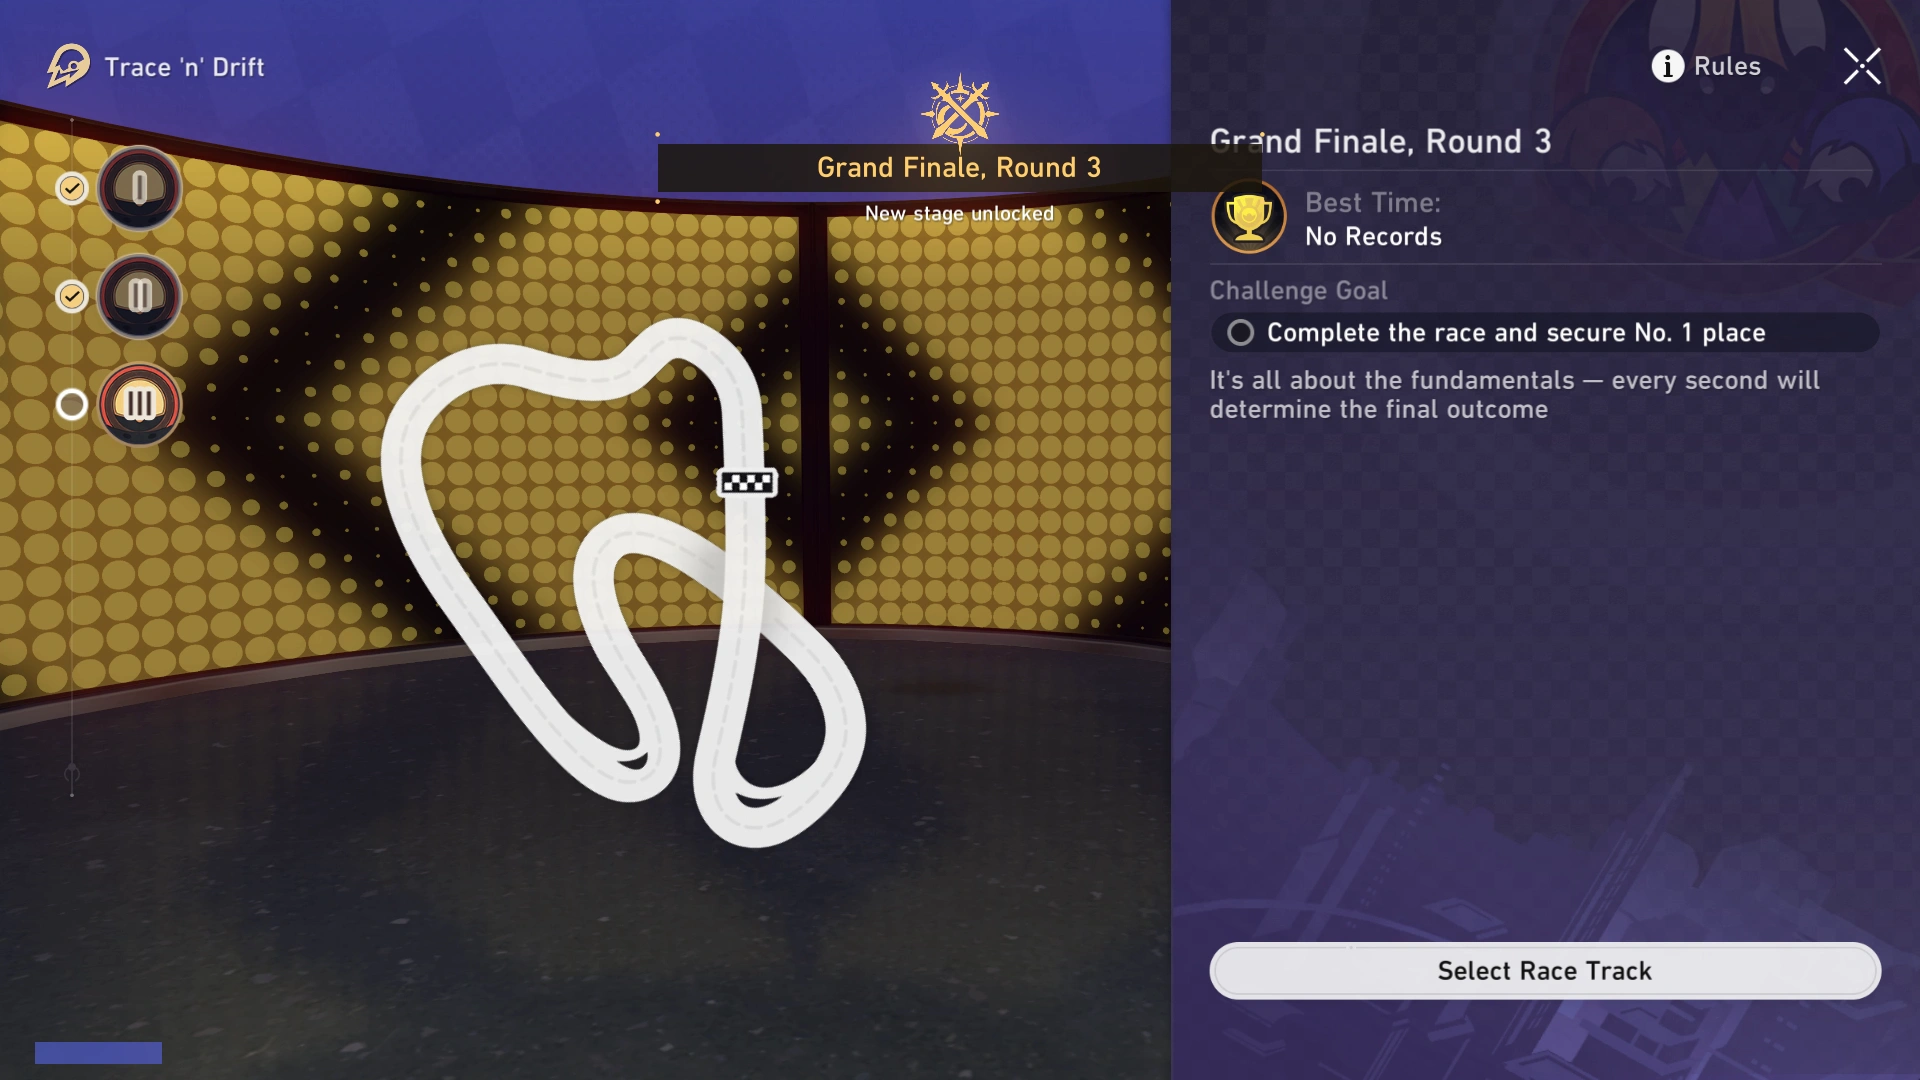
Grand Finale, Round 3
This will be your last racetrack for the event! But this time, there's a catch: you will have to best every racer on the track for First Place to win the Tournament. Good luck!
| Challenge Goals | Recommended Model |
|---|---|
|
|
For all Grand Finale matches, there will be a recommendation for both First-Time Racers and those looking to improve their times.
Just like always, most race cars will generally be fine to place first. However, there are a significant amount of Moving Billboards, and as such, you may perform better with "The Hertadore" (Abbr.). The key to better race times is consistency: any collision with an Unidentified Doll or Billboard may cost you the victory.
Similar to the previous racetrack, if you are going for speed, the race car that will make this job the easiest will be the Exclusive Trailblazer Model when upgraded post-story. In addition, you will want to obtain as many Skill Bottles and Speed Boost Bottles whenever possible, as constant use throughout the laps will help you best Silver Wolf's score.
You will need to clear 3 laps to finish this racetrack.
If you have fulfilled the Challenge Goal for Round 3, you will reach the end of the Event story, as well as unlocking the Challenge Races. See the relevant section for more information.
What are Trace 'n' Drift Rewards?
During the event, you can earn the following limited-time rewards:
- 500 Stellar Jades
- 1 Tracks of Destiny
- 35 Traveler's Guides
- 25 Refined Aethers
- 15 Lost Crystals
- 36 Starfire Essences
- 150,000 Credits
The event and these rewards are no longer available.
Changelog
- 01 Jul. 2025: Updated limited-time event and reward availability.
- 14 Jun. 2025: Page added.