Scarlet Halls Heroic Dungeon Guide (WoD 6.1.2)
Table of Contents
The Scarlet Halls is a 5-man dungeon located in Tirisfal Glades. In Mists of Pandaria, It has been revamped to include a level 90 Heroic mode. It houses 3 encounters: Houndmaster Braun, Armsmaster Harlan, and Flameweaver Koegler.
Introduction
The Scarlet Halls is a 5-man dungeon that replaces, in Mists of Pandaria, the Armory and Library wings of the old Scarlet Monastery instance. It now also features a level 90 Heroic mode. The Scarlet Monastery is one of the strongholds of the Scarlet Crusade, a group of maddened zealots so dedicated to the removal of all undead that they commonly attack the living.
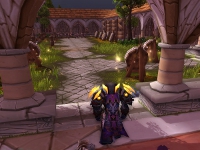
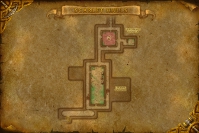
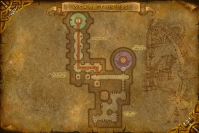
The dungeon has a linear layout during which you will descend through 2 sub-zones, which are reminiscent of the old Armory and Library wings, until you reach Flameweaver Koegler. For level 90 players, only the Heroic mode of the dungeon will be of interest.
| Training Grounds | Athenaeum |
|---|---|
|
|
This guide will cover all of the three boss encounters, as well as the quests and achievements that are available in the dungeon.
Loot
The level of the items you can obtain from the Scarlet Halls
is 463, with one exception, ![]() Vithrak, Gaze of the Deadman,
which has an item level of 476.
Vithrak, Gaze of the Deadman,
which has an item level of 476.
Armor
| Item Name | Armor | Slot | Main Stats | Source |
|---|---|---|---|---|
| Cloth | Chest | Intellect/Hit | Flameweaver Koegler | |
| Cloth | Waist | Intellect/Spirit | Just for Safekeeping, Of Course | |
| Cloth | Waist | Intellect/Hit | Just for Safekeeping, Of Course | |
| Cloth | Feet | Intellect/Hit | Armsmaster Harlan | |
| Leather | Hands | Intellect | Flameweaver Koegler | |
| Leather | Waist | Intellect | Just for Safekeeping, Of Course | |
| Leather | Hands | Agility | Houndmaster Braun | |
| Leather | Wrists | Agility | Armsmaster Harlan | |
| Leather | Waist | Agility | Just for Safekeeping, Of Course | |
| Waist | Intellect | Just for Safekeeping, Of Course | ||
| Legs | Intellect | Flameweaver Koegler | ||
| Shoulders | Agility | Armsmaster Harlan | ||
| Waist | Agility | Flameweaver Koegler | ||
| Waist | Agility | Just for Safekeeping, Of Course | ||
| Plate | Waist | Strength/Parry | Just for Safekeeping, Of Course | |
| Plate | Waist | Strength/Mastery | Just for Safekeeping, Of Course | |
| Plate | Waist | Intellect | Just for Safekeeping, Of Course | |
| Plate | Strength | Strength | Flameweaver Koegler | |
| Plate | Chest | Strength/Dodge | Houndmaster Braun | |
| Plate | Wrists | Strength | Houndmaster Braun |
Weapons
| Item Name | Type | Main Stats | Source |
|---|---|---|---|
| Dagger | Intellect | Flameweaver Koegler | |
| One-Hand Dagger | Agility | Flameweaver Koegler | |
| Crossbow | Agility | Houndmaster Braun | |
| Two-Handed Axe | Strength | Armsmaster Harlan | |
| Two-Handed Mace | Strength/Mastery | Flameweaver Koegler |
Amulets and Rings
| Item Name | Type | Main Stats | Source |
|---|---|---|---|
| Amulet | Intellect | Flameweaver Koegler | |
| Ring | Intellect | Flameweaver Koegler | |
| Ring | Intellect/Spirit | Houndmaster Braun | |
| Amulet | Agility | Flameweaver Koegler | |
| Amulet | Strength/Parry | Armsmaster Harlan |
Quests
There are 2 quests that can be completed within the instance. They are both given by the Hooded Crusader, at the entrance of the instance.
The first quest is Rank and File, which requires you to kill 50 members of the Scarlet Crusade within the instance.
The second quest is Just for Safekeeping, Of Course, which requires you to kill
Flameweaver Koegler, the final boss of the dungeon, and loot his
![]() Codex of the Crusade.
Codex of the Crusade.
Only Just for Safekeeping, Of Course has rewards. They have an item level of 440 (see loot section above).
Trash Mobs and Gauntlet Event
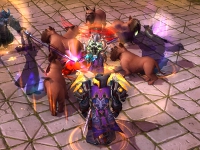
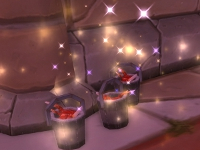
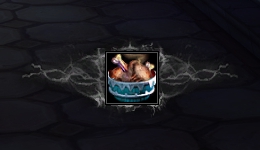
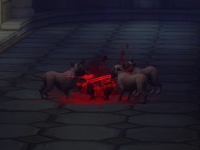
Throughout the instance, you will find buckets of meat that you can click. Doing so grants you a new button in the middle of your screen (see screenshots below). You can use this button to target where you want to throw the meat you have just picked up. We advise you to throw the meat on Scarlet Crusade members who are accompanied by dogs. This will cause the dogs to rebel against their masters and kill them.
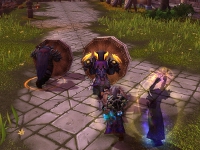
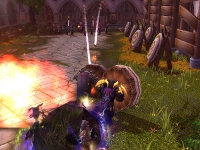
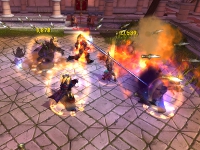
Before reaching Houndmaster Braun, you will have to face a Gauntlet Event. At the entrance of the first courtyard, you will notice practice targets that you can interact with. By click them, you can use them as a shield to protect yourself and party members standing directly behind you from the arrows that the Scarlet Crusade archers will fire. At some point, you will also have to avoid fire patches on the ground. Up to 3 party members can use the practice targets as shield.
Houndmaster Braun
The fight against Houndmaster Braun is very straighforward.
Positioning is important to properly deal with
![]() Piercing Throw and
Piercing Throw and ![]() Death Blossom.
Death Blossom.
 Piercing Throw often targets random party players, dealing
damage to the targeted player, but also to any players located between the boss
and the targeted player. Make sure that no one is standing between you and
the boss.
Piercing Throw often targets random party players, dealing
damage to the targeted player, but also to any players located between the boss
and the targeted player. Make sure that no one is standing between you and
the boss.-

 Death Blossom causes Braun to leap to a random player and deal
damage to that player and everyone within 5 yards. The spell effect is similar
to that of
  Fan of Knives, the Rogue ability. To miminise the damage
from Death Blossom, spread out 5 yards.
![]() Bloody Mess is a damaging, stacking debuff applied to players who are
hit by
Bloody Mess is a damaging, stacking debuff applied to players who are
hit by ![]() Death Blossom or
Death Blossom or ![]() Piercing Throw. This makes
positioning all the more important, since proper positioning will reduce the
number of players hit by Death Blossom and Piercing Throw, therefore increasing
the chances that the debuff will drop before being reapplied.
Piercing Throw. This makes
positioning all the more important, since proper positioning will reduce the
number of players hit by Death Blossom and Piercing Throw, therefore increasing
the chances that the debuff will drop before being reapplied.
At 90%, 80%, 70%, and 60%, Braun summons hounds to help him. They need to be tanked and are rather easy to dispose of.
At 50% health, he enters ![]() Bloody Rage, making him attack 50% faster
and deal 25% more damage. The tank and the healer need to pay special
attention to this second half of the fight as the tank damage will be higher.
Bloody Rage, making him attack 50% faster
and deal 25% more damage. The tank and the healer need to pay special
attention to this second half of the fight as the tank damage will be higher.
When Braun is nearing death, his dogs, attracted by the smell of blood, will turn against him and finish your job.
Achievement: Humane Society
Completing ![]() Humane Society is very straightforward. Simply burn down
Houndmaster Braun without killing any of the hounds that he summons.
Humane Society is very straightforward. Simply burn down
Houndmaster Braun without killing any of the hounds that he summons.
You may want to consider using a second tank to keep the hounds away from the party, so that they do not get killed by collateral damage on Braun.
Armsmaster Harlan
The fight against Armsmaster Harlan presents you with one main ability,
![]() Blades of Light, that can quickly kill you if you fail to react properly.
Blades of Light, that can quickly kill you if you fail to react properly.
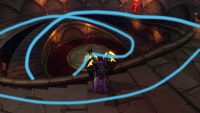
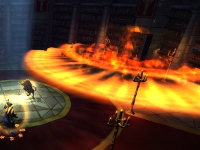
![]() Blades of Light causes Harlan to travel around the room, spinning
rapidly with his axe. While spinning, he deals heavy damage to all targets
within 6 yards and then carries them around the room with him (still dealing
damage to them). During Blades of Light, Harlan always travels along the same
path (see screenshot on the left), but not always in the same direction. The
easiest way to deal with Blades of Light is to be on the stairs when it starts
and jump down when Harlan comes towards you.
Blades of Light causes Harlan to travel around the room, spinning
rapidly with his axe. While spinning, he deals heavy damage to all targets
within 6 yards and then carries them around the room with him (still dealing
damage to them). During Blades of Light, Harlan always travels along the same
path (see screenshot on the left), but not always in the same direction. The
easiest way to deal with Blades of Light is to be on the stairs when it starts
and jump down when Harlan comes towards you.
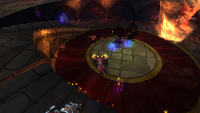
![]() Blades of Light is always cast right after Harlan performs
Blades of Light is always cast right after Harlan performs
![]() Heroic Leap, so there is no reason for Blades of Light to
surprise you. Heroic Leap causes him to leap to the center of his room,
dealing heavy Physical damage to all enemies within 8 yards. As a rule of
thumb, avoid being in the middle of the room.
Heroic Leap, so there is no reason for Blades of Light to
surprise you. Heroic Leap causes him to leap to the center of his room,
dealing heavy Physical damage to all enemies within 8 yards. As a rule of
thumb, avoid being in the middle of the room.
Scarlet Defenders will often join Harlan in his fight against you. You
should ignore these adds, as they will die every time Harlan uses
![]() Blades of Light.
Blades of Light.
Also, do not stand in front of Harlan, as he possesses a frontal damaging
attack: ![]() Dragon's Reach.
Dragon's Reach.
Finally, healers should be aware of ![]() Berserker Rage, which Harlan stacks
on himself every 3 seconds, and that causes him to deal more damage and
attack faster. Dispelling this effect removes 10 stacks.
Berserker Rage, which Harlan stacks
on himself every 3 seconds, and that causes him to deal more damage and
attack faster. Dispelling this effect removes 10 stacks.
Achievement: Mosh pit
To complete ![]() Mosh Pit, you need to get 4 Scarlet Defenders
and 4 players caught up in the same execution of Armsmaster Harlan's
Mosh Pit, you need to get 4 Scarlet Defenders
and 4 players caught up in the same execution of Armsmaster Harlan's
![]() Blades of Light.
Blades of Light.
Usually, when Scarlet Defenders spawn, they are almost immediately sucked in Harlan's Blades of Light. Your tank needs to taunt the first pair of Defenders and make them avoid the Blades of Light. For the next Blades of Light, you will have 4 Scarlet Defenders up, and the tank should make sure they get caught up. Then, four of the players (everyone save the healer, if possible) should willingly cross Harlan's path during Blades of Light. The healer has to be very careful and keep everyone alive.
It is better to jump into ![]() Blades of Light towards the end of it,
as you receive less damage.
Blades of Light towards the end of it,
as you receive less damage.
Alternatively, you can have the tank taunt every pair of Defenders until
you have gathered 8 of them. Then, let them be sucked in ![]() Blades of Light.
Blades of Light.
Flameweaver Koegler
The fight against Flameweaver Koegler is all about avoiding
![]() Greater Dragon's Breath, a frontal attack, and
Greater Dragon's Breath, a frontal attack, and ![]() Book Burner,
which creates damaging Fire zones.
Book Burner,
which creates damaging Fire zones.
-

 Greater Dragon's Breath deals heavy Fire damage in front of Koegler,
who slowly rotates on himself during the cast. Being hit by Greater Dragon's
Breath also causes you to become disorientated for 5 seconds. Therefore,
you need to keep moving around Koegler to avoid being hit by the breath.
-

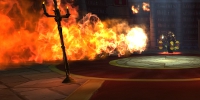
 Book Burner is used a few times during the encounter and sets
a book shelf aflame, creating a large damaging fiery zone around the shelf.
Players can intercept the missile that Keogler throws to light the book
shelf by standing in its path.
Other than avoiding these two abilities, you should interrupt his casts of
![]() Fireball Volley and
Fireball Volley and ![]() Pyroblast whenever possible. Note
that he will sometimes use
Pyroblast whenever possible. Note
that he will sometimes use ![]() Quickened Mind, which makes his next three spells
with a cast time be almost instant, preventing you from interrupting them.
Quickened Mind, which makes his next three spells
with a cast time be almost instant, preventing you from interrupting them.
Final Considerations
This concludes our Scarlet Halls dungeon guide. If you find any inconsistency or mistake, feel free to comment or send us an e-mail.
- Hardcore WoW Just Got Much Harder With This New Game Mode
- This Player Turned Old WoW Servers into Glowing Room Art
- An Almost Completely Solid Meta: Tank and Healer Log Rankings, Week 7
- Sub for 6 Months, Get This Exclusive Fire Horse Mount in 2026
- These Mounts Are Coming to the Trading Post in Patch 11.2.5
- Anniversary Classic WoW 1-Hour Scheduled Maintenance – Tuesday, September 30th
- Don’t Miss This Week’s Biggest WoW News!
- RP Players Are Losing It Over This All-Class Kilt Set
