Mogu'shan Palace Heroic Dungeon Guide (WoD 6.1.2)
Table of Contents
The Mogu'shan Palace is a 5-man dungeon located in the Valde of Eternal Blossoms on Pandaria. The Normal-difficulty version of the dungeon is open to players between level 87 and 90, while the Heroic-difficulty version of the dungeon is reserved to level 90 players. It houses 3 encounters: Trial of the King, Gekkan, and Xin the Weaponmaster.
Introduction
The Mogu'shan Palace becomes available to players after reaching level 87. In this dungeon, players need to defeat this last bastion of the Mogu, further weakening their positions on Pandaria.
The dungeon has a linear layout during which you will progress through four different zones and encounter three bosses. The dungeon features both Normal (level 87+) and Heroic (level 90) modes. There are no differences in mechanics between Normal and Heroic modes. The only differences are increased health and damage done for all bosses and enemies.
| Throne of Ancient Conquerors | Vault of Kings past | The Crimson Assembly Hall |
|---|---|---|
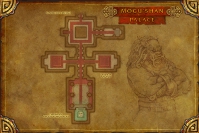
|
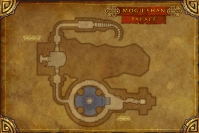
|
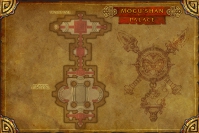
|
This guide will cover all of the three boss encounters, as well as the quests and achievements that are available in the dungeon.
Normal Difficulty Loot
In Normal Difficulty, the level of the items you can obtain from the Mogu'shan Palace is 450.
Armor
| Item Name | Armor | Slot | Main Stats | Source |
|---|---|---|---|---|
| Cloth | Shoulders | Intellect/Spirit | Xin the Weaponmaster | |
| Cloth | Wrist | Intellect | Kuai the Brute | |
| Cloth | Wrists | Intellect | Relics of the Four Kings | |
| Cloth | Wrists | Intellect/Spirit | Relics of the Four Kings | |
| Cloth | Legs | Intellect/Hit | A New Lesson for the Master | |
| Cloth | Legs | Intellect/Spirit | A New Lesson for the Master | |
| Cloth | Feet | Intellect | Xin the Weaponmaster | |
| Leather | Wrists | Intellect | Relics of the Four Kings | |
| Leather | Wrists | Agility | Relics of the Four Kings | |
| Leather | Waist | Intellect | Kuai the Brute | |
| Leather | Feet | Agility | Xin the Weaponmaster | |
| Leather | Legs | Intellect | A New Lesson for the Master | |
| Leather | Legs | Agility | A New Lesson for the Master | |
| Wrists | Intellect | Relics of the Four Kings | ||
| Hands | Intellect | Gekkan | ||
| Legs | Intellect | A New Lesson for the Master | ||
| Head | Agility | Kuai the Brute | ||
| Wrists | Agility | Relics of the Four Kings | ||
| Wrists | Agility | Xin the Weaponmaster | ||
| Legs | Agility | A New Lesson for the Master | ||
| Plate | Wrists | Intellect | Relics of the Four Kings | |
| Plate | Chest | Intellect | Xin the Weaponmaster | |
| Plate | Legs | Intellect | A New Lesson for the Master | |
| Plate | Feet | Intellect | Gekkan | |
| Plate | Head | Strength | Kuai the Brute | |
| Plate | Wrists | Strength | Relics of the Four Kings | |
| Plate | Wrists | Strength/Parry | Relics of the Four Kings | |
| Plate | Hands | Strength/Parry | Xin the Weaponmaster | |
| Plate | Legs | Strength/Parry | A New Lesson for the Master | |
| Plate | Legs | Strength | A New Lesson for the Master |
Weapons
| Item Name | Type | Main Stats | Source |
|---|---|---|---|
| Dagger | Intellect | Xin the Weaponmaster | |
| One-Hand Fist Weapon | Agility | Gekkan | |
| Polearm | Agility | Xin the Weaponmaster |
Amulets, Cloaks, Rings, and Trinkets
| Item Name | Type | Main Stats | Source |
|---|---|---|---|
| Amulet | Intellect/Spirit | Xin the Weaponmaster | |
| Cloak | Intellect | Gekkan | |
| Amulet | Strength/Mastery | Kuai the Brute | |
| Ring | Strength | Xin the Weaponmaster | |
| Trinket | Stamina/Dodge | Gekkan |
Heroic Difficulty Loot
In Heroic Difficulty, the level of the items you can obtain from the Mogu'shan Palace is 463.
Armor
| Item Name | Armor | Slot | Main Stats | Source |
|---|---|---|---|---|
| Cloth | Shoulders | Intellect/Spirit | Xin the Weaponmaster | |
| Cloth | Wrist | Intellect | Kuai the Brute | |
| Cloth | Feet | Intellect | Xin the Weaponmaster | |
| Leather | Waist | Intellect | Kuai the Brute | |
| Leather | Feet | Agility | Xin the Weaponmaster | |
| Hands | Intellect | Gekkan | ||
| Head | Agility | Kuai the Brute | ||
| Wrists | Agility | Xin the Weaponmaster | ||
| Plate | Chest | Intellect | Xin the Weaponmaster | |
| Plate | Feet | Intellect | Gekkan | |
| Plate | Head | Strength | Kuai the Brute | |
| Plate | Hands | Strength/Parry | Xin the Weaponmaster |
Weapons
| Item Name | Type | Main Stats | Source |
|---|---|---|---|
| Dagger | Intellect | Xin the Weaponmaster | |
| One-Hand Fist Weapon | Agility | Gekkan | |
| Polearm | Agility | Xin the Weaponmaster |
Amulets, Cloaks, Rings, and Trinkets
| Item Name | Type | Main Stats | Source |
|---|---|---|---|
| Amulet | Intellect/Spirit | Xin the Weaponmaster | |
| Cloak | Intellect | Gekkan | |
| Amulet | Strength/Mastery | Kuai the Brute | |
| Ring | Strength | Xin the Weaponmaster | |
| Trinket | Stamina/Dodge | Gekkan |
Quests
There are 2 quests that can be completed within the instance. They are given by Sinan the Dreamer inside the palace, at the entrance.
The first quest is Relics of the Four Kings. It requires you to collect 4 relics that you will find inside vaults located in the room where you fight Gekkan, the second boss.
The second quest is A New Lesson for the Master. It requires you to defeat Xin the Weaponmaster, the last boss of the dungeon.
The quests reward you with item level 450 gear (see loot section above).
Dungeon Trash Mobs
None of the trash mobs present in the dungeon should pose your group a problem. Therefore, we will focus chiefly on the bosses.
Trial of the King
During this encounter, you will have to fight 3 bosses in succession: Kuai the Brute, Ming the Cunning, and Haiyan the Unstoppable. Ming becomes active when you kill Kuai, and Hayian becomes active when you kill Ming.
Kuai the Brute
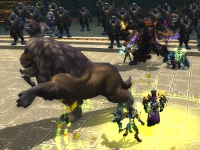 Kuai the Brute is accompanied by Mu'Shiba, his loyal quilen.
- Kuai deals moderate melee damage to the tank and will often cast
 Shockwave, which sends players standing in front of him
in the air, making them susceptible to heavy fall damage.
 - Mu'Shiba will keep jumping on random players, afflicting them with
 Ravage, a powerful DoT.
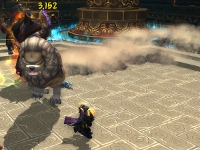 The only thing to watch out for is
 ![]() Shockwave, so
avoid standing in front of the boss.
Shockwave, so
avoid standing in front of the boss.
You should kill Mu'Shiba first, in order to remove the strain on your healer
that ![]() Ravage represents. Then you can kill Kuai.
Ravage represents. Then you can kill Kuai.
At higher gear levels, groups will most likely choose to ignore Mu'Shiba and kill Kuai directly, to shorten the duration of the fight.
Ming the Cunning
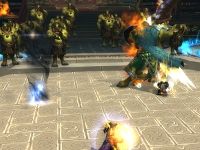
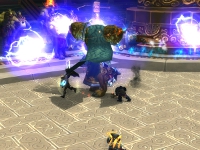
Ming the Cunning is a standard tank-and-spank fight with mainly two abilities to avoid or deal with.
 Whirling Dervish summons a moving cyclone that randomly moves around the
arena, dealing damage and knocking back players it runs into. Avoid it.
 Magnetic Field causes Ming to create a damaging vortex around him in
which he pulls all party members. Get out of it quickly.
In addition, he keeps casting ![]() Lightning Bolt at the tank.
This spell's cast can be interrupted.
Lightning Bolt at the tank.
This spell's cast can be interrupted.
|
|
Haiyan the Unstoppable
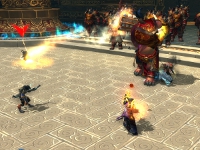 For this fight, players need to stack loosely to deal with
![]() Meteor. They need to be spread out no more than 10 yards.
When Haiyan casts this ability (something he does regularly), it will send a
meteor at a random party member, dealing damage shared by everyone within 10
yards of the impact.
Meteor. They need to be spread out no more than 10 yards.
When Haiyan casts this ability (something he does regularly), it will send a
meteor at a random party member, dealing damage shared by everyone within 10
yards of the impact.
Other than that, random players will often be afflicted by
![]() Conflagrate, which deals Fire damage for 5 seconds
and disorients. When Conflagrate ends, it jumps to a nearby player.
To prevent this from happening, move away from players afflicted by
this ability.
Conflagrate, which deals Fire damage for 5 seconds
and disorients. When Conflagrate ends, it jumps to a nearby player.
To prevent this from happening, move away from players afflicted by
this ability.
Healers should pay special attention to Haiyan's last ability: ![]() Traumatic Blow.
It causes the tank to receive 50% less healing for 5 seconds.
Traumatic Blow.
It causes the tank to receive 50% less healing for 5 seconds.
Gekkan
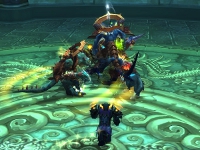 After defeating the Trial of the King, you need to follow a Saurok down a
flight of stairs that will open up on the side of the arena. After fighting
a few groups of trash mobs, you will meet Gekkan and his four followers:
Glintrok Hexxer, Glintrok Ironhide, Glintrok Oracle, and
Glintrok Skulker. To progress past this encounter, you need to defeat
all 5 enemies, even if you kill Gekkan first.
Abilities
Gekkan, the Glintrok Ironhide, and the Glintrok Skulker will attack players with melee attacks, so they need to be tanked. The Glintrok Hexxer and the Glintrok Oracle will remain stationary for the entire duration of the fight.
Gekkan will often buff his followers with ![]() Reckless Inspiration, which
increases their haste and the damage that they take. This effect can stack up
to 10 stacks. Reckless Inspiration is Gekkan's only ability. Upon dying,
he will stack Reckless Inspiration one last time on all his remaining followers.
Reckless Inspiration, which
increases their haste and the damage that they take. This effect can stack up
to 10 stacks. Reckless Inspiration is Gekkan's only ability. Upon dying,
he will stack Reckless Inspiration one last time on all his remaining followers.
Gekkan's followers have various abilities. All of them are interruptible.
- The Glintrok Ironhide channels
 Iron Protector, which grants
nearby allies a 50% damage taken reduction.
 - The Glintrok Skulker casts
 Shank, which deals damage to a random
player, stunning them.
 - The Glintrok Oracle casts
 Cleansing Flame, which
regularly heals all allies within 60 yards for a large amount, and
 Fire Bolt (only if no one is in his melee range),
which deals Fire damage.
 - The Glintrok Hexxer casts
 Hex of Lethargy, which inflicts shadow
damage and applies a stacking debuff on the target that reduces spell casting
speed, and
  Dark Bolt (only if no one is in his melee range), which
deals Shadow damage.
Strategy
Despite the large number of combined abilities from the boss and his followers, the combat is relatively simple.
The most important part of the encounter is to focus on interrupting the abilities of the followers. While the Glintrok Ironhide and the Glintrok Hexxer are still alive, interrupt their abilities with priority.
With that in mind, we believe that the easiest strategy for this encounter is to kill the followers in the order we give below before killing Gekkan.
- Kill the Glintrok Ironhide, so that you no longer need to interrupt
his channels of
 Iron Protector.
 - Kill the Glintrok Hexxer, so that you no longer need to interrupt
his casts of
 Hex of Lethargy.
 - Kill the Glintrok Skulker.
- Kill the Glintrok Oracle.
Once all the followers are dead, the tank and the healers must be mindful
of the fact that Gekkan will have 4 stacks of ![]() Reckless Inspiration,
which cause him to attack twice faster.
Reckless Inspiration,
which cause him to attack twice faster.
Achievement: Glintrok N' Roll
Completing ![]() Glintrok N' Roll is very straightforward, although it is not
an easy task, especially since you need to do it in the Heroic version of the fight.
Glintrok N' Roll is very straightforward, although it is not
an easy task, especially since you need to do it in the Heroic version of the fight.
When you enter the lower part of the palace, a Glintrok Scout will spot you and you will be given a very visible emote. From there on, you have 5 minutes to kill Gekkan and his followers.
There are a lot of trash mobs on your way to Gekkan, so you cannot realistically engage them all and still make it in time (at least not at low gear levels). To skip fighting as many mobs as possible, you should jump down into the arena where you fight Gekkan, as soon as your reach the room where this arena is located.
Having a Rogue in your group can be very helpful, thanks to Shroud of Concealment.
Xin the Weaponmaster
Xin the Weaponmaster is the last boss of the dungeon and will present you with an interesting fight, during which there are no complex mechanics to deal with. Rather, you will have to be almost constantly on the move to avoid the various traps and damaging abilities that the boss will throw at your group.
![]() Inciting Roar and Death From Above! are the only
source of unavoidable damage in the fight. Inciting Roar is regularly cast by
Xin. Death From Above is not a spell or an ability, but rather it is
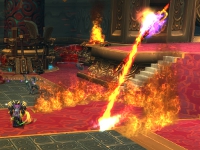
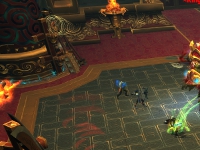
an event that actives when Xin reaches 33% health. It causes damaging arrows to
be shot to players from the walls.
Inciting Roar and Death From Above! are the only
source of unavoidable damage in the fight. Inciting Roar is regularly cast by
Xin. Death From Above is not a spell or an ability, but rather it is
an event that actives when Xin reaches 33% health. It causes damaging arrows to
be shot to players from the walls.
The other sources of damage can all be avoided by properly moving out of the danger zone they create.
 Ground Slam deals damage in a 30-yard cone in front of Xin and
stacks an armor reduction debuff on players hit by the slam. Avoid standing
in front of Xin.
Ground Slam deals damage in a 30-yard cone in front of Xin and
stacks an armor reduction debuff on players hit by the slam. Avoid standing
in front of Xin.- Circles of Flames will be created throughout the fight around random players. The circle takes a few seconds to complete, after which time it explodes and deals damage to players inside it, knocking them into the air. Move out of circles of flames being drawn around you.
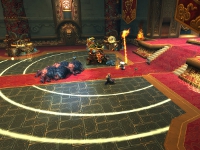
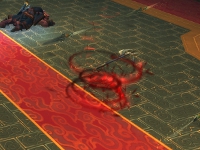
- Whirlwinding Axes are axes that travel through the arena and deal damage to players they run into, knocking them back in the process.
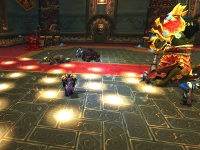
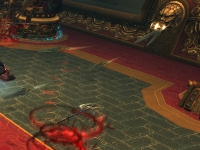
- Blade Trap activates when Xin reaches 66% health and causes streams of swords to be thrown at the party from the walls, dealing heavy damage to anyone they catch.
Circles of Flames and Whirlwinding Axes are the most important abilities. If you are caught by them, you will knocked back or into the air, which runs the risk that you will land on another zone of danger.
When Xin reaches 33% health, all the traps are activated and the arena becomes very confusing, and you will have very little room to move. There is no known enrage timer to the encounter, so you should focus on avoiding abilities and attack the boss when you are safe.
| Circle of Flame | ||
|---|---|---|
|
|
|
| Whirlwinding Axes | Blade Trap | Death From Above! |
|
|
|
Tip
Several mechanics of the fight can safely be ignored by having the tank pull Xin back to the trance of the room and have Xin face either corner of the doorway. See a post by Alroxas on our forums.
Achievement: What Does This Button Do?
![]() What Does This Button Do? requires serious coordination between
party members.
What Does This Button Do? requires serious coordination between
party members.
Shortly after Xin activates his Death From Above! trap, you will see 2 crystals appearing on opposite corners of the room. You will need to designate two players whose task will be to reach these crystals and click them. As a result, another crystal will appear along the walls of the room. This new crystal represent the secret defense mechanism mentioned in the tooltip of the achievement. Clicking it will activate that secret weapon and you simply need the tank to move the boss in its path.
Note that with all players spread around the room, healing them will be somewhat chaotic. To make it easier, the healer should try to remain close to the center of the room, so that everyone in the party is in range (or almost in range).
Achievement: Quarrelsome Quilen Quintet
![]() Quarrelsome Quilen Quintet is a very straightforward achievement. To
complete it, you need to collect the 5 Jade Quilens hidden inside
the dungeon. These are small, friendly NPCs with a very distinctive green
color.
Quarrelsome Quilen Quintet is a very straightforward achievement. To
complete it, you need to collect the 5 Jade Quilens hidden inside
the dungeon. These are small, friendly NPCs with a very distinctive green
color.
Final Considerations
This concludes our Mogu'shan Palace dungeon guide. If you find any inconsistency or mistake, feel free to comment or send us an e-mail.
- Mage Class Changes in War Within Alpha Build 54361
- Mythic+ Dungeon Adjustments: April 26th
- Savage Ebony Turtle Mount in Patch 10.2.7
- Earthen Allied Race Dances and Customization Options
- Warband Members in Follower Dungeons?
- Dragonflight 10.2.6 and SoD Hotfixes, April 25th
- Affliction Warlock Changes in War Within Alpha: April 25th
- Windwalker Monk Changes in War Within Alpha: April 25th