

The Iron Maidens Detailed Strategy Guide (Heroic+Mythic Modes included)

Introduction
This guide is intended to provide a comprehensive description of the encounter with The Iron Maidens in Blackrock Foundry. It is targeted at anyone who desires to understand the fight mechanics.
This guide is updated for World of Warcraft WoD 6.1.2.
The Iron Maidens is a boss encounter in the Iron Assembly wing of the Blackrock Foundry raid instance. This council-style fight requires excellent coordination from your raid. Throughout the fight, some raid members will have to travel to a different fighting area to perform specific tasks.
General Information
Normal, Heroic, and Mythic Difficulty
This main part of this guide covers both the Normal and Heroic versions of the encounter, as far as mechanics and general strategy is concerned. The only difference between these two modes is found in the tuning, with Heroic being more difficult.
When we speak of extreme situations (such as the difficulty of a soft enrage timer, or damage from a certain source being too high to survive), we mostly refer to Heroic mode.
In addition to this, we have a specific Mythic mode section, where we present all the differences between Normal/Heroic and Mythic, as well as the strategy to defeat the Mythic encounter.
Enrage Timer
We do not currently know what the hard enrage timer for this encounter is.
There are several soft enrage mechanics towards the end of the fight, which will eventually overwhelm the healers with raid-wide damage.
Summing Things Up
In this section, we will very briefly summarise what the players belonging to each of the three roles have to do during this fight. This is by no means meant to provide sufficient information to master the encounter, and it is only supposed to give you a very rough idea of what to watch out for.
Tanks
- On the main platform, pick up the 3 bosses. One tank should take Sorka, the other tank should take Marak. Gar'an does not have a threat table and does not melee, but she can be taunted to have her focus her damage on tanks for limited amounts of time. This can be helpful, but it is not necessary. There is no need for a tank switch.
- Marak the Blooded should be tanked facing away from the raid, so
that only her tank and the player targeted by
 Blood Ritual take damage
from that cone attack.
Blood Ritual take damage
from that cone attack. - When tanking Marak the Blooded, after 100 Iron Fury, chain damage-mitigating
cooldowns to reduce the damage the raid takes from
 Sanguine Strikes.
 - Whenever a boss jumps to a ship, one of the two tanks must use a chain to go to the ship as well, and tank the mob(s) present there. Gorak, one of the 3 mini bosses, must be tanked facing the raid.
Healers
- Beware of the predictable damage that you can expect throughout the
fight.
- high damage on Marak's tank when Blood Ritual is cast;
- high damage on the player targeted by
 Dark Hunt;
 - high raid-wide damage from Sanguine Strikes;
- high damage on Gorak's tank (on the ship).
- high damage on Marak's tank when
- In addition to this, watch out for players taking avoidable damage from
abilities such as
 Rapid Fire and
  Bomb Impact.
 - In Mythic mode, beware of the extreme damage suffered by the
targets of Blood Ritual and
 Blade Dash. Also make sure to
dispel
Blade Dash. Also make sure to
dispel  Convulsive Shadows only when the affected players are out of
the raid (ideally in a corner of the main platform).
Convulsive Shadows only when the affected players are out of
the raid (ideally in a corner of the main platform).
DPS
- DPS the 3 bosses in a balanced way, following the priority given to you by the raid leader.
- If you are jumping on the ship, prioritise the adds over the mini bosses, and be sure to interrupt Battle Medic Rogg as much as possible.
Everyone
- On the main platform
- Be spread out at least 8 yards apart to minimise the damage from
Blade Dash.
- Move away from other players (and towards the edge of the platform) when
you are targeted by Rapid Fire.
- Move in front of Marak the Blooded if you are targeted by
Blood Ritual.
- Move in between Admiral Gar'an and the player targeted by
 Penetrating Shot, in order to split the damage.
 - Players targeted by
 Bloodsoaked Heartseeker must move away from
one another.
Bloodsoaked Heartseeker must move away from
one another.
- Be spread out at least 8 yards apart to minimise the damage from
- On the ship
- Spread out around Uktar to minimise the damage from
 Grapeshot Blast.
 - Constantly move out of the void zones created under you by
Uk'urogg's
 Blood Corruption Aura. Move in such a way as to
conserve as much space as possible.
Blood Corruption Aura. Move in such a way as to
conserve as much space as possible.
- Spread out around Uktar to minimise the damage from
- In Mythic mode
- If targeted by Blood Ritual, move out of the raid and use defensive
cooldowns to soak the subsequent 2 casts of Blood Ritual, which will also
target you.
- If affected by Convulsive Shadows, move to a corner of the main
platform and wait to be dispelled there. All players must avoid touching the
Lingering Shadow void zones.
- Avoid being hit by the
 Swirling Vortex tornadoes that result from
Blade Dash.
Swirling Vortex tornadoes that result from
Blade Dash. - Players targeted by Bloodsoaked Heartseeker should move away from
both the raid and each other, and all raid members should stand as far as they
can from
 Volatile Blood Orbs.
- If targeted by
Overview of the Fight
The encounter against the Iron Maidens is a complex council-style fight. You will face 3 bosses which do not share health, each with their own unique abilities. The fight takes place on a platform, but at certain fixed intervals in the fight, the lowest-health boss will leap to a nearby ship, where they will spawn certain adds. Some of your raid members will have to travel over to that ship and defeat the adds in a certain amount of time; otherwise, you will wipe.
The 3 bosses also have an Iron Fury resource that very slowly increases over time, granting the bosses a new ability at 30 Iron Fury and another at 100 Iron Fury.
We do not have a video preview of the Iron Maidens encounter, but we recommend this video by Method. Note that this is based on footage from the Warlords of Draenor Beta, so things can very well change before the fight reaches live servers.
Surroundings and Encounter Format
It is important to understand both the setting and the format of the encounter, since these elements play a large role in the fight and in the way you will build your strategy. In this section, we will cover everything about the mechanics of the fight which does not have anything to do with specific abilities.
The Bosses
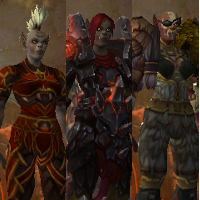
You will face 3 bosses in this encounter: Admiral Gar'an, Enforcer Sorka, and Marak the Blooded. The three bosses do not share health, and you will have to engage all 3 of them at once when you start the fight. Each boss has a set of several unique abilities.
The bosses have a resource called Iron Fury. This resource starts out empty, and it increases very slowly throughout the fight, independently of anything the raid does, at the same rate for all 3 bosses. It takes roughly 10 minutes for them to reach 100 Iron Fury.
Each of the bosses gains a new ability at 30 Iron Fury, and another new ability at 100 Iron Fury.
It is also worth noting that the bosses have a sort of passive ability
called ![]() Iron Will, which is triggered when one of the bosses reaches
20% health. This instantly grants all 3 bosses 100 Iron Fury, and stacks a
buff on them increasing their damage done by 5% every 20 seconds.
Iron Will, which is triggered when one of the bosses reaches
20% health. This instantly grants all 3 bosses 100 Iron Fury, and stacks a
buff on them increasing their damage done by 5% every 20 seconds.
As we will see in the following section, at certain intervals in the fight, one of the 3 bosses will temporarily leave the fighting area.
The Ship
The fight takes place primarily on a square platform. This is where the bosses are engaged at the start of the fight, and where the raid will spend most of their time. However there is another fight area that is sometimes accessible. A short distance from this platform, there is a large ship. At regular intervals in the fight (seemingly 1 minute after the start of the fight, and every 3 minutes and 20 seconds after that), one of the 3 bosses will temporarily leave the ship, jumping onto the ship.
The first boss to jump to the ship will be the one whose health is lowest at the time of the first jump. The second boss to jump will be the one whose health is lowest at the time of the second jump, out of the two bosses that had not jumped the first time. The third jump will be performed by the only boss who had not jumped in the previous two jumps.
When a boss jumps onto the ship, they will cease to use their normal abilities, and instead simply spam projectiles at the main platform. We will talk about this ability in the Abilities section. A number of chains at the edge of the platform become active at this time, allowing some raid members to travel to the deck of the ship. On the Beta, we experienced 6 chains (each one only allowing a single use), but this may depend on the raid size. As we are about to see, sending players to the shop is very important.
Once a boss jumps to the ship, they cannot be targeted or attacked, and they do not need to; the raid members who jump on the ship have a different task, instead. On the ship, each boss will summon a specific mini boss (which can, in turn, summon more adds). Additionally, a small bomb will appear on the deck of the ship, which can be clicked by raid members once the mini boss is dead. Clicking the bomb starts a short channel, which sabotages the main gun of the ship. Failing to do this before a certain amount of time (we are not sure how long this is, but it is between 85-95 seconds) causes the cannon to deal lethal damage to the entire raid. When the cannon is successfully sabotaged, all raid members on the deck of the ship are returned to the main platform, and boss that had jumped to the ship returns there as well, rejoining the fight.
There is no way to get to the ship aside from using the chains we mentioned above, and players who are on the ship are out of range of the players on the platform, and vice versa.
Abilities
In this section, we will look at the abilities of each of the 3 bosses, as well as of the specific mini boss that they summon when they jump to the ship. However, before we look at each boss specifically, we must talk about an ability that all 3 bosses share.
While a boss is on the ship, they spam an ability called ![]() Bomb Impact
on the main platform, where the raid is located. Each cast of Bomb Impact
fires a large barrage of bombs onto the platform, which deal a high amount of
Fire damage in a small radius when they land. About 5 seconds after landing,
the bombs explode (
Bomb Impact
on the main platform, where the raid is located. Each cast of Bomb Impact
fires a large barrage of bombs onto the platform, which deal a high amount of
Fire damage in a small radius when they land. About 5 seconds after landing,
the bombs explode (![]() Detonation Sequence), dealing a very high amount of Fire damage in a 7-yard
radius. Each wave contains enough bombs to effectively fill up the entire
platform (meaning that there are no safe spots between the bombs), but
fortunately not all the bombs are launched at once. This means that the bombs
that land first also explode first, creating a safe zone where players can move
to avoid the explosions of the other bombs. Bombs that are about to explode
grow in size and turn red.
Detonation Sequence), dealing a very high amount of Fire damage in a 7-yard
radius. Each wave contains enough bombs to effectively fill up the entire
platform (meaning that there are no safe spots between the bombs), but
fortunately not all the bombs are launched at once. This means that the bombs
that land first also explode first, creating a safe zone where players can move
to avoid the explosions of the other bombs. Bombs that are about to explode
grow in size and turn red.
Admiral Gar'an
Admiral Gar'an has two basic abilities, and two abilities that she gains at 30 and 100 Iron Fury, respectively.
 Iron Shot targets a random raid member, dealing a high amount of
Physical damage to them. This ability cannot be avoided in any way. Gar'an
spams this ability so much that she will very rarely melee her tank.
Iron Shot targets a random raid member, dealing a high amount of
Physical damage to them. This ability cannot be avoided in any way. Gar'an
spams this ability so much that she will very rarely melee her tank.- Rapid Fire is an ability that Gar'an uses regularly
throughout the fight. She targets a random raid member, and a few seconds
later begins firing a barrage of projectiles at their location. These
projectiles have a short travel time, and the area where they will land is
indicated by a red circle. Each projectile deals a high amount of Fire damage
in a 5-yard radius. It is important to mention that each projectile is fired
at the updated location of the targeted player, meaning that players
can determine where the projectiles will land by running in a certain
direction.
- Penetrating Shot is the ability that Gar'an gains at 30 Iron Fury,
and which she uses regularly after this time. She targets a random raid
member, and begins the 6-second cast time of the spell. At the end of the
cast time, she deals a massive amount of Physical damage to the target, split
between any players who are located between Gar'an and her target at that
time.
 Deploy Turret is the ability that Gar'an gains at 100 Iron Fury,
and which she uses regularly after this time. The boss summons a turret that
fires projectiles in a circular pattern. Any players who are hit by these
projectiles have a stacking Fire damage DoT applied to them.
Deploy Turret is the ability that Gar'an gains at 100 Iron Fury,
and which she uses regularly after this time. The boss summons a turret that
fires projectiles in a circular pattern. Any players who are hit by these
projectiles have a stacking Fire damage DoT applied to them.
When Admiral Gar'an jumps to the ship, she summons a mini boss called
Uktar on the deck of the ship. Uktar has a single ability, called
![]() Grapeshot Blast, which targets a random raid member (located on the
deck of the ship) and deals a high amount of Physical damage in a cone
(directed towards the targeted player). Uktar spams this ability, and he does
not need to be tanked. Additionally, Uktar also summons an
add called Battle Medic Rogg.
Grapeshot Blast, which targets a random raid member (located on the
deck of the ship) and deals a high amount of Physical damage in a cone
(directed towards the targeted player). Uktar spams this ability, and he does
not need to be tanked. Additionally, Uktar also summons an
add called Battle Medic Rogg.
- Battle Medic Rogg has 3 abilities.
 Earthen Barrier is an interruptible spell that places a damage
absorption shield, either on Uktar or on Rogg himself.
Earthen Barrier is an interruptible spell that places a damage
absorption shield, either on Uktar or on Rogg himself.- Protective Earth is an interruptible spell that creates a pool on
the ground, which applies a damage absorption shield to either Uktar or to
Rogg, if they come in contact with it.
 Chain Lightning is an interruptible spell that deals
a high amount of Nature damage to a player (located on the deck of the ship),
and which jumps to other nearby players.
Chain Lightning is an interruptible spell that deals
a high amount of Nature damage to a player (located on the deck of the ship),
and which jumps to other nearby players.
Enforcer Sorka
Enforcer Sorka has only one basic ability, and two abilities that she gains at 30 and 100 Iron Fury, respectively.
- Blade Dash is an ability that Sorka uses regularly throughout the
fight. A temporary copy of the boss charges the raid member that is furthest
away from her, dealing a
high amount of Physical damage to them and to any allies within 8 yards of
them.
- Convulsive Shadows is the ability that Sorka gains at 30 Iron Fury,
and which she uses regularly after this time. She applies a dispellable Shadow
damage DoT
to a random raid member, which starts out with 4 stacks. The DoT deals damage
to the target every 2 seconds, with each tick removing one of the stacks. The
DoT deals a moderate amount of Shadow damage for each stack. If the
DoT is dispelled, the player takes a much larger amount of damage per
dispelled stack.
- Dark Hunt is the ability that Sorka gains at 100 Iron Fury,
and which she uses regularly after this time. She targets a random raid member,
and 8 seconds later she teleports to that player, dealing a high amount of
Physical damage to them.
When Enforcer Sorka jumps to the ship, she summons a mini boss called
Gorak on the deck of the ship. Gorak has a single ability, called
![]() Deadly Throw. He targets a random raid member (located on the deck of
the ship), and he throws a knife in their direction. The knife damages the
first player it comes in contact with for a very high amount of Physical damage,
also slowing the movement speed of the affected player by 80% for 5 seconds.
Additionally, Gorak regularly summons adds called
Iron Eviscerators.
Deadly Throw. He targets a random raid member (located on the deck of
the ship), and he throws a knife in their direction. The knife damages the
first player it comes in contact with for a very high amount of Physical damage,
also slowing the movement speed of the affected player by 80% for 5 seconds.
Additionally, Gorak regularly summons adds called
Iron Eviscerators.
- Iron Eviscerators have 3 abilities.
 Fixate causes the Eviscerator to fixate on a random
raid member (located on the deck of the ship) and only attack that target.
Fixate causes the Eviscerator to fixate on a random
raid member (located on the deck of the ship) and only attack that target. Swiftness is a stacking self buff that increases the movement
speed and haste of the Eviscerator by 10% per stack.
Swiftness is a stacking self buff that increases the movement
speed and haste of the Eviscerator by 10% per stack. Expose Armor is an ability that the Eviscerator uses against its
fixate target. This deals a high amount of Physical damage to the target,
and debuffs them to take 10% increased Physical damage for 15 seconds.
Expose Armor is an ability that the Eviscerator uses against its
fixate target. This deals a high amount of Physical damage to the target,
and debuffs them to take 10% increased Physical damage for 15 seconds.
Marak the Blooded
Marak the Blooded has only one basic ability, and two abilities that she gains at 30 and 100 Iron Fury, respectively.
- Blood Ritual is an ability that Marak uses regularly throughout the
fight. She targets a random raid member, and fires a cone attack in the
direction of that player. This deals a high amount of Shadow damage to all
affected players, and it also has a second component called
 Crystallized Blood, which deals a massive amount of Physical damage to
the closest target within that cone. The same player is always targeted by
3 Blood Ritual casts in a row, after which time a new random player is
chosen.
Crystallized Blood, which deals a massive amount of Physical damage to
the closest target within that cone. The same player is always targeted by
3 Blood Ritual casts in a row, after which time a new random player is
chosen. - Bloodsoaked Heartseeker is the ability that Marak gains at 30 Iron
Fury, and which she uses regularly after this time. Marak marks 3 targets,
and then throws an axe at one of them. The axe bounces between the 3 marked
players, dealing Physical damage each time it hits one of them. The amount of
Physical damage depends on the distance between the players, with the damage
being massive if the players are very close to each other.
- Sanguine Strikes is the ability that Marak gains at 100 Iron Fury,
and which she uses regularly after this time. Her melee attacks inflict
raid-wide Shadow damage equal to a part of the damage they deal to her
tank.
When Marak the Blooded jumps to the ship, she summons a mini boss called
Uk'urogg on the deck of the ship. Uk'urogg has a single ability, called
![]() Blood Corruption Aura. This causes all raid members on the deck of the
ship to spawn a damaging void zone at their location, every 2 seconds. These
void zones, called
Blood Corruption Aura. This causes all raid members on the deck of the
ship to spawn a damaging void zone at their location, every 2 seconds. These
void zones, called ![]() Corrupted Blood, are not very large, but
they remain on the ship for the entire duration of the ship phase, and they
deal very high Shadow damage every 2 seconds to players who stand in them.
Corrupted Blood, are not very large, but
they remain on the ship for the entire duration of the ship phase, and they
deal very high Shadow damage every 2 seconds to players who stand in them.
Strategy
Your raid has to combine several different elements in order to successfully defeat the Iron Maidens.
- You will have to be able to correctly deal with the abilities used by the Iron Maidens on the main platform.
- You will have to send players to the ship each time a boss jumps to it, and these players will have to kill the adds on the ship in time to sabotage the ship's cannon. Each group of players that jumps to the platform should be comprised of 1 tank, 1 healer, and as many DPS players as you can send.
- You will have to bring the three bosses to low health at the same time, and kill them quickly once the first boss reaches 20% health and all bosses gain 100 Iron Fury. For this, you will need a correct general strategy.
In the following sub-sections, we will go into more details. We will start by explaining how to handle the abilities of each boss (on the main platform, as well as how to handle the mini boss they spawn on the ship), and then we will go over the general strategy for the fight.
Tanking Concerns
One tank should pick up Sorka, while the other picks up Marak. There is no need for any tank switch. Gar'an will only rarely melee her tank, so tanking her results in very low damage, so either one of the two tanks can take her.
Admiral Gar'an
Main Platform
On the main platform, Admira Gar'an has to be tanked, but she will very
rarely melee her tank. Instead, she will spam ![]() Iron Shot on random
raid members, something which cannot be avoided or prevented in any way, and
the damage of which just has to be healed.
Iron Shot on random
raid members, something which cannot be avoided or prevented in any way, and
the damage of which just has to be healed.
![]() Rapid Fire, however, is an ability that must be handled
very carefully. The player who is targeted by it has to quickly move away from
other raid members, preferably to one of the edges of the platform, and they
have to keep moving in order to avoid being hit by any of the projectiles.
Rapid Fire, however, is an ability that must be handled
very carefully. The player who is targeted by it has to quickly move away from
other raid members, preferably to one of the edges of the platform, and they
have to keep moving in order to avoid being hit by any of the projectiles.
At 30 Iron Fury, Gar'an will start using ![]() Penetrating Shot. To handle
this ability, whenever a player is targeted by it, as many raid members who are
not being damaged by another ability (and who are not very low on health) as
possible should move in between that player and the boss, so that the damage
is split between as many player as possible.
Penetrating Shot. To handle
this ability, whenever a player is targeted by it, as many raid members who are
not being damaged by another ability (and who are not very low on health) as
possible should move in between that player and the boss, so that the damage
is split between as many player as possible.
Finally, at 100 Iron Fury, Gar'an will start using ![]() Deploy Turret.
Players will simply have to avoid the blasts from the turret while it is
up.
Deploy Turret.
Players will simply have to avoid the blasts from the turret while it is
up.
Ship Mini Boss
When Gar'an jumps to the ship, she will summon Uktar, who does not
need to be tanked. This means that sending 1 healer and 5 DPS players (or
as many as there are chains) is viable. Players who
are on the ship should spread out, so as to ensure that
only the target of ![]() Grapeshot Blast takes damage from its cone
attack.
Grapeshot Blast takes damage from its cone
attack.
Battle Medic Rogg is a higher priority than Uktar, and your raid
should try to kill him off as quickly as possible. While he is alive, he should
be interrupted as much as possible. The most important spell to interrupt is
![]() Earthen Barrier, followed by
Earthen Barrier, followed by ![]() Chain Lightning,
and finally
Chain Lightning,
and finally ![]() Protective Earth. If a Protective Earth cast does go
through, just make sure that neither Rogg nor Uktar are moved into the pool
that is created on the ground, so that they do not receive a damage absorption
shield.
Protective Earth. If a Protective Earth cast does go
through, just make sure that neither Rogg nor Uktar are moved into the pool
that is created on the ground, so that they do not receive a damage absorption
shield.
Keep in mind that Rogg does not need to be killed for your raid to be able to sabotage the ship. It is enough to kill Uktar, so as an alternative strategy you can just interrupt Rogg and kill Uktar. Doing it this way can be quicker and more efficient.
Enforcer Sorka
Main Platform
On the main platform, Enforcer Sorka must be tanked, and she deals a fair
amount of damage to her tank. While Sorka is on the platform, raid members
should be spread out at least 8 yards apart, so that ![]() Blade Dash does
not damage more than one player. After Blade Dash is cast, players will have
to avoid being hit by the (rather slow moving) tornadoes that the spell leaves
behind.
Blade Dash does
not damage more than one player. After Blade Dash is cast, players will have
to avoid being hit by the (rather slow moving) tornadoes that the spell leaves
behind.
At 30 Iron Fury, Sorka will begin applying ![]() Convulsive Shadows to random raid members. In principle, healers should not dispel this, and heal the
players as the debuff ticks and removes its stacks. The damage of the first
tick will be highest, so it is useful if players can use a defensive cooldown
or a self heal to ensure that they do not die. Dispelling the debuff should
only be done if the debuffed player has a very strong defensive cooldown
active (such as
Convulsive Shadows to random raid members. In principle, healers should not dispel this, and heal the
players as the debuff ticks and removes its stacks. The damage of the first
tick will be highest, so it is useful if players can use a defensive cooldown
or a self heal to ensure that they do not die. Dispelling the debuff should
only be done if the debuffed player has a very strong defensive cooldown
active (such as ![]() Dispersion).
Dispersion).
At 100 Iron Fury, Sorka will begin using ![]() Dark Hunt. Healers have to
be aware of players who are targeted by Dark Hunt. At the end of the 8-second
duration of the ability, these players will take a lot of Physical damage, so
it is important that they are topped off.
Dark Hunt. Healers have to
be aware of players who are targeted by Dark Hunt. At the end of the 8-second
duration of the ability, these players will take a lot of Physical damage, so
it is important that they are topped off.
Ship Mini Boss
When Sorka jumps to the ship, she will summon Gorak, who needs
to be tanked. When fighting
Gorak, the players on the ship should be grouped together behind the tank
(with Groak essentially facing all the players on the ship), so that no matter
who Gorak targets with ![]() Deadly Throw, the tank will be the first player
to be hit by it, thus soaking the very high amount of Physical damage that
this deals.
Deadly Throw, the tank will be the first player
to be hit by it, thus soaking the very high amount of Physical damage that
this deals.
While fighting Gorak, the Iron Eviscerators that he constantly
summons are a top priority. These adds easy to handle as long as they have
not been alive for a long time, since otherwise their stacking
![]() Swiftness buff can become too dangerous. Players who are Fixated on
by the Eviscerators should move and kite them. It is best if players kite the
adds in tight circles around Gorak, so that cleave damage hits both Gorak
and the Iron Eviscerators.
Swiftness buff can become too dangerous. Players who are Fixated on
by the Eviscerators should move and kite them. It is best if players kite the
adds in tight circles around Gorak, so that cleave damage hits both Gorak
and the Iron Eviscerators.
Marak the Blooded
Main Platform
On the main platform, Marak the Blooded must be tanked, and she deals a fair amount of damage to her tank.
While Marak is on the platform, players have to
be prepared for her casts of ![]() Blood Ritual, since these require special
handling. Whenever a player is targeted by Blood Ritual, they must quickly move
in front of Marak, in such a way that Marak's tank is located between the
player and the boss. The goal is to have only the tank and the targeted player
in front of Marak, so that the cone attack of Blood Ritual only hits the two of
them, with the tank being the closest player to the boss, so that they soak the
Physical damage element of the ability (
Blood Ritual, since these require special
handling. Whenever a player is targeted by Blood Ritual, they must quickly move
in front of Marak, in such a way that Marak's tank is located between the
player and the boss. The goal is to have only the tank and the targeted player
in front of Marak, so that the cone attack of Blood Ritual only hits the two of
them, with the tank being the closest player to the boss, so that they soak the
Physical damage element of the ability (![]() Crystallized Blood).
Crystallized Blood).
At 30 Iron Fury, Marak will being casting ![]() Bloodsoaked Heartseeker.
The players who are marked by this ability will have to quickly move as far
away from one another as they can, in order to minimise the damage of the
ability.
Bloodsoaked Heartseeker.
The players who are marked by this ability will have to quickly move as far
away from one another as they can, in order to minimise the damage of the
ability.
At 100 Iron Fury, Marak will begin using ![]() Sanguine Strikes. This
causes each raid member to take part of the damage that the tank takes, as
Shadow damage. When this happens, the Marak's tank should try to chain as many
damage-mitigating abilities as possible, in order to reduce the damage that the
raid takes. Healers must also be prepared for this part of the fight, and
save some raid cooldowns. Since it comes in at 100 Fury, the fight will be
close to its end, so this is the time to go all out as far as
healing goes.
Sanguine Strikes. This
causes each raid member to take part of the damage that the tank takes, as
Shadow damage. When this happens, the Marak's tank should try to chain as many
damage-mitigating abilities as possible, in order to reduce the damage that the
raid takes. Healers must also be prepared for this part of the fight, and
save some raid cooldowns. Since it comes in at 100 Fury, the fight will be
close to its end, so this is the time to go all out as far as
healing goes.
Ship Mini Boss
When Marak jumps to the ship, she will summon Uk'urogg, who needs
to be tanked. When fighting
him, essentially the only concern of the players on the ship is correct
management of the space on the deck of the ship, as far as the
![]() Corrupted Blood void zones are concerned. Every player on
the ship will create a small void zone under their location every 2 seconds,
so even though the deck of the ship is large, it is possible to almost run out
of space, depending on the DPS of the players on the ship. So, it is important
the players begin on one end of the ship (opposite to the end where the bomb
to sabotage the cannon is located), pack the void zones neatly next to each other,
and slowly work their way to the other end of the ship by the time that
Uk'urogg dies.
Corrupted Blood void zones are concerned. Every player on
the ship will create a small void zone under their location every 2 seconds,
so even though the deck of the ship is large, it is possible to almost run out
of space, depending on the DPS of the players on the ship. So, it is important
the players begin on one end of the ship (opposite to the end where the bomb
to sabotage the cannon is located), pack the void zones neatly next to each other,
and slowly work their way to the other end of the ship by the time that
Uk'urogg dies.
General Strategy
On the main platform, players will essentially be spending their time
handling the combined abilities of all 3 bosses, in the ways that we have
described above. Before 30 Iron Fury, this
means mostly staying spread out, moving out of the raid when targeted by
![]() Rapid Fire, and moving in front of Marak when targeted by
Rapid Fire, and moving in front of Marak when targeted by
![]() Blood Ritual.
Blood Ritual.
After 30 Iron Fury, additional movement is required to move in and soak the
damage of ![]() Penetrating Shot, and for the players targeted by
Penetrating Shot, and for the players targeted by
![]() Bloodsoaked Heartseeker to spread out. Healers will also have to find
the best way to deal with
Bloodsoaked Heartseeker to spread out. Healers will also have to find
the best way to deal with ![]() Convulsive Shadows.
Convulsive Shadows.
After 100 Iron Fury, the fight will enter its most intense phase. It is
most likely (and probably required, from a DPS check perspective) that at this
point the bosses be around 20% health, which means that the 100 Iron Fury could
well be triggered by ![]() Iron Will. What this means is that the bosses will
not only use their 100 Iron Fury abilities, but also receive a stacking
buff increasing their damage dealt. The combination of these two factors will
create an extremely stressful environment, with increasing raid-wide damage
from
Iron Will. What this means is that the bosses will
not only use their 100 Iron Fury abilities, but also receive a stacking
buff increasing their damage dealt. The combination of these two factors will
create an extremely stressful environment, with increasing raid-wide damage
from ![]() Sanguine Strikes, which will eventually overwhelm the healers and
lead to a wipe.
Sanguine Strikes, which will eventually overwhelm the healers and
lead to a wipe.
What we have described above, however, is not everything. As we mentioned,
whenever a boss jumps to the ship, she will no longer use her normal abilities
on the platform, which will give the raid a small respite. However, when this
happens, she will be spamming ![]() Bomb Impact on the platform. Below,
we will tell you how to handle Bomb Impact, and then we will tell you in
which order the bosses should be killed.
Bomb Impact on the platform. Below,
we will tell you how to handle Bomb Impact, and then we will tell you in
which order the bosses should be killed.
Bomb Impact
When a boss jumps to the ship and begins casting ![]() Bomb Impact, the
entire platform will be hit by bombs. Avoiding the initial impact of these
bombs can be difficult, but their damage is not very high, so this is not a
great concern. The great concern is making sure not to take damage from their
subsequent explosions. There is a reliable way to do this.
Bomb Impact, the
entire platform will be hit by bombs. Avoiding the initial impact of these
bombs can be difficult, but their damage is not very high, so this is not a
great concern. The great concern is making sure not to take damage from their
subsequent explosions. There is a reliable way to do this.
When the bombs begin to land on the platform, you must pay attention to which bombs land first. Then, you should move close to these bombs (but outside of the 7-yard radius of their impending explosion), and wait for them to explode. As soon as they explode, move into the area where they were, and you will be safe there from the explosions of the subsequently-landed bombs.
Remember that you will still have to deal with the abilities of the remaining 2 bosses while Bomb Impact is being cast.
Boss Order
Since the bosses do not share health, it is tempting to think that you can
just focus on a single boss and kill her, thus taking her out of the fight
early on and eliminating a number of abilities. However, the effect of
![]() Iron Will prevents this, because as soon as one boss reaches 20%
health, all of them instantly gain 100 Iron Fury, meaning that surviving for
an extended period of time, even against 2 bosses, is impossible.
Iron Will prevents this, because as soon as one boss reaches 20%
health, all of them instantly gain 100 Iron Fury, meaning that surviving for
an extended period of time, even against 2 bosses, is impossible.
Instead of this, the bosses should all be damaged simultaneously, so that
they all reach 20% around the same time. Then, when they are at 20%, you can
use all DPS cooldowns to finish them off quickly, and all healing cooldowns to
survive this intense period of the fight. At this time, you can kill off the
most problematic boss first, and this will probably be Marak the Blooded, in
order to get rid of the AoE damage that her ![]() Sanguine Strikes
causes.
Sanguine Strikes
causes.
There is more thing that must be mentioned regarding how to damage the bosses. Whenever it is time for a boss to jump to the ship, as we have explained, the lowest health boss will jump (provided that that boss had not already jumped to the ship). This means that you get to control the order in which the bosses jump to the ship. The order in which you choose to do this will depend on which bosses are giving your particular raid a harder time, with the idea being to send the one that is proving easiest on the main platform first, so that he is on the platform later on in the fight when the Iron Maidens have over 30 Iron Fury. By doing this, you will have about 1 minute when the other, more difficult bosses will be gone to the ship, at a time when the fight is more difficult, because the bosses have over 30 Iron Fury.
When to Use Heroism/Bloodlust/Time Warp
We recommend using ![]() Heroism/
Heroism/![]() Bloodlust/
Bloodlust/![]() Time Warp
when the first of the Iron Maidens reaches 20% health. At
this time, the bosses'
Time Warp
when the first of the Iron Maidens reaches 20% health. At
this time, the bosses' ![]() Iron Will will cause all of them to have 100
Iron Fury, and this will trigger a soft enrage that will quickly overwhelm your
healers. This is, therefore, the moment when the raid has to maximise DPS and
finish off the bosses as quickly as possible.
Iron Will will cause all of them to have 100
Iron Fury, and this will trigger a soft enrage that will quickly overwhelm your
healers. This is, therefore, the moment when the raid has to maximise DPS and
finish off the bosses as quickly as possible.
Mythic Mode
The Mythic mode of the Iron Maidens encounter is similar to the Normal/Heroic mode, but there are several additions to existing mechanics that have important consequences for your raid's strategy, and that also make the fight significantly more difficult.
Differences From Normal/Heroic Mode
As with all Mythic modes, all the mobs in the encounter have increased health and deal increased damage, as compared to their Normal/Heroic mode counterparts. Aside from this, there are several additions and changes to existing mechanics.
- The stacking damage increase granted by
 Iron Will is now 10%, up
from 5%.
Iron Will is now 10%, up
from 5%. - Players hit by Marak's Blood Ritual are debuffed by
 Marak's Bloodcalling, causing them to take 180% increased damage from
Blood Ritual for 1 minute. Subsequent applications of this debuff only refresh
its duration, and it does not stack.
Marak's Bloodcalling, causing them to take 180% increased damage from
Blood Ritual for 1 minute. Subsequent applications of this debuff only refresh
its duration, and it does not stack. - There are two additions to Sorka's Blade Dash.
- Players hit by Blade Dash are debuffed by
 Sorka's Prey, causing them to take 180% increased damage from Blade Dash,
for 4 minutes. Subsequent applications of this debuff only refresh its
duration, and it does not stack.
Sorka's Prey, causing them to take 180% increased damage from Blade Dash,
for 4 minutes. Subsequent applications of this debuff only refresh its
duration, and it does not stack. - After Blade Dash, a Swirling Vortex will spawn that follows the
path Sorka took during the Blade Dash. Players who are hit by the Vortex take a
moderate amount of Nature damage, and they will be stunned for 1.5
seconds.
- Players hit by Blade Dash are debuffed by
- Whenever Convulsive Shadows ticks, a Lingering Shadow void
zone spawns at that location. The void zone lasts until the end of the fight,
and any players who come in contact with it are debuffed by Convulsive
Shadows.
- When players are hit by Marak's Bloodsoaked Heartseeker, a
Volatile Blood Orb spawns at the location where player were hit. These
orbs last until the end of the fight, and they regularly cast
 Volatile Bloodbath, dealing raid-wide Shadow damage. The damage is
lower the farther away raid members are from the orb.
Volatile Bloodbath, dealing raid-wide Shadow damage. The damage is
lower the farther away raid members are from the orb.
Strategy
Despite the large number of changes to abilities, the strategy does not change drastically. It is important to mention, before anything else, that the way the raid handles the ship phases does not change, and the only differences are on the main platform.
Since ![]() Blade Dash always targets the player that is furthest away
from the boss at the time of the cast, the ideal way to handle Blade Dash
(and the
Blade Dash always targets the player that is furthest away
from the boss at the time of the cast, the ideal way to handle Blade Dash
(and the ![]() Sorka's Prey debuff) is to have a designated ranged raid
member always be the furthest away player from Sorka. They should have a
dedicated healer prepared to focus on them, and defensive cooldowns (both
internal and external) should be used to ensure the survival of this
player.
Sorka's Prey debuff) is to have a designated ranged raid
member always be the furthest away player from Sorka. They should have a
dedicated healer prepared to focus on them, and defensive cooldowns (both
internal and external) should be used to ensure the survival of this
player.
All raid members should make sure to avoid being hit by the
![]() Swirling Vortex tornadoes.
Swirling Vortex tornadoes.
Since ![]() Blood Ritual always targets the same player 3 times in a row,
when a player is hit by the ability for a first time, they should move out of
the raid and use any defensive cooldowns needed to survive (and the healers
will, obviously, have to help as well).
Blood Ritual always targets the same player 3 times in a row,
when a player is hit by the ability for a first time, they should move out of
the raid and use any defensive cooldowns needed to survive (and the healers
will, obviously, have to help as well).
Players who are targeted by ![]() Bloodsoaked Heartseeker will have to
move away from the raid and away from each other, and to use defensive
cooldowns. It is ideal if these player find locations that are somewhere
along the outside of the platform, to make it easy for the rest of the raid
to remain away from the resulting
Bloodsoaked Heartseeker will have to
move away from the raid and away from each other, and to use defensive
cooldowns. It is ideal if these player find locations that are somewhere
along the outside of the platform, to make it easy for the rest of the raid
to remain away from the resulting ![]() Volatile Blood Orbs.
Volatile Blood Orbs.
The ![]() Lingering Shadow void zones left behind by
Lingering Shadow void zones left behind by
![]() Convulsive Shadows ticks must be avoided by all players at all costs,
because even one additional Convulsive Shadows application will often result
in a wipe. As such, players affected by Convulsive Shadows should move away
from the raid, ideally in a corner of the platform, and be dispelled when they
are there.
Convulsive Shadows ticks must be avoided by all players at all costs,
because even one additional Convulsive Shadows application will often result
in a wipe. As such, players affected by Convulsive Shadows should move away
from the raid, ideally in a corner of the platform, and be dispelled when they
are there.
Aside from these elements, the fight against the Iron Maidens plays out the same as in Normal and Heroic mode.
Learning the Fight
There are many abilities in the fight that require correct movement and fast
reactions, such as ![]() Blood Ritual,
Blood Ritual, ![]() Rapid Fire, and
Rapid Fire, and
![]() Penetrating Shot. However, none of these abilities present any real
complexity, so as long as your raid members are paying attention, they should
be fine.
Penetrating Shot. However, none of these abilities present any real
complexity, so as long as your raid members are paying attention, they should
be fine.
The aspect of the fight that is most likely to cause you casualties is
![]() Bomb Impact. Taking the unnecessary damage that these bombs deal is
simply unacceptable, especially later on in the fight, so all raid members have
to avoid them almost flawlessly throughout the fight. This is an ability that
happens often enough that players should be able to get a lot of practice, but
it is important that you stress the correct way to do so (move close to one of
the initial bombs, wait for it to explode, then move into the space left behind
where you will be safe from the other bombs).
Bomb Impact. Taking the unnecessary damage that these bombs deal is
simply unacceptable, especially later on in the fight, so all raid members have
to avoid them almost flawlessly throughout the fight. This is an ability that
happens often enough that players should be able to get a lot of practice, but
it is important that you stress the correct way to do so (move close to one of
the initial bombs, wait for it to explode, then move into the space left behind
where you will be safe from the other bombs).
Loot
In this section, you will find the loot table for The Iron Maidens. The section is divided in 3 subsections: armor, weapons, and the rest (neck, back, finger, and trinket items).
In addition, The Iron Maidens can drop tokens needed for the Hands items of the Tier 17 set:
 Gauntlets of the Iron Vanquisher (Heroic, Mythic);
- Gauntlets of the Iron Protector (Heroic, Mythic);
- Gauntlets of the Iron Conqueror (Heroic, Mythic).
Armor
| Item Name | Armor | Slot | Secondary Stats |
|---|---|---|---|
| Cloth | Waist |
|
|
| Cloth | Waist |
|
|
| Cloth | Legs |
|
|
| Cloth | Legs |
|
|
| Leather | Head |
|
|
| Leather | Head |
|
|
| Leather | Hands |
|
|
| Leather | Feet |
|
|
| Head |
|
||
| Wrists |
|
||
| Legs |
|
||
| Plate | Head |
|
|
| Plate | Chest |
|
|
| Plate | Waist |
|
|
| Plate | Feet |
|
Weapons
| Item Name | Type | Main Stats | Secondary Stats |
|---|---|---|---|
| 1H Sword | Intellect |
|
|
| 1H Sword | Agility |
|
|
| 1H Sword | Agility |
|
Amulets, Cloaks, Rings, and Trinkets
| Item Name | Type | Main Stats | Secondary Stats |
|---|---|---|---|
| Amulet | Strength |
|
|
| Cloak | Agility |
|
|
| Cloak | Strength |
|
|
| Ring | Intellect |
|
|
| Trinket | Agility | Multistrike on proc | |
| Trinket | Strength | Multistrike on use |
Concluding Remarks
This concludes our raid guide for the Iron Maidens. We hope you have found it helpful. Please do not hesitate to post any feedback you may have on our forums.
Changelog
- 12 Apr. 2015: Added Mythic mode strategy.
- 06 Feb. 2015: Added a mention that Gar'an's mini boss does not need to be tanked, and that therefore it is possible to send only a healer and DPS players to the ship at that time. Also specified the duration of the ship's main cannon warming up (85-95 seconds). Clarified that only Uktar needs to be killed on Gar'an's platform for you to be able to sabotage the ship, so it is possible to leave Battle Medic Rogg alive and interrupt him, instead of killing him.