
Sea of Bygone Eras Seelie Locations and Guide
This page is for all the Seelies in the Sea of Bygone Eras in Genshin Impact, learn about their locations as well as any requirements for these Seelie.
Sea of Bygone Eras Seelie Guide
The Sea of Bygone Eras is a separate map unlocked through the World Quest series called "Canticles of Harmony". There are a total of seven Seelie available on this map. Three of which are on the west side while the other four are on the eastern side.
It is recommended to complete the World Quest series first before going out of your way to collect any Seelies to ensure all areas of the map are unlocked. World Quest completion also unlocks an additional traversal mechanic which may allow you to collectables faster.
Sea of Bygone Eras Left Side Seelie
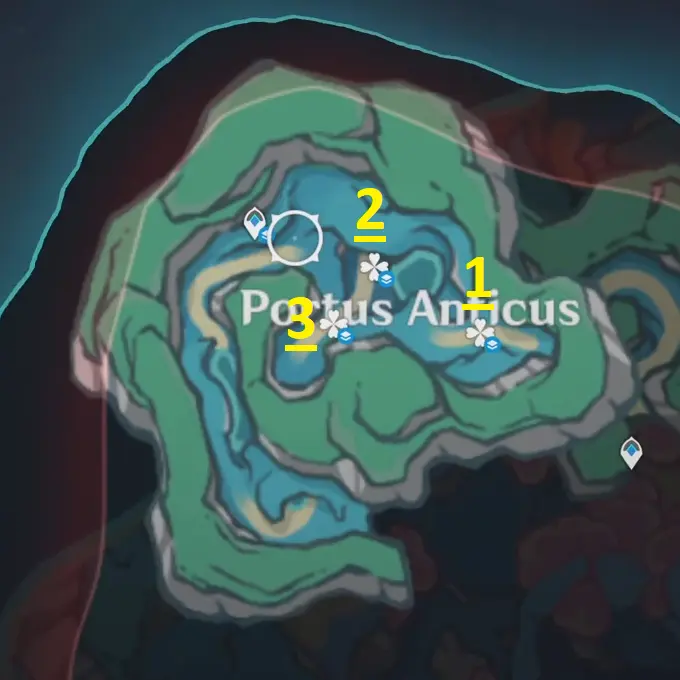
All three of the available Seelies can be found in the Portus Anticus cave right at the north of the map. These are all tied together to give the player a Luxurious Chest.
Screenshots of all Locations
 #1 Can be found high up by Anemo Slimes.
 Defeat 3 waves of Anemo slimes for the Seelie to progress upwards towards the Bell.
 Interact with Seelie #1 first before moving onto #2 on the Bell.
 #3 Can be found south of the bell on the ground.
 Defeat the 2 enemies so that the Seelie will move.
 Follow the final Seelie to obtain your Luxurious Chest.
Sea of Bygone Eras Right Side Seelie
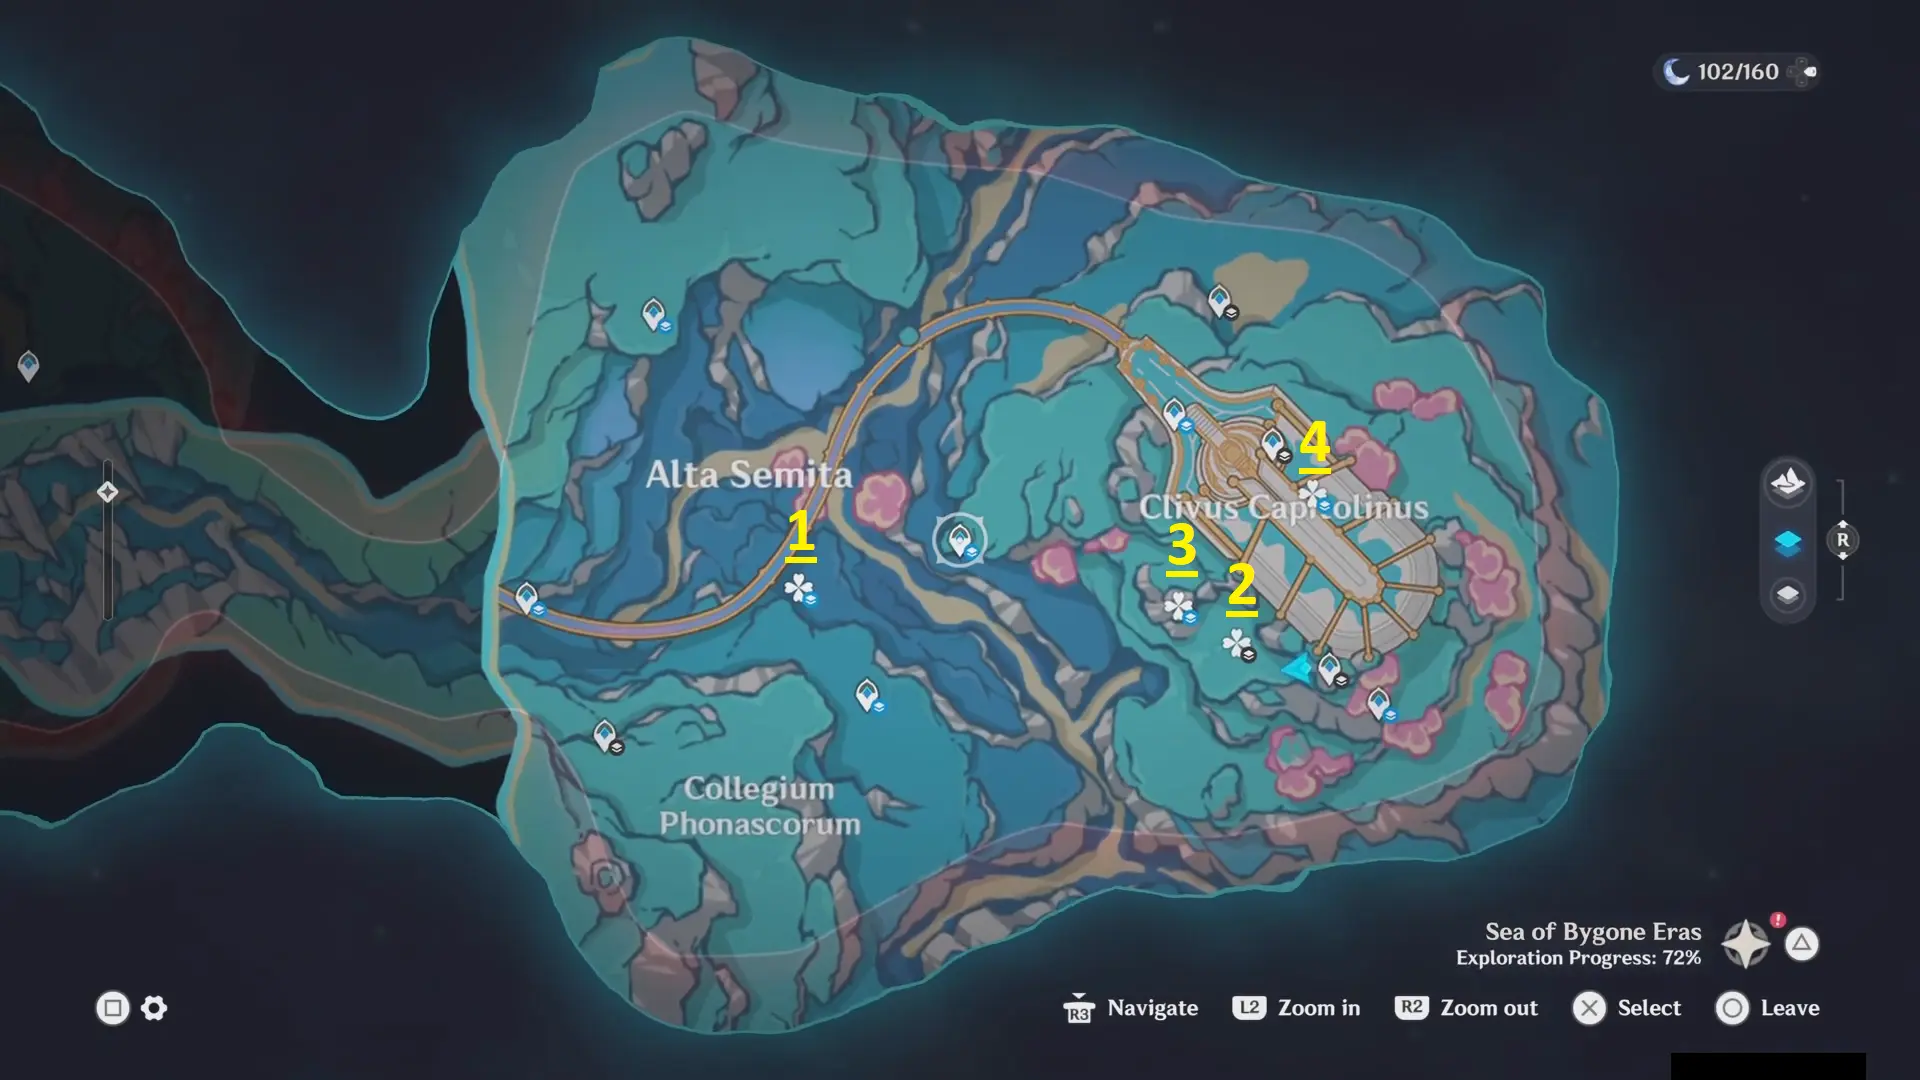
There are four Seelie available on this half of the map, scattered around the region.
Screenshots of all Locations
 Defeat the enemies surrounding #1.
 Seelie #1's end point.
 #2 can be found near the Teleport point under the water.
 Seelie #2's end point is right by the Teleport.
 #3 can be found circling the pillar. Defeat all enemies to proceed.
 Seelie #3's end point is below the pillar.
 Use the symphony power to stop the Anglerfish at seelie #4
 Seelie #5's end point near toe Anglerfish.
Changelog
- 27 Apr. 2024: Guide added.
Written by SoraHoshina, a gacha game guide writer with experience across multiple titles, covering both early progression and endgame content. With hands-on experience across a wide range of characters and builds, she shares practical strategies for tackling challenging content. She also shares gameplay and showcases on YouTube and Twitch (@sorahoshina).