Adamant Vaults Strategy Guide for Torghast
The Adamant Vaults are meant to be a bonus area of Torghast, which can only be accessed if you have unlocked it on the new Torghast talent tree (Box of Many Things) and have enough Score at the end of a regular cell block run.
This area is comprised of only two floors with new traps, enemies, and bosses,
and rewards unique new cosmetics, pets, and even ![]() Death-Bound Shards, if
you are lucky!
Death-Bound Shards, if
you are lucky!
In this guide, we will go into detail on what you can expect from these bonus floors, and list all the possible rewards.
The Adamant Vaults
If your Score is a flawless 5-star run at the end of a Torghast run, you will be able to ascend further into the Adamant Vaults.
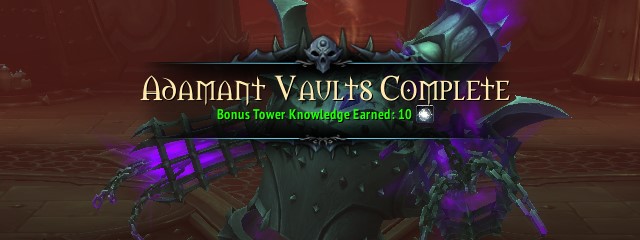
These vaults are composed of a bonus floor and a boss floor. The bonus floor
has new enemies and traps, and the boss floor has one of the three new bosses.
Defeating this boss rewards 10 Tower Knowledge and can also potentially
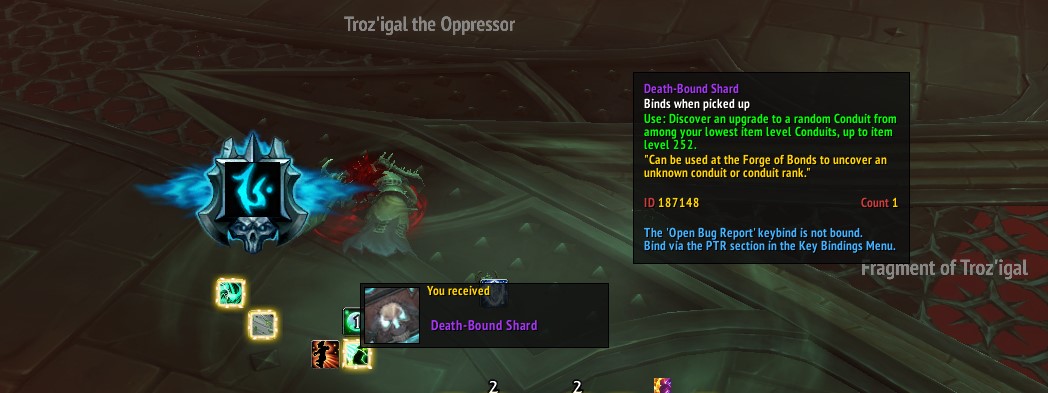
reward new cosmetics, pets, and the coveted ![]() Death-Bound Shard item,
which can drop once per week.
Death-Bound Shard item,
which can drop once per week.
The likelihood of getting a ![]() Death-Bound Shard at the end of an Adamant
Vaults run increases with the Torghast layer you are running.
Death-Bound Shard at the end of an Adamant
Vaults run increases with the Torghast layer you are running.
Adamant Vaults Traps and Layout
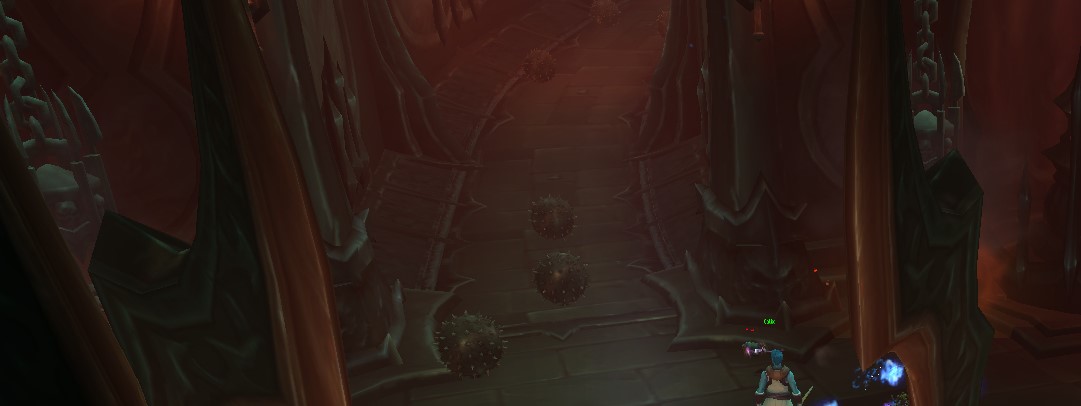
The traps in Adamant Vaults are not found anywhere else in Torghast.
Some staircases have axes that periodically hit the ground, dealing damage and knocking you back if you are hit.
You will also find corridors that contain iron balls rolling down. If you get hit by these, you will take a lot of damage and also be knocked back.
Some of the most unassuming traps in here are the Iron Maidens. These look just like passive parts of the scenery, until you get too close and they open, usually unleashing multiple dangerous elites on you! Setups such as the one shown below can be very dangerous if you get aggro from multiple elites from each Maiden, so make sure to advance carefully on these unless you have a very powerful Anima Power build going.
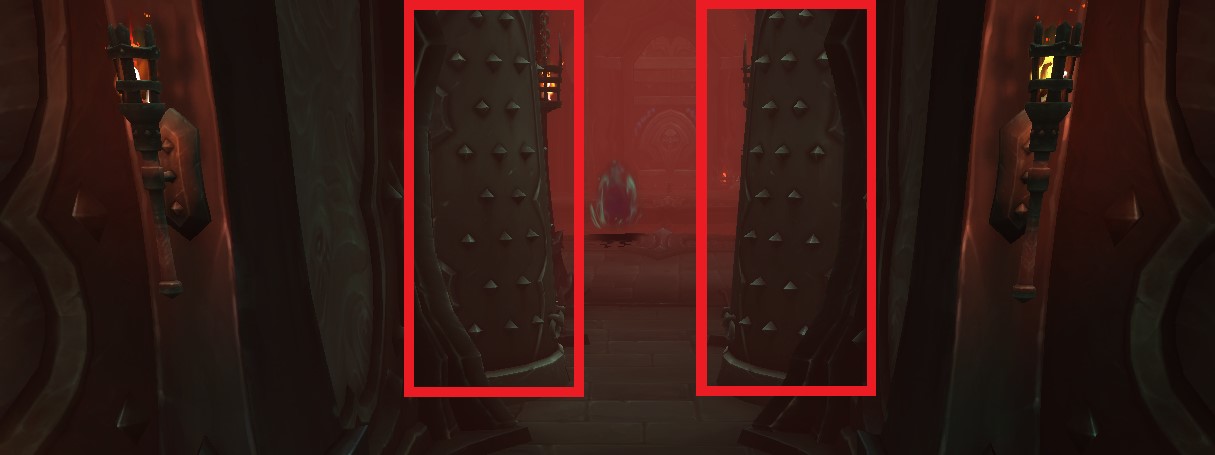
The Iron Maidens can also contain a purple effect that damages and slowly pulls you in. Just run away from it in order to break this effect.

There are also some moving spike traps on the ground, which can simply be avoided as you move around the zone.
Adamant Vaults Enemies
Most enemies within the Adamant Vaults are not threatening, and the abilities that can kill you are usually well telegraphed with casts and swirly ground effects.
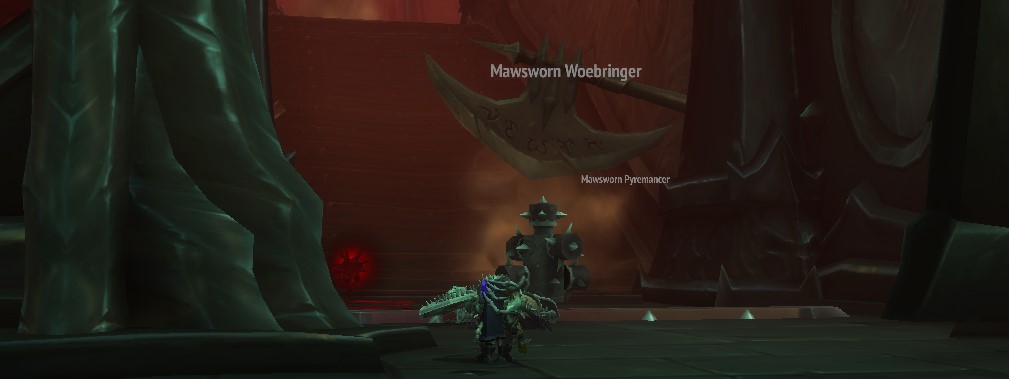
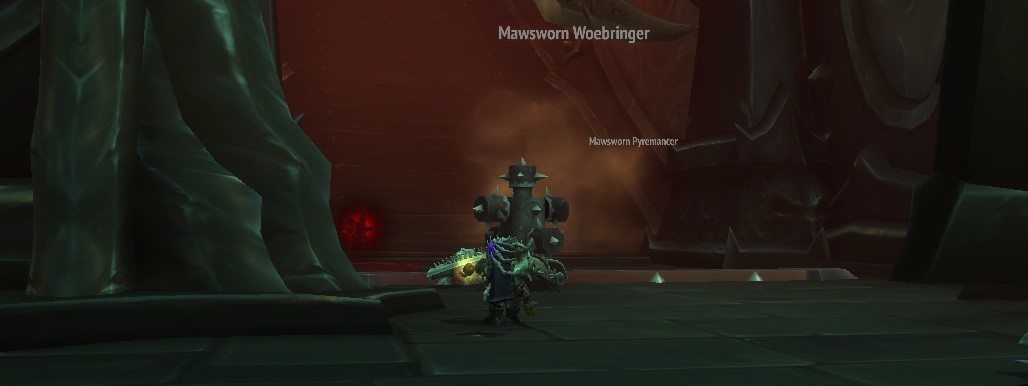
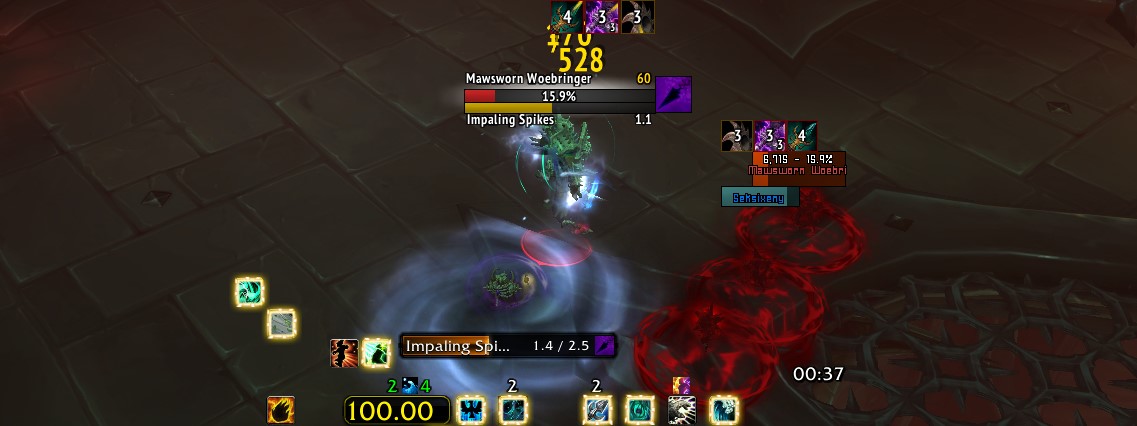
Mawsworn Woebringers will occasionally channel Impaling Spikes, which causes highly damaging swirlies to appear under your feet, make sure to dodge these!
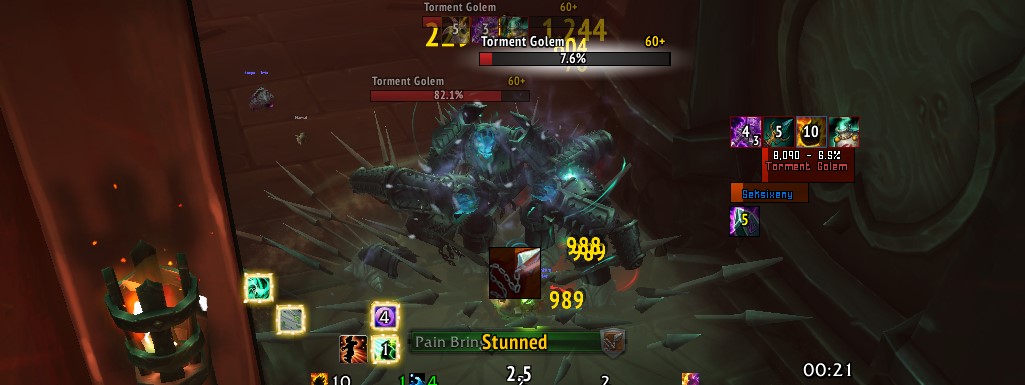
Torment Golems are elites that cast Pain Bringer, a very damaging short ranged area of effect cast that also stuns you for 3 seconds.
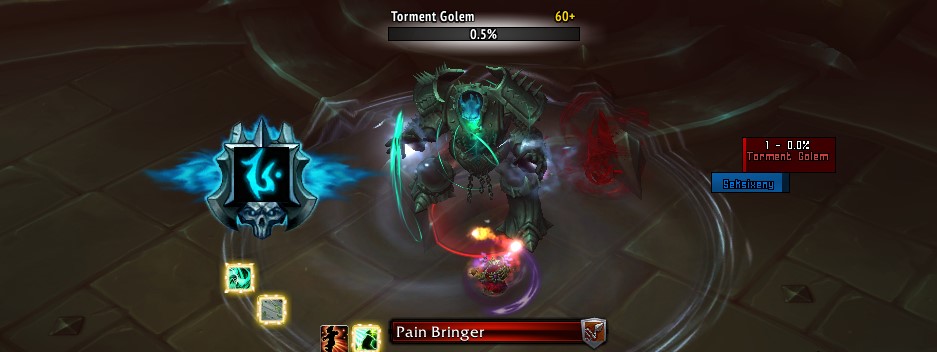
They can ambush you in multiples from inside strategically placed Iron Maidens, so make sure to be prepared to kite them around in order to avoid being stun-locked to your death!
Adamant Vaults Bosses
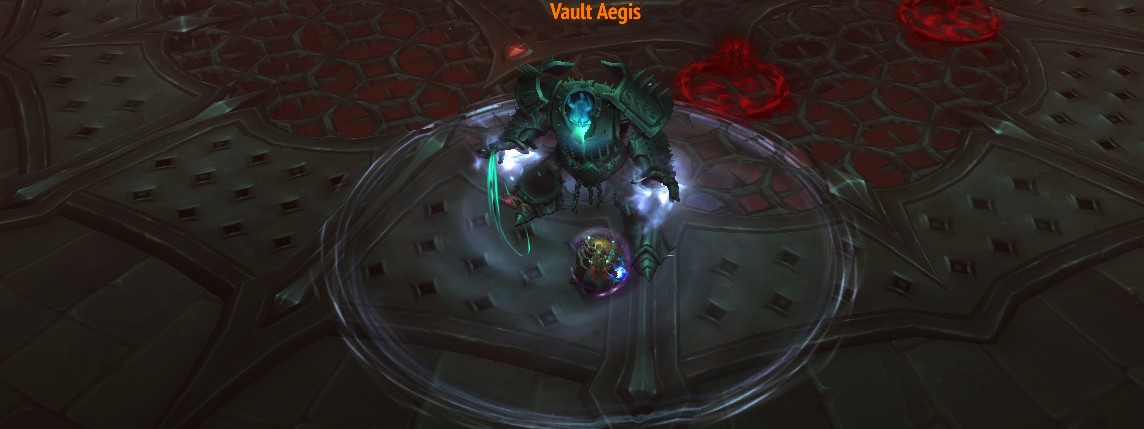
Vault Aegis
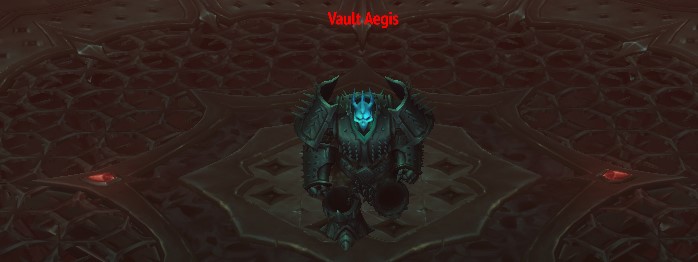
The Vault Aegis is a very easy boss with three low impact abilities:
Shredder is a short cast which hits any players inside its area of effect when it finishes, also applying a physical damage over time effect. If you are outside the circle around the boss when the cast finishes, you take no damage.
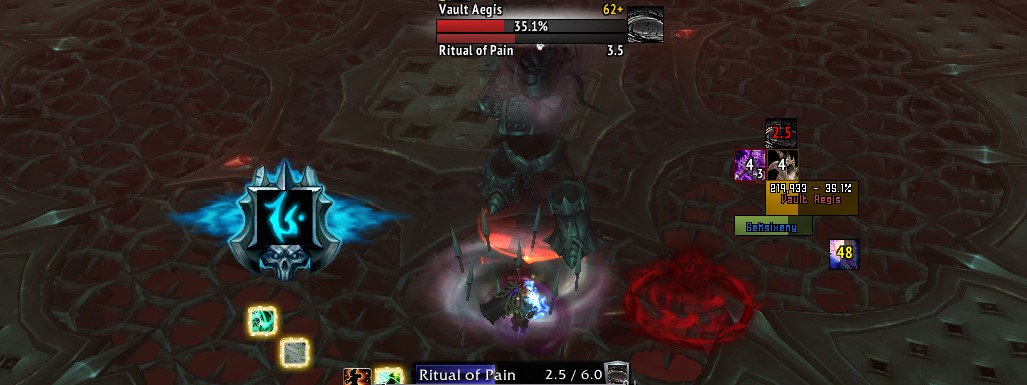
Ritual of Pain is a boss channel that causes swirlies to appear below your character, which explode for high damage soon afterwards. Keep moving to avoid this ability.
Ritual of Slaughter is cast two times per fight, at 66% and 33% health, respectively. It causes the boss to take reduced damage and channel wide damage circles around himself. There will be a non-darkened safe area nearby, which you must stand in before each wave of circles explodes.
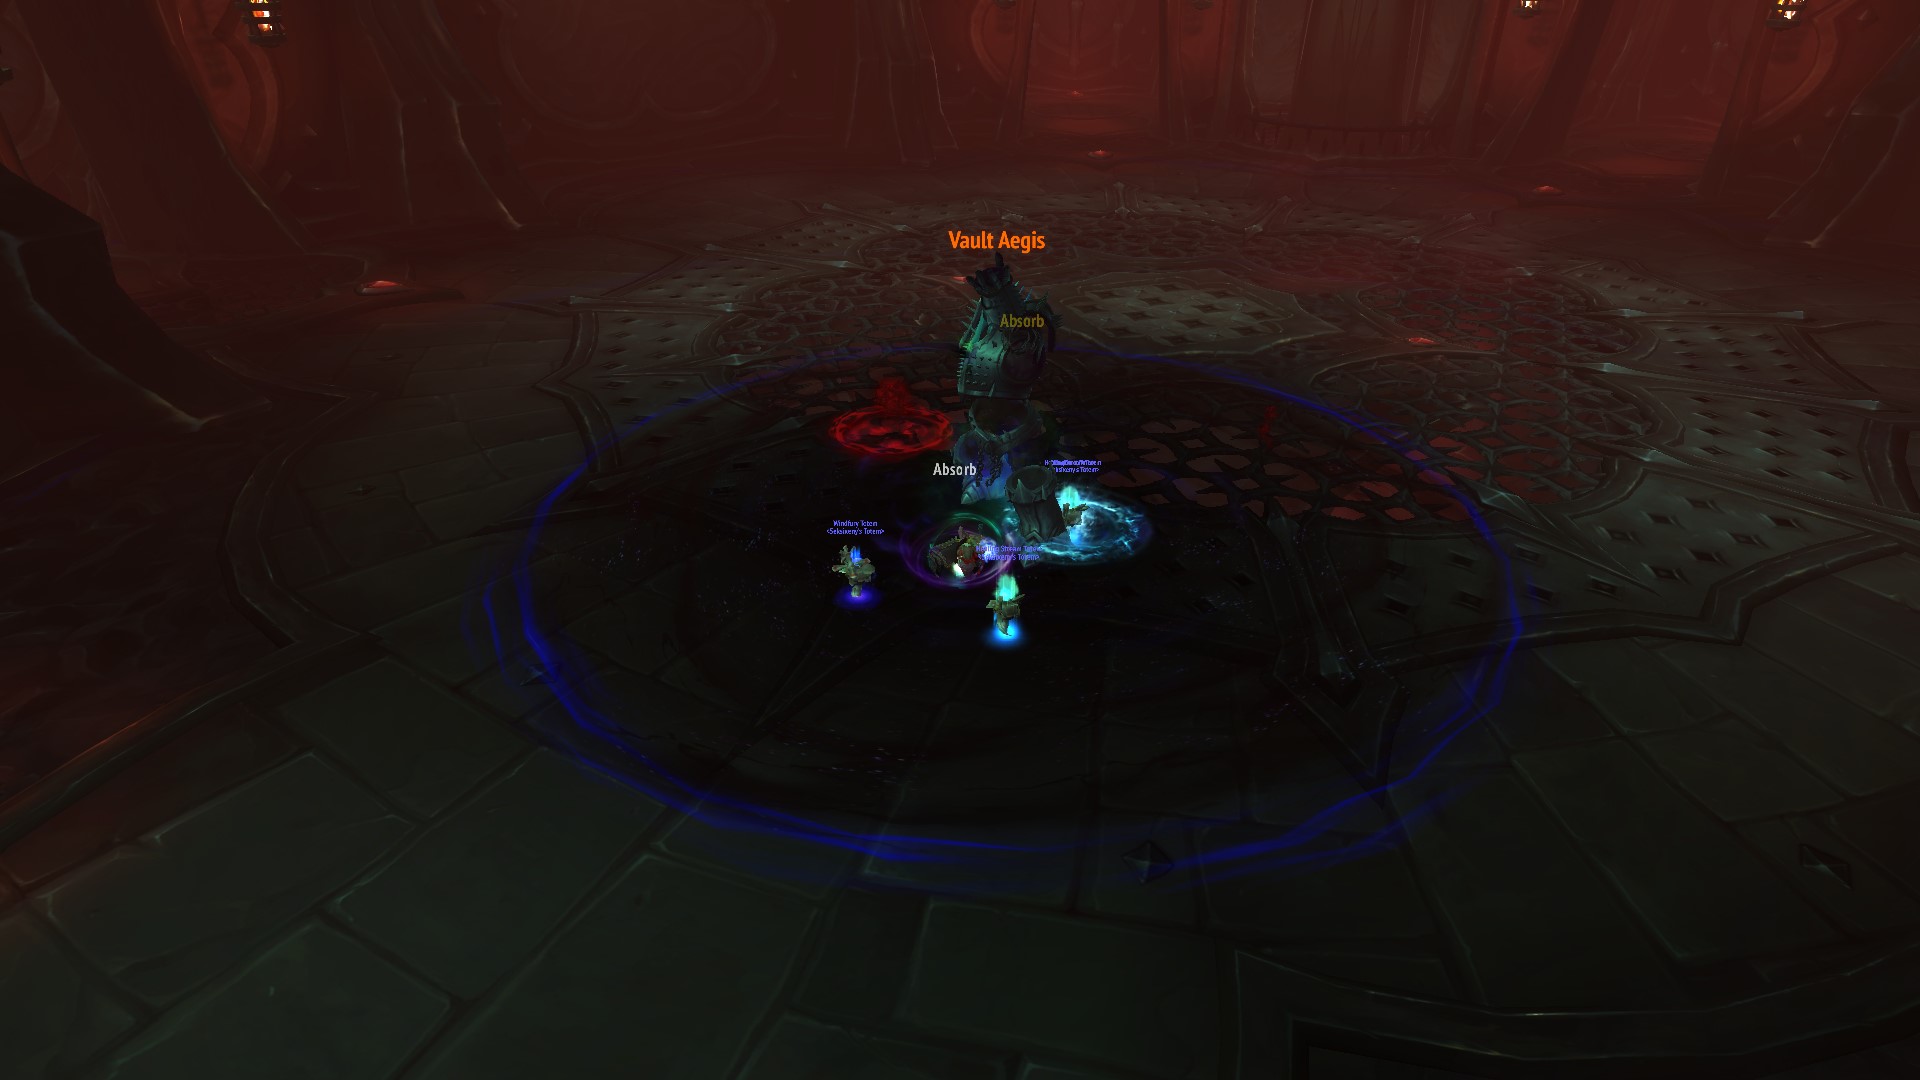
Overall, as long as you have gotten decent Anima Powers and can move out of his ability targeting circles, you have nothing to fear from this boss.
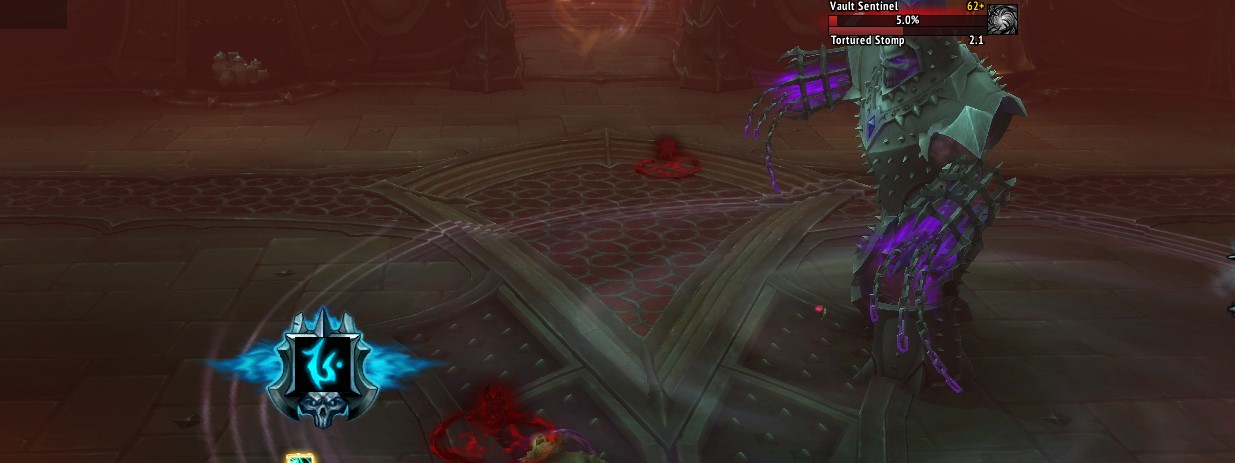
Vault Sentinel
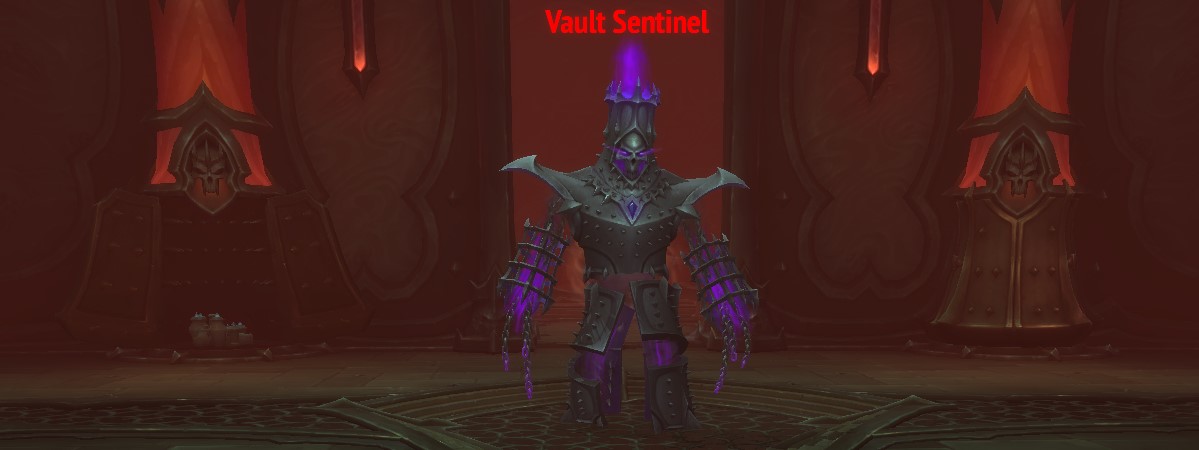
The Vault Sentinel is not hard, but does have some tricky abilities which require interrupts / anti-fear tools, as well as good area effect damage capabilities.
Tortured Stomp is a short cast which hits any players inside its area of effect when it finishes, also applying a physical damage over time effect. If you are outside the circle around the boss when the cast finishes, you take no damage.
Cries of the Tormented is another short cast which fears every player within 80 yards for 5 seconds, unless it is interrupted. This can be dangerous when combined with other boss abilities, and should be interrupted whenever possible.
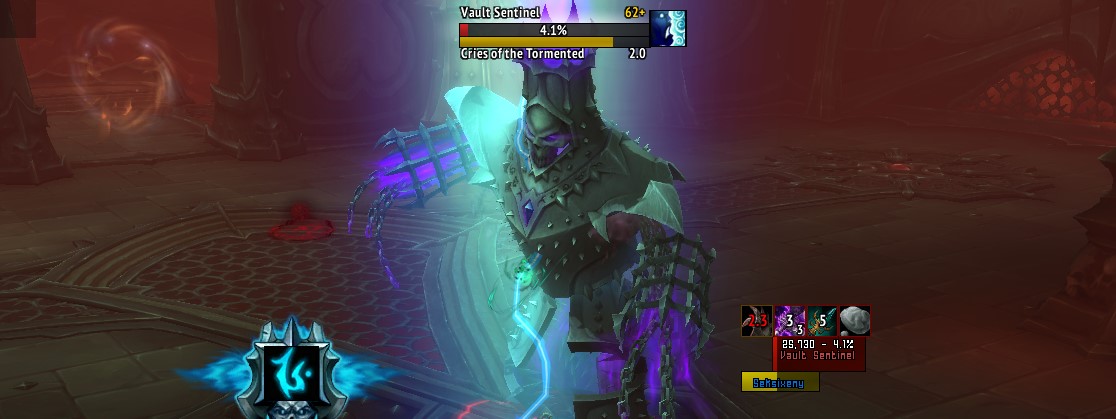
Soul Tormentor is cast two times per fight, at 66% and 33% health, respectively. It causes the boss to take 99% reduced damage and channel swirlies all over the room, which explode soon after appearing. Deadsoul Wraith mobs will also spawn in great quantities and try to melee you down. Killing all of them will end the ability, returning the boss to its normal state.
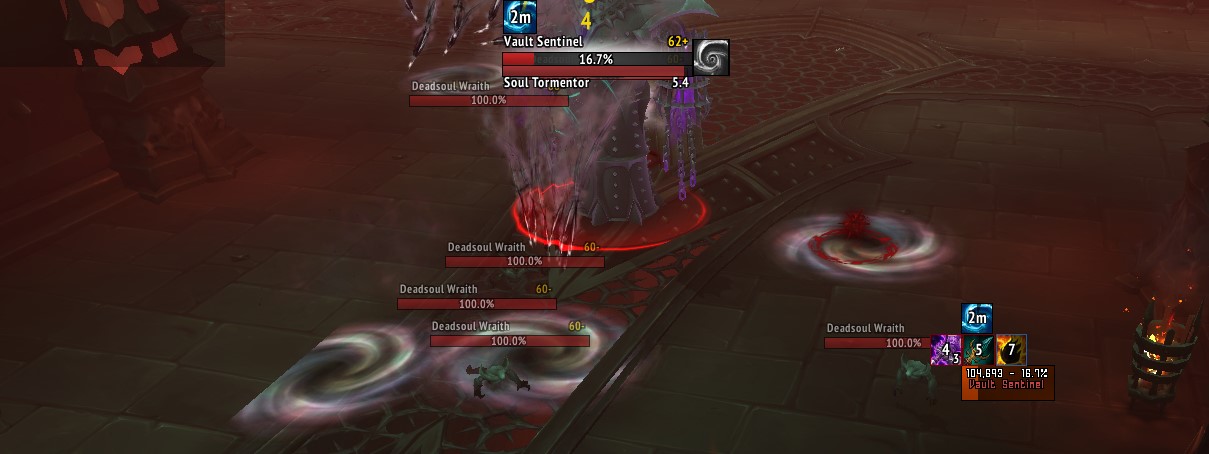
His fear ability and, especially, the high amount of enemies created by Soul Tormentor can be hard to deal with if you have no interrupts or area of effect damage, but if you made it this far with a perfect score, it is likely that you have already obtained strong powers to help you out.
Troz'igal the Oppressor
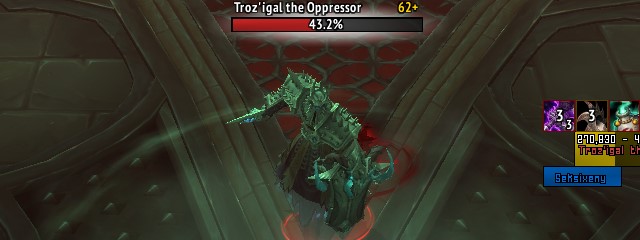
Troz'igal the Oppressor can be a challenging boss if your damage or movement abilities are poor, as his intermission ability can fill the room with highly damaging projectiles if you cannot take out some of his clones quickly.
Torturing Swipe is a short cast which hits any players in front of the boss when it finishes, also applying a shadow damage over time effect. You can avoid it by moving away before the cast finishes.
Soul Breaker is a short channel into a player, which causes the player to explode for very high damage to himself and other players nearby. Interrupt it or use a defensive cooldown if you are not topped when it is cast on you.
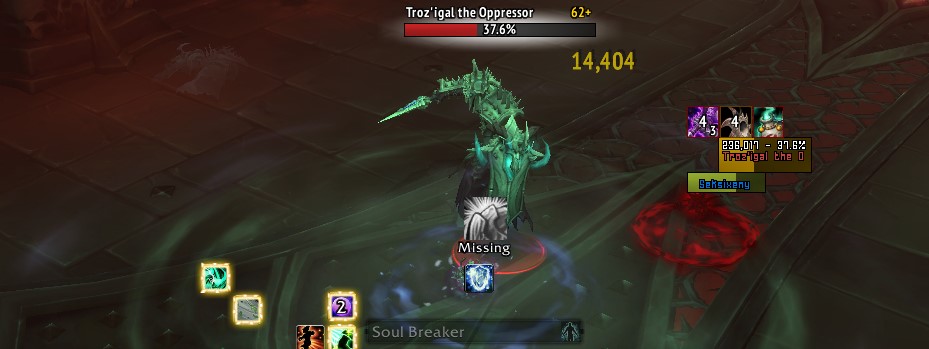
Ceremony of Hatred is cast two times per fight, at 66% and 33% health, respectively. It causes the boss to take 99% reduced damage and four clones of him to appear. These clones will constantly cast a barrage of highly damaging projectiles at nearby players until killed, at which point the boss will return to its original state.
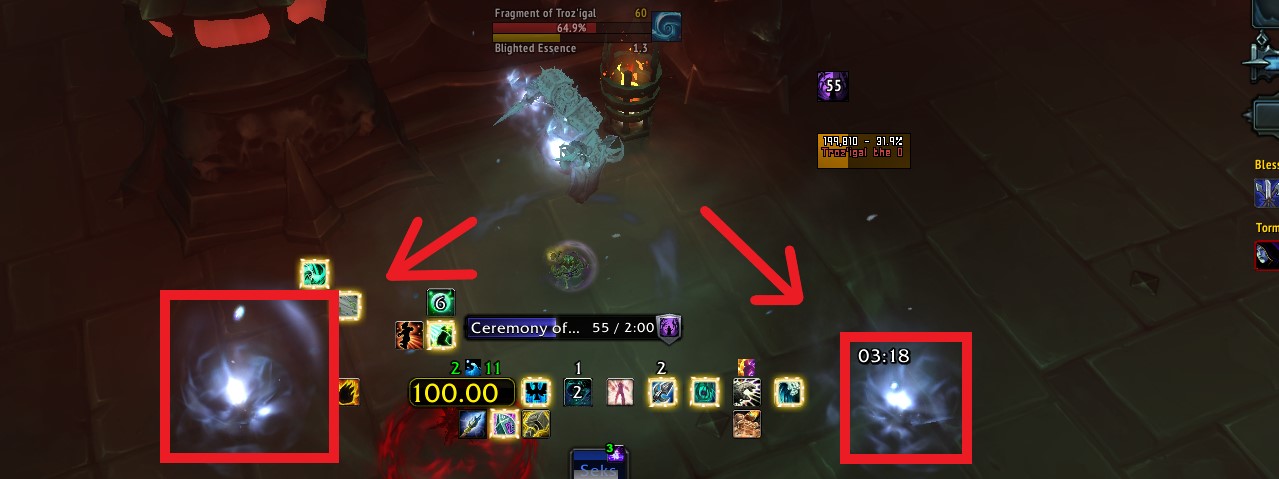
Overall, this boss will test your movement and burst damage abilities, especially
in its intermissions, so make sure to take down some of the clones very quickly,
in order to gain some breathing room for the rest. Notably, the ![]() Bottled Enigma
Anima Power will prevent the clones from casting anything at all unless you are
standing next to them, so use it to your advantage here!
Bottled Enigma
Anima Power will prevent the clones from casting anything at all unless you are
standing next to them, so use it to your advantage here!
Changelog
- 17 Aug. 2021: Added more info on Death-Bound Shard drop conditions.
- 15 Jul. 2021: Added an image and description for the Iron Ball corridor.
- 26 Jun. 2021: Guide added.

This guide has been written by Seksi, member of Cursed Gifts and healing aficionado. You can find him answering questions and discussing Restoration Shaman gameplay on the Ancestral Guidance and Earthshrine Discords.
- Judgement for Warriors?! WoW 12.0.5 Makes Void Tier 2 Sets Class-Agnostic
- The Darkwell Was Hidden Beneath the Sunwell This Entire Time?!
- WoW Subscription Prices to Rise by Up to 37% in Select Regions – Renew Before June 22
- In Case You Missed It: You Can Direct Valeera With Pings in WoW Midnight
- It’s Safe to Roll for Loot: Voidcore Bonus Roll Repeat Gear Bug Fixes
- Bonus Roll, Class, Decor Duel and Voidcore Fixes: Midnight 12.0.5 Hotfixes, April 22nd
- The Best Mythic+ DPS Specs for Patch 12.0.5: Tier List
- Add Challenges to Your Ritual Site Experience for More Rewards