Tarlna the Ageless Detailed Strategy Guide
Table of Contents
Introduction
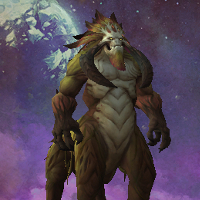
This guide is intended to provide a comprehensive description of the encounter with Tarlna the Ageless in Draenor. It is targeted at anyone who desires to understand the fight mechanics.
This guide is updated for World of Warcraft WoD 6.1.2.
Tarlna the Ageless is a world boss in Draenor. The fight against Tarlna will test your raid's ability to deal with adds, and it also stresses positional awareness.
General Information
Enrage Timer
We do not know if Tarlna the Ageless has a hard enrage timer, and there do not appear to be any soft enrage mechanics present in the encounter.
Loot
To be added.
Spawn Patterns
Tarlna the Ageless is known to spawn in the Deeproot area of Gorgrond. We currently do not know if there are any other locations where the boss may spawn.
We are unsure of what the respawn timer of this boss is, but it most likely follows other world bosses in having a longer timer.
It is also worth mentioning that the tagging system for world bosses is faction-wide. That is to say, as long as the boss is engaged by someone on your faction, all other members of your faction are eligible for loot if they engage the boss, regardless of whether or not they are grouped together.
Overview of the Fight
The fight against Tarlna the Ageless is straightforward. It is a single-phase fight, during which you will have to face Tarlna, as well as two types of adds that Tarlna spawns. Indeed, handling these adds is the most important part of the fight.
The most peculiar aspect of the encounter is having to run over some of the adds that Tarlna spawns, before they have a chance to activate. Doing this destroys them, but any adds that were not destroyed will become active and start damaging the raid.
Abilities
Tarlna the Ageless has two abilities that he uses regularly against your raid, as well as two abilities that he uses to summon adds.
 Colossal Blow is an attack that deals frontal cone damage and
stuns affected players for 5 seconds, and which also deals raid-wide
damage.
Colossal Blow is an attack that deals frontal cone damage and
stuns affected players for 5 seconds, and which also deals raid-wide
damage. Savage Vines is an ability Tarlna uses on random raid members.
Initially, a debuff is placed on the affected players. The debuff lasts 8
seconds (and does nothing while it is active), and when it expires, affected
players take Nature damage, have a Nature damage DoT applied on them that
lasts for 8 seconds, and are rooted in place for the same amount of time. In
addition to this, the initial Nature damage that players take when the debuff
expires is also dealt to any allies within 8 yards of them. Savage Vines can
be dispelled.
Savage Vines is an ability Tarlna uses on random raid members.
Initially, a debuff is placed on the affected players. The debuff lasts 8
seconds (and does nothing while it is active), and when it expires, affected
players take Nature damage, have a Nature damage DoT applied on them that
lasts for 8 seconds, and are rooted in place for the same amount of time. In
addition to this, the initial Nature damage that players take when the debuff
expires is also dealt to any allies within 8 yards of them. Savage Vines can
be dispelled. Genesis is an ability that the boss uses to summon adds
called Giant Lashers. Genesis has a 6-second channel time, and during
this time, the unactivated Lashers can be seen on the ground (as sproutlings).
During this time, raid members can walk over the sproutlings and
Genesis is an ability that the boss uses to summon adds
called Giant Lashers. Genesis has a 6-second channel time, and during
this time, the unactivated Lashers can be seen on the ground (as sproutlings).
During this time, raid members can walk over the sproutlings and
 Trample them, effectively killing them. Any Lashers that remain
untrampled at the end of the Genesis channel become active.
Trample them, effectively killing them. Any Lashers that remain
untrampled at the end of the Genesis channel become active.- Giant Lashers have only one ability, called
 Lasher Venom.
They use this to deal Nature damage to random raid members. These adds must
be tanked.
Lasher Venom.
They use this to deal Nature damage to random raid members. These adds must
be tanked.
- Giant Lashers have only one ability, called
 Grow Untamed Mandragora is an ability that Tarlna uses to summon
an Untamed Mandragora, an add that casts
Grow Untamed Mandragora is an ability that Tarlna uses to summon
an Untamed Mandragora, an add that casts  Noxious Spit at random
raid members, creating a void zone at their location. The Untamed Mandragoras
must be tanked.
Noxious Spit at random
raid members, creating a void zone at their location. The Untamed Mandragoras
must be tanked.
Please note that some of the above-mentioned information is speculative, having not had the opportunity to fight the boss on the Beta. Likewise, we are unaware of any abilities that require a tank switch, but two or more tanks will be needed to handle the adds that spawn throughout the fight.
Strategy
This fight is all about proper add control, since the abilities of Tarlna are not very problematic on their own. That said, we will look at how to handle Tarlna's abilities first, since these form the baseline of the fight.
Tarlna will use ![]() Colossal Blow to regularly deal raid-wide damage,
and this will keep the healers occupied for a good amount of time. This raid
wide damage also means that all raid members must be careful not to take
additional avoidable damage. Tanks will have to face Tarlna away from the
raid, and they themselves will have to move away from Tarlna's frontal cone
whenever Colossal Blow is cast. This is because the frontal cone damage of the
ability is extremely high, and it will effectively kill anyone hit by it
(since it is coupled with the raid-wide damage).
Colossal Blow to regularly deal raid-wide damage,
and this will keep the healers occupied for a good amount of time. This raid
wide damage also means that all raid members must be careful not to take
additional avoidable damage. Tanks will have to face Tarlna away from the
raid, and they themselves will have to move away from Tarlna's frontal cone
whenever Colossal Blow is cast. This is because the frontal cone damage of the
ability is extremely high, and it will effectively kill anyone hit by it
(since it is coupled with the raid-wide damage).
Tarlna's second ability is ![]() Savage Vines. Players who are affected
by this ability will have to move away from other raid members, and wait there
for their debuff to expire (or be dispelled). They should note that they will
become rooted in place when Savage Vines is dispelled, so being, for example,
in front of Tarlna is not a good idea. Healers should watch out for these
players, and make sure that they receive enough healing to stay alive. A
particular problem can arise if these players, while rooted, are also targeted
by the void zones cast by the Untamed Mandragora, in which case they
will require even more healing.
Savage Vines. Players who are affected
by this ability will have to move away from other raid members, and wait there
for their debuff to expire (or be dispelled). They should note that they will
become rooted in place when Savage Vines is dispelled, so being, for example,
in front of Tarlna is not a good idea. Healers should watch out for these
players, and make sure that they receive enough healing to stay alive. A
particular problem can arise if these players, while rooted, are also targeted
by the void zones cast by the Untamed Mandragora, in which case they
will require even more healing.
Dealing with the Adds
Aside from handling Tarlna's abilities, your raid will have to deal with the adds.
Firstly, you should attempt to ![]() Trample all of the
Giant Lashers before they spawn. Any Lashers that survive being
trampled will have to be picked up by a tank, and quickly killed.
Trample all of the
Giant Lashers before they spawn. Any Lashers that survive being
trampled will have to be picked up by a tank, and quickly killed.
Secondly, the tank who is not tanking Tarlna will have to pick up and tank the Untamed Mandragora as soon as it spawns, and all DPS players will have to focus it down and kill it. The sooner it dies, the fewer void zones it will have spawned, so this is important.
When to Use Heroism/Bloodlust/Time Warp
We recommend using ![]() Heroism/
Heroism/![]() Bloodlust/
Bloodlust/![]() Time Warp at
the start of the fight, when all players have their DPS cooldowns available.
Time Warp at
the start of the fight, when all players have their DPS cooldowns available.
Corpse Running/Avoiding Wipes
Because the fight does not take place in an instanced environment, it is possible for dead raid members to release spirit and run back to the place where they died and resurrect. This is a good way for your raid to replenish its numbers. Keep in mind the following things:
- After 2 resurrections in quick succession, you will have to wait for 2 minutes before you can resurrect again.
- When you resurrect, you come back with 50% of your maximum health. It is best that healers are prepared ahead of time to heal you.
- It is best to group up (in ghost form) and resurrect at the same time, rather than each one individually. This gives you a better chance to recover.
If a large portion of your raid dies, remaining raid members should attempt to delay a wipe for as long as possible, to give the dead raid members a chance to run back.
Learning the Fight
In this fight, proper add handling is everything. This means that the focus on your raid, from the very beginning, will have to be trampling as many Giant Lashers as possible, and killing off any remaining ones quickly.
It is also important to make sure that DPS players do not get carried away and ignore the Untamed Mandragora adds, since having more than one up at one time can start overwhelming the raid.
Concluding Remarks
This concludes the Tarlna the Ageless guide. As soon as we have the chance to kill the boss on live realms, we will update the guide where it is needed.
- Zen Flight Stealth Nerf: No More Interactions
- War Within 11.1.5 and Season of Discovery Hotfixes: April 28th
- Hall of Fame Deadline Pushed to May 6
- Mists of Pandaria Classic Beta Reveals Mysterious Sha-Touched Drake Mount
- Liberation of Undermine Raid DPS Log Rankings, Week 8: The Age of Devastation
- Official Children’s Week 2025 Overview
- RPGLootFeed: Clean Up Your Chat and Upgrade Your Loot Experience
- 10 Playable Races World of Warcraft Should Add, According to Crendor