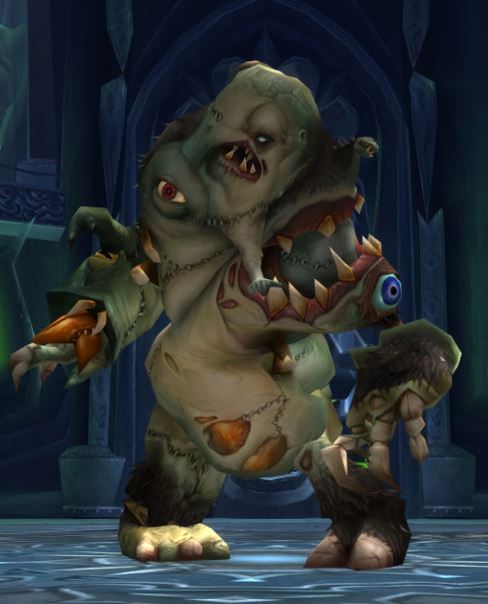
Rotface Encounter Guide: Strategy, Abilities, Loot
Festergut is most commonly the sixth boss players will encounter in Icecrown Citadel, and the second boss that must die to unlock the final room of The Plagueworks wing of the raid. Do not forget to be aware of the various Raid Buffs and Debuffs as you work to optimize your Raid Composition for this encounter's mechanics!
Role-Specific Tips for Rotface
DPS Tips
- Melee DPS should be sure to stack together and move together to keep the room as clear as possible, similar to Algalon the Observer.
- Ranged DPS should spread around as much as possible to prevent the
 Vile Gas from hitting more than 1 person at at time.
Healer Tips
- Healers should spread around as much as possible to prevent the
Vile Gas from hitting more than 1 person at at time.
- Setup and follow a dispel order for the
 Mutated Infection; similar
to Grobbulus, you do not want these to be removed until the affected
player is in the correct position.
Mutated Infection; similar
to Grobbulus, you do not want these to be removed until the affected
player is in the correct position.
Tank Tips
- Do your best to take as little damage from the Ooze as possible. You should be able to maintain threat on them without needing to be in melee range.
- Be ready to taunt any loose Big Ooze if you temporarily loose threat.
- Movement speed items, such as
 Nitro Boosts, can be invaluable here
to help you reposition and grab an add, or create some distance between one you
already have threat on.
Nitro Boosts, can be invaluable here
to help you reposition and grab an add, or create some distance between one you
already have threat on.
Strategy for Rotface
Before engaging the boss, have your ranged DPS and healers spread around the room by hugging the wall. This helps greatly as you will want to pop all offensive cooldowns instantly on pull to burn as much down on the boss as you can.
The main mechanic in this fight are the oozes that spawn from the
![]() Mutated Infection. Rotface will infect a random player with
this disease, which deals 4,875 to 5,125 damage every 1 second and reduces
healing received by 75% for 12 seconds. This player needs to quickly move out
of the raid to a safe location and have the disease dispelled before they die.
This will spawn a
Mutated Infection. Rotface will infect a random player with
this disease, which deals 4,875 to 5,125 damage every 1 second and reduces
healing received by 75% for 12 seconds. This player needs to quickly move out
of the raid to a safe location and have the disease dispelled before they die.
This will spawn a ![]() Sticky Ooze in at the players location, which will
have a large threat lead on the player they spawned from. This player will need
to kite the ooze around, preventing them from pathing through the raid, or into
other ooze.
Sticky Ooze in at the players location, which will
have a large threat lead on the player they spawned from. This player will need
to kite the ooze around, preventing them from pathing through the raid, or into
other ooze.
Healers should be aware that they must not dispel the
![]() Mutated Infection until the player has ran out of the raid into a
pre-determined position, very similar to the Grobbulus encounter
in Naxxramas. When this debuff is dispelled, a
Mutated Infection until the player has ran out of the raid into a
pre-determined position, very similar to the Grobbulus encounter
in Naxxramas. When this debuff is dispelled, a ![]() Sticky Ooze
will spawn at the players location. Everyone should quickly move away from these
ooze as they deal high damage to all nearby players. The tank assigned to ooze
duty will then need to quickly pick these up and kite them around the room,
preventing them from pathing through the raid.
Sticky Ooze
will spawn at the players location. Everyone should quickly move away from these
ooze as they deal high damage to all nearby players. The tank assigned to ooze
duty will then need to quickly pick these up and kite them around the room,
preventing them from pathing through the raid.
The only way to remove these ooze are to merge them together. When 2
![]() Sticky Ooze touch, they combine together into a Big Ooze.
These will need to be handled by either a Protection Paladin or
Blood Death Knight, who will need to maintain aggro from at least 10
yards away and kite these around the room.
Sticky Ooze touch, they combine together into a Big Ooze.
These will need to be handled by either a Protection Paladin or
Blood Death Knight, who will need to maintain aggro from at least 10
yards away and kite these around the room.
The Big Ooze are the main ooze type that the raid need to always be
aware of. Whenever a Small Ooze touches the Big Ooze, the
big one will absorb the small one, gaining a stack of ![]() Unstable Ooze.
Once the Big Ooze reaches 5 stacks of
Unstable Ooze.
Once the Big Ooze reaches 5 stacks of ![]() Unstable Ooze, it will
cast
Unstable Ooze, it will
cast ![]() Unstable Ooze Explosion, which shoots a projectile towards every
players current position. Everyone in the raid will need to move within 3
seconds to avoid this damage. This is a great time to use any raid-wide defensive
cooldowns, as most likely some players will get hit by this, and there is no
other real need for these cooldowns otherwise.
Unstable Ooze Explosion, which shoots a projectile towards every
players current position. Everyone in the raid will need to move within 3
seconds to avoid this damage. This is a great time to use any raid-wide defensive
cooldowns, as most likely some players will get hit by this, and there is no
other real need for these cooldowns otherwise.
Ooze management is the real challenge of this encounter. Your ooze tank needs
great coordination and communication with the players infected by
![]() Mutated Infection. The raid should always have an eye on the ooze
tanks position, and attempt to "drop off" any new ooze in a path that will
quickly connect with the Big Ooze. It is worth noting that if 2
Big Ooze are created, they can be dragged together and will merge with
one-another, combining any stacks of
Mutated Infection. The raid should always have an eye on the ooze
tanks position, and attempt to "drop off" any new ooze in a path that will
quickly connect with the Big Ooze. It is worth noting that if 2
Big Ooze are created, they can be dragged together and will merge with
one-another, combining any stacks of ![]() Unstable Ooze.
Unstable Ooze.
Rotface Abilities
- Mutated Infection — The Mutated Infection inflicts 4,875 to
5,125 damage every 1 second and reduces healing received by 75% for 12 seconds.
After the Infection is removed, a small ooze is created at the target's
location.
 Radiating Ooze — The Radiating Ooze inflicts 6,338 to 6,662
damage to enemies within 10 yards, it will also cause the Big Ooze to merge with
other nearby Ooze.
Radiating Ooze — The Radiating Ooze inflicts 6,338 to 6,662
damage to enemies within 10 yards, it will also cause the Big Ooze to merge with
other nearby Ooze.- Weak Radiating Ooze — The Radiating Ooze inflicts 4,875 to
5,125 damage to enemies within 10 yards, it will also cause the Little Ooze to
merge with other nearby Ooze.
 Slime Spray — Raining Green Ooze. Deals 7,800 to 8,200 Nature
to enemies in cone.
Slime Spray — Raining Green Ooze. Deals 7,800 to 8,200 Nature
to enemies in cone. Sticky Ooze — The Ooze sprays a puddle of Green Goo near the
target. The Green Goo inflicts 3,900 to 4,100 damage every 1 second and decreases
movement speed by 50%.
Sticky Ooze — The Ooze sprays a puddle of Green Goo near the
target. The Green Goo inflicts 3,900 to 4,100 damage every 1 second and decreases
movement speed by 50%. Unstable Ooze Explosion — Inflicts 14,625 to 15,375 damage to
enemies within 6 yards.
Unstable Ooze Explosion — Inflicts 14,625 to 15,375 damage to
enemies within 6 yards.- Vile Gas — Inflicts a Vile plague in targeted area, inflicting
4,875 to 5,125 damage every 2 seconds for 6 seconds. The plague causes the
infected targets to vomit uncontrollably inflicting 5,850 to 6,150 damage to
nearby allies.
- Ooze Flood — The Ooze Flood inflicts 6,338 to 6,662 damage
every 1 second, and reduces movement speed by 10% for 5 seconds.
Rotface Loot
Icecrown Citadel bosses have 4 varying difficulties that they can be engaged on, with each difficulty dropping geared tailored to match its' challenges. Below you can find a list of gear dropped on each and every difficulty for this boss encounter.
10-Man Normal Loot
| Item | Type/Slot |
|---|---|
| Mail Head | |
| Neck | |
| Leather Chest | |
| Cloth Wrist | |
| Cloth Hands | |
| Plate Waist | |
| Mail Feet | |
| Ring | |
| Main-Hand Fist | |
| Main-Hand Mace | |
| Staff | |
| Thrown |
10-Man Heroic Loot
| Item | Type/Slot |
|---|---|
| Mail Head | |
| Neck | |
| Leather Chest | |
| Cloth Wrist | |
| Cloth Hands | |
| Plate Waist | |
| Mail Feet | |
| Main-Hand Fist | |
| Main-Hand Mace | |
| Staff | |
| Thrown |
25-Man Normal Loot
| Item | Type/Slot |
|---|---|
| Leather Head | |
| Neck | |
| Mail Shoulder | |
| Plate Shoulder | |
| Back | |
| Plate Chest | |
| Plate Chest | |
| Mail Wrist | |
| Cloth Wrist | |
| Leather Hands | |
| Ring | |
| Trinket | |
| Main-Hand Mace | |
| One-Hand Dagger | |
| Wand |
25-Man Heroic Loot
| Item | Type/Slot |
|---|---|
| Leather Head | |
| Neck | |
| Mail Shoulder | |
| Plate Shoulder | |
| Back | |
| Plate Chest | |
| Plate Chest | |
| Mail Wrist | |
| Cloth Wrist | |
| Leather Hands | |
| Ring | |
| Trinket | |
| Main-Hand Mace | |
| One-Hand Dagger | |
| Wand |
Rotface Achievements in Wrath of the Lich King
| Achievement | Description |
|---|---|
| Defeat Rotface without a Big Ooze casting Unstable Ooze Explosion in 10-player mode. | |
| Defeat Rotface without a Big Ooze casting Unstable Ooze Explosion in 25-player mode. |
Further Reading
Rotface is just one of the twelve encounters present in the Icecrown Citadel raid of Wrath of the Lich King. If you would like to learn more about the others, please see our other pages for the raid below.
Changelog
- 01 Jan. 2024: Updated for Phase 5.
- 09 Oct. 2023: Page added for Phase 4 release.
This guide has been written by Abide, TBC and WotLK veteran for nearly a decade. Abide is a Warrior tank and multi-class expert currently playing on Faerlina Horde. You can find him in the Icy Veins Discord if you have any questions or concerns.
- UI Updates: Burning Crusade Classic Hotfixes, July 17th
- The Best Camelot Theory Yet Connects Classic+ to WoW’s Original Design
- Classic Era’s New UI Could Break Nameplate and Raid Frame Addons
- Icy Veins is Looking for Dedicated WoW Classic Writers
- WoW Classic+ Leak Claims Deadmines, Death Knights, and Karazhan Are Coming
- WoW Classic on a Phone?! This Player Shows It Actually Works
- Blizzard Confirms No Fresh Season of Discovery Servers, Fueling Classic+ Rumors
- XP Blocker Moves: Season of Discovery Hotfixes, June 25th