Assembly of Iron Encounter Guide: Strategy, Abilities, Loot
Assembly of Iron is the fifth boss of Ulduar. Unlike most other boss encounters, this fight has three bosses instead of one. The order in which you kill these bosses determines how difficult the fight is and the gear that will drop. Do not forget to be aware of the various Raid Buffs and Debuffs as you work to optimize your Raid Composition for this encounter's mechanics!
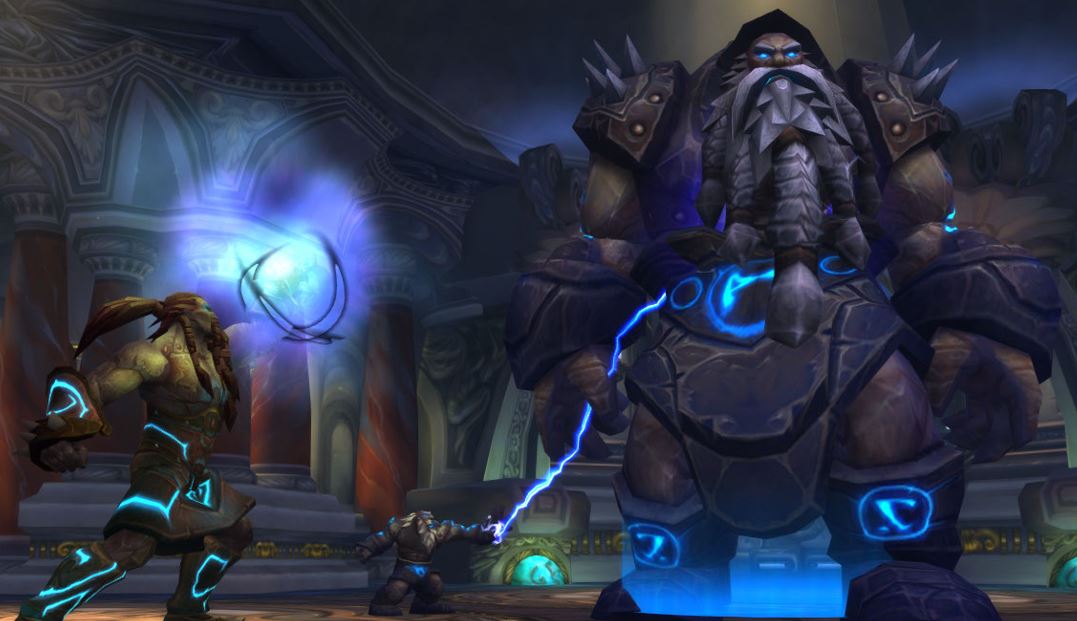
Overview of Assembly of Iron in Wrath of the Lich King Classic
The Assembly of Iron fight, often referred to as The Iron Council, consists of three separate bosses, Runemaster Molgeim, Steelbreaker, and Stormcaller Brundir. These bosses can be tackled in any order, offering unique challenges and abilities depending on the order they are killed. Whenever one of the bosses dies, the others will heal to full, making AoEing them down not an option. Killing Steelbreaker last is considered the hard mode for this fight while killing him first is the easiest way to complete this encounter normally. This hard mode fight is where the quest chain begins to gain access to Algalon.
Role-Specific Tips for Assembly of Iron
DPS Tips
- Staying inside the
 Rune of Power as much as possible on this fight
is required to make the DPS checks. Always be aware of your positioning and
when you may need to move.
Rune of Power as much as possible on this fight
is required to make the DPS checks. Always be aware of your positioning and
when you may need to move.  Lightning Whirl must be interrupted as soon as possible to
prevent it from dealing massive damage. Be aware of the timer at all times.
Lightning Whirl must be interrupted as soon as possible to
prevent it from dealing massive damage. Be aware of the timer at all times. Shield of Runes must be removed instantly, ideally with a
Mage
Shield of Runes must be removed instantly, ideally with a
Mage  Spellstealing it.
- You will want to save your cooldowns for the third and final boss, as this is when the real DPS race starts, especially if doing the hard mode.
Healer Tips
- Runemaster Molgeim will start to spawn
 Rune of Death if not
killed first, which spawn under random players' feet. Avoid standing with the
DPS to give a chance not to spawn this on top of the Rune of Power.
Rune of Death if not
killed first, which spawn under random players' feet. Avoid standing with the
DPS to give a chance not to spawn this on top of the Rune of Power. - Coordinating defensive cooldowns with the tank is important when only one boss is remaining, especially if doing hard mode by killing Steelbreaker last.
- When attempting hard mode, you will likely keep Runemaster Molgeim
alive till he spawns a fresh Rune of Power. This is a great time to
apply some DoT to Steelbreaker in preparation for the upcoming DPS
race.
- Be mindful of the
 Fusion Punch timer and instantly dispel the
applied magical debuff.
Fusion Punch timer and instantly dispel the
applied magical debuff.
Tank Tips
- Positioning the directly next to Rune of Power, not inside of
it, is crucial to meet the DPS requirements of the fight. You must drag the
bosses out of the rune instantly, or you can die easily.
- Remember that Stormcaller Brundir can be interrupted and stunned; a tank with the ability to do both can mitigate tons of damage this way.
- No matter which order you choose to kill the bosses in, you will need to
coordinate your defensive cooldowns with the raid when tanking the final boss,
as the
 Supercharge will boost their damage output greatly. This is
especially important if doing hard mode with Steelbreaker alive last as
he will also have
Supercharge will boost their damage output greatly. This is
especially important if doing hard mode with Steelbreaker alive last as
he will also have  Electrical Charge, further increasing his damage
done.
Electrical Charge, further increasing his damage
done. - When attempting hard mode, tank deaths are unavoidable. Be sure to coordinate battle resses and other in-combat revivals to keep the tanks in the fight.
Assembly of Iron Encounter Abilities
Runemaster Molgeim Abilities
- Normal Abilities
- Hardmode Abilities
Steelbreaker Abilities
- Normal Abilities
- Hardmode Abilities
Stormcaller Brundir Abilities
- Normal Abilities
- Hardmode Abilities
Strategy for Assembly of Iron
As this fight has three bosses with unique abilities, the order in which you kill them determines the difficulty and, thus, the loot rewards from this fight. This means there are six different kill orders you follow here. Still, only two are recommended for the normal version and the hard mode.
Steelbreaker is the most threatening boss in this fight, and killing him last is the full hard mode version of the fight, rewarding the highest loot possible. If going for the normal version of the fight, you will want to kill Steelbreaker first to make the encounter much easier.
Runemaster Molgeim will be the second kill target in this fight for
both normal and hard mode. He will periodically drop ![]() Rune of Power on
the floor, buffing the damage of anyone inside of the rune, including both
players and the bosses. Drag the bosses out of this rune instantly to
prevent them from killing your tanks, but keep them close enough that your DPS
can maintain this buff and still reach the boss with their attacks.
Rune of Power on
the floor, buffing the damage of anyone inside of the rune, including both
players and the bosses. Drag the bosses out of this rune instantly to
prevent them from killing your tanks, but keep them close enough that your DPS
can maintain this buff and still reach the boss with their attacks.
Stormcaller Brundir is the third boss in this encounter. For the
the normal version of this fight, you will want to kill him last as he is the least
threatening all three bosses. For the hard mode version, you will be killing
Stormcaller Brundir first, as you need the ![]() Rune of Power buff as
from Runemaster Molgeim as long as possible to meet the DPS
requirements.
Rune of Power buff as
from Runemaster Molgeim as long as possible to meet the DPS
requirements.
Strategy for Normal Version of the Assembly of Iron
In this strategy, your kill order will be Steelbreaker first, followed by Runemaster Molgeim, and lastly, Stormcaller Brundir will be the final boss you kill. Start by having one tank pick up Steelbreaker and the other tank pick up both Runemaster Molgeim and Stormcaller Brundir. Stack all three together and have your DPS begin damaging Steelbreaker. Remember that when one boss dies, the others heal to full, making cleave and AoE attacks pointless and a waste of damage.
The main reason for stacking the bosses together is the
![]() Rune of Power that Runemaster Molgeim spawn periodically
throughout the fight. These are crucial for meeting the DPS requirements of
the fight and should be played around extensively. Whenever
Runemaster Molgeim drops a
Rune of Power that Runemaster Molgeim spawn periodically
throughout the fight. These are crucial for meeting the DPS requirements of
the fight and should be played around extensively. Whenever
Runemaster Molgeim drops a ![]() Rune of Power, the tanks must make
sure the bosses are not inside of it as it will also increase their damage
dealt. Make sure the melee DPS are still able to get this buff while being able
to reach the boss.
Rune of Power, the tanks must make
sure the bosses are not inside of it as it will also increase their damage
dealt. Make sure the melee DPS are still able to get this buff while being able
to reach the boss.
Steelbreaker only has two abilities at this point in the fight,
![]() High Voltage and
High Voltage and ![]() Fusion Punch.
Fusion Punch. ![]() High Voltage is
simply unavoidable raid-wide AoE damage every 3 seconds while
High Voltage is
simply unavoidable raid-wide AoE damage every 3 seconds while
![]() Fusion Punch is a dangerous tank-nuke ability.
Fusion Punch is a dangerous tank-nuke ability. ![]() Fusion Punch
It also leaves a deadly Nature damage debuff on the target over time, which must
be dispelled instantly before it deals damage. With this strategy, you are killing
Steelbreaker first, so these are the only two abilities of his you will
need to deal with.
Fusion Punch
It also leaves a deadly Nature damage debuff on the target over time, which must
be dispelled instantly before it deals damage. With this strategy, you are killing
Steelbreaker first, so these are the only two abilities of his you will
need to deal with.
Runemaster Molgeim starts off with only ![]() Rune of Power and
Rune of Power and
![]() Shield of Runes. Positioning the entire raid and the bosses around the
Shield of Runes. Positioning the entire raid and the bosses around the
![]() Rune of Power locations are a vital part of this fight. Be sure your
melee DPS can get this buff and still reach the bosses while being sure
none of them are buffed with it simultaneously. Make sure to dispel or
Rune of Power locations are a vital part of this fight. Be sure your
melee DPS can get this buff and still reach the bosses while being sure
none of them are buffed with it simultaneously. Make sure to dispel or
![]() Spellsteal the
Spellsteal the ![]() Shield of Runes off of
Runemaster Molgeim quickly to prevent him from gaining a 50% increased
damage buff.
Shield of Runes off of
Runemaster Molgeim quickly to prevent him from gaining a 50% increased
damage buff.
Once Steelbreaker dies, both other bosses will heal to full and
gain a stack of ![]() Supercharge, increasing their damage done and
granting them new abilities. Runemaster Molgeim will now cast
Supercharge, increasing their damage done and
granting them new abilities. Runemaster Molgeim will now cast
![]() Rune of Death under a random players feet, dealing 7,000 Shadow
damage per second to all nearby players. To prevent this from being placed on
top of the needed
Rune of Death under a random players feet, dealing 7,000 Shadow
damage per second to all nearby players. To prevent this from being placed on
top of the needed ![]() Rune of Power, be mindful of the timer for
Rune of Power, be mindful of the timer for
![]() Rune of Death and have everyone spread out a few seconds before this
spell goes off, then quickly stack back inside of the previous
Rune of Death and have everyone spread out a few seconds before this
spell goes off, then quickly stack back inside of the previous
![]() Rune of Power. Healers can and should spread around the room after the
initial
Rune of Power. Healers can and should spread around the room after the
initial ![]() Rune of Power spawns, as they do not need the damage buff,
allowing them to move much less often. Depending on your timing, you may
wish to keep Runemaster Molgeim alive until he casts a fresh
Rune of Power spawns, as they do not need the damage buff,
allowing them to move much less often. Depending on your timing, you may
wish to keep Runemaster Molgeim alive until he casts a fresh
![]() Rune of Power so you can maintain the increased damage buff for the
harder part of the fight.
Rune of Power so you can maintain the increased damage buff for the
harder part of the fight.
The third boss you will be killing with this strategy is
Stormcaller Brundir. Brundir starts the fight off with only
![]() Chain Lightning and
Chain Lightning and ![]() Supercharge. Brundir himself can be
interrupted and even stunned. He should be as often as possible to
prevent as much
Supercharge. Brundir himself can be
interrupted and even stunned. He should be as often as possible to
prevent as much ![]() Chain Lightning damage as possible, especially on
tanks. However,
Chain Lightning damage as possible, especially on
tanks. However, ![]() Overload can not be interrupted; instead, the raid
must move over 20 yards away from the boss to avoid its damage and stun.
Overload can not be interrupted; instead, the raid
must move over 20 yards away from the boss to avoid its damage and stun.
Once Steelbreaker dies, Stormcaller Brundir will gain the
![]() Lightning Whirl ability, dealing serious AoE damage to all nearby
enemies. Luckily this can also be interrupted with a kick or stun, similar to
the
Lightning Whirl ability, dealing serious AoE damage to all nearby
enemies. Luckily this can also be interrupted with a kick or stun, similar to
the ![]() Chain Lightning casts. This ability must always be
interrupted instantly, be mindful of its timer, and if you need to let a couple
of
Chain Lightning casts. This ability must always be
interrupted instantly, be mindful of its timer, and if you need to let a couple
of ![]() Chain Lightning casts go through to save your kicks or stuns, do
so.
Chain Lightning casts go through to save your kicks or stuns, do
so.
Finally, when both Steelbreaker and Runemaster Molgeim are
dead, Stormcaller Brundir will gain an additional ability,
![]() Lightning Tendrils. This spell deals serious Nature damage every second to
all nearby enemies. Brundir will then "target" a player and chase them slowly,
requiring that player to kite the boss and everyone else to move out of
their path and away from the boss. Repeat this process till Brundir ends his
cast and lands again, allowing you to continue to DPS him till he dies.
Lightning Tendrils. This spell deals serious Nature damage every second to
all nearby enemies. Brundir will then "target" a player and chase them slowly,
requiring that player to kite the boss and everyone else to move out of
their path and away from the boss. Repeat this process till Brundir ends his
cast and lands again, allowing you to continue to DPS him till he dies.
Strategy for Hardmode Version of the Assembly of Iron
The hard mode version of this fight is essentially the reversed order of the normal version. You will start by killing Stormcaller Brundir, followed by Runemaster Molgeim second still, and lastly Steelbreaker will be the third and final kill target of the fight.
Killing Stormcaller Brundir first means you will only need to deal
with his ![]() Chain Lightning and
Chain Lightning and ![]() Overload abilities.
Interrupt
Overload abilities.
Interrupt ![]() Chain Lightning as much as possible and run away from
Brundir whenever he casts
Chain Lightning as much as possible and run away from
Brundir whenever he casts ![]() Overload.
Overload.
Runemaster Molgeim will function the same way he does in both
the normal and hard modes. Be sure to keep the bosses near the
![]() Rune of Power on the ground to benefit from the damage buff while
ensuring the bosses are not gaining this buff. Run away from the
Rune of Power on the ground to benefit from the damage buff while
ensuring the bosses are not gaining this buff. Run away from the
![]() Rune of Power shortly before
Rune of Power shortly before ![]() Rune of Death is cast to prevent
the 2 from stacking and removing your access to the damage buff from
Rune of Death is cast to prevent
the 2 from stacking and removing your access to the damage buff from
![]() Rune of Power. It is highly recommended to keep
Runemaster Molgeim alive at deficient health until he casts a new
Rune of Power. It is highly recommended to keep
Runemaster Molgeim alive at deficient health until he casts a new
![]() Rune of Power as you can use this damage increase for the final phase
of the fight.
Rune of Power as you can use this damage increase for the final phase
of the fight.
Steelbreaker is the main difference with this strategy. In the normal
version, he is killed first as he is the most dangerous if left alive, which is
exactly what the hard mode requires. When Stormcaller Brundir dies,
Steelbreaker will gain the ![]() Static Disruption spell. This
will damage the furthest target away from him and any nearby allies, increasing
their Nature damage taken by 75%.
Static Disruption spell. This
will damage the furthest target away from him and any nearby allies, increasing
their Nature damage taken by 75%.
Seeing as your healers are already spread out for the
![]() Rune of Death, you can further use this to guarantee the
Rune of Death, you can further use this to guarantee the ![]() Static Disruption
targets them. Make sure your ranged DPS are stacked inside
the
Static Disruption
targets them. Make sure your ranged DPS are stacked inside
the ![]() Rune of Power and that your healers are the furthest players away
from Steelbreaker.
Rune of Power and that your healers are the furthest players away
from Steelbreaker. ![]() Static Disruption will target a
healer every time, allowing your DPS to continue damaging while standing together
inside the
Static Disruption will target a
healer every time, allowing your DPS to continue damaging while standing together
inside the ![]() Rune of Power.
Rune of Power. ![]() Static Disruption can not target
the same player multiple times in a row if other targets are available
without the debuff. Be sure your healers are spread out properly for this.
Static Disruption can not target
the same player multiple times in a row if other targets are available
without the debuff. Be sure your healers are spread out properly for this.
When both Stormcaller Brundir and Runemaster Molgeim are dead,
Steelbreaker gains two more abilities. Firstly, whenever any player dies
during the fight, Steelbreaker will gain a stack of
![]() Electrical Charge, further increasing his damage output by 25% per
stack. In addition, whenever a player dies, Steelbreaker will heal for
40% of his maximum health. This heal can and must be reduced by healing
reduction spells such as
Electrical Charge, further increasing his damage output by 25% per
stack. In addition, whenever a player dies, Steelbreaker will heal for
40% of his maximum health. This heal can and must be reduced by healing
reduction spells such as ![]() Mortal Strike or
Mortal Strike or ![]() Wound Poison.
Wound Poison.
The second ability Steelbreaker gains is
![]() Overwhelming Power. This will be applied to the current tank,
increasing the damage dealt by 200%. However, after 25 seconds, they will
Overwhelming Power. This will be applied to the current tank,
increasing the damage dealt by 200%. However, after 25 seconds, they will
![]() Meltdown, exploding for lethal Nature damage to all nearby allies. To
prevent this from wiping the raid, you will need to tank swap and have the tank
with the
Meltdown, exploding for lethal Nature damage to all nearby allies. To
prevent this from wiping the raid, you will need to tank swap and have the tank
with the ![]() Overwhelming Power debuff run out of the raid. It is worth
noting that this damage can not be mitigated or prevented; it will always deal
maximum damage to ALL nearby allies. Tank deaths to this mechanic are unavoidable
and are considered the soft-enrage mechanic of the fight as Steelbreaker
will gain a stack of
Overwhelming Power debuff run out of the raid. It is worth
noting that this damage can not be mitigated or prevented; it will always deal
maximum damage to ALL nearby allies. Tank deaths to this mechanic are unavoidable
and are considered the soft-enrage mechanic of the fight as Steelbreaker
will gain a stack of ![]() Electrical Charge every time a player dies,
further increasing his damage by 25% per stack. Tanks must be ressed in combat
via things such as
Electrical Charge every time a player dies,
further increasing his damage by 25% per stack. Tanks must be ressed in combat
via things such as ![]() Soulstone or
Soulstone or ![]() Rebirth and fully rebuffed so
they can return to their tanking jobs.
Rebirth and fully rebuffed so
they can return to their tanking jobs.
Keep in mind with both other bosses dead, Steelbreaker will also have
2 stacks of ![]() Supercharge, granting him 50% more damage on top of the
stacks of
Supercharge, granting him 50% more damage on top of the
stacks of ![]() Electrical Charge he gains with each player's death. This
makes even his basic attacks deadly the further you get into the fight, and his
Electrical Charge he gains with each player's death. This
makes even his basic attacks deadly the further you get into the fight, and his
![]() Fusion Punch now becomes a massive threat that requires a major
defensive cooldown on the tank to survive the cast. Coordinate your cooldowns so
there is always something available for each cast. Eventually, this
will start to one-shot your tanks even through cooldowns as Steelbreaker
will have highly increased damage through
Fusion Punch now becomes a massive threat that requires a major
defensive cooldown on the tank to survive the cast. Coordinate your cooldowns so
there is always something available for each cast. Eventually, this
will start to one-shot your tanks even through cooldowns as Steelbreaker
will have highly increased damage through ![]() Supercharge and
Supercharge and
![]() Electrical Charge. This is the soft-enrage timer, wiping your raid
after about four casts of
Electrical Charge. This is the soft-enrage timer, wiping your raid
after about four casts of ![]() Overwhelming Power.
Overwhelming Power.
Mastering this fight and saving as many offensive and defensive cooldowns for
this final phase with just Steelbreaker alive is crucial to defeating
this hard mode encounter. Use all major offensive cooldowns together with the
freshly spawned ![]() Rune of Power to burn down Steelbreaker as
quickly as possible and collect your extra rewards.
Rune of Power to burn down Steelbreaker as
quickly as possible and collect your extra rewards.
Assembly of Iron Loot
Assembly of Iron 10 Player Normal Loot
| Item | Type/Slot |
|---|---|
| Mail Head | |
| Leather Shoulder | |
| Cloth Wrist | |
| Mail Waist | |
| Leather Legs | |
| Leather Feet | |
| Plate Feet | |
| Main Hand Dagger | |
| One Hand Sword | |
| Finger |
Assembly of Iron 10 Player Hardmode Loot
| Item | Type/Slot |
|---|---|
| Necklace | |
| Leather Waist | |
| Main Hand Fist | |
| One Hand Dagger | |
| Finger |
Assembly of Iron 25 Player Normal Loot
| Item | Type/Slot |
|---|---|
| Plate Helm | |
| Necklace | |
| Necklace | |
| Mail Shoulder | |
| Back | |
| Cloth Chest | |
| Leather Chest | |
| Plate Chest | |
| Mail Hands | |
| Plate Hands | |
| Cloth Legs | |
| Leather Feet | |
| Finger | |
| Staff | |
| Two Hand Sword |
Assembly of Iron 25 Player Hardmode Loot
| Item | Type/Slot |
|---|---|
| Necklace | |
| Leather Shoulder | |
| Back | |
| Plate Waist | |
| Mail Feet | |
| One Hand Dagger |
Further Reading
Assembly of Iron is just one of the 14 encounters present in the Ulduar raid of Wrath of the Lich King Classic. If you would like to learn more about the other fights and their respective loot, please see our Ulduar Raid Hub page below.
Changelog
- 18 Jan. 2023: Page added.
This guide has been written by Abide, TBC and WotLK veteran for nearly a decade. Abide is a Warrior tank and multi-class expert currently playing on Faerlina Horde. You can find him in the Icy Veins Discord if you have any questions or concerns.
- Burning Crusade Classic Phase 2 Now Live: Here’s What to Expect
- Did Blizzard Just Quietly Invite Creators to Play WoW Classic’s Next Chapter?
- WoW Weekly Returns: Patch 12.0.5, Twitch Drops & Classic Updates
- WoW BCC Anniversary Edition: Overlords of Outland – Everything Coming May 14
- Battleground Honor Significantly Increased
- Limited-Time Mount Alert: Get the Voidfeather Dragonhawk for TBC Classic Servers Now!
- Could WoW Be Added to Xbox Game Pass Ultimate?
- MoP Classic Escalation PTR Update Details New Content