Scarlet Enclave Walkthrough
Scarlet Enclave is the brand new raid being added to Season of Discovery, allowing players to improve their characters further beyond the previous limits of Naxxramas. Here players will face off against numerous challenges in an attempt to stop the Scarlet Crusade once and for all!
Scarlet Enclave Loot
Scarlet Enclave offers the most powerful gear available in the game for players to obtain, surpassing even Naxxramas gear in strength! Below you can find a list of all of the loot available throughout this new raid during the Season of Discovery.
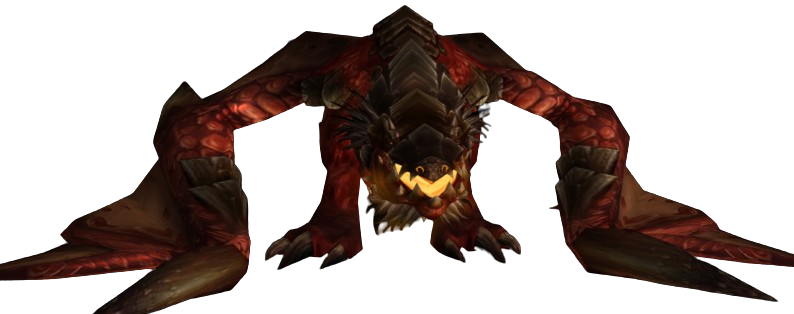
Balnazzar

 Circle of Domination
 Carrion Swarm
 Prey on the Weak
- Screeching Terror
 Screeching Fear
 Screeching Frenzy
 Suppressing Darkness
 Summon Infernal
Strategy for Balnazzar
Start the fight off by dragging Balnazzar to the far purple
wall; this will allow you to gain a few additional seconds of DPS while
Balnazzar runs towards the center of the room during the phase
two transition. Balnazzar has only a few spells that he will
continually use during all three phases. ![]() Circle of Domination is
a 10-second mind control on a random player, simply crowd control the targeted
player and avoid killing them with AoE damage such as
Circle of Domination is
a 10-second mind control on a random player, simply crowd control the targeted
player and avoid killing them with AoE damage such as ![]() Cleave.
Cleave.
![]() Carrion Swarm will frequently debuff players, dealing damage to
all nearby allies. The raid will need to spread out in groups of two, as
Carrion Swarm will frequently debuff players, dealing damage to
all nearby allies. The raid will need to spread out in groups of two, as
![]() Prey on the Weak will spawn multiple Shades of Balnazzar at the
location of random players and deal very high Shadow damage to players who are
alone in the area. Spreading out into groups of two allow you to entirely avoid
the damage dealt by
Prey on the Weak will spawn multiple Shades of Balnazzar at the
location of random players and deal very high Shadow damage to players who are
alone in the area. Spreading out into groups of two allow you to entirely avoid
the damage dealt by ![]() Prey on the Weak, while only taking some minor
damage from
Prey on the Weak, while only taking some minor
damage from ![]() Carrion Swarm.
Carrion Swarm.
Screeching Terrors will periodically be summoned in throughout
the entire fight. These adds must be picked up by a second tank and should be
stacked together on top of Balnazzar to ![]() Cleave them
down. Melee DPS should prioritize the Screeching Terrors when needed,
interrupting the
Cleave them
down. Melee DPS should prioritize the Screeching Terrors when needed,
interrupting the ![]() Screeching Fear cast as often as possible. Once
Balnazzar reaches 70% he will run into the center of the
room and fly into the air, beginning phase two.
Screeching Fear cast as often as possible. Once
Balnazzar reaches 70% he will run into the center of the
room and fly into the air, beginning phase two.
Once Balnazzar takes off into the air he will use
![]() Suppressing Darkness, silencing the entire raid. At the same time
four Priests will appear around the center of the area, blessing nearby players
with
Suppressing Darkness, silencing the entire raid. At the same time
four Priests will appear around the center of the area, blessing nearby players
with ![]() Light's Hope, which prevents the
Light's Hope, which prevents the
![]() Suppressing Darkness debuff. Have the raid split into three
groups, with each group stacking on a different Priest to minimize the damage
from
Suppressing Darkness debuff. Have the raid split into three
groups, with each group stacking on a different Priest to minimize the damage
from ![]() Carrion Swarm; it's possible for players with the
Carrion Swarm; it's possible for players with the
![]() Carrion Swarm debuff to stand on the very outer-edge of the
light provided by the Priests to avoid damaging other players, but still have the
Carrion Swarm debuff to stand on the very outer-edge of the
light provided by the Priests to avoid damaging other players, but still have the
![]() Suppressing Darkness debuff removed.
Suppressing Darkness debuff removed.
Melee DPS should continue dealing with the Screeching Terrors,
with the goal of having as few adds remaining before phase three begins, while
Ranged DPS entirely focus on damaging Balnazzar as he flies
around the area. Tanks will need to quickly ![]() Taunt the
Screeching Terrors and drag them away from the Priests, as if
they touch the
Taunt the
Screeching Terrors and drag them away from the Priests, as if
they touch the ![]() Light's Hope they will enter a
Light's Hope they will enter a
![]() Screeching Frenzy, greatly increasing their damage dealt. If this
happens, have a Hunter use
Screeching Frenzy, greatly increasing their damage dealt. If this
happens, have a Hunter use ![]() Tranquilizing Shot quickly to remove the frenzy
before the tanks take too much damage. Use all major DPS cooldowns here to end
this phase as quickly as possible; once Balnazzar reaches 40%
health he will land and phase three will begin.
Tranquilizing Shot quickly to remove the frenzy
before the tanks take too much damage. Use all major DPS cooldowns here to end
this phase as quickly as possible; once Balnazzar reaches 40%
health he will land and phase three will begin.
Once Balnazzar lands he must be picked up by a tank and
positioned between the three groups standing near the Priests from earlier.
![]() Suppressing Darkness will continue to silence any player not
standing near a light source, requiring players to continue standing on the
Priests to remove the silence. Balnazzar will use
Suppressing Darkness will continue to silence any player not
standing near a light source, requiring players to continue standing on the
Priests to remove the silence. Balnazzar will use
![]() Summon Infernal every 20-seconds, calling down a
Infernal on top one of the four Priests. The landing impact
of the Infernal stuns all nearby players for 4-seconds and kills
the targeted Priest, which removes the
Summon Infernal every 20-seconds, calling down a
Infernal on top one of the four Priests. The landing impact
of the Infernal stuns all nearby players for 4-seconds and kills
the targeted Priest, which removes the ![]() Light's Hope light source.
These players will need to relocate to one of the remaining Priests to avoid
being silenced by
Light's Hope light source.
These players will need to relocate to one of the remaining Priests to avoid
being silenced by ![]() Suppressing Darkness, and this will continue
throughout the phase until all four Priests are dead.
Suppressing Darkness, and this will continue
throughout the phase until all four Priests are dead.
Tanks will need to pick up the Infernals and tank them away
from the raid, as they have the ![]() Infernal Presence buff. This
deals damage to nearby players, but also acts as a light source, similar to the
Infernal Presence buff. This
deals damage to nearby players, but also acts as a light source, similar to the
![]() Light's Hope buff provided by the Priests from before. The raid
can use these Infernals as an additional light source once all
the Priests have died to prevent the
Light's Hope buff provided by the Priests from before. The raid
can use these Infernals as an additional light source once all
the Priests have died to prevent the ![]() Suppressing Darkness silence.
Damage should be heavily focused on Balnazzar this fight, ignoring
the Infernals entirely and only killing low health
Screeching Terrors early on. Once Balnazzar
reaches 5% health he will
Suppressing Darkness silence.
Damage should be heavily focused on Balnazzar this fight, ignoring
the Infernals entirely and only killing low health
Screeching Terrors early on. Once Balnazzar
reaches 5% health he will ![]() Sleep the raid and end the
fight with a roleplaying event.
Sleep the raid and end the
fight with a roleplaying event.
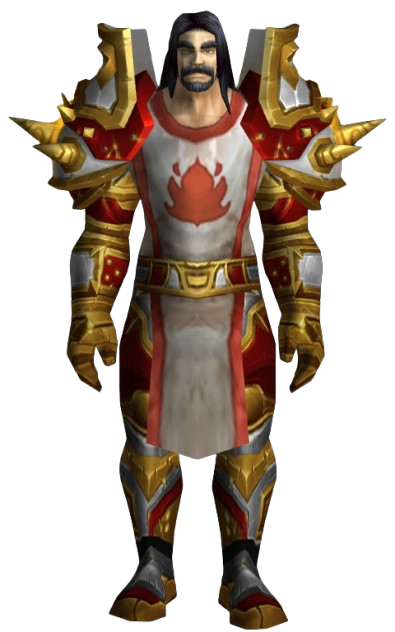
High Commander Beatrix

 Rose's Thorn
 Stock Break
 Unwavering Blade
Strategy for High Commander Beatrix
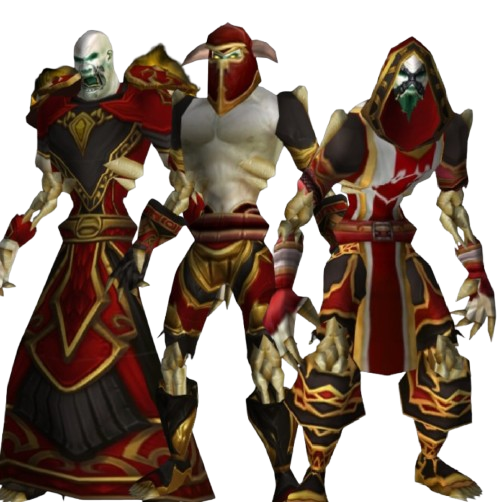
After defeating Balnazzar, players will become imprisoned and need to break free and deal with the Scarlet Captains before engaging High Commander Beatrix herself. These 6 captains can be seen on the image below:

Before engaging with these captains, players should speak with Fydriel to find out which of the two captains are empowered for the week, meaning they are always active during the fight with Beatrix. From here, the raid will have the option to engage the captains in whichever order is desired. The order the captains are killed matters, as the first two non-empowered captains that die will remain dead and will not help Beatrix during the fight. The remaining non-empowered captains will flee, leaving you with a total of 2 dead captains, and 4 captains (2 that fled and 2 that are empowered) to aid Beatrix in her fight. Our recommended order for captains to kill can be found below:
- Cardinal Stiltz — (
 Confession)
 - Knight-Captain Fratley — (
 Thundering Hooves)
 - Shield Warden Stein — (
 Scarlet Phalanx)
 - Cannon Mistress Lind — (
 Explosive Shell)
Once the 6 captains have been dealt with in the desired order, High Commander Beatrix will appear at the indicated area in the picture above. Upon reaching the area, a roleplay event will take place where the 4 captains that remained alive (the 2 empowered and 2 that fled), will surround the raid in a square with 4 armies, attacking the players before a short while before Beatrix herself appears. Depending on which captains are alive, the raid will have to contend with the following abilities:
| Captain | Spell | Description |
|---|---|---|
| Arcanist Hilda | - | Calls down a giant meteor at an indicated location. The entire raid must stack together for this to evenly split the damage. |
| Bowmaster Puck | - | Deals minor damage-over-time to the entire raid. |
| Cannon Mistress Lind | Summons multiple large red explosive swirls on the ground that must be avoided. | |
| Cardinal Stiltz | Slows the movement speed of all players down drastically over 5-seconds, after which all players will deal damage around them, increased by how close other players are. | |
| Knight-Captain Fratley | Summons fast moving lines of cavalry to charge the players, knock-back and deal 25% health to any players hit. These move very fast, but have large gaps for players to safely move through. | |
| Shield Warden Stein | Summons long lines of slowly moving infantry that knock-back and deal 25% health to any players hit. These lines of infantry have small gaps throughout them for the raid to move through and avoid being damaged. |
The 4 active captains will continue to use these "Captains Calls" throughout the entire fight, forcing the raid to deal with multiple mechanics at a time. In addition, they will frequently send in adds to attack the raid, depending on the specific captain. Focus these adds down quickly, making sure to interrupt and kill all Mage and Priest adds that appear as these are the most deadly if allowed to free cast. After 2 Captains Calls, High Commander Beatrix herself will appear and engage in combat.
The Captains Calls will continue while Beatrix is active, further adding to
the chaos of the encounter. Tanks will need to be on the lookout for
![]() Unwavering Blade and be ready for a taunt swap whenever it goes out.
Beatrix will also target 3 random players with
Unwavering Blade and be ready for a taunt swap whenever it goes out.
Beatrix will also target 3 random players with ![]() Stock Break,
dropping them to 1% health, stunning them for 5 seconds, and making them
briefly immune to damage; healers must be quick to use this brief immunity period
to heal these players up as they will quickly die to all of the AoE damage if
left at low health. Random players will also be targeted with
Stock Break,
dropping them to 1% health, stunning them for 5 seconds, and making them
briefly immune to damage; healers must be quick to use this brief immunity period
to heal these players up as they will quickly die to all of the AoE damage if
left at low health. Random players will also be targeted with ![]() Rose's Thorn,
a bleed that only goes away once the targeted player is fully healed.
Rose's Thorn,
a bleed that only goes away once the targeted player is fully healed.
The main difficulty of this encounter comes from dealing with the Captains Calls while Beatrix herself is active. Be sure to save all major cooldowns for Beatrix herself and wait for a Captains Call that requires very little or no movement to use them and burn her down before her very short enrage timer.
Solistrasza
 Lightforge
 Tarnished Breath
 Cremation
 Crimson Flare
 Radiant Light
 Hallowed Dive
- Lightgorged Whelp
 Unstable Detonation
 Blistering Vent
Strategy for Solistrasza
Solistrasza is a single phase fight that repeats itself three
times, with the boss restoring her health to full the first two times
Solistrasza would otherwise die, requiring you to kill her three
times to complete this encounter. Start off by having the tank drag the boss towards
the wall and face her away from the raid. Tanks will need to perform a taunt
swap every two stacks of ![]() Tarnished Breath as this deals 10% of the
debuffed players maximum health per stack, absolutely melting your tanks if it
is allowed to stack more. Have the raid quickly move behind Solistrasza
while avoiding her front and maintaining a loose spread.
Tarnished Breath as this deals 10% of the
debuffed players maximum health per stack, absolutely melting your tanks if it
is allowed to stack more. Have the raid quickly move behind Solistrasza
while avoiding her front and maintaining a loose spread.
![]() Radiant Light will fall down from the raid in random locations
constantly throughout the encounter, indicated by a quickly moving beam of "Holy
Light"; simply avoid being in the indicated areas where these light beams will
land to avoid the damage.
Radiant Light will fall down from the raid in random locations
constantly throughout the encounter, indicated by a quickly moving beam of "Holy
Light"; simply avoid being in the indicated areas where these light beams will
land to avoid the damage. ![]() Cremation will target three random DPS
players and send yellow orbs towards them, creating a small patch of fire on the
ground when it reaches the targeted player. Have the raid loosely spread out and
targeted players quickly move towards the walls and away from other players; the
fire created by
Cremation will target three random DPS
players and send yellow orbs towards them, creating a small patch of fire on the
ground when it reaches the targeted player. Have the raid loosely spread out and
targeted players quickly move towards the walls and away from other players; the
fire created by ![]() Cremation will despawn after a short timer.
Cremation will despawn after a short timer.
Every 40-seconds Solistrasza will
fly into the air, knocking back all nearby players, and mark an area with large,
yellow swirls; She will then slam down in the ground with ![]() Hallowed Dive,
dealing damage and stunning remaining anyone in the targeted area. Run away from
this area and be ready with a personal defensive cooldown if you catch yourself
unable to run away in time. After landing, three Lightgorged Whelps
will spawn and must be grabbed by a tank. Upon death each
Lightgorged Whelp will cast
Hallowed Dive,
dealing damage and stunning remaining anyone in the targeted area. Run away from
this area and be ready with a personal defensive cooldown if you catch yourself
unable to run away in time. After landing, three Lightgorged Whelps
will spawn and must be grabbed by a tank. Upon death each
Lightgorged Whelp will cast ![]() Unstable Detonation, dealing
1,000 Holy damage to the entire raid; single target one of the three whelps down,
leaving two alive. After 30-seconds the whelps will automatically die and deal
their AoE damage, be ready with a raid-wide defensive cooldown here to keep
everyone healthy.
Unstable Detonation, dealing
1,000 Holy damage to the entire raid; single target one of the three whelps down,
leaving two alive. After 30-seconds the whelps will automatically die and deal
their AoE damage, be ready with a raid-wide defensive cooldown here to keep
everyone healthy.
Every 30-seconds Solistrasza will target a random player
with ![]() Crimson Flare, marking them with a large yellow circle for
5-seconds. After 5-seconds Solistrasza will breath deadly fire
wherever the targeted player was, leaving a pool of lava on the ground for the
fight. Whoever is targeted by
Crimson Flare, marking them with a large yellow circle for
5-seconds. After 5-seconds Solistrasza will breath deadly fire
wherever the targeted player was, leaving a pool of lava on the ground for the
fight. Whoever is targeted by ![]() Crimson Flare must quickly move
towards the wall and place the fire away from the raid, taking up as little space
in the room as possible. While Solistrasza is breathing fire at
this targeted area the raid will take damage from
Crimson Flare must quickly move
towards the wall and place the fire away from the raid, taking up as little space
in the room as possible. While Solistrasza is breathing fire at
this targeted area the raid will take damage from ![]() Blistering Vent,
possibly requiring some healer cooldowns to help keep the raid alive while the
debuff is active.
Blistering Vent,
possibly requiring some healer cooldowns to help keep the raid alive while the
debuff is active.
The first two times that Solistrasza reaches low health She
will heal to full with ![]() Lightforge, knocking back all players and dealing
some damage. Repeat the mechanics until you manage to kill her for a third time
and you can finally claim her loot.
Lightforge, knocking back all players and dealing
some damage. Repeat the mechanics until you manage to kill her for a third time
and you can finally claim her loot.
Alexei the Beastlord

- Alexei the Beastlord
 Enkindle
 Entangling Shot
- Rending Slash
 Open Wound
 Fiery Eruption
- Sir Dornel
 Enervate
- Wild Aperture
 Stomp
Stomp
Strategy for Alexei the Beastlord
Players will face off against both Alexei the Beastlord and
his loyal pet bear Sir Dornel at the same time. Both bosses share
the same health pool, allowing you to deal damage to whichever one you are able
to attack. Start off by having the raid split into two groups, with an even split
of tanks, healers, and DPS in each group; the groups need to be split to deal
with both ![]() Enervate and
Enervate and ![]() Enkindle, which work in a similar
way to the marks from the Four Horseman encounter in Naxxramas.
Enkindle, which work in a similar
way to the marks from the Four Horseman encounter in Naxxramas.
Alexei the Beastlord will use ![]() Enkindle every 16-seconds
on the 5 nearest players, dealing direct Fire damage, increasing Fire damage taken
(per stack), and applies a Fire damage-over-time debuff (this stacks as well).
Sir Dornel will use a similar spell
Enkindle every 16-seconds
on the 5 nearest players, dealing direct Fire damage, increasing Fire damage taken
(per stack), and applies a Fire damage-over-time debuff (this stacks as well).
Sir Dornel will use a similar spell ![]() Enervate,
which is the exact same spell as Alexei the Beastlords
Enervate,
which is the exact same spell as Alexei the Beastlords ![]() Enkindle,
but deals Nature damage rather than Fire damage. These marks must be managed by
having your tanks keep the bosses split apart, one at each of the two groups that
the raid split into earlier. After two marks, 32-seconds total, have your tanks
drag the bosses towards each other with the goal of meeting in the middle of the
two groups. Here, the tanks will taunt the opposite boss off of the other tank
before the tanks return to their original positions with the new boss. This
will ensure that both
Enkindle,
but deals Nature damage rather than Fire damage. These marks must be managed by
having your tanks keep the bosses split apart, one at each of the two groups that
the raid split into earlier. After two marks, 32-seconds total, have your tanks
drag the bosses towards each other with the goal of meeting in the middle of the
two groups. Here, the tanks will taunt the opposite boss off of the other tank
before the tanks return to their original positions with the new boss. This
will ensure that both ![]() Enervate and
Enervate and ![]() Enkindle have the
proper amount of time to fall off before additional stacks are applied.
Enkindle have the
proper amount of time to fall off before additional stacks are applied.
While ![]() Enkindle and
Enkindle and ![]() Enervate are the main abilities
of the encounter, both Alexei the Beastlord and Sir Dornel
have a few abilities of their own. Sir Dornel will use
Enervate are the main abilities
of the encounter, both Alexei the Beastlord and Sir Dornel
have a few abilities of their own. Sir Dornel will use
![]() Stomp every 30-seconds, stunning all nearby players and dealing
minor damage; try to avoid this if possible and make sure Sir Dornel
is never positioned on-top of the ranged DPS and healers. The Bear will also use
Stomp every 30-seconds, stunning all nearby players and dealing
minor damage; try to avoid this if possible and make sure Sir Dornel
is never positioned on-top of the ranged DPS and healers. The Bear will also use
![]() Wild Aperture, creating numerous bolas of blue energy spread in a cone
in front of him. These will activate and then explode after a few seconds, killing
any players nearby; be on the lookout for the indicators that appear as blue balls,
as this will show you the lethal areas you must avoid.
Wild Aperture, creating numerous bolas of blue energy spread in a cone
in front of him. These will activate and then explode after a few seconds, killing
any players nearby; be on the lookout for the indicators that appear as blue balls,
as this will show you the lethal areas you must avoid.
Alexei the Beastlord himself has a frontal cleave with
![]() Rending Slash, which applies a stacking bleed (
Rending Slash, which applies a stacking bleed (![]() Open Wound),
to anyone hit; keep Him faced away from the raid at all times. Alexei will shoot
an
Open Wound),
to anyone hit; keep Him faced away from the raid at all times. Alexei will shoot
an ![]() Entangling Shot at a random area, showing a large green circle
in the targeted location. After 5 seconds anyone still inside the green circle
will be rooted temporarily; be ready to move away from these whenever they appear
as movement is crucial for this encounter, and being rooted can easily lead to
your death. Alexei the Beastlord will also drop numerous immolation
traps around himself, which will explode in a
Entangling Shot at a random area, showing a large green circle
in the targeted location. After 5 seconds anyone still inside the green circle
will be rooted temporarily; be ready to move away from these whenever they appear
as movement is crucial for this encounter, and being rooted can easily lead to
your death. Alexei the Beastlord will also drop numerous immolation
traps around himself, which will explode in a ![]() Fiery Eruption if
activated, applying a Fire damage-over-time debuff to the player who stepped on
the trap and creates a devastating patch of fire on the ground.
Fiery Eruption if
activated, applying a Fire damage-over-time debuff to the player who stepped on
the trap and creates a devastating patch of fire on the ground.
This fight focuses mostly on personal responsibility, as players will need to
constantly be watching their feet to avoid the numerous AoE spells (![]() Entangling Shot,
Entangling Shot,
![]() Wild Aperture,
Wild Aperture, ![]() Fiery Eruption, etc.) Play safe and you
can slowly whittle down their shared health pools as your tanks continue to
perform their tank swaps.
Fiery Eruption, etc.) Play safe and you
can slowly whittle down their shared health pools as your tanks continue to
perform their tank swaps.
Mason the Echo

 Mortal Wound
 Blade Dance
 Oil Spill
 Burning Oil
 Drowning Shallows
 Tidal Force
 Tidal Force
Strategy for Mason the Echo
Have your raid loosely spread out behind the boss. Tanks will need to be ready
to tank swap each time a new ![]() Mortal Wound is applied to the
current tank, while the raid will need to decurse any
Mortal Wound is applied to the
current tank, while the raid will need to decurse any ![]() Drowning Shallows
debuffs that go out. Frequently throughout the fight,
Mason the Echo will use
Drowning Shallows
debuffs that go out. Frequently throughout the fight,
Mason the Echo will use ![]() Blade Dance, charging
around the room in random directions and leaving a
Blade Dance, charging
around the room in random directions and leaving a ![]() Oil Spill
behind in his wake. Players hit by
Oil Spill
behind in his wake. Players hit by ![]() Blade Dance will take a bit
of damage (be spread beforehand), and players inside the oil will have their
movement speed slowed.
Blade Dance will take a bit
of damage (be spread beforehand), and players inside the oil will have their
movement speed slowed.
Mason the Echo will order his ships to fire on the raid,
blasted targeted areas with cannon fire. If this cannon fire hits one of the
![]() Oil Spills, the oil will turn into
Oil Spills, the oil will turn into ![]() Burning Oil,
dealing high Fire damage to players in the area. Be on the lookout for the
red indicators for the cannon fire, and avoid being near the patches of oil as
often as you can.
Burning Oil,
dealing high Fire damage to players in the area. Be on the lookout for the
red indicators for the cannon fire, and avoid being near the patches of oil as
often as you can.
The main mechanic to deal with occurs every 25% health, where
Mason the Echo will use ![]() Tidal Force and become
immune to damage. While immune to damage, He will also gain a stacking buff
(
Tidal Force and become
immune to damage. While immune to damage, He will also gain a stacking buff
(![]() Tidal Force), increasing his damage dealt and attack speed by
5% per stack. To stop the
Tidal Force), increasing his damage dealt and attack speed by
5% per stack. To stop the ![]() Tidal Force channel and break the
damage immunity, players will need to grab a cannonball from the pile on the pier
before boarding both nearby ships by hoping in the nearby cannon. From here, the
player with the cannon ball can use the cannon on the ship to shoot
Mason the Echo, and once he has been shot once by both ships
Tidal Force channel and break the
damage immunity, players will need to grab a cannonball from the pile on the pier
before boarding both nearby ships by hoping in the nearby cannon. From here, the
player with the cannon ball can use the cannon on the ship to shoot
Mason the Echo, and once he has been shot once by both ships
![]() Tidal Force will stop and he can be damaged once more.
Tidal Force will stop and he can be damaged once more.
Have two designated player assigned to grab a cannonball and jump on both ships to shoot Mason the Echo whenever he becomes immune to damage. These players should leave 2-3% early, allowing them to instantly shoot Mason and continue the fight. Both tanks will need to be ready to pick up the numerous Eastsea Scallywags that spawn in during this part of the encounter. They deal very high damage if left alive for long, so quickly kill them before returning your focus to Mason the Echo himself. You will need to repeat this process again at 50%, and 25% before finally finishing the boss off.
Reborn Council
- Doan
 Reborn Inspiration
 Fireball
 Imbued Assault
 Slow
Slow Blast Wave
 Molten Basin
- Herod
 Reborn Inspiration
 Blades of Light
 Divine Avatar
 Radiant Divide
- Divine Strike
- Vishas
 Reborn Inspiration
 Peeled Secrets
 Rend Flesh
 Garrote
 Veil of Darkness
Strategy for Reborn Council
Players will face off against the Reborn Council of past Scarlet Crusade bosses, previously found in the dungeons; Doan, Herod, and Vishas make a return as the 6th boss in Scarlet Enclave. Unlike Alexei the Beastlord, these bosses do not have a shared health pool, but instead have unique abilities tied to their deaths. Each boss also has their own unique buff that they grant other bosses near them, requiring you to keep all three bosses spread out for the entire fight.
Have two tanks grab both Vishas and Herod, while Doan does not need a tank as he will attack random players. Melee DPS should focus on Vishas while Ranged DPS primarily focus on Doan; your goal is to kill Doan as quickly as possible to simplify the encounter.
Doan will teleport around the room randomly, using
![]() Blast Wave on nearby players, and buffing any of the other nearby
bosses with
Blast Wave on nearby players, and buffing any of the other nearby
bosses with ![]() Reborn Inspiration. Doan will also
attack random targets with
Reborn Inspiration. Doan will also
attack random targets with ![]() Fireball and applies debuffs to
random targets, either
Fireball and applies debuffs to
random targets, either ![]() Slow or
Slow or ![]() Imbued Assault,
which must be quickly dispelled. Doans special ability is
Imbued Assault,
which must be quickly dispelled. Doans special ability is
![]() Molten Basin, where he will fill the bottom level of the room
with lava and summon a Fire tornado on the nearby stairs. Avoid tanking any of
the bosses in the bottom of the room, and kite the tornado around the stairs
to avoid the damage. Ranged DPS should focus hard on getting Doan
down quickly, as his teleporting will require the tanks to reposition the other
two bosses constantly. When Doan dies,
Molten Basin, where he will fill the bottom level of the room
with lava and summon a Fire tornado on the nearby stairs. Avoid tanking any of
the bosses in the bottom of the room, and kite the tornado around the stairs
to avoid the damage. Ranged DPS should focus hard on getting Doan
down quickly, as his teleporting will require the tanks to reposition the other
two bosses constantly. When Doan dies, ![]() Molten Basin
will continue to be cast for the rest of the encounter.
Molten Basin
will continue to be cast for the rest of the encounter.
Herod needs to be quickly picked up and dragged away from
the raid as he will periodically use ![]() Blades of Light, spinning in
a deadly whirlwind, dealing very high damage to all nearby players. Have your
tank use defensive cooldowns during this and keep the boss in place and stop him
from moving around while he is spinning. Herod must also be faced
away from other players at all
times as he will often use
Blades of Light, spinning in
a deadly whirlwind, dealing very high damage to all nearby players. Have your
tank use defensive cooldowns during this and keep the boss in place and stop him
from moving around while he is spinning. Herod must also be faced
away from other players at all
times as he will often use ![]() Radiant Divide, a frontal cleave that
reduces all healing received by 50%. He will also occasionally buff himself
with
Radiant Divide, a frontal cleave that
reduces all healing received by 50%. He will also occasionally buff himself
with ![]() Divine Avatar, increasing his damage dealt by 50% for
15-seconds.
Divine Avatar, increasing his damage dealt by 50% for
15-seconds. ![]() Divine Strike will rain bolts of Holy energy down on
random areas of the room, dealing moderate Holy damage to any player in the
indicated area. When Herod dies,
Divine Strike will rain bolts of Holy energy down on
random areas of the room, dealing moderate Holy damage to any player in the
indicated area. When Herod dies, ![]() Divine Strike
will continue to be cast for the rest of the encounter.
Divine Strike
will continue to be cast for the rest of the encounter.
Vishas needs to be tanked by himself and should be primarily
focused on by the melee DPS. He will frequently try to cast ![]() Peeled Secrets
which must be interrupted or it will likely lead to a raid-wipe. Assign a few
interrupters to always attack Vishas and be sure this never
goes off. Vishas will also occasionally vanish and use
Peeled Secrets
which must be interrupted or it will likely lead to a raid-wipe. Assign a few
interrupters to always attack Vishas and be sure this never
goes off. Vishas will also occasionally vanish and use
![]() Garrote on a random target, requiring them to be healed
above 90% health to remove the bleed. When Vishas dies,
Garrote on a random target, requiring them to be healed
above 90% health to remove the bleed. When Vishas dies,
![]() Veil of Darkness will be continually cast on the raid, requiring
constant movement to avoid the indicated attack markers.
Veil of Darkness will be continually cast on the raid, requiring
constant movement to avoid the indicated attack markers.
With all three bosses in mind, the strategy is to keep all of the bosses
separate at all times, as if they are near each other they will give each other
their respective buffs (![]() Reborn Inspiration,
Reborn Inspiration, ![]() Reborn Inspiration,
and
Reborn Inspiration,
and ![]() Reborn Inspiration). Doan will constantly be
teleporting around the room, requiring your tanks to frequently reposition the
other bosses around Doans new position. Be on the lookout for the
Fire tornado whenever
Reborn Inspiration). Doan will constantly be
teleporting around the room, requiring your tanks to frequently reposition the
other bosses around Doans new position. Be on the lookout for the
Fire tornado whenever ![]() Molten Basin goes off and the room begins
to fill with lava, and interrupt every cast of
Molten Basin goes off and the room begins
to fill with lava, and interrupt every cast of ![]() Peeled Secrets on
Vishas. Once Doan is dead, have ranged DPS focus
on Herod, and have melee DPS swap to Herod as
needed, attempting to have both Herod and Vishas
die around the same time.
Peeled Secrets on
Vishas. Once Doan is dead, have ranged DPS focus
on Herod, and have melee DPS swap to Herod as
needed, attempting to have both Herod and Vishas
die around the same time.
Lillian Voss

 Debilitating Strike
 Ambition
 Ambitious Pursuit
 Ignite
 Unstable Concoction
 Scarlet Grasp
 Noxious Poison
 Intoxicating Venom
Strategy for Lillian Voss
Lillian Voss will face players in her human form, while being aided
by Putress, who is patrolling around the room. Lillian Voss
herself has ![]() Ambition, granting stacks of
Ambition, granting stacks of
![]() Ambitious Pursuit based on how much health the raid is missing; this
can cause one mistake to quickly lead to deaths as the stacks quickly add up.
Tanks will need to deal with
Ambitious Pursuit based on how much health the raid is missing; this
can cause one mistake to quickly lead to deaths as the stacks quickly add up.
Tanks will need to deal with ![]() Debilitating Strike, a 40,000 heal
absorption debuff that requires a tank swap and for healers to remove the
Debilitating Strike, a 40,000 heal
absorption debuff that requires a tank swap and for healers to remove the
![]() Debilitating Strike from the previous tank as quickly as possible,
by healing them for 40,000.
Debilitating Strike from the previous tank as quickly as possible,
by healing them for 40,000.
Putress will target 3 players with ![]() Unstable Concoction,
placing a large marker around them; at the same time, Lillian Voss will
use
Unstable Concoction,
placing a large marker around them; at the same time, Lillian Voss will
use ![]() Scarlet Grasp, pulling all players on top of her after a
short cast. The players targeted by
Scarlet Grasp, pulling all players on top of her after a
short cast. The players targeted by ![]() Unstable Concoction will
then need to quickly spread out and avoid damaging the raid before the debuff
expires.
Unstable Concoction will
then need to quickly spread out and avoid damaging the raid before the debuff
expires.
The raid will need to be spread out to avoid the occasional ![]() Ignite,
a massive Fire damage-over-time that also deals damage to nearby allies. Be ready
with raid-wide defensive cooldowns for this as needed as the DoT deals very high
damage. Putress will debuff random players with
Ignite,
a massive Fire damage-over-time that also deals damage to nearby allies. Be ready
with raid-wide defensive cooldowns for this as needed as the DoT deals very high
damage. Putress will debuff random players with ![]() Intoxicating Venom,
requiring them to constantly move to avoid being stunned, or
Intoxicating Venom,
requiring them to constantly move to avoid being stunned, or ![]() Noxious Poison,
dealing damage-over-time for 8-seconds and leaving a large pool of poison behind
whenever the debuff is dispelled or expires.
Noxious Poison,
dealing damage-over-time for 8-seconds and leaving a large pool of poison behind
whenever the debuff is dispelled or expires.
Grand Crusader Caldoran
 Execution Sentence
 Blinding Flare
 Blade of Malice
 Wake of Ashes
 Quietus
- Divine Conflagration
 Judge Unworthy
Strategy for Grand Crusader Caldoran
Grand Crusader Caldoran is a two phase fight, where the raid
will face off against the greatest challenge yet in the Scarlet Enclave.
Grand Crusader Caldoran is a "tank-buster" fight, having numerous
abilities that deal damage based on his targets maximum health (![]() Execution Sentence,
Execution Sentence,
![]() Blade of Malice,
Blade of Malice, ![]() Wake of Ashes,
Wake of Ashes, ![]() Quietus).
In addition, his melee attacks deal Holy damage rather than Physical damage;
as Holy damage can not be resisted, and percentage health damage can not be
reduced by defensive cooldowns, the raid must heavily rely on absorbs to keep
their tanks alive. Have the raid stack up behind the boss, with healers using the
nearby pillars to line-of-sight adds that will come in the future.
Quietus).
In addition, his melee attacks deal Holy damage rather than Physical damage;
as Holy damage can not be resisted, and percentage health damage can not be
reduced by defensive cooldowns, the raid must heavily rely on absorbs to keep
their tanks alive. Have the raid stack up behind the boss, with healers using the
nearby pillars to line-of-sight adds that will come in the future.
Grand Crusader Caldoran will frequently cast ![]() Blinding Flare
throughout the fight, blinding any players facing him at the end of the cast.
Turn away from the boss before this goes out to avoid the blind, with healers
being able to stay faced away from the boss at all times. He will summon three
types of adds constantly throughout the encounter: Scarlet Martyrs,
Scarlet Magus, and Scarlet Ravagers. Have a free tank
grab these adds and focus down the Scarlet Martyrs and
Scarlet Magus first, interrupting times any spells they attempt
to cast. Grand Crusader Caldoran will frequently ressurect all of
the dead adds in his room.
Blinding Flare
throughout the fight, blinding any players facing him at the end of the cast.
Turn away from the boss before this goes out to avoid the blind, with healers
being able to stay faced away from the boss at all times. He will summon three
types of adds constantly throughout the encounter: Scarlet Martyrs,
Scarlet Magus, and Scarlet Ravagers. Have a free tank
grab these adds and focus down the Scarlet Martyrs and
Scarlet Magus first, interrupting times any spells they attempt
to cast. Grand Crusader Caldoran will frequently ressurect all of
the dead adds in his room.
Grand Crusader Caldoran will target a random player with
![]() Divine Conflagration, marking them with a giant circle. After
5-seconds a large patch of fire will spawn at the targeted players location,
dealing very high damage to players in the area. Adds that die in this fire are
unable to be ressurected during this encounter, preventing you from becoming
overwhelmed by the quickly spawning adds. Be sure to place the
Divine Conflagration, marking them with a giant circle. After
5-seconds a large patch of fire will spawn at the targeted players location,
dealing very high damage to players in the area. Adds that die in this fire are
unable to be ressurected during this encounter, preventing you from becoming
overwhelmed by the quickly spawning adds. Be sure to place the ![]() Divine Conflagration
in a position near the tanks, so low health adds can be sure to die inside the
fire and prevent them from ressing. The raid will need to balance dealing with
adds, interrupting spells with stuns, and keeping the tanks alive during this
chaotic first phase until Grand Crusader Caldoran reaches 55%
health.
Divine Conflagration
in a position near the tanks, so low health adds can be sure to die inside the
fire and prevent them from ressing. The raid will need to balance dealing with
adds, interrupting spells with stuns, and keeping the tanks alive during this
chaotic first phase until Grand Crusader Caldoran reaches 55%
health.
At 55% HP, Grand Crusader Caldoran will summon
The Ashbringer, which has its own health bar and deals raid-wide
damage with ![]() Wrath of the Crusade every second until it reaches
40% health. Once The Ashbringer reaches 40% health,
Grand Crusader Caldoran will grab it, root all players for 5-seconds,
and begin to cast
Wrath of the Crusade every second until it reaches
40% health. Once The Ashbringer reaches 40% health,
Grand Crusader Caldoran will grab it, root all players for 5-seconds,
and begin to cast ![]() Dying Light. Players will have 15 seconds
after the root ends to reach the room behind the altar; here a mage will provide
players inside her circle with protection from
Dying Light. Players will have 15 seconds
after the root ends to reach the room behind the altar; here a mage will provide
players inside her circle with protection from ![]() Dying Light.
After the
Dying Light.
After the ![]() Dying Light cast completes, the raid will need to run
back into the main room and take the portal on the other side of the room to
follow Grand Crusader Caldoran, all while dodging falling debris.
Dying Light cast completes, the raid will need to run
back into the main room and take the portal on the other side of the room to
follow Grand Crusader Caldoran, all while dodging falling debris.
Upon taking the portal, players will find Grand Crusader Caldoran
on a hillside, overlooking the town he just set ablaze. He will continue using
![]() Execution Sentence,
Execution Sentence, ![]() Blinding Flare,
Blinding Flare,
![]() Blade of Malice, and
Blade of Malice, and ![]() Wake of Ashes in this phase,
with a new ability
Wake of Ashes in this phase,
with a new ability ![]() Quietus adding a 4th ability that is damaging your
tank. In this phase Caldoran will build up energy (he starts with 100 energy), and
upon reaching 100 energy he will cast
Quietus adding a 4th ability that is damaging your
tank. In this phase Caldoran will build up energy (he starts with 100 energy), and
upon reaching 100 energy he will cast ![]() Cessation, summoning
Scarlet Hollows to aid him. These adds must be picked up by a tank and
dragged away from the raid as they will leave a void zone upon death. Quickly
deal with the adds to free your second tank up to perform any taunt swaps as
needed, as the tanks can very easily die to Grand Crusader Caldoran
during this phase.
Cessation, summoning
Scarlet Hollows to aid him. These adds must be picked up by a tank and
dragged away from the raid as they will leave a void zone upon death. Quickly
deal with the adds to free your second tank up to perform any taunt swaps as
needed, as the tanks can very easily die to Grand Crusader Caldoran
during this phase.
Once Grand Crusader Caldoran reaches 5% health, he will
summon The Ashbringer again and begin using the abilities of
previous bosses in the raid, such as ![]() Stock Break. Be ready to
dodge any of the previous abilities you might see, as certain ones can wreck
havoc (
Stock Break. Be ready to
dodge any of the previous abilities you might see, as certain ones can wreck
havoc (![]() Blades of Light on the melee for example). Bring
The Ashbringer down, and Grand Crusader Caldoran
will be attackable again, allowing you to finish him off and bring an end to the
corrupted Scarlet Crusade.
Blades of Light on the melee for example). Bring
The Ashbringer down, and Grand Crusader Caldoran
will be attackable again, allowing you to finish him off and bring an end to the
corrupted Scarlet Crusade.
Changelog
- 01 May 2025: Page added.
In The Same Category
This guide has been written by Abide, TBC veteran for nearly a decade. Abide is a Warrior tank and multi-class expert currently playing on Faerlina as Horde. You can find him in the the Icy Veins Discord. You can also see him live on Twitch.
- Burning Crusade Classic Phase 2 Now Live: Here’s What to Expect
- Did Blizzard Just Quietly Invite Creators to Play WoW Classic’s Next Chapter?
- WoW Weekly Returns: Patch 12.0.5, Twitch Drops & Classic Updates
- WoW BCC Anniversary Edition: Overlords of Outland – Everything Coming May 14
- Battleground Honor Significantly Increased
- Limited-Time Mount Alert: Get the Voidfeather Dragonhawk for TBC Classic Servers Now!
- Could WoW Be Added to Xbox Game Pass Ultimate?
- MoP Classic Escalation PTR Update Details New Content