Gnomeregan Introduction
Gnomeregan has been fully overhauled in Season of Discovery from a 5-man dungeon to a 10-player raid. With 6 bosses, including a brand new never-before-seen encounter, this raid is sure to have even more irradiated fun than the original. Prepare to have a wrench thrown in your gears as you explore the heart of the once-great Gnomish capital, pull the plug on Thermaplugg and save the day. In this new levelup raid, you will unlock powerful gadgets & items to elevate your level 40 character in the Season of Discovery. Read our overview below to get the inside scoop on all of the changes being made to this iconic and legendary dungeon!
Gnomeregan Overview
Embark on an radioactive journey as Gnomeregan transforms from a humble 5-man dungeon into a full-fledged 10-player raid in the Season of Discovery! With its new found raid classification, players can expect a heightened level of complexity and scale to the iconic Gnomish city. Once a technological marvel, Gnomeregan now stands overrun by troggs, plagued by engineering mishaps, and shrouded in radiation.
Bosses
Gnomeregan showcases six bosses, including an exciting never-before-seen encounter: Mechanical Managerie! Drawing inspiration from the revamped mechanics introduced in Blackfathom Deeps, each boss in Gnomeregan features fresh and reimagined challenges, surpassing the original 5-man version.
Grubbis
Grubbis, a trogg boss accompanied by his loyal basilisk pet, is located at the far end of the cave area near the Dungeon's entrance. Deal with waves of troggs and dodge radioactive gas clouds to defeat him.
Abilities
-
 Grubbis Mad!: Grubbis splashes AoE in a small area around him dealing
moderate physical damage to nearby enemies. Players should get out of melee
range during this ability to avoid taking unnecessary damage.
Grubbis Mad!: Grubbis splashes AoE in a small area around him dealing
moderate physical damage to nearby enemies. Players should get out of melee
range during this ability to avoid taking unnecessary damage.
-
 Radiation?: Grubbis emits green radioactive gas from his backside,
damaging players behind him. Players should attack Grubbis from his front or
flank during this.
Radiation?: Grubbis emits green radioactive gas from his backside,
damaging players behind him. Players should attack Grubbis from his front or
flank during this.
-
 Trogg Rage: Grubbis deals increased damage and has increased attack
speed for a duration after casting this ability. Tanks should use any defensive
cooldowns at their disposal and healers should be ready for heavy tank damage.
Trogg Rage: Grubbis deals increased damage and has increased attack
speed for a duration after casting this ability. Tanks should use any defensive
cooldowns at their disposal and healers should be ready for heavy tank damage.
Trogg Gauntlet
After speaking with Blastmaster Emi Shortfuse to begin the encounter, waves of troggs enter the arena from both sides. Simultaneously, green gas clouds appear and circle the arena dealing damage to allies who stand in them. When the trogg adds make contact with the gas clouds, they instantly die and the gas clouds despawn. Players should drag troggs into the gas clouds consistently throughout the encounter both to efficiently kill troggs and to free the arena from annoying gas clouds. Once several waves of troggs have been defeated, Grubbis and Chomper, his basilisk companion, make their entrance.
Encounter Strategy
Grubbis is a fairly simple encounter with only a few notable abilities.
Once several waves of troggs are defeated, Grubbis and his pet Chomper appear
and will need to be quickly picked up. A single tank may be able to tank both
Grubbis and Chomper, but if the damage proves to be too much, Chomper can be kited
around the room by any class with a slow such as Hamstring, Wing Clip or Frost Shock.
Note that troggs will still continue to spawn throughout the encounter, so players
will need to consistently drag troggs into gas clouds to defeat them. Melee DPS players
should be ready to leave Grubbis's backside when he casts ![]() Radiation? and leave
melee range entirely when he channels
Radiation? and leave
melee range entirely when he channels ![]() Grubbis Mad!. If ranged players stay
a healthy distance from the boss, they should be able to ignore these two mechanics.
Grubbis Mad!. If ranged players stay
a healthy distance from the boss, they should be able to ignore these two mechanics.
Viscous Fallout
Viscous Fallot, a water elemental mob, roams the lower level of the Dungeon, close to the entrance. Safely pulling this boss poses significant risks due to the combination of his patrol route and high mob density in the area. Take your time and be sure to clear all surrounding mobs before engaging Viscous Fallout.
Abilities
-
 Sludge: Similar to Grobbulus in Naxxramas, Viscous Fallout will
consistently spawn green slime puddles underneath him that deal damage and
slow nearby allies. The boss will need to be kited to prevent melee players
from taking unnecessary damage.
Sludge: Similar to Grobbulus in Naxxramas, Viscous Fallout will
consistently spawn green slime puddles underneath him that deal damage and
slow nearby allies. The boss will need to be kited to prevent melee players
from taking unnecessary damage.
-
 Summon Irradiated Goo: Viscous Fallout summons three Irradiated Goos
that begin to run away from him in all directions. These mobs deal pulsing
AoE damage with their ability
Summon Irradiated Goo: Viscous Fallout summons three Irradiated Goos
that begin to run away from him in all directions. These mobs deal pulsing
AoE damage with their ability  Toxic Emission. If the Irradiated Goos
are not killed within 10 seconds, they transform into Desiccated Fallouts, a much
more dangerous mob that casts
Toxic Emission. If the Irradiated Goos
are not killed within 10 seconds, they transform into Desiccated Fallouts, a much
more dangerous mob that casts  Radiation Burn.
-
Toxic Emission: Pulsing AoE damage dealt in a proximity around Irradiated Goo.
This damage can be mitigated by making sure that ranged players are a healthy distance
from the boss when he begins casting Summon Irradiated Goo. For melee players,
this damage is unavoidable and must be healed through.
-
Radiation Burn: Immediately after spawning, Desiccated Fallouts
will begin casting Radiation Burn. If the cast goes uninterrupted, it will apply
a poison DoT to the entire raid. The Radiation Burn DoT can be removed by abilities
such as
 Abolish Poison or
  Poison Cleansing Totem.
Encounter Strategy
The tank will need to kite Viscous Fallout after each spawning of ![]() Sludge
so melee can avoid taking unnecessary damage. Ranged should attempt to be a healthy
distance away from the boss at all times or they'll take pulsing nature damage while
Irradiated Goo are active.
Sludge
so melee can avoid taking unnecessary damage. Ranged should attempt to be a healthy
distance away from the boss at all times or they'll take pulsing nature damage while
Irradiated Goo are active.
After Viscous Fallout casts ![]() Summon Irradiated Goo, players should try their
best to kill as many Irradiated Goos as possible. Some raid groups may be able to kill
all three before they transform into Desiccated Fallouts, where as others may only
be able to kill one. If Desiccated Fallouts do spawn, it is imperative that players
interrupt their cast of
Summon Irradiated Goo, players should try their
best to kill as many Irradiated Goos as possible. Some raid groups may be able to kill
all three before they transform into Desiccated Fallouts, where as others may only
be able to kill one. If Desiccated Fallouts do spawn, it is imperative that players
interrupt their cast of ![]() Radiation Burn to prevent the raid from being pelted with nature damage.
Radiation Burn to prevent the raid from being pelted with nature damage.
Rinse and repeat this process of kiting the boss and dealing with Goo until the boss dies.
Crowd Pummeler 9-60
Crowd Pummeler has undergone a full mechanics overhaul in the 10-man raid version of Gnomeregan. His abilities are primarily based on trying to knock allies off of his floating platform to their death. Dodge gears and mechanized punches to keep your feet planted on the ground long enough to defeat him!
Abilities
-
 Gnomeregan Smash: Crowd Pummeler focuses a player and looks in their
direction while casting this 3-second uninterruptable ability. At the end of his cast,
he blows steam in front him, knocking back anyone in its path.
Gnomeregan Smash: Crowd Pummeler focuses a player and looks in their
direction while casting this 3-second uninterruptable ability. At the end of his cast,
he blows steam in front him, knocking back anyone in its path.
-
 Gear Toss: Gears spawn from Crowd Pummeler and randomly traverse the arena,
knocking back players on contact.
Gear Toss: Gears spawn from Crowd Pummeler and randomly traverse the arena,
knocking back players on contact.
-
 The Claw!: Crowd Pummeler fixates on a random player for a few seconds
before charging and grabbing them. This sequence is unavoidable.
Players are CC'd while grabbed by the Pummeler's Claw and take massive damage
that must be healed through.
The Claw!: Crowd Pummeler fixates on a random player for a few seconds
before charging and grabbing them. This sequence is unavoidable.
Players are CC'd while grabbed by the Pummeler's Claw and take massive damage
that must be healed through.
Encounter Strategy
Crowd Pummeler 9-60 should be tanked in the center of his platform, with ranged DPS spread out along the perimeter.
This entire encounter revolves around players being able to dodge his frontal,
![]() Gnomeregan Smash as well as the fast moving gears that move randomly around his platform.
If players are hit by either of these mechanics, there is a high likelihood
that they will be knocked off the platform to their deaths.
Gnomeregan Smash as well as the fast moving gears that move randomly around his platform.
If players are hit by either of these mechanics, there is a high likelihood
that they will be knocked off the platform to their deaths.
Other than dodging these two mechanics, healers will need to keep an eye out
for whoever is targeted by ![]() The Claw! and spam heals on them.
The Claw! and spam heals on them.
Electrocutioner 6000
Electrocutioner 6000 is stationed on the bottom floor of the launch bay and players will need to ride an elevator downstairs to reach him. His arena is surrounded by trash mobs that you will want to clear out before engaging him, as you will need a large area do the encounter properly.
Abilities
-
 Static Arc: Electrocutioner casts a chain lightning type ability at the furthest raid member,
chaining to the 3 closest targets dealing moderate nature damage. After getting hit by Static Arc,
players will gain a debuff increasing their damage taken by Static Arc by 500% for 20 seconds.
Static Arc: Electrocutioner casts a chain lightning type ability at the furthest raid member,
chaining to the 3 closest targets dealing moderate nature damage. After getting hit by Static Arc,
players will gain a debuff increasing their damage taken by Static Arc by 500% for 20 seconds.
-
 Magnetic Pulse: Targets a random raid member and applies a debuff that sucks in
and deals damage to nearby allies. Players targeted by this should get away from raid members,
but not so far that they become targeted by Static Arc.
Magnetic Pulse: Targets a random raid member and applies a debuff that sucks in
and deals damage to nearby allies. Players targeted by this should get away from raid members,
but not so far that they become targeted by Static Arc.
-
 Discombobulation Protocol: An unavoidable AoE knockback that deals nature damage to the raid.
Encounter Strategy
The key to this encounter revolves around managing ![]() Static Arc.
After a player is hit by
Static Arc.
After a player is hit by ![]() Static Arc, they gain a debuff ensuring that
they will die if they are hit by another
Static Arc, they gain a debuff ensuring that
they will die if they are hit by another ![]() Static Arc within 20 seconds.
The best way to handle this is to have your entire raid stacked underneath the boss,
with only a single ranged DPS standing out in order to soak
Static Arc within 20 seconds.
The best way to handle this is to have your entire raid stacked underneath the boss,
with only a single ranged DPS standing out in order to soak ![]() Static Arc predictably.
Once
Static Arc predictably.
Once ![]() Static Arc goes out on the intended player, another player takes his place.
Static Arc goes out on the intended player, another player takes his place.
Just as important is that the players that ![]() Static Arc chains to also
don't have the
Static Arc chains to also
don't have the ![]() Static Arc debuff. To accomplish this,
players should separate themselves into two groups: the players that do not have
Static Arc debuff. To accomplish this,
players should separate themselves into two groups: the players that do not have
![]() Static Arc should play on the bosses right leg, and the players that do have
the
Static Arc should play on the bosses right leg, and the players that do have
the ![]() Static Arc debuff should play on the bosses left leg.
Static Arc debuff should play on the bosses left leg.
![]() Magnetic Pulse is a debuff that targets a random player and causes them
to pulse with nature damage to nearby allies. Handle this by having the affected player
run out of the raid, but be sure not to run so far out of the raid that they become the
Magnetic Pulse is a debuff that targets a random player and causes them
to pulse with nature damage to nearby allies. Handle this by having the affected player
run out of the raid, but be sure not to run so far out of the raid that they become the ![]() Static Arc target.
Static Arc target.
Mechanical Managerie
Mechanical Managerie is 4-boss council style fight that requires coordination and heavy movement.
STX-04/BD (Dragon) Abilities
-
 Sprocketfire Breath: A large frontal fire breath that deals moderate
fire damage and leaves a DoT effect on affected players.
Sprocketfire Breath: A large frontal fire breath that deals moderate
fire damage and leaves a DoT effect on affected players.
-
 Slag Embers: A fiery patch is left on the ground underneath STX-25/BD periodically.
Tanks will need to kite the boss so melee are able to hit him without having to stand in fire.
Slag Embers: A fiery patch is left on the ground underneath STX-25/BD periodically.
Tanks will need to kite the boss so melee are able to hit him without having to stand in fire.
-
 Overheat: Every 25% health, the Dragon boss will cast Overheat which is applied
to all nearby bosses and causes them to deal AoE fire damage to nearby allies.
To counter this, you can either heal through it or drag the Dragon boss a healthy distance
away from the other bosses just before each 25% health threshold.
Overheat: Every 25% health, the Dragon boss will cast Overheat which is applied
to all nearby bosses and causes them to deal AoE fire damage to nearby allies.
To counter this, you can either heal through it or drag the Dragon boss a healthy distance
away from the other bosses just before each 25% health threshold.
STX-37/CN (Chicken) Abilities
-
 Explosive Egg: Every 25 seconds the Chicken boss will lay an egg
on the ground with 1600 health. If players touch the egg it will explode
for roughly 800 AoE fire damage in a small radius around it. It is advisable
to kill them as soon as they spawn to prevent taking any unecessary damage.
Explosive Egg: Every 25 seconds the Chicken boss will lay an egg
on the ground with 1600 health. If players touch the egg it will explode
for roughly 800 AoE fire damage in a small radius around it. It is advisable
to kill them as soon as they spawn to prevent taking any unecessary damage.
-
 Peck: STX-25/CN will cause a moderate amount of physical damage
to their primary target. In addition to his regular melee attacks,
this ability makes the Chicken boss do significantly more tank damage than the other bosses.
Peck: STX-25/CN will cause a moderate amount of physical damage
to their primary target. In addition to his regular melee attacks,
this ability makes the Chicken boss do significantly more tank damage than the other bosses.
-
 Cluck!: Increases the attack speed of all bosses by 50% for a short duration.
Tanks should use any defensive cooldowns at their disposal during this effect.
Cluck!: Increases the attack speed of all bosses by 50% for a short duration.
Tanks should use any defensive cooldowns at their disposal during this effect.
STX-25/NB (Squirrel) Abilities
-
 Widget Volley: An interruptable cast that causes a large amount of raid damage if uninterrupted.
Assign two kickers to this target to ensure that no casts of Widget Volley are successful.
Widget Volley: An interruptable cast that causes a large amount of raid damage if uninterrupted.
Assign two kickers to this target to ensure that no casts of Widget Volley are successful.
-
 Nutty Shield: Decreases damage taken by 25% from all sources.
This effect is permanent. This makes the Squirrel the tankiest boss of the 4.
Nutty Shield: Decreases damage taken by 25% from all sources.
This effect is permanent. This makes the Squirrel the tankiest boss of the 4.
-
 Widget Fortress: Creates a barrier on the ground that reduces the damage
taken by all bosses by 49%. Tanks should quickly move any bosses out of this barrier as soon as it is placed.
Widget Fortress: Creates a barrier on the ground that reduces the damage
taken by all bosses by 49%. Tanks should quickly move any bosses out of this barrier as soon as it is placed.
STX-13/LL (Sheep) Abilities
-
 Binary Bleat: Silences all raid members within melee range of the Sheep.
-
Frayed Wiring: Shocks all raid members within 15 yards of the Sheep.
Encounter Strategy
This fight involves fighting all four bosses simultaneously, and bringing their health down to 0 as evenly as possible. If one bosses health hits 0, players will only have 30 seconds to defeat the other 3 bosses before their health regenerates to 30%.
The positioning of this encounter largely revolves around the STX-13/LL, or the Sheep boss.
Getting too close to the Sheep will cause you to be silenced and take heavy nature damage.
To counter this, the Sheep should not be tanked, leaving it to slowly wander towards the raid.
Keep the Sheep in the center of the room by kiting the other 3 bosses in a circle around the sheep,
moving whenever the Sheep gets too close to the raid. This strategy of semi-consistent movement
also mitigates the fire left on the ground from the Dragon boss's ![]() Slag Embers.
Slag Embers.
Mekgineer Thermaplugg
Thermaplugg is a complex and multi-phase encounter that requires endurance and consistency to take it down. Players will need to advance through a Fire Phase, Ice Phase, Poison Phase and Ultimate Phase to defeat this boss, each one with dynamic mechanics and heavy raid damage. Each phase ends when Thermaplugg reaches 50% health, except for the Ultimate Phase in which you bring his health to 0 to end the encounter.
Phase 1 (Fire) Abilities
-
Sprocketfire Punch: A frontal ability that deals heavy fire damage.
The tank should ensure that the boss is facing away from raid members at all times.
-
Sprocketfire: A damage over time effect that deals moderate fire damage.
It is applied from Sprocketfire Punch and Furnace Surge.
-
Furnace Surge: After a short cast, Thermaplugg unleashes a powerful frontal
fire spray that lasts 10 seconds. The tank should attempt to kite Thermaplugg during
this attack or else he will get very high stacks of Sprocketfire.
Phase 2 (Frost) Abilities
-
 Supercooled Smash: Deals a large amount of frost damage to Thermaplugg's
primary target that applies a stack of
Supercooled Smash: Deals a large amount of frost damage to Thermaplugg's
primary target that applies a stack of  Freezing.
-
Freezing: A stacking debuff that slows affected raid members,
applied from Supercooled Smash as well as the frost patches left
on the ground from Bombs killed during Phase 2.
-
 Coolant Discharge: An unavoidable AoE ability that deals massive
frost damage to the raid. The amount of taken taken is increased per each
stack of Supercooled Smash.
Coolant Discharge: An unavoidable AoE ability that deals massive
frost damage to the raid. The amount of taken taken is increased per each
stack of Supercooled Smash.
Phase 3 (Poison) Abilities
-
 Hazardous Hammer: Deals moderate nature damage to Thermaplugg's
primary target and applies a stack of
Hazardous Hammer: Deals moderate nature damage to Thermaplugg's
primary target and applies a stack of  Radiation Sickness.
-
Radiation Sickness: Increases nature damage taken by 50% per stack.
It is applied to Thermaplugg's primary threat target after Hazardous Hammer.
-
Toxic Ventilation: A channeled, interruptable spell that deals massive
poison damage to all raid members.
Phase 4 (Ultimate) Abilities
In the 4th and final phase of the encounter, Thermaplugg uses a combination of abilities from the first three phases.
-
Sprocketfire Punch: A frontal ability that deals heavy fire damage.
The tank should ensure that the boss is facing away from raid members at all times.
-
Sprocketfire: A damage over time effect that deals moderate fire damage.
It is applied from Sprocketfire Punch and Furnace Surge.
-
Furnace Surge: After a short cast, Thermaplugg unleashes a powerful
frontal fire spray that lasts 10 seconds. The tank should attempt to kite
Thermaplugg during this attack or else he will get very high stacks of Sprocketfire.
-
Supercooled Smash: Deals a large amount of frost damage to Thermaplugg's
primary target that applies a stack of Freezing.
-
Hazardous Hammer: Deals moderate nature damage to Thermaplugg's
primary target and applies a stack of Radiation Sickness.
-
Radiation Sickness: Increases nature damage taken by 50% per stack.
It is applied to Thermaplugg's primary threat target after Hazardous Hammer.
-
Toxic Ventilation: A channeled, interruptable spell that deals massive poison
damage to all raid members.
Bomb Management
The primary mechanic throughout the encounter is managing the bombs that spawn from the six
bomb dispensers within Thermaplugg's arena. Periodically one of the faces above the dispensers
will begin to glow, signifying that several bombs are about to spawn from that location.
A player, ideally a ranged DPS or healer, will need to interact with the button beneath the
dispenser to stop the bombs from spawning. After interacting with a button, players will gain
a 30-second long debuff ![]() High Voltage! preventing them from interacting with a button
for its duration. Players will need to coordinate amongst themselves who has
the
High Voltage! preventing them from interacting with a button
for its duration. Players will need to coordinate amongst themselves who has
the ![]() High Voltage! debuff to establish who will press the subsequent button.
High Voltage! debuff to establish who will press the subsequent button.
Even when the dispensers are not glowing, bombs will periodically spawn from all dispenser locations. These bombs will need to be taken out by ranged DPS in a timely fashion, before the bombs are able to make contact with a player. Upon making contact with a player, bombs will explode, leaving a void zone on the ground in their place. The effects of the void zone are dependent on the current phase Thermaplugg is in.
-
In the fire phase, bombs will leave a fiery void zone on the ground,
dealing massive fire damage and applying a stack of Sprocketfire
to players that stand in it.
-
In the frost phase, bombs will leave a patch of frost on the ground that deals frost damage,
slows, and applies a stack of Freezing to players that stand in it.
-
In the poison phase, bombs will leave a poison puddle on the ground that deals
poison damage and applies a stack of Radiation Sickness to players that stand in it.
- In the ultimate phase, every type of bomb from the previous 3 phases will spawn.
Phase 1 (Fire) Strategy
Success in this phase is largely on the main tank.
The main tank must succeed at kiting Thermaplugg during his channeled cast of ![]() Furnace Surge.
Quick reflexes must be employed in order to kite him successfully without taking
any stacks of
Furnace Surge.
Quick reflexes must be employed in order to kite him successfully without taking
any stacks of ![]() Sprocketfire.
Sprocketfire. ![]() Swiftness Potion can be used to make this
significantly easier. After Thermaplugg finishes casting
Swiftness Potion can be used to make this
significantly easier. After Thermaplugg finishes casting ![]() Furnace Surge,
an off-tank or hunter pet should taunt Thermaplugg to allow the main tank's stacks
of
Furnace Surge,
an off-tank or hunter pet should taunt Thermaplugg to allow the main tank's stacks
of ![]() Sprocketfire to reset.
Sprocketfire to reset.
Phase 2 (Frost) Strategy
This phase is mostly an output check on behalf of your healers who must keep
the raid alive through ![]() Coolant Discharge, as well as your DPS to push the boss
into the next phase before your healers get overwhelmed. Bomb management in this phase
is particularly difficult due to stacks of
Coolant Discharge, as well as your DPS to push the boss
into the next phase before your healers get overwhelmed. Bomb management in this phase
is particularly difficult due to stacks of ![]() Freezing that your bomb killers
are sure to accumulate.
Freezing that your bomb killers
are sure to accumulate. ![]() Free Action Potions and/or
Free Action Potions and/or ![]() Blessing of Freedom
can be utilized here by your bomb killers to make sure they don't get stuck in a patch of frost.
Blessing of Freedom
can be utilized here by your bomb killers to make sure they don't get stuck in a patch of frost.
Phase 3 (Poison) Strategy
The boss should be positioned in the middle of the arena during this phase to ensure
that all players are in range of your healers at any given time.
Assign an interrupter to the boss to kick his channeled cast of ![]() Toxic Ventilation as soon as possible.
If interrupts are quick and the bomb killers continue to do their job,
this phase will be the easiest phase of the encounter.
Toxic Ventilation as soon as possible.
If interrupts are quick and the bomb killers continue to do their job,
this phase will be the easiest phase of the encounter.
Phase 4 (Ultimate) Strategy
The Ultimate phase of this encounter combines abilities and bombs from the other
3 phases of the fight. Bomb killers will need to stay adaptive, as bombs that spawn
in this phase have the potential to be fire bombs, frost bombs or poison bombs.
The main tank should be ready to kite Thermaplugg during ![]() Furnace Surge at any given time.
Healers should be ready for massive tank damage, as the tank will be victim to all three tank mechanics
from previous phases:
Furnace Surge at any given time.
Healers should be ready for massive tank damage, as the tank will be victim to all three tank mechanics
from previous phases: ![]() Sprocketfire Punch,
Sprocketfire Punch, ![]() Supercooled Smash, and
Supercooled Smash, and ![]() Hazardous Hammer.
Note that this phase will last at least twice as long as previous phases,
as you will need to bring the bosses health to zero instead of half.
Hazardous Hammer.
Note that this phase will last at least twice as long as previous phases,
as you will need to bring the bosses health to zero instead of half.
Getting to Gnomeregan
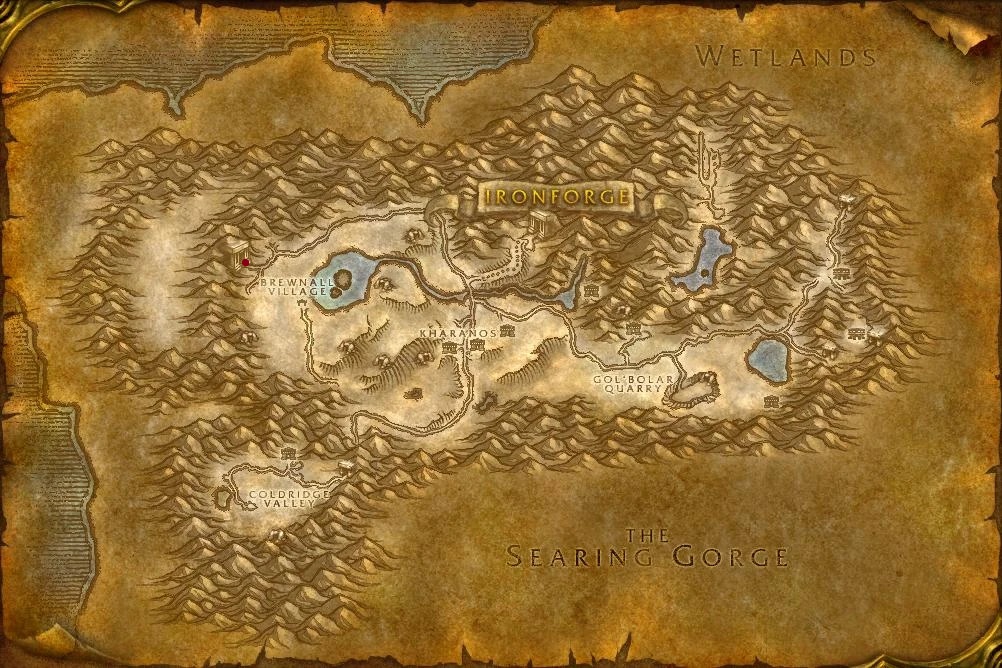
Gnomeregan is located at the northwestern corner of Dun Morogh, buried deep in the recesses of a mountain. Guarding the entrance are countless Leper-Gnomes, a mutated race of Gnomes turned evil from exposure to radiation.
In The Same Category
This guide has been written by Abide, TBC veteran for nearly a decade. Abide is a Warrior tank and multi-class expert currently playing on Faerlina as Horde. You can find him in the the Icy Veins Discord. You can also see him live on Twitch.
- Burning Crusade Classic Phase 2 Now Live: Here’s What to Expect
- Did Blizzard Just Quietly Invite Creators to Play WoW Classic’s Next Chapter?
- WoW Weekly Returns: Patch 12.0.5, Twitch Drops & Classic Updates
- WoW BCC Anniversary Edition: Overlords of Outland – Everything Coming May 14
- Battleground Honor Significantly Increased
- Limited-Time Mount Alert: Get the Voidfeather Dragonhawk for TBC Classic Servers Now!
- Could WoW Be Added to Xbox Game Pass Ultimate?
- MoP Classic Escalation PTR Update Details New Content