Sunken Temple Overview
The Temple of Atal'Hakkar, most commonly referred to as Sunken Temple, is a level 50-55 dungeon originally introduced in Vanilla WoW. In Season of Discovery the 5 man dungeon has been re-worked into a 20-player raid instance, offering some new, powerful rewards for the increased difficulty across 8 boss encounters.
With Phase 3 of Season of Discovery, The Temple of Atal'Hakkar has been re-envisioned as the premier raid players can tackle once reaching level 50. Commonly referred to Sunken Temple, this is the first 20-man raiding content we have seen so far during SoD, with the previous raids being made for 10 players. Prepare yourself as much as possible before entering the raid with our fully detailed guide on each of the new challenging encounters!
Bosses in Season of Discovery Sunken Temple Raid
With the return of The Sunken Temple, we have seven of the old fights from the original dungeon returning, and one entirely brand new encounter, added exclusively for Season of Discovery! Below you will find all of the information you need to understand and complete this raid with ease.
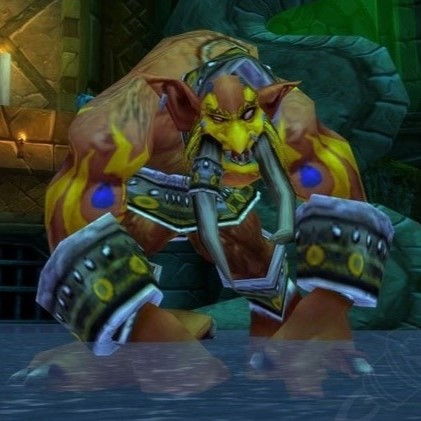
Atal'alarion
Returning as the first boss inside The Temple of Atal'Hakkar, Atal'alarion serves as a great entry level introduction to the new raid.
 Pillars of Might
- Pillars of Might
 Demolishing Smash
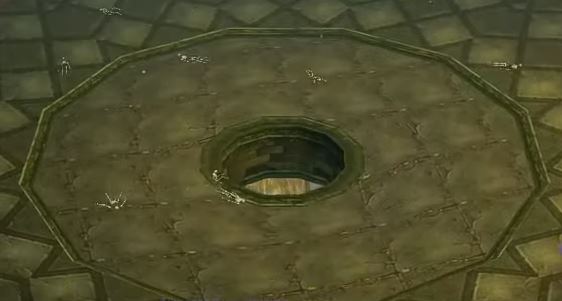
Start the fight off by tanking Atal'alarion in the middle of
the room, having your raid spread out around the entire area to cover as much
of the space as possible. Atal'alarion will frequently cast
![]() Pillars of Might during the fight, dealing damage to the raid and
spawning in pillars. For each pillar that is active, Atal'alarion
will gain a stack of
Pillars of Might during the fight, dealing damage to the raid and
spawning in pillars. For each pillar that is active, Atal'alarion
will gain a stack of ![]() Pillars of Might, increasing his damage dealt
by 5% per stack.
Pillars of Might, increasing his damage dealt
by 5% per stack.
Periodically throughout the fight, Atal'alarion will cast
![]() Demolishing Smash. This deals moderately-high damage to the
entire raid and knocks everyone back and slows
them by 99%. If a players body makes contact with one of the pillars during
this knock back, the pillar will be destroyed. The current tank will also
have their threat wiped after the
Demolishing Smash. This deals moderately-high damage to the
entire raid and knocks everyone back and slows
them by 99%. If a players body makes contact with one of the pillars during
this knock back, the pillar will be destroyed. The current tank will also
have their threat wiped after the ![]() Demolishing Smash cast, so be
ready to taunt when you land or have an off-tank ready.
Demolishing Smash cast, so be
ready to taunt when you land or have an off-tank ready.
It is important to destroy all pillars with every cast of
![]() Demolishing Smash, or the stacks of
Demolishing Smash, or the stacks of
![]() Pillars of Might will quickly overwhelm your healers through the
raid-wide AoE damage. Be aware of your surroundings and always try to position
yourself between a pillar and Atal'alarion, but be aware that
the pillars can cause line of sight issues.
Pillars of Might will quickly overwhelm your healers through the
raid-wide AoE damage. Be aware of your surroundings and always try to position
yourself between a pillar and Atal'alarion, but be aware that
the pillars can cause line of sight issues.
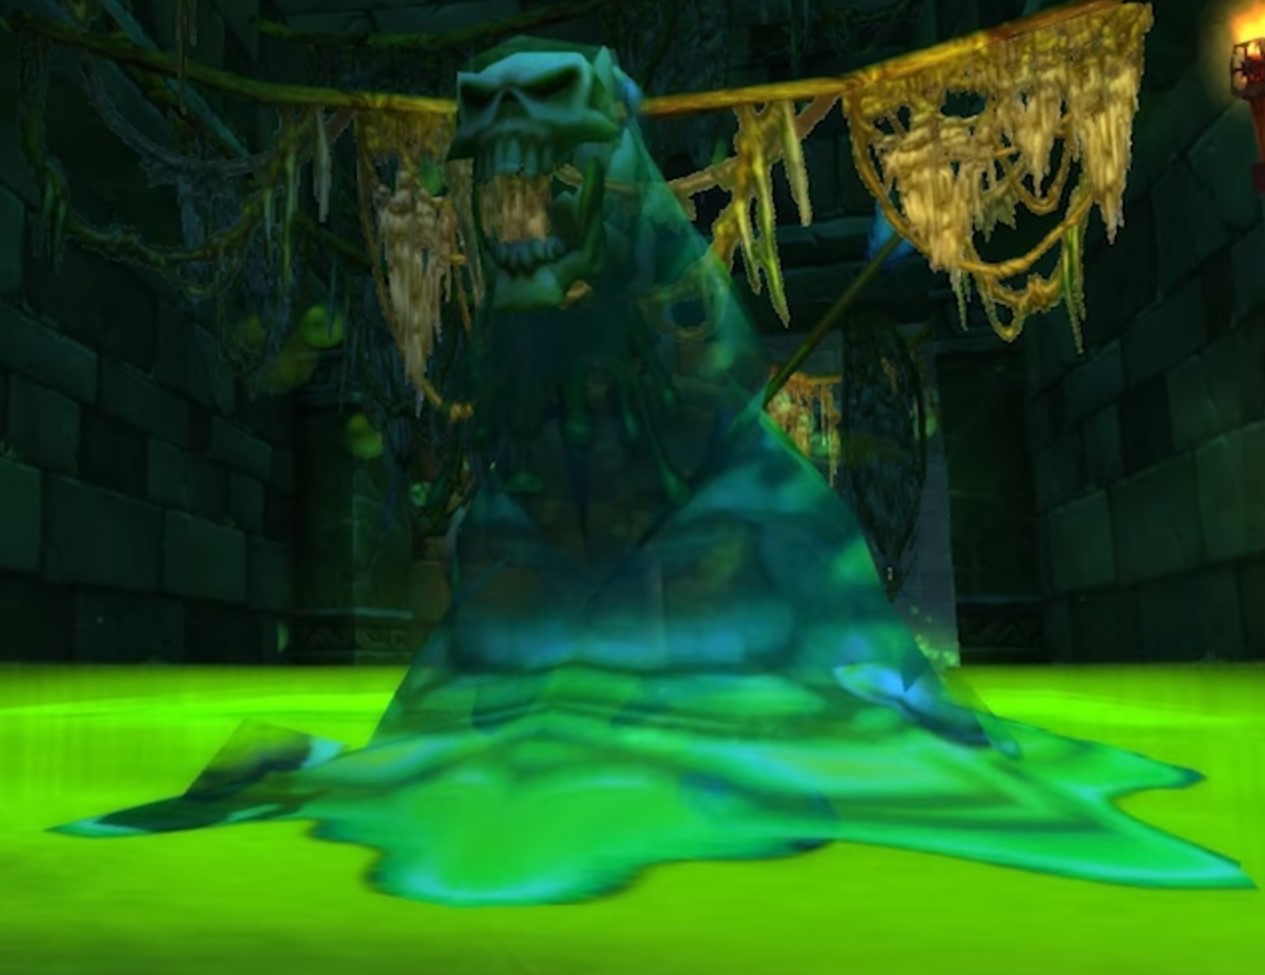
The Festering Rotslime
The Festering Rotslime is the new boss in the raid, being a unique encounter that requires a high amount of movement and quick reactions.
-

 Gunk
Gunk - Slime Time
 Nauseous Gas
Festering Rotslime starts off by patrolling the corridors in a large circle patrol; be careful not to run into it as you are coming up the stairs. This is not the traditional tank-and-spank fight, instead Festering Rotslime will slowly walk at your group, instantly killing anyone that it touches. For this reason, you must kite the boss around the corridors and avoid getting hit by it. While this might sound easy, the boss has a few abilities that aim to hinder you from kiting it.
- Festering Rotslime will gain a stack of
Slime Time every 3 seconds, gaining 5% increased movement speed
per stack. To stop these stacks from growing too high and letting the boss run
your raid group down, you will need to "feed" the slime and satisfy its hunger.
To do this, you must destroy the nearby Atal'ai Candles,
Atal'ai Drums, and Atal'ai Slabs. Once destroyed, these objects
will fall on the path in front of Festering Rotslime, and it will
devour these objects as it passes over them. Feed the boss enough of these
objects and it will lose all stacks, returning its movement speed to normal.
- Your raid will also be frequently debuffed by Gunk, dealing some
Nature damage over time. More importantly, this slows the movement speed of the
afflicted players by 75%, making them extremely vulnerable to getting eaten.
Luckily this disease can be dispelled and should be your main priority if you
are capable of removing it.
- The entire time you are engaged in combat with
Festering Rotslime it will be throwing out large
Nauseous Gas poison pools, greatly reducing the amount of
space you have as a raid to stand on and move through. These poison pools do not
despawn until the fight is over, making the amount of room you have to stand and
fight very limited towards the end of the encounter.
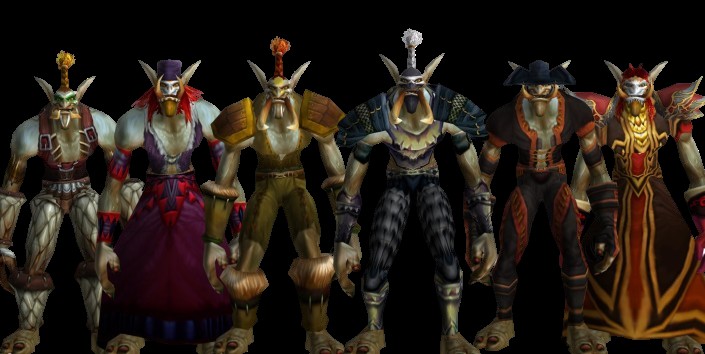
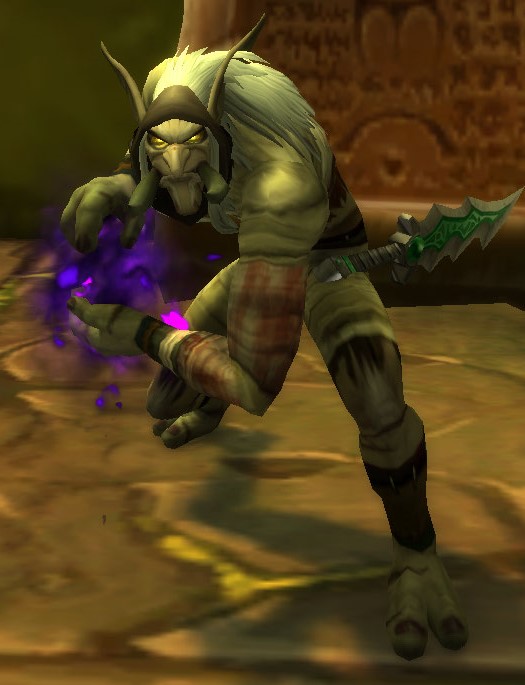
Atal'ai Defenders
Making a return as a council style fight, the Atal'ai Defenders are the third encounter you must face in this raid.
- Zul'Lor
 Corrupted Slam
 Frailty
- Mijan
- Serpent Totem
 Healing Ward
 Healing Wave
 Renew
Renew Thorns
- Zolo
- Atal'ai Totem
 Chain Lightning
 Unstable Cask
- Gasher
 Spinning Axes
- Loro
 Disarm
 Shield Spike
- Hukku
 Hukku's Guardians
 Shadow Bolt
- Shadow Bolt Volley
Unlike traditional "council style" fights, in this encounter you will only fight one enemy at a time. However, once you have defeated 1 of the 6 bosses, they will respawn as an Undead version of themselves and keep fighting. Luckily these Undead versions can, and should, be crowd controlled so you can keep focusing on whichever Humanoid boss is currently active and get through the fight as quickly as possible.
As the resurrected versions of the bosses are Undead, this makes
Priest strong during this fight as they
can simply ![]() Shackle Undead the boss and remove them from the fight for
40 seconds. Hunters are also useful for their
Shackle Undead the boss and remove them from the fight for
40 seconds. Hunters are also useful for their
![]() Trap Launcher —
Trap Launcher — ![]() Freezing Trap combo.
Ultimately, any form of crowd control that works on Undead mobs can and should
be used here, including stuns and slows.
Freezing Trap combo.
Ultimately, any form of crowd control that works on Undead mobs can and should
be used here, including stuns and slows.
For individual bosses, Mijan needs to be interrupted as much
as possible as he casts multiple heals on himself and injured allies.
Mijan and Zolo both summon totems that should be
quickly focused down before they can deal too much damage. Gasher
should be kited by the tanks after the ![]() Spinning Axes come out as
they deal fatal damage to nearby enemies every second.
Spinning Axes come out as
they deal fatal damage to nearby enemies every second.
This fight is much more about control than anything else. Keep the bosses crowd controlled, interrupted and away from the raid and you will easily breeze past this encounter.
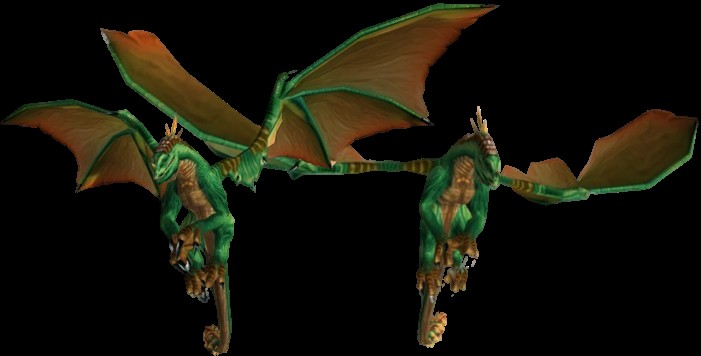
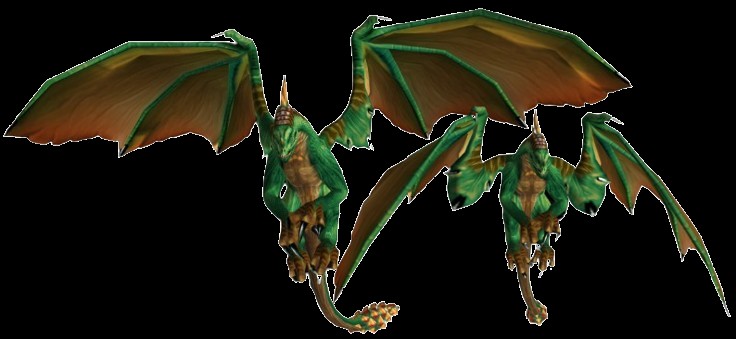
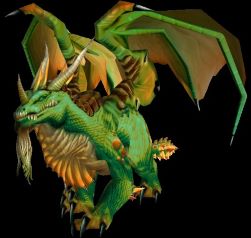
Dreamscythe and Weaver
We see Dreamscythe and Weaver return as a dragon pair for the fourth boss fight in the raid. These two have a shared health pool, allowing you to attack whichever one is in range.
 Acid Breath
 Caustic Overflow
 Wing Buffet
 Delayed Wing Buffet
You will be fighting Dreamscythe and Weaver in the same room that you just fought the Atal'ai Defenders in. Activate the boss by walking towards the hole in the center of the room. Both dragons share the same health pool, so you can DPS whichever one is nearest without worry.
 The fight starts off with the entire room, except a small circle in the
middle, being covered in
The fight starts off with the entire room, except a small circle in the
middle, being covered in ![]() Caustic Overflow. This fire deals
extremely fatal damage, ticking for 1,000 damage every 0.5 seconds. Be sure to
use the little room available to avoid the fire at all costs.
Caustic Overflow. This fire deals
extremely fatal damage, ticking for 1,000 damage every 0.5 seconds. Be sure to
use the little room available to avoid the fire at all costs.
In the middle of the safe space you are given, there is a small hole. If you
fall down this hole you will die to fall damage; always be aware of your
positioning regarding both the ![]() Caustic Overflow and this
hole as you will be moving very often during this fight.
Caustic Overflow and this
hole as you will be moving very often during this fight.
To make matters worse, both Dreamscythe and
Weaver will be trying to knock you into the
![]() Caustic Overflow as well as the hole with their constant use
of
Caustic Overflow as well as the hole with their constant use
of ![]() Wing Buffet and
Wing Buffet and ![]() Delayed Wing Buffet. This can
get very overwhelming after the bosses health reaches 60% and you are facing
both dragons at once, taking 2
Delayed Wing Buffet. This can
get very overwhelming after the bosses health reaches 60% and you are facing
both dragons at once, taking 2 ![]() Delayed Wing Buffet back-to-back.
Avoid standing with your back to the hole, or close to any fires as you can easily
be knocked into both of them.
Delayed Wing Buffet back-to-back.
Avoid standing with your back to the hole, or close to any fires as you can easily
be knocked into both of them.
Lastly, tanks will need to worry about the ![]() Acid Breath. This
places a stacking debuff on anyone hit, so be sure to always face both bosses
away from other players. Before the bosses health reaches 60% you will only be
fighting 1 dragon at a time, so you can simply tank swap after each breath.
After 60% health however, you will be fighting both dragons at once, which can
quickly lead to high stacks. Because of this, we recommend bringing 3 tanks to
taunt swap tanking assignments every 2-3 stacks of
Acid Breath. This
places a stacking debuff on anyone hit, so be sure to always face both bosses
away from other players. Before the bosses health reaches 60% you will only be
fighting 1 dragon at a time, so you can simply tank swap after each breath.
After 60% health however, you will be fighting both dragons at once, which can
quickly lead to high stacks. Because of this, we recommend bringing 3 tanks to
taunt swap tanking assignments every 2-3 stacks of ![]() Acid Breath,
preventing them from stacking too high.
Acid Breath,
preventing them from stacking too high.
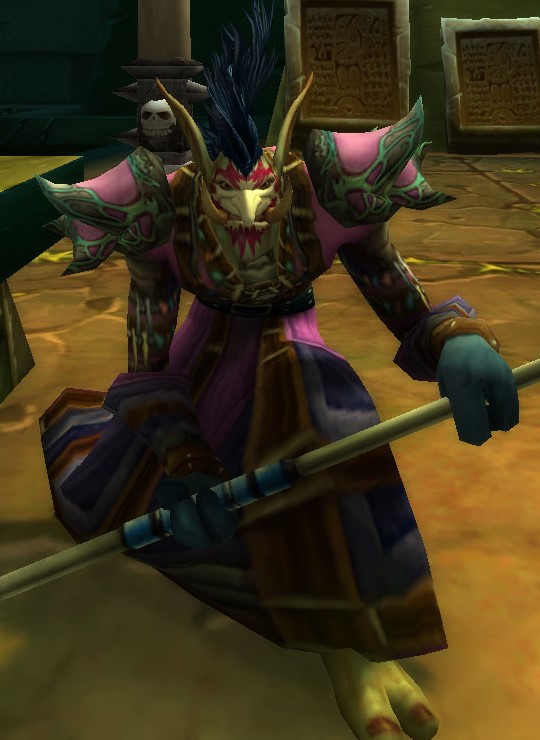
Jammal'an the Prophet and Ogom the Wretched
Jammal'an the Prophet and Ogom the Wretched return as a dynamic duo once again as the fifth boss inside the raid.
- Phase 1
- Ogom the Wretched
 Agonizing Weakness
 Mortal Lash
- Jammal'an the Prophet
 Holy Fire
 Smite
Smite Holy Nova
- Ogom the Wretched
- Phase 2
- Ogom the Wretched
 Consecration
 Divine Storm
 Hammers of Justice
- Holy Strike
- Jammal'an the Prophet
- Holy Nova
 Mass Penance
 Power Word: Shield
 Psychic Scream
 Shadow Sermon: Pain
- Ogom the Wretched
 This fight is broken down into two phases where you will face off against both
Jammal'an the Prophet and Ogom the Wretched at the same time. In
the first phase one of either Jammal'an the Prophet or
Ogom the Wretched will be immune to damage, forcing you to kill the
other first. This will swap every week, giving you a slightly different boss
encounter weekly. Ogom the Wretched himself is no real threat in Phase
1; simply keep the tank alive whenever he uses
This fight is broken down into two phases where you will face off against both
Jammal'an the Prophet and Ogom the Wretched at the same time. In
the first phase one of either Jammal'an the Prophet or
Ogom the Wretched will be immune to damage, forcing you to kill the
other first. This will swap every week, giving you a slightly different boss
encounter weekly. Ogom the Wretched himself is no real threat in Phase
1; simply keep the tank alive whenever he uses ![]() Mortal Lash and
decurse the raids
Mortal Lash and
decurse the raids ![]() Agonizing Weakness debuffs to return their
damage to normal.
Agonizing Weakness debuffs to return their
damage to normal.
 Jammal'an the Prophet is much more of a threat, even during Phase 1. He
will need to be tanked and interrupted whenever he casts
Jammal'an the Prophet is much more of a threat, even during Phase 1. He
will need to be tanked and interrupted whenever he casts ![]() Smite.
He will also cast an AoE
Smite.
He will also cast an AoE ![]() Holy Fire on multiple, random targets;
be sure to keep these people topped up.
Holy Fire on multiple, random targets;
be sure to keep these people topped up.
Jammal'an the Prophets main threat are the ![]() Holy Novas
that he casts. These will target random players and spawn an explosion of light
at the feet of the targeted players, dealing high Holy damage to all nearby
enemies. Because of this, we recommend having players stack and move together
so all you need to do is simply move as a group every time
Holy Novas
that he casts. These will target random players and spawn an explosion of light
at the feet of the targeted players, dealing high Holy damage to all nearby
enemies. Because of this, we recommend having players stack and move together
so all you need to do is simply move as a group every time
![]() Holy Nova is cast.
Holy Nova is cast.
Once either Ogom the Wretched or Jammal'an the Prophet is defeated, whichever boss is alive will consume the others corpse, granting them additional abilities.
If you are facing Ogom the Wretched in Phase 2, be ready to quickly
move out of the ![]() Consecrations that he frequently drops.
Ogom the Wretched will also regularly use
Consecrations that he frequently drops.
Ogom the Wretched will also regularly use ![]() Divine Storm,
dealing 750 Holy damage to the raid and pulling everyone on top of him, dealing
further damage to the raid with his
Divine Storm,
dealing 750 Holy damage to the raid and pulling everyone on top of him, dealing
further damage to the raid with his ![]() Consecration. Simply be
ready to move out when you get dragged in. Lastly, he will occasionally cast
Consecration. Simply be
ready to move out when you get dragged in. Lastly, he will occasionally cast
![]() Hammers of Justice, stunning the whole raid for 6 seconds. It's
recommended to use any stun immunities available, such as
Hammers of Justice, stunning the whole raid for 6 seconds. It's
recommended to use any stun immunities available, such as
![]() Free Action Potion, to prevent the stun and dispel others.
Free Action Potion, to prevent the stun and dispel others.
If you are facing Jammal'an the Prophet in Phase 2, he will still
continue to cast ![]() Holy Novas, requiring the raid to continue to
dodge them. He will also frequently cast
Holy Novas, requiring the raid to continue to
dodge them. He will also frequently cast ![]() Mass Penance, dealing
moderate Holy damage to the entire raid. He will place
Mass Penance, dealing
moderate Holy damage to the entire raid. He will place
![]() Shadow Sermon: Pain damage over time debuffs on random raid
members, just simply dispel these or heal through them. He will also periodically
cast
Shadow Sermon: Pain damage over time debuffs on random raid
members, just simply dispel these or heal through them. He will also periodically
cast ![]() Power Word: Shield on himself as well as
Power Word: Shield on himself as well as
![]() Psychic Scream on nearby enemies. The
Psychic Scream on nearby enemies. The
![]() Power Word: Shield must be dispelled as soon as possible as
it absorbs 100,000 damage, and the
Power Word: Shield must be dispelled as soon as possible as
it absorbs 100,000 damage, and the ![]() Psychic Scream can be dispelled
off of your allies right away.
Psychic Scream can be dispelled
off of your allies right away.
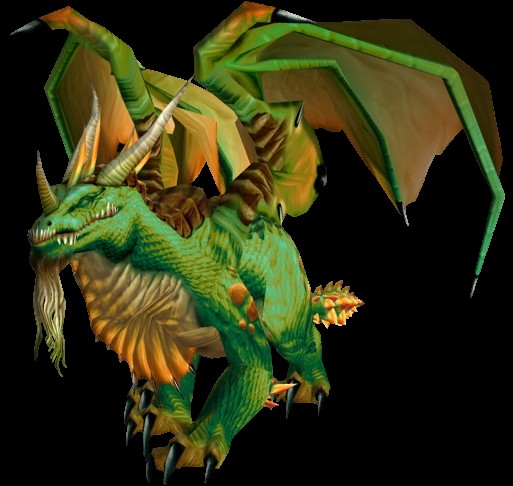
Hazzas and Morphaz
Both Hazzas and Morphaz see a return as the 6th encounter inside The Temple of Atal'Hakkar.
 Dreamer's Lament
 Lucid Dreaming
 Lucid Dreaming
- Eternal Slumber
 Backfire
- Corrupted Breath
- Lucid Dreaming
As with the Dreamscythe and Weaver fight, you will be facing both dragons at at the same time. That being said, the majority of your focus will be on damaging Hazzas as Morphaz is in the dream realm; regardless, they share the same health pool as well.
Frequently throughout the fight Hazzas will cast
![]() Dreamer's Lament on six random targets, dealing a small bit of
damage over time. He will also frequently cast
Dreamer's Lament on six random targets, dealing a small bit of
damage over time. He will also frequently cast ![]() Backfire, dealing
high Fire damage and knocking back anyone standing behind him.The only other
mechanic at this point is the
Backfire, dealing
high Fire damage and knocking back anyone standing behind him.The only other
mechanic at this point is the ![]() Corrupted Breath; tanks must keep
Hazzass' face and tail away from the raid and should swap tanking
once their stacks reach 2-3.
Corrupted Breath; tanks must keep
Hazzass' face and tail away from the raid and should swap tanking
once their stacks reach 2-3.
The first transition of the fight happens once Hazzas reaches
80% health. He will then cast ![]() Animate Flame and summon five
Animated Flames. Immediately after that he will begin
a 20 second cast,
Animate Flame and summon five
Animated Flames. Immediately after that he will begin
a 20 second cast, ![]() Lucid Dreaming. This gives you 20 seconds to
deal with the five Animated Flames by quickly grouping them up
and AoEing them down.
Lucid Dreaming. This gives you 20 seconds to
deal with the five Animated Flames by quickly grouping them up
and AoEing them down.
When the Animated Flames die, they will leave a large fire
on the ground, debuffing anyone that walks through it with ![]() On Fire!!.
While you are debuffed by
On Fire!!.
While you are debuffed by ![]() On Fire!!, your character is forced to move
forward and this can not be stopped in anyway. You can however control your
direction still easily with your mouse.
On Fire!!, your character is forced to move
forward and this can not be stopped in anyway. You can however control your
direction still easily with your mouse.
When Hazzas finishes his 20 second cast of
![]() Lucid Dreaming the entire raid will be put to sleep and
transported to the "Dream Realm". While inside the "Dream Realm",
players will be afflicted with
Lucid Dreaming the entire raid will be put to sleep and
transported to the "Dream Realm". While inside the "Dream Realm",
players will be afflicted with ![]() Lucid Dreaming, taking damage
every second. Immediately after the
Lucid Dreaming, taking damage
every second. Immediately after the ![]() Lucid Dreaming cast finishes,
Hazzas and Morphaz will begin to cast
Lucid Dreaming cast finishes,
Hazzas and Morphaz will begin to cast
![]() Eternal Slumber. When this spell finishes casting, any raid
member still sleeping will instantly die.
Eternal Slumber. When this spell finishes casting, any raid
member still sleeping will instantly die.
To prevent this, you must not allow your whole raid to be slept, as you need
people to be awake so they can wake up other players. To stay awake, simply step
into the fires dropped by the dead Animated Flames right
before the ![]() Lucid Dreaming cast finishes. Players that are
debuffed with the
Lucid Dreaming cast finishes. Players that are
debuffed with the ![]() On Fire!! debuff are immune to the sleep. Players with
the
On Fire!! debuff are immune to the sleep. Players with
the ![]() On Fire!! debuff will then run onto their nearby sleeping friends,
which in-turn removes the
On Fire!! debuff will then run onto their nearby sleeping friends,
which in-turn removes the ![]() On Fire!! debuff and awakens the player they
touched. Anyone not awakened before the
On Fire!! debuff and awakens the player they
touched. Anyone not awakened before the ![]() Eternal Slumber cast
finishes will die.
Eternal Slumber cast
finishes will die.
When the ![]() Eternal Slumber cast ends, the fight will return to
normal, with Hazzas using only the main three abilities
Eternal Slumber cast ends, the fight will return to
normal, with Hazzas using only the main three abilities
![]() Backfire,
Backfire, ![]() Corrupted Breath and
Corrupted Breath and
![]() Dreamer's Lament until his health reaches 30% and the final
DPS race begins.
Dreamer's Lament until his health reaches 30% and the final
DPS race begins.
This time Hazzas will cast ![]() Lucid Dreaming,
which is only a 4 second cast time instead of 20 seconds. There will be no more
Animated Flames spawning this time, which means no fires to
prevent the sleep, or break anyone out of the sleep. After the 4 second cast of
Lucid Dreaming,
which is only a 4 second cast time instead of 20 seconds. There will be no more
Animated Flames spawning this time, which means no fires to
prevent the sleep, or break anyone out of the sleep. After the 4 second cast of
![]() Lucid Dreaming, Morphaz will start to cast
Lucid Dreaming, Morphaz will start to cast
![]() Eternal Slumber.
Eternal Slumber.
Since the whole raid is transported into the "Dream Realm" with no way to escape, this is a race against the clock to burn the last 30% health off of the boss in 30 seconds before everyone dies. You must save all DPS cooldowns here to beat this timer, and as well should be looking to cast a few DPS spells in between heals to beat this close timer. Lastly, while the whole raid is in the "Dream Realm" for this final push, large boulders will randomly land throughout the area. Watch your feet for the indicators and move out of the way quickly to avoid taking high damage from their landing impact.
Shade of Eranikus
Shade of Eranikus makes a return as the 7th fight in the raid.
-
 Tail Sweep
  Bellowing Roar
 Corrosive Breath
 Lethargic Poison
 Deep Slumber
 Waking Nightmare
 Deep Slumber
The Shade of Eranikus fight can be broken down into four phases.
Phase 1 he is a standard dragon, possessing a ![]() Tail Sweep and
frontal cone attack. Avoid being in front of or behind the boss at all times,
aside from the current tank. While keeping the bosses head and tailed faced away
from the raid group, tanks will be dealing with the
Tail Sweep and
frontal cone attack. Avoid being in front of or behind the boss at all times,
aside from the current tank. While keeping the bosses head and tailed faced away
from the raid group, tanks will be dealing with the
![]() Corrosive Breath, which reduces armor by 100% and requires
a tank swap.
Corrosive Breath, which reduces armor by 100% and requires
a tank swap.
Shade of Eranikus will cast ![]() Bellowing Roar from
time to time, simply interrupt this and do not let the cast
go through. He will also frequently cast
Bellowing Roar from
time to time, simply interrupt this and do not let the cast
go through. He will also frequently cast ![]() Lethargic Poison on
random players; dispel this as quickly as possible.
Lethargic Poison on
random players; dispel this as quickly as possible.
Shade of Eranikus will also regularly cast
![]() Deep Slumber, spawning 3 clouds under random targets. If players
do not quickly move out of these clouds before getting hit, they will
succumb to
Deep Slumber, spawning 3 clouds under random targets. If players
do not quickly move out of these clouds before getting hit, they will
succumb to ![]() Deep Slumber, stunning them for 15 seconds. Similar to the
Jammal'an and Ogom fight, the best strategy to
avoid these is to stack tightly together as a group and simply move right away
after Shade of Eranikus casts
Deep Slumber, stunning them for 15 seconds. Similar to the
Jammal'an and Ogom fight, the best strategy to
avoid these is to stack tightly together as a group and simply move right away
after Shade of Eranikus casts ![]() Deep Slumber.
Deep Slumber.
1 minute after being engaged, and every 1 minute and 10 seconds after that,
Shade of Eranikus will cast ![]() Waking Nightmare,
dealing 30,000 Shadow damage to the entire raid. To avoid dying from this,
players will step into the
Waking Nightmare,
dealing 30,000 Shadow damage to the entire raid. To avoid dying from this,
players will step into the ![]() Deep Slumber clouds to gain the
Deep Slumber clouds to gain the
![]() Deep Slumber buff, reducing incoming damage. When the
Deep Slumber buff, reducing incoming damage. When the
![]() Waking Nightmare cast finishes, this buff is removed from all
players.
Waking Nightmare cast finishes, this buff is removed from all
players. ![]() Waking Nightmare can also be line-of-sighted,
something that the tanks will probably want to do instead of searching for a
cloud.
Waking Nightmare can also be line-of-sighted,
something that the tanks will probably want to do instead of searching for a
cloud.
Phase 2 starts when Shade of Eranikus reaches 70% health.
He will start by casting ![]() Deep Slumber on himself, reducing his
damage taken by 99%. After this he will spawn in two
Lumbering Dreamwalkers, which will constantly cast
Deep Slumber on himself, reducing his
damage taken by 99%. After this he will spawn in two
Lumbering Dreamwalkers, which will constantly cast
![]() Lethargic Poison. Interrupt and stun the
Lumbering Dreamwalkers as much as possible while focusing them down
quickly.
Lethargic Poison. Interrupt and stun the
Lumbering Dreamwalkers as much as possible while focusing them down
quickly.
In addition to these two adds, Shade of Eranikus will spawn in six
Nightmare Whelplings every 15 seconds for the rest of the fight. These have low
health and should be AoE'd down as soon as possible. While alive, the
Nightmare Whelplings will bombard the raid with
![]() Acid Shot, so killing them is high priority.
Acid Shot, so killing them is high priority.
From here on you continue to deal with all of the previous mechanics on top
of the Nightmare Whelplings, including the
![]() Waking Nightmare casts every 1 minute and 10 seconds, until
Shade of Eranikus reaches 40% health.
Waking Nightmare casts every 1 minute and 10 seconds, until
Shade of Eranikus reaches 40% health.
Phase 3 begins at 40%. Shade of Eranikus will again
start by casting ![]() Deep Slumber on himself, reducing his damage
taken by 99%. Then he will spawn in two more
Lumbering Dreamwalkers which must be interrupted, stunned and focused
down. However, instead of six Nightmare Whelplings spawning in every 15
seconds, he will spawn in two Nightmare Scalebanes instead. These
dragons have much higher health and cast
Deep Slumber on himself, reducing his damage
taken by 99%. Then he will spawn in two more
Lumbering Dreamwalkers which must be interrupted, stunned and focused
down. However, instead of six Nightmare Whelplings spawning in every 15
seconds, he will spawn in two Nightmare Scalebanes instead. These
dragons have much higher health and cast ![]() Acid Rain, dealing much
higher damage to targets hit. The
Acid Rain, dealing much
higher damage to targets hit. The ![]() Acid Rain can be avoided by
watching the floor for the impact indicators and should be moved out of as much
as possible.
Acid Rain can be avoided by
watching the floor for the impact indicators and should be moved out of as much
as possible.
You will need to continue to clear the Nightmare Scalebanes every 15 seconds, using all available interrupts and stuns to prevent them from casting as much as possible. This phase will repeat like this until Shade of Eranikus reaches 10% health and the final phase begins.
At 10% health Shade of Eranikus will spawn in three
Nightmare Whelplings on top of the one
Nightmare Scalebane every 9 seconds, making this a pure DPS race
to burn the boss down before your raid is overwhelmed by adds. Save DPS cooldowns
for this and nuke the boss down while trying to avoid the
![]() Acid Rains and
Acid Rains and ![]() Deep Slumbers.
Deep Slumbers.
Avatar of Hakkar
The Avatar of Hakkar returns as the 8th and final boss in Sunken Temple.
 Blood Nova
 Bubbling Blood
 Corrupted Blood
 Curse of Tongues
 Drain Blood
 Skeletal
 Insanity
This boss can only be summoned if someone is on the quest
The God Hakkar. For more information on the quest chain that unlocks
this quest, check out our Sunken Temple Quests
Guide. Even after completing this quest you can still summon
Avatar of Hakkar with the ![]() Yeh'kinya's Scroll you get as a
quest reward.
Yeh'kinya's Scroll you get as a
quest reward.
The Avatar of Hakkar fight starts off with you killing four Atal'ai Ritualists that are channeling to control the Hakkari Bloodkeeper they are surrounding. Once all four of the Atal'ai Ritualists are dead, the Hakkari Bloodkeeper will be set free and begin to attack.
Similar to both the Jammal'an and Ogom, and
Shade of Eranikus fights, your group will want
to stack together tightly to easily avoid the ![]() Bubbling Blood being
thrown at random players. This will spawn a pool of blood on the floor that deals
damage to players inside. Stack together and move together whenever this is cast.
Bubbling Blood being
thrown at random players. This will spawn a pool of blood on the floor that deals
damage to players inside. Stack together and move together whenever this is cast.
This phase of the fight is rather short, simply interrupt all of the
![]() Frightsome Howl casts and dispel the
Frightsome Howl casts and dispel the ![]() Spirit Chains
debuff off of players. The Hakkari Bloodkeeper will start off
with 0 Mana and quick regenerate his mana via
Spirit Chains
debuff off of players. The Hakkari Bloodkeeper will start off
with 0 Mana and quick regenerate his mana via ![]() Tides of Blood.
Once it reaches 100% Mana it will channel its life force to free
The God Hakkar, starting the real fight.
Tides of Blood.
Once it reaches 100% Mana it will channel its life force to free
The God Hakkar, starting the real fight.
The God Hakkar himself has quite a few abilities, mostly all
revolving around blood and debuffs. He will frequently cast
![]() Blood Nova dealing damage to the entire raid,
Blood Nova dealing damage to the entire raid,
![]() Curse of Tongues on random targets, and continues to use
Curse of Tongues on random targets, and continues to use
![]() Bubbling Blood as well. He will also use
Bubbling Blood as well. He will also use ![]() Insanity
periodically. Be sure to move out of the
Insanity
periodically. Be sure to move out of the ![]() Bubbling Blood pools
fast, decurse the
Bubbling Blood pools
fast, decurse the ![]() Curse of Tongues debuffs, and dispel the
Mind Controls as soon as possible.
Curse of Tongues debuffs, and dispel the
Mind Controls as soon as possible.
After being afflicted by either ![]() Drain Blood or
Drain Blood or
![]() Corrupted Blood, players will receive the
Corrupted Blood, players will receive the ![]() Skeletal
debuff, preventing them from being healed for 6 seconds. Tanks will need to
manage the
Skeletal
debuff, preventing them from being healed for 6 seconds. Tanks will need to
manage the ![]() Drain Blood debuff and properly tank swap after each
use to avoid tanking the boss while they can not be healed.
Drain Blood debuff and properly tank swap after each
use to avoid tanking the boss while they can not be healed.
The main mechanic do deal with this phase is the
![]() Corrupted Blood spell. This will target three random players and
debuff them, dealing damage to them every 2 seconds. Each time this debuff deals
damage it has a high chance to spread to nearby players that do not have the
debuff yet.
Corrupted Blood spell. This will target three random players and
debuff them, dealing damage to them every 2 seconds. Each time this debuff deals
damage it has a high chance to spread to nearby players that do not have the
debuff yet.
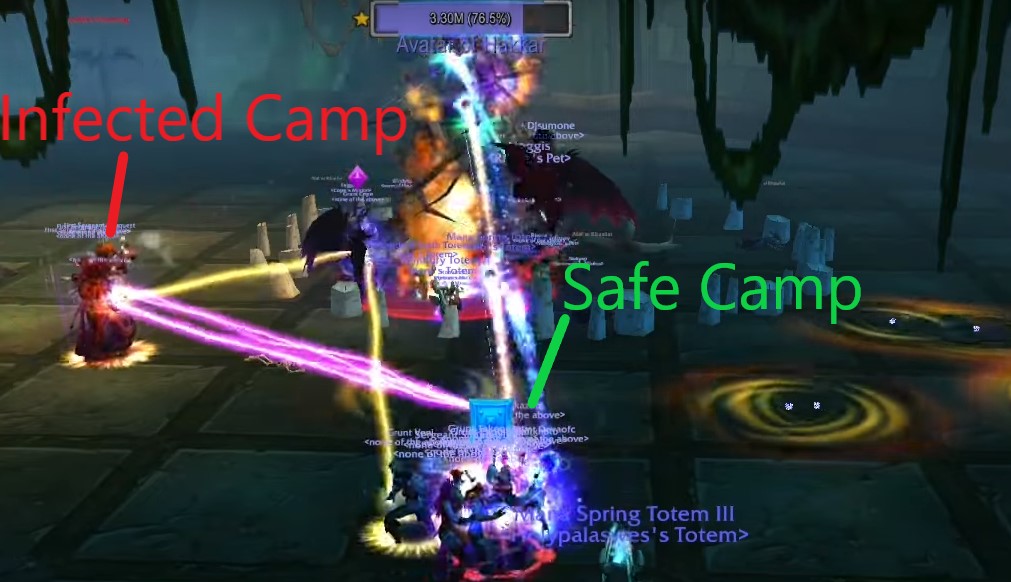
The best way to overcome this is to split your raid into two camps; one camp
will be for the infected players which stand in front of
Avatar of Hakkar (people with the ![]() Corrupted Blood),
the other camp will be for clean players (people without a the debuff). This will
prevent
Corrupted Blood),
the other camp will be for clean players (people without a the debuff). This will
prevent ![]() Corrupted Blood from spreading as it can not bounce to
players who already have the debuff. Everyone should be on their toes and ready
at a moments notice to move to the "infected camp" as soon as they get the
Corrupted Blood from spreading as it can not bounce to
players who already have the debuff. Everyone should be on their toes and ready
at a moments notice to move to the "infected camp" as soon as they get the
![]() Corrupted Blood debuff. When Avatar of Hakkar casts
Corrupted Blood debuff. When Avatar of Hakkar casts
![]() Drain Blood it will hit everyone in front of him, removing all
Drain Blood it will hit everyone in front of him, removing all
![]() Corrupted Blood debuffs.
Corrupted Blood debuffs.
Sunken Temple Entrance Location
Sunken Temple is located in the middle of the Swamp of Sorrows. As the name implies, it is a large temple that has sunken into the middle of the lake. Alliance players will need to fly to Nethergarde Keep in The Blasted Lands and ride a short distance up into Swamp of Sorrows. Horde players can land even closer to the dungeon simply by flying to Stonard in Swamp of Sorrows.
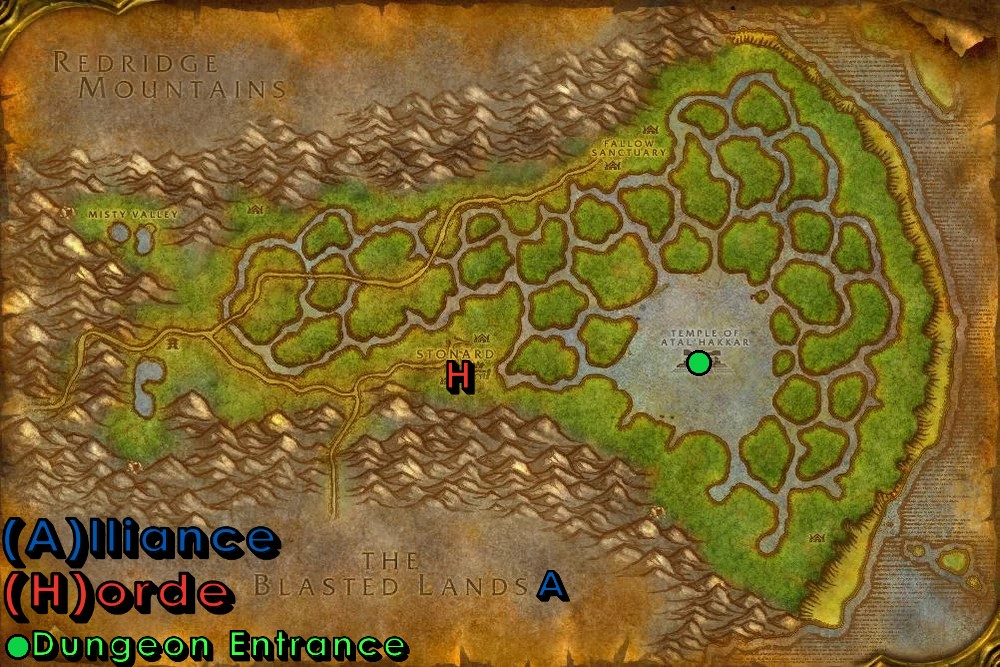
Sunken Temple is found in the middle of the lake towards the eastern side of the zone. You will need to swim down through the flooded entrance until you can resurface on the inside of the temple. Quickly traverse a couple flights of stairs and you will be facing the entrance of the dungeon.
Changelog
- 12 Apr. 2024: Adjusted boss tactics with new information.
- 06 Apr. 2024: Updated Guide with boss tactics.
- 01 Apr. 2024: Page added.
This guide has been written by Abide, TBC veteran for nearly a decade. Abide is a Warrior tank and multi-class expert currently playing on Faerlina as Horde. You can find him in the the Icy Veins Discord. You can also see him live on Twitch.
- Burning Crusade Classic Phase 2 Now Live: Here’s What to Expect
- Did Blizzard Just Quietly Invite Creators to Play WoW Classic’s Next Chapter?
- WoW Weekly Returns: Patch 12.0.5, Twitch Drops & Classic Updates
- WoW BCC Anniversary Edition: Overlords of Outland – Everything Coming May 14
- Battleground Honor Significantly Increased
- Limited-Time Mount Alert: Get the Voidfeather Dragonhawk for TBC Classic Servers Now!
- Could WoW Be Added to Xbox Game Pass Ultimate?
- MoP Classic Escalation PTR Update Details New Content