Shannox DPS Strategy Guide (Heroic Mode included)
Table of Contents
Introduction
This guide is intended to provide a comprehensive description of the encounter with Shannox in Firelands. It is mostly targeted to DPS who desire to have a short but detailed overview of what is expected of them during that fight.
This guide is updated for World of Warcraft WoD 6.1.2.
The Shannox encounter provides few challenges for DPS players, who are mostly required to be careful with their positioning and stop DPS at certain key points.
Overall, even with with little experience and a brief understanding of the encounter, DPS players should have little problems in being successful.
Overview of the Fight
Shannox is essentially a single phase encounter during which you will not only face Shannox himself, a Flamewaker with the traits of a hunter, but also his two pets, Riplimb and Rageface. The abilities of his pets and their synergy with Shannox will shape the strategy you should employ.
Shannox will become enraged and do additional damage and attack faster whenever Riplimb and Rageface are killed, and Riplimb and Rageface will become enraged when Shannox reaches 30% health. Because of the specifics of their enrage mechanics (detailed below) you will want to kill Rageface and Riplimb first, and survive Shannox's enrage.
In addition to attacking the correct target, DPS players will have to be on the look out for various traps that the boss places on the ground, and which should be avoided at all costs.
Relevant Enemies and Abilities
During this encounter, you will be faced with three enemies: Shannox and his two pets, Rageface and Riplimb. Below, we detail the abilities which are relevant to DPS players.
Shannox
Of Shannox' abilities, the following are of concern to DPS players:
- Immolation Trap: Shannox will regularly fire off Immolation Traps around himself. 2 seconds after being fired, a trap will become armed and it will detonate on contact with either a raid member or Rageface or Riplimb. On detonation, the trap will deal 65,000 Fire damage followed by another 50,000 Fire damage over 3 seconds, and it will increase its target's damage taken by 40% for 9 seconds. The trap is not AoE and will only affect the player or dog who has triggered its detonation.
- Crystal Prison Trap: Shannox will regularly fire off Crystal Prison Traps around himself. 2 seconds after being fired, a trap will become armed and it will detonate on contact with either a raid member or Rageface or Riplimb. On detonation, the trap will encase its target in a Crystal Prison. The block can be damaged and destroyed, which will free its target. The Crystal Prison has 600,000 health in 10-man difficulty and 950,000 health in 25-man difficulty. When Rageface and Riplimb become trapped in a Crystal Prison, the prison will damage itself entirely over 10 seconds.
- Hurl Spear: Shannox throws his spear at a target location, indicated by a red circle on the ground. The spear deals a high amount of Physical damage to enemies within 3 yards of the location and 42,500 Fire damage to everyone within 50 yards. It then causes the ground around it to erupt in fiery explosions in a spiraling pattern clearly indicated by small fire marks. Both the initial location as well as the explosions should be avoided. Shannox's spear is then returned to him by Riplimb. While he misses his spear, Shannox cannot perform Arcing Slash.
- Magma Rapture: after Riplimb is killed, Shannox performs an ability similar to Hurl Spear. He no longer throws his spear at a target location, but instead he drives it into the ground, inflicting 42,500 Fire damage and increasing fire damage taken by all players by 40% for 1 minute. The fire damage increase stacks. Magma Rapture causes the same kind of fiery explosions as Hurl Spear. Shannox casts this every 15 seconds.
In addition to this, Shannox also performs a cleaving attack, so DPS players should never be in front of the boss.
Shannox is also immunte to taunt, so careless DPS players who over-aggro the tanks will most certainly die, as tanks have no instant means to regain aggro.
Riplimb
Riplimb's abilities are, generally, of no concern to DPS players. This mob is also immune to taunt, so again, over aggroing will likely result in death, as tanks cannot regain aggro instantly.
Rageface
Rageface cannot be tanked and will run around targeting random raid members. Only the following ability is relevant to DPS players:
Face Rage: makes Rageface focus on a target, stun them and deal 7,000 Physical damage to them every 0.5 seconds, which increases over time. Rageface will continue this until he is damaged for at least 30,000 damage (in 10-man difficulty) or 45,000 damage (in 25-man difficulty) in a single hit. This is made considerably easier by the fact that, while Face Raging, Rageface is 50% more likely to receive critical hits.
Strategy
As mentioned above, both Rageface and Riplimb become enraged (and will one shot players) if Shannox reaches 30% health, and Shannox himself becomes enraged (though it is a much more mild form) when the dogs are killed. As such, your raid's aim is to bring Shannox close to 30% health, kill Rageface and Riplimb and then nuke down Shannox.
During this fight, players will need to survive Shannox' abilities and DPS the correct targets.
Surviving
Ground effects are abundant in this encounter, and none of them are beneficial. Indeed, the first thing players will notice is that, often, Shannox will throw Crystal Prison Traps and Immolation Traps on the ground. Stepping on a Crystal Prison trap will cause the player to be encased in a block of crystal, while Immolation traps deal large amounts of damage.
Additionally, DPS players should keep in mind that Crystal Prisons act as solid blocks and will cause line of sight issues with targets which are found on the opposite side of the Prison from the attacking player. Repositioning might be required to continue DPSing.
DPS players will simply have to be on the look-out for these traps. Shannox always targets a player's location when casting a trap, so if he targets you, you must be ready to move at a moment's notice. While doing this, you should also be careful not to step on anyone else's traps.
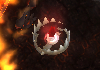
We have included a screenshot of each of the two traps:
- Immolation Trap (yellow/orange flame):

- Crystal Prison Trap (red flame):


It is worth mentioning that traps can be disarmed by Rogues.
In addition to traps, Shannox will regularly cast Hurl Spear. The location where the spear will land is visibly marked by a red marker, and should be avoided, as should the many small fiery explosions that radiate out from the red marker after a few seconds. Hurl Spear will also deal 42,500 unavoidable Fire damage, with which you should not concern yourselves.
After Riplimb's death, Hurl Spear becomes Magma Rapture. In the case of Magma Rapture, only the fiery explosions on the ground must be avoided.
If you manage to successfully avoid all of these dangers, then you are most likely going to survive the entire encounter, unless your raid is wiping. You are now ready to move on to actually doing DPS!
Prioritising DPS
Based on the strategy listed above, your raid leader will most likely assign different DPS players to different targets. Ranged DPS classes with hard hitting abilities, such as Arcane Mages and Marksmanship Hunters will most likely be assigned to attacking Rageface, so as to quickly break any Face Rage that he may be performing.
Other players will be split among Shannox and Riplimb. Essentially, you will want to stick to your assigned DPS target while avoiding the aforementioned ground effects.
In addition to this, you may need to switch to and DPS Crystal Prisons caused by raid members triggering Crystal Prison Traps. Trapped members should be freed immediately.
Riplimb and Rageface can also be affected by Shannox traps (although only once per 25 seconds, for each dog). This means that occasionally, the dogs will get trapped in Crystal Prisons. This causes them to be unattackable for around 10 seconds until they break free. During this time, you should switch to attacking a different target.
When Shannox comes close to 30% health and the dogs are close to dying, you should use common sense, regardless of your assignment, and apply DPS such that the dogs die (in as quick succession as possible) before Shannox reaches 30% health.
Once the dogs are dead, the fight gains a soft enrage mechanic which will quickly wipe your raid, so you should focus on doing as much DPS as possible, and using your DPS cooldowns for this purpose. Keep in mind that, even during this final part of the encounter, the ground effects will still need to be avoided.
Heroic Mode
Shannox' heroic mode version presents the most accessible challenge for raids attempting heroic Firelands. This section contains all you need to know to make the transition from normal to heroic Shannox.
Differences from Normal Mode
When compared to the normal mode of the encounter, you will notice the following differences relevant to DPS players:
- The fight has a single phase which is the same from start to finish. Neither Riplimb nor Rageface can be killed, nor do they enrage when Shannox reaches 30%. They should not be DPSed either (except for one specific player assigned to Rageface). There is no longer a soft enrage phase at the end of the fight.
- Both Riplimb and Rageface gain a stacking buff, Feeding Frenzy, each time they perform a successful attack. Feeding Frenzy increases their damage done by 5% per stack and lasts 20 seconds.
Overall, these changes make the fight easier (though slightly different) in its execution. We will cover the adequate strategy for the encounter in the section below, but to sum up, we can say that the heroic mode strategy revolves around focused DPS on Shannox and strategic trapping of the dogs.
In addition to these changes, avoidable encounter abilities, such as Immolation Trap and Hurl Spear (and its subsequent explosions) deal considerably more damage. However, as these should be avoided in normal mode anyway, it does not affect the encounter's execution.
Strategy Changes
Whereas in the normal mode version, trapping Rageface in Crystal Prison Traps was entirely optional, and trapping Riplimb was very useful, in heroic mode, it is mandatory that both pets be trapped regularly. The chief motivation for this is resetting their stacks of Feeding Frenzy, which can only be done by preventing them from meleeing anyone for 20 seconds. Obviously, in the case of Riplimb, it also serves the purpose of resetting Jagged Tear stacks on the tanks.
There are other small adjustments to be made to your strategy, which we will explain below.
Notes Regarding Mechanics
Feeding Frenzy, as noted above, is a stacking buff which both Rageface and Riplimb gain each time they successfully melee a player. Each stack increases their damage done by 5%, and the buff lasts 20 seconds.
Parried, dodged or missed attacks do not apply stacks of Feeding Frenzy, and quite importantly, Rageface does not gain stacks of Feeding Frenzy while he is performing Face Rage.
Face Rage is broken in the same way as in normal mode, by performing an attack of over 30,000 damage in 10-man difficulty and 45,000 damage in 25-man difficulty. This is made easy by the fact that all attacks made on Rageface during Face Rage are critical strikes.
It is important to note that Rageface will focus on the player who broke his Face Rage, and attack that player for some time.
Kiting and Tanking Rageface
Successful completion of the encounter will require your raid to regularly trap both Rageface and Riplimb, in order to reset their stacks of Feeding Frenzy (and in the case of Riplimb, the stacks of Jagged Tear as well). As trapping Riplimb is not the job of DPS players, we will not go into details regarding this matter, but it is important to note that the dogs should be trapped alternatively (one trap for Riplimb, one trap for Rageface).
DPS players are divided into two categories during this encounter: players assigned to tank/kite Rageface, and players not assigned to do so. We will begin by explaining the duties of the first category, and then make some general observations regarding the second.
Trapping Rageface is a task which belongs chiefly to a player, who will be assigned to DPSing Rageface at all times (and thus breaking Face Rage promptly). Rageface will, most of the time, focus on this player because of the mechanic listed above. A backup player will be assigned, for those Face Rages which target the previously mentioned player.
The player assigned to breaking Face Rage will be tanking Rageface for most of the encounter. While doing so, the aim is to always keep in mind where Crystal Prison Traps are, and to be prepared to kite Rageface over one when the time is right. The "time is right" when Rageface's stacks of Feeding Frenzy are high (generally, over 15) and Riplimb has recently been trapped.
Sometimes, however, Rageface will need to be trapped while he is focusing his attacks on a player other than the desgined kiter. Because of this fact, all DPS players will need to be aware of where exactly Crystal Prison Traps are located, and they must be prepared to quickly kite Rageface over one such trap.
Because Rageface attacks targets (mostly) at random and cannot be tanked, the entire raid is responsible for ensuring that Rageface does not trigger Immolation Traps, to avoid gaining the Wary buff.
Actual Execution
The heroic mode of this encounter actually simplifies the fight, compared to normal mode. Your raid will no longer DPS Riplimb at all, as damaging him is totally useless. Rageface will also only take minimal damage, and the bulk of your DPS will be focused on Shannox himself.
Raiders will still have to avoid Immolation Trap as well as the impact zone and subsequent explosions from Hurl Spear.
Finally, your entire raid should attempt to get as much distance as possible from the Crystal Prison Trap in which Rageface is encased, so that when he breaks out, he will have to run a great distance to his first (random) target, allowing for Feeding Frenzy to wear out.

- Don’t Make This Mistake in Patch 12.0.5 – Void Tier 2 Recolours Have a Hidden Trap!
- More CN Titanforged Exclusives Have WoW Players Feeling Left Out
- Raid Nerfs and Dungeon Tuning: Midnight Weekly Hotfix Summary, April 13 – 20
- Prepare Yourself for Patch 12.0.5 With Our Guides – Voidforge, World Events and More
- At Least Two New Mounts Will Come From the Keystone Myth Achievement
- More in Mythic! The Most Popular and Best Performing Classes and Specs: Final 12.0 Look
- Massive Class Tuning, New M+ Route Affix, Achievements and Mounts, Hide as Decor, Four New Activities, Voidforge Turbo Boost: 12.0.5 Official Preview
- WoW Guilds Only Have A Few Days Left to Enter the Voidspire Hall of Fame