Splendorous Tools Stage One Guide for FFXIV
Your first stage in the FFXIV Splendorous Tools series will allow you to augment your Crafting and Gathering tools to further increase their stats. This guide will explain how best to gather the required collectables and provide rotations and lists for crafting.
Augmenting your Splendorous Tool in FFXIV
Start by again speaking to Chora-Zoi in the Crystarium (X: 10.5, Y: 7.7) to begin the quest "A Dedicated Tool (1st Enhancement)". Now that you have obtained your initial tool and any subsequent tools from the scrip exchange you can begin to augment your Splendorous Tool.
This stage will require you to obtain a large amount of collectables using
your tools to be exchanged for Splendorous Components such as ![]() Splendorous Goldsmith's Component.
These are all class specific and Fisher even has 2,
Splendorous Goldsmith's Component.
These are all class specific and Fisher even has 2, ![]() Splendorous Fishing Reel Component
and
Splendorous Fishing Reel Component
and ![]() Splendorous Fishing Rod Component. Miner and Botanist also require
additional new Shards to be gathered to hand in with the quest.
Splendorous Fishing Rod Component. Miner and Botanist also require
additional new Shards to be gathered to hand in with the quest.
By speaking to Quinnana in The Crystarium(X: 10.4, Y: 7.8) you will be able to exchange your collectables for these Splendorous components. Do not forget, you always need the tools equipped to be able to craft and gather items related to the relic.
If you have completed this stage, feel free to move on to the next upgrade in the series:
Splendorous Augmentation for Crafters
Crafting classes are required to craft collectables to exchange for components.
With a rating of 540-899 you will obtain 1 component, whereas for 900+ collectability you
will obtain 3. These crafts are very easy simply using ![]() Trained Eye to
speed through things at level 100.
Trained Eye to
speed through things at level 100.
This stage needs 60 Splendorous Components meaning at the highest collectability tier you need 20 crafts per class.
Each craft uses a material purchased with White Scrips which can be found in the Other tab on the Scrip Exchange while speaking to Quinnana. It will cost you 50 scrips for every craft meaning 1000 white scrips per class if you only need 20 crafts.
The next stage also uses these same scrip material but 30 of them. Stockpile a total of 50 now instead of stopping later. This will cost you 2500 White Scrips per crafter or 20,000 total.
Click here for a crafting list i created for these tools.
Augmented Splendorous Tool Crafting Macros
For this stage, macros are not recommended anymore since the release
of dawntrail. These tools are not worth obtaining at level 90 and instead
you should continue leveling to 100 and then use ![]() Trained Eye
to complete these crafts in seconds!
Trained Eye
to complete these crafts in seconds!
Splendorous Augmentation for Miner/Botanist
Gathering classes will need to gather 2 materials, collectables to exchange for Splendorous Components as well as Splendorous Shards to be handed in at the end of the quest.
The Shards are also hidden, what this means is that they will not always appear on nodes and instead have a set chance to randomly appear. This makes it important to focus them when possible.
You will need 180 of both of these items, with collectables giving 1 or 3 depending on the collectability rating of 570 for 1 and 1000 for 3. This means you need a minimum of 60 collectables if every collatable is 1000 collectability.
| Class | Collectable 60-180x | Hidden Item 180x |
|---|---|---|
| Mining | ||
| Botany |
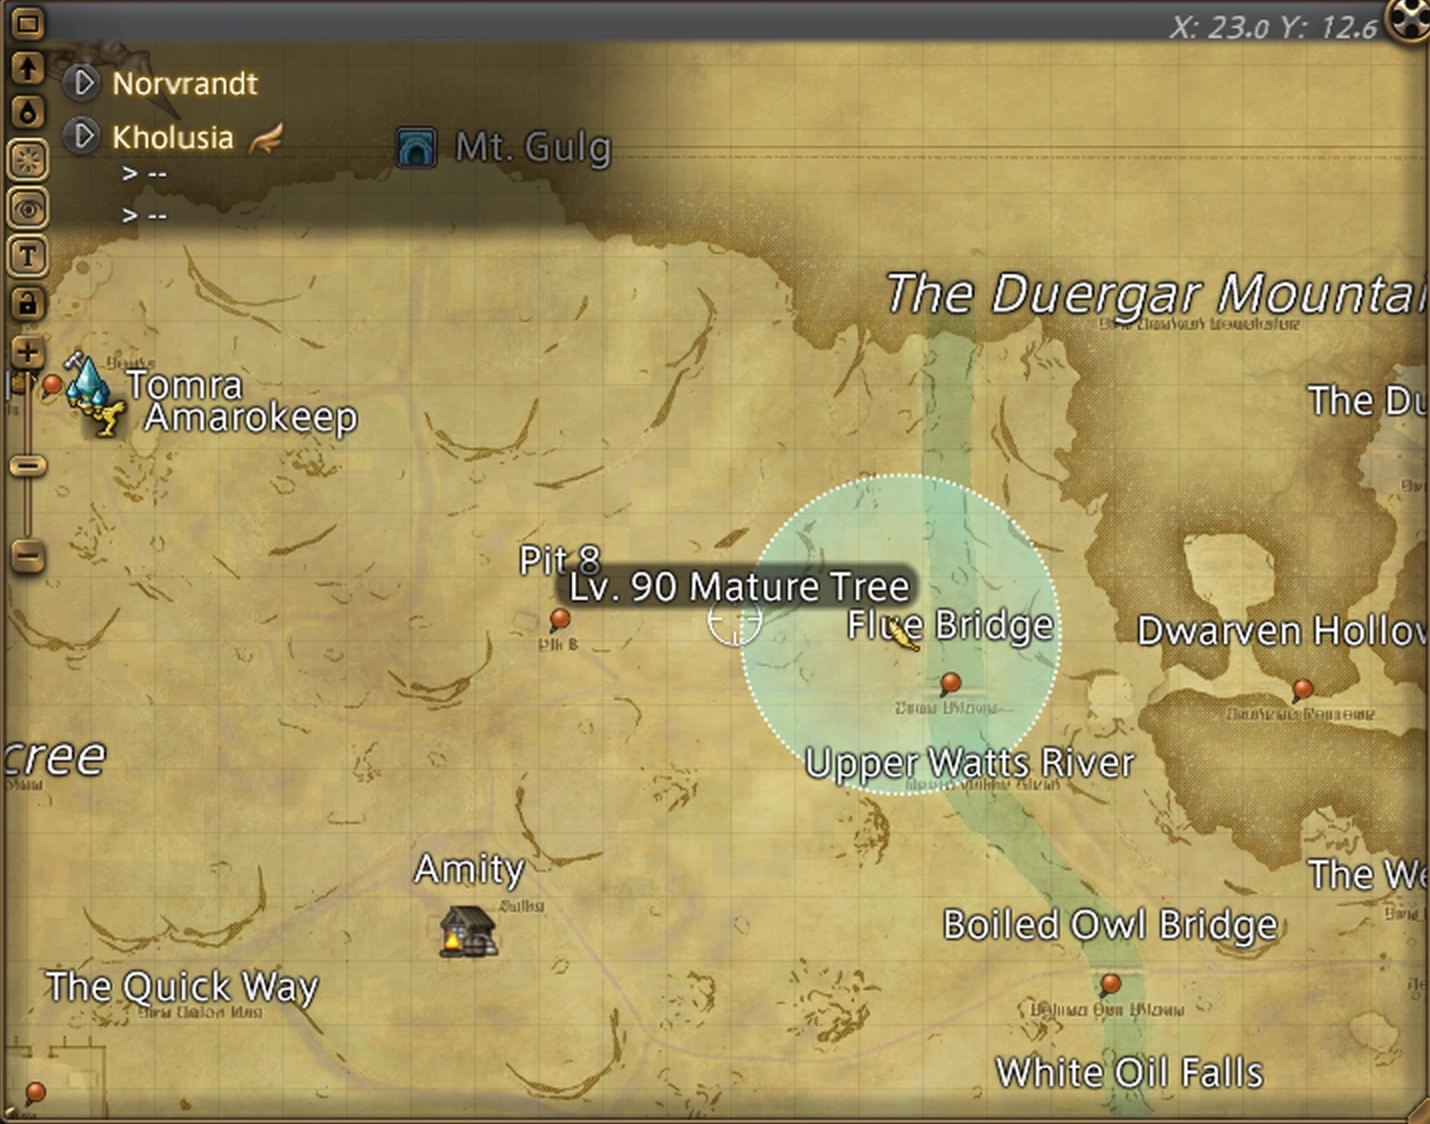
Mining materials can be found in Il Mheg (X:11.3, Y:36.6)
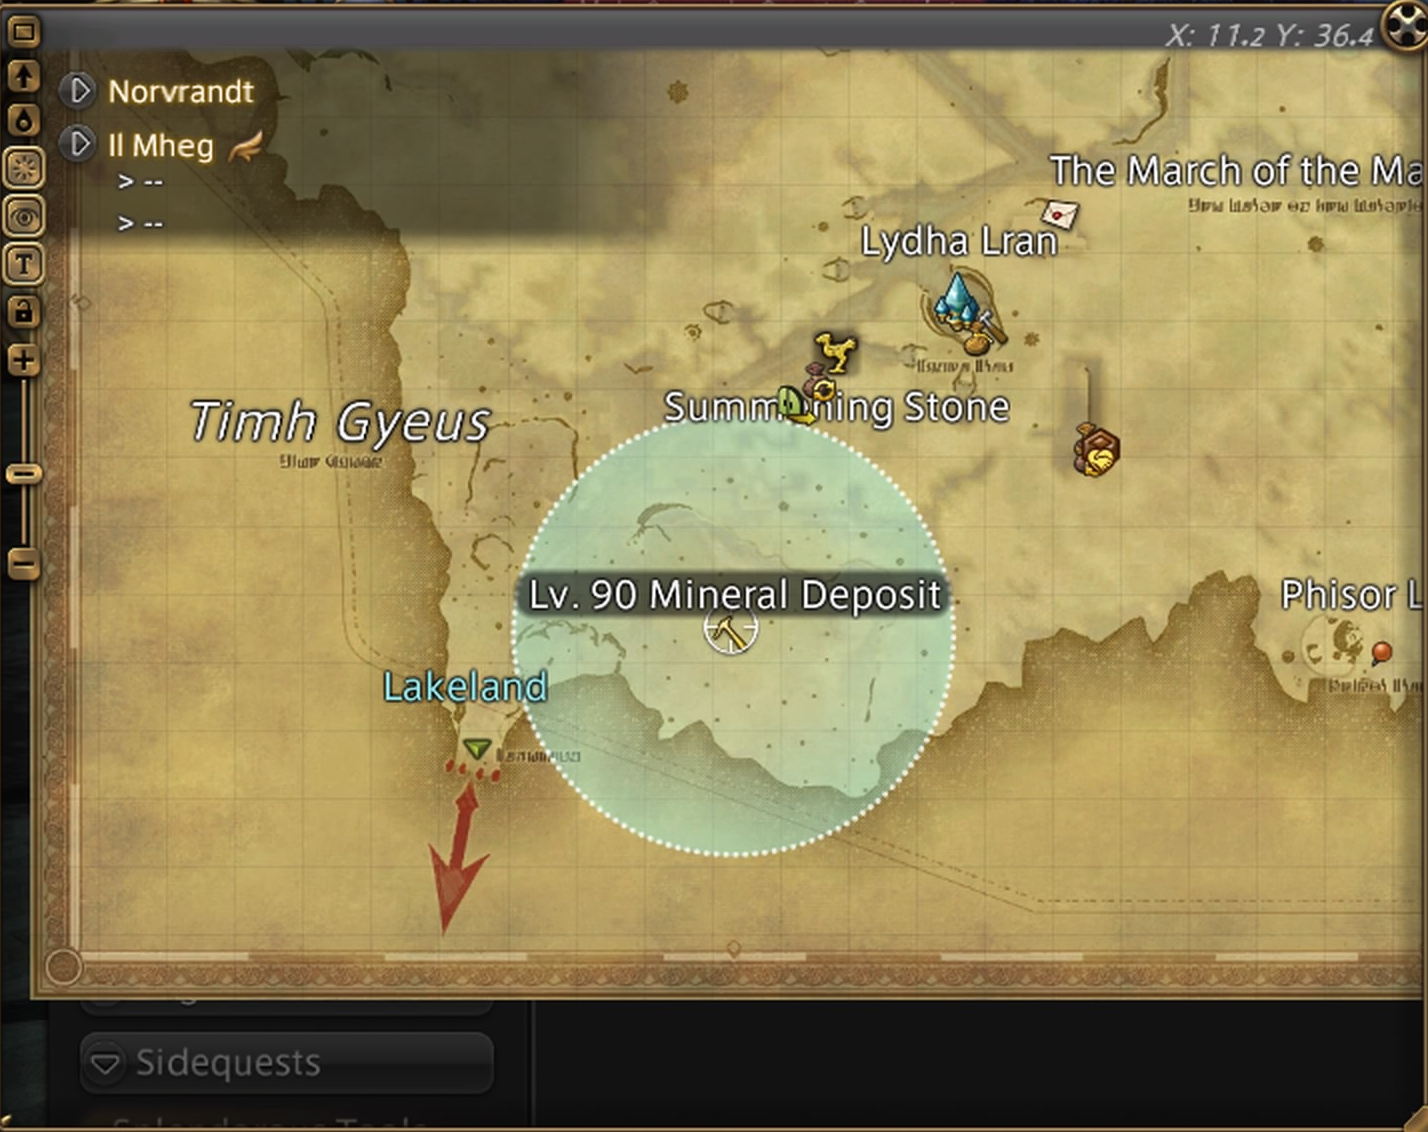
Botany materials can be found in Kholusia (X:25.5, Y:12.8)
Breakpoints for Splendorous Tool Nodes
There are also a range of breakpoints you may want to consider when gathering. These are:
- 30-50% Boon Bonus - 3154-3774 Perception
- +1 Integrity - 900GP
- Collectable Skills Cap - 3349 Gathering
- Collectable Skill Proc Chance Cap - 3525 Gathering and Perception
- Scrutiny Cap - 3349 Gathering and Perception
- 60% Boon cap - 5288 Perception
Gathering Advice for Splendorous Tool Nodes
The most important thing is cordial use. ![]() Hi-Cordial is the
most efficient cordial and using it on cooldown will increase your yield
drastically. If you have none, use other cordials so you still gain a lot
of additional GP.
Hi-Cordial is the
most efficient cordial and using it on cooldown will increase your yield
drastically. If you have none, use other cordials so you still gain a lot
of additional GP.
While gathering these items, we recommend always aiming for the Shards if they are available unless you are on max GP. This will allow you to ensure you gather all of them before you finish your collectables.
Skills that increase specifically the yield on Shards/Crystals/Clusters do not work on these items.
If there are no Shards, use a standard collectable rotation on the collectable item such as the ones in out collectable guide.
Splendorous Augmentation for Fishers
Fishing classes will be tasked with obtaining 2 separate fish as collectables one for rod components and one for reel components. Quinnana requires 60 of each Splendorous Component with different amounts of components being given based on your collectability.
| Fish | Component Offered | Rating for 1 Component | Rating for 2 Components | Location |
|---|---|---|---|---|
| 47 - 109 | 110+ | Lakeland (X:15.7, Y:25.5) | ||
| 283 - 664 | 665+ | Kholusia (X:16, Y:35) |
2100 Perception is the main requirement to ensure you always reach enough collectability to obtain 2 components every fish. If so, you will only need 30 of each fish.
The bait for these fish is ![]() Select Bait Ball which can be
purchased from Quinnana.
Select Bait Ball which can be
purchased from Quinnana.
Fishing Advice for Platinum Seahorse
You want to use ![]() Patience II with
Patience II with ![]() Precision Hookset
on Every '!' bite within the first 8 seconds of your cast.
Precision Hookset
on Every '!' bite within the first 8 seconds of your cast.
If you have spare GP or Anglers Art stacks to use on ![]() Thaliak's Favor,
you can use
Thaliak's Favor,
you can use ![]() Identical Cast to catch another
Identical Cast to catch another ![]() Platinum Seahorse.
Platinum Seahorse.
At the 8 second mark there is a chance that the fish ![]() Hard Candy appears.
If you accidentally catch a
Hard Candy appears.
If you accidentally catch a ![]() Hard Candy do not worry. Just use
Hard Candy do not worry. Just use ![]() Surface Slap
so that your next '!' bite is a guaranteed
Surface Slap
so that your next '!' bite is a guaranteed ![]() Platinum Seahorse. But it would
be better to use
Platinum Seahorse. But it would
be better to use ![]() Identical Cast where possible.
Identical Cast where possible.
The following macro makes it easy to catch this fish when using Patience:
/ac "cast" <wait.5>
/e 5 <wait.1>
/e 6 <wait.1>
/e 7 <wait.1>
/e 8
/ac "Precision Hookset"
/micon "Cast"
Fishing Advice for Clavekeeper
![]() Clavekeeper's best catching method is by using
Clavekeeper's best catching method is by using ![]() Prize Catch.
This is because it is the only '!!' bite in the hole. It can have a bit of a
long cast time. If you get a '!' hook, simply ignore it don't even press hook.
Prize Catch.
This is because it is the only '!!' bite in the hole. It can have a bit of a
long cast time. If you get a '!' hook, simply ignore it don't even press hook.
Whenever you catch ![]() Clavekeeper, use
Clavekeeper, use ![]() Identical Cast
to then catch another.
Identical Cast
to then catch another.
It is not really advised to use ![]() Surface Slap, but if you are
getting really unlucky, then use it for Kholusian Flounder or South Kholusian Cod.
Surface Slap, but if you are
getting really unlucky, then use it for Kholusian Flounder or South Kholusian Cod.
Changelog
- 14 Sep. 2024: Updated for Dawntrail to add notes on Trained eye as well as 60% boon breakpoint.
- 19 Jul. 2023: Rotations updated for new budget gear.
- 10 Mar. 2023: Guide Added.

This guide has been written by I'nanghal Shikhu (Discord - Shikhu). He is a Crafting & Gathering theorycrafter, mentor for The Balance and also a guide maker for Teamcraft alongside Icy Veins. He also managed to obtain 10 top 12's on the leaderboard during the Ishgard Restoration rankings.
- FFXIV’s Berlin Fan Festival Schedule Is Out!
- Pre-Order FFXIV Nendoroids Y’shtola & G’raha Now!
- From Action to Tab Targetting — How Did You Start FFXIV?
- Developing FFXIV Big Fish Together With Ryuta Suyama
- These Changes Will Make You Think Twice Before Tanking in Evercold
- Complete Dawntrail’s Art Book Collection With – Relics of Eternity –
- New Framer’s Kit With Return Of Breaking Brick Mountains
- Last Chance For THE PRIMALS x Download Festival T-Shirt!