The Tenth Circle P10S (Savage): Pandaemonium Raid Guide
This guide aims to prepare players for Anabaseios: The Tenth Circle (Savage) by providing detailed explanations of the fight's mechanics, as well as consistent strategies for the purpose of farming.
Introduction to The Tenth Circle (Savage)
Stone and steel moving by means of magicks or technology is hardly cause to raise an eyebrow, but the idea of inanimate objects being imbued with life is fantastic indeed. Nemjiji seems to agree, and to see the flourishes she adds to your report of the battle with Pandæmonium, you wonder if her power to create may rival even Athena's.
Unlock Requirements
The Tenth Circle (Savage) can be unlocked at level 90 after completing the Normal difficulty of the Anabaseios raid and talking to Nemjiji in Labyrinthos (x8.4, y27.4). It requires a minimum item level of 630 to queue, but this requirement can be bypassed when entering with a full party.
Pandaemonium Raid Guide
Pandaemonium has a hard enrage of 10:40, with a soft enrage starting at 10:28. The fight has a DPS check of roughly 68,400 raid DPS.
Raid Preparation
Begin by assigning all DPS and all tanks and healers "quickmarch/leviathan" spots - positions in a vertical line from 1 to 4, with melee in the front and ranged in the back. Next, split the raid into two light parties of one tank, one healer, and two DPS each. Each DPS will be partnered with one support - tanks with melee DPS and healers with ranged DPS. They will also have quickmarch spots. Supports will go to the left side platform, and DPS will go to the right when necessary.
Throughout the fight, eight towers will spawn that must soaked by one player each. While parties are free to assign towers however they want, it is recommended for the players spreading to the side platforms to have the towers close left and right, as there are mechanics that require them to move from the top of the side platforms to the towers.
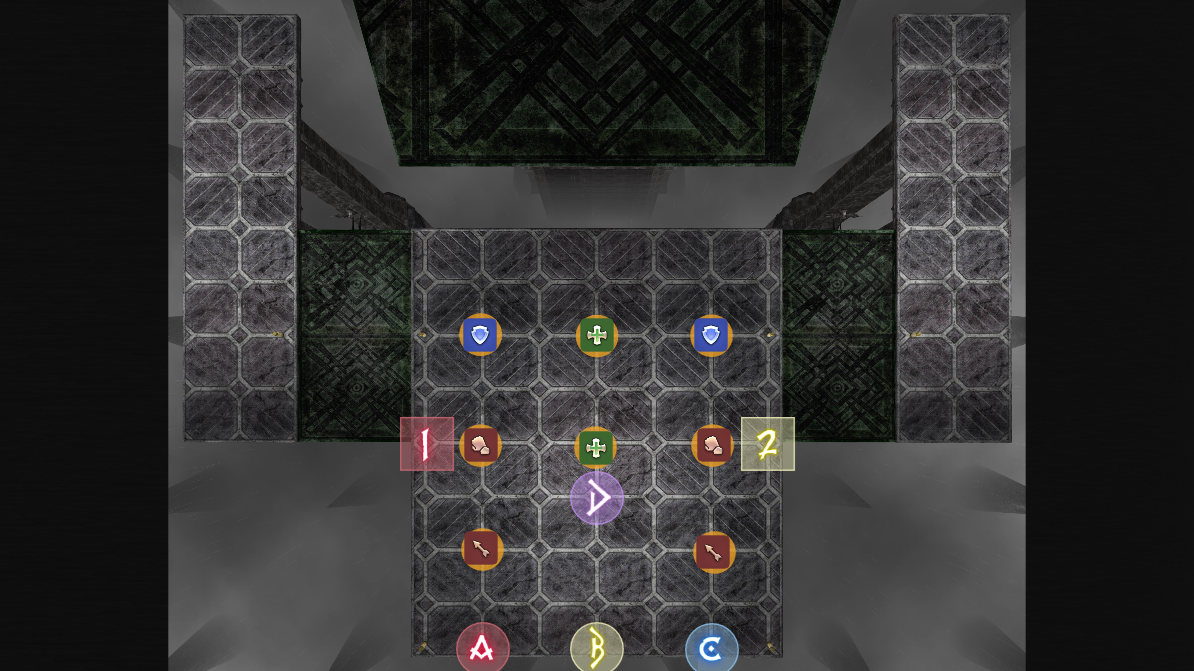
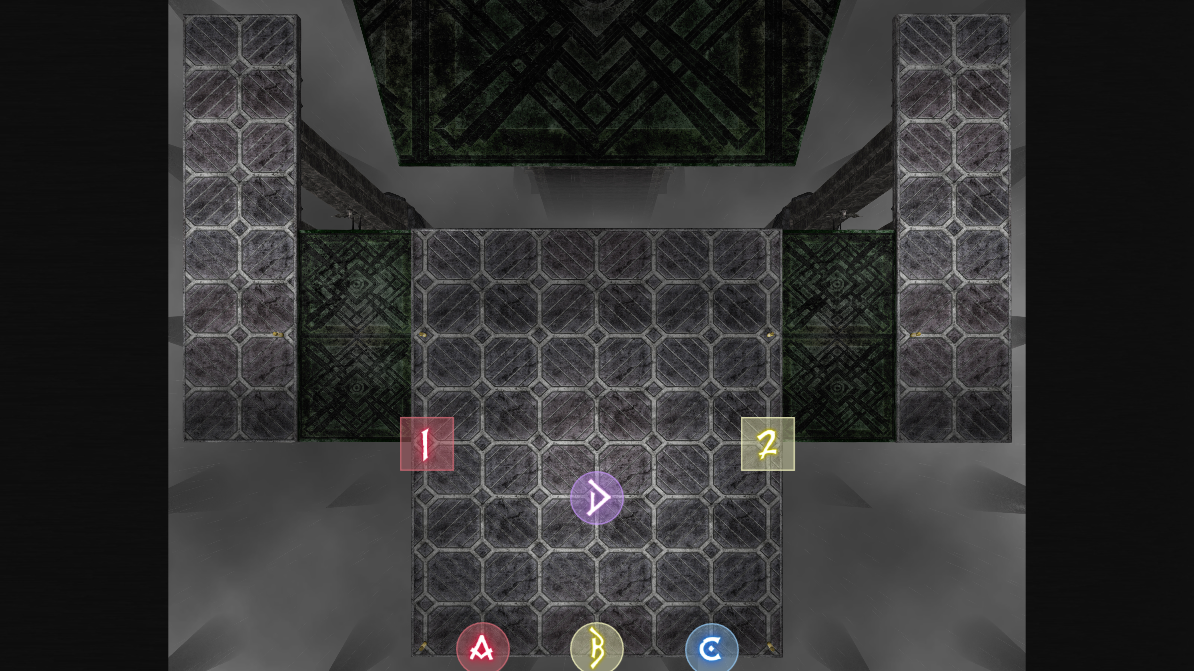
Waymarks can be placed to suit the party's needs. It is recommended to place three waymarks at the back of the arena to help positioning for the hardest mechanic of the fight - an example is shown below.
Pandaemonium's Main Mechanics
The arena in The Tenth Circle is divided into a main platform with two platforms on the side. There is a pool of poison that divides the side platforms and standing in this pool at any time will inflict a 45-second poison DoT. The boss will cast web-based abilities, and specific ones can be used to create a bridge to cross the poison to the side platforms.
Pandaemonium is a wall boss, meaning its position is static and there are no positionals.
Phase One
Pandaemonium has the following abilities starting in the first phase.
- Ultima: Heavy raidwide magical damage that inflicts a bleed DoT.
- Soul Grasp: A multi-hit magical tank buster on the current main tank. This must be shared by both tanks or invulned, and hits four times.
- Dividing Wings: Pandaemonium summons two sword wings on the arena, which tether to one DPS and one support. This will shoot a wide cone in their direction, dealing moderate magic damage and inflicting both a magic vulnerability debuff and a bleed DoT.
- Steel Web: A random DPS and support will receive a web stack marker. All players in the stack will receive shared magic damage, and become tethered to each other with a web. If players are too close to each other in the stack, this web is unbreakable, but if players are far enough, this web becomes breakable by any other player running through it. While trapped, players will receive stacks of Heavy Soul Snare. If the debuff count reaches 4, players will instantly die.
- Circles of Pandaemonium: A donut AoE from the boss.
- Pandaemon's Holy: A point-blank AoE from the boss.
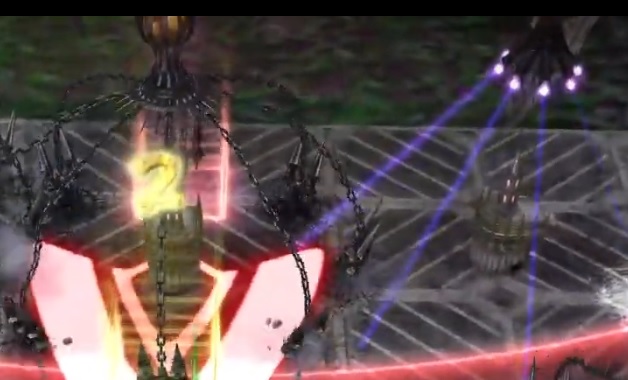
- Wicked Step: Two towers spawn on the arena on the left and right of the main platform. These must be soaked by a tank, deal heavy physical damage, and inflicts a bleed DoT. These towers will also knock players up, and the tanks must stand in the correct position in order to get knocked onto a side platform.
- Entangling Web: Both tanks, a random healer, and a random DPS will be marked for a web AoE. If both of these webs are touching a post on the arena between the main platform and a side platform, it will create a bridge between the two platforms that can be used to cross the poison. Players must move out of the AoE after it drops.
- Pandaemoniac Pillars: Eight towers spawn on the main platforms that must be soaked by one player each. These will spawn cannon adds, which will either do a donut AoE or a point-blank AoE depending on what the cannon looks like.
- Silkspit: All players are marked for a web AoE that deals moderate magic damage. Players too close to each other or on top of a post will be tethered to each other or the post with a web, which can be broken by running through it.
- Daemoniac Bonds: Inflicts all players with the Daemoniac Bonds
debuffs. In addition, two players of opposite roles may be inflicted with
the Tetradaemoniac Bonds debuff, or four players of the same role may be
inflicted with the Duodaemoniac Bonds debuff. These debuffs will do an AoE
when they expire.
- Daemoniac Bonds deals moderate magic damage and inflicts a magic vulnerability debuff when it expires.
- Tetradaemoniac Bonds deals moderate magic damage and inflicts a magic vulnerability debuff when it expires. It must be shared with three other players, and if there are not four players in the stack, all players in the stack will instantly die.
- Tetradaemoniac Bonds deals moderate magic damage and inflicts a magic vulnerability debuff when it expires. It must be shared with one other player, and if there are not two players in the stack, all players in the stack will instantly die.
- Pandaemoniac Meltdown: A stack marker on a random player, which deals heavy shared damage in a line. In addition, two other random players are marked with a prey marker - this will shoot a line AoE at them. All instances of damage inflict a magic vulnerability debuff.
- Touchdown: Pandaemonium slams down on the central platform, knocking back players and likely instantly killing them from damage.
Pandaemonium is a fight that requires precise execution and careful debuff reading. The fight begins with Ultima into Soul Grasp. Tanks need to ensure they save some mitigation for Wicked Step about 45 seconds after. Following this is the first mechanic of the fight, a combination of Dividing Wings and Steel Web. A random DPS and support will get tethered to wings that spawn in the middle of the central platform. They need to point these away from the party, which will stack in a loose triangle to the left and right of the arena with supports left and DPS right. Tethered players will go to their wing and stand Northeast and Northwest.
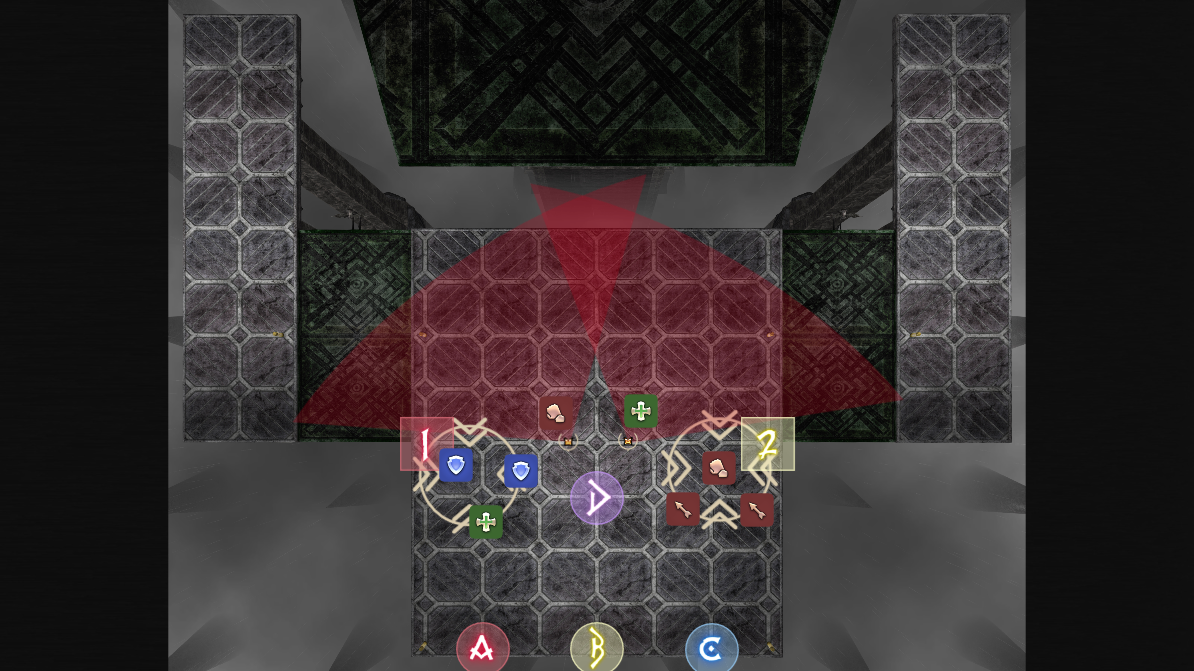
Afterwards, the tethered players must break the players free on the side they are on by running through the webs. Keep in mind both tethered players will take a heavy bleed, so they must be healed. Immediately after breaking them out, Pandaemonium will cast either Circles of Pandaemonium or Pandaemon's Holy, so go close to the boss or outside its hitbox.
Next is Wicked Step. The tanks will pick the opposite tower as their light party platform, as they get knocked back to the opposite side. The ideal place to stand is the exact middle of the tile towards the side platform, and be sure to mitigate the hit. After tanks get knocked back, both tanks, a random healer, and a random DPS will be targeted by Entangling Web. They need to stand close to each other, touching AoEs on the poles. Move out of the AoE afterwards, as it will create a bridge and tether all players caught inside. Tanks need to move back in, and all players should move to their positions for Pandaemoniac Pillars.
After soaking these towers, cannon adds will spawn. These will either dig into the ground, indicating a point-blank AoE, or use beams and rotate, indicating a donut AoE. The boss also casts either Circles of Pandaemonium or Pandaemon's Holy. Players will need to run inside or outside the boss's hitbox and stand in a donut cannon. If there are two donut cannons next to each other, the AoE will clip into the safe spot, so stand on the correct side of the donut.
The boss then casts Silkspit. All players need to spread out, making sure to not stand too close to each other with the marked AoE. There is room for four players on the central platform and two players on each side platform. Have the tanks and melees move to the side platform of their respective light party, and the ranged and healers stay in the middle for ease of movement. The players on the central platform need to stand to make sure they do not hit the posts on each end.
While players are spreading, the boss will cast Daemoniac Bonds. Players need to read the debuff list to check how they are spreading and stacking when the debuffs resolve. If two players have Tetradaemoniac Bonds, players will spread in their roles and stack in their roles. If four players have Duodaemoniac Bonds, players will spread in their light parties and stack with their partner. In addition, players need to look if they are stacking first or spreading first: check if Daemoniac Bonds expires first or the stack debuff.
After the Silkspit AoE goes off, return to the centre platform for Pandaemoniac Meltdown. Players marked with the prey should move out of the stack to the sides, and the stack should remain in the middle. Be sure to heal up and mitigate. Note that both preys can be on the same side, as the line AoE is thin, but one player should move to the front to shoot their AoE towards the side.
Pandaemonium will then begin casting Touchdown. Players need to spread to the side platforms in the formation discussed previously based on debuffs, either in roles or light parties. On the platform, players will need to obey the debuff that is expiring first, then the debuff that is expiring second. They need to spread in their quickmarch position, and then stack with their group or their partner or vice-versa. Return to the main platform when the mechanic is completed.
Phase Two
Pandaemonium gains the following abilities starting in the second phase.
- Pandaemoniac Turrets: Pandaemonium spawns eight towers that must be soaked by one player each, in a line formation with four North and four South. These towers will spawn a turret each. Two turrets will each be marked from one to four, indicating the order in which they fire. Turrets are baited on the closest person to them. When they fire, they do shared damage to all players hit, knock them back, and inflicts a Dark Resistance Down debuff to the closest player that prevents them from taking another instance of turret damage.
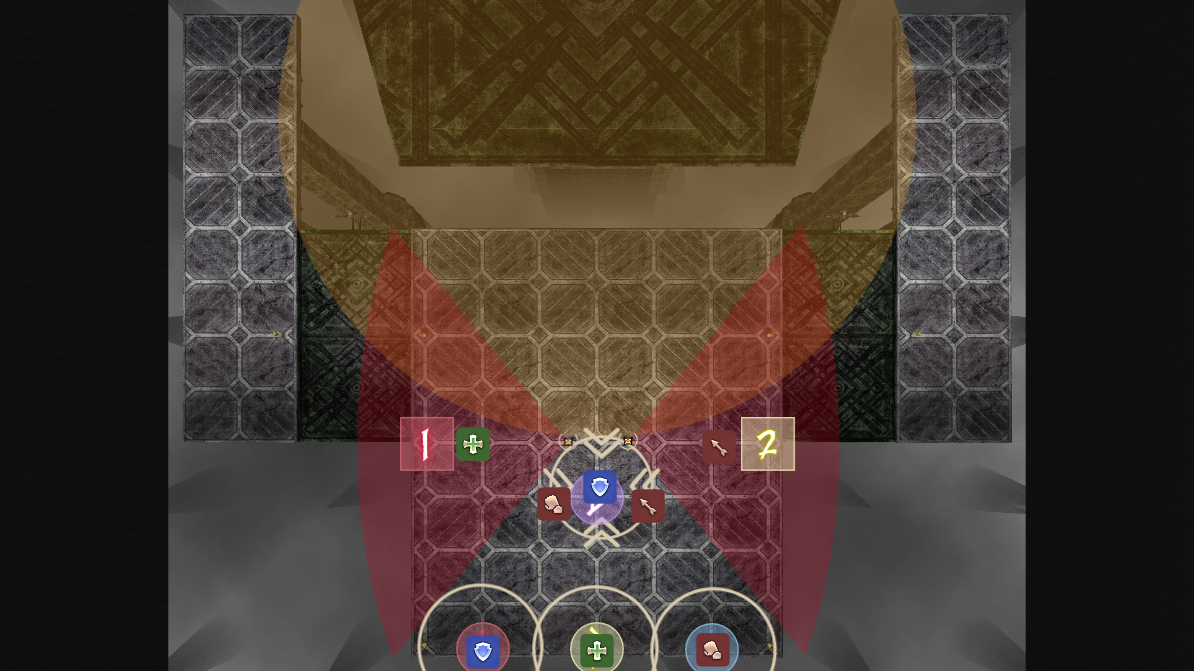
- Pandaemoniac Ray: Pandaemonium's face will dislodge and point towards one side of the arena. This will do a half-room AoE on that side, fearing players hit. These will also spawn bits on the side hit, doing a thin line AoE from where they spawned.
The second phase of the fight begins with another Ultima into Soul Grasp. Be sure to heal up and mitigate after the damage from the spread and stack. The boss then casts Daemoniac Bonds, which will always inflict players with Duodaemoniac Bonds as well as Daemoniac Bonds. These debuffs will resolve after the next major mechanic set, so keep the order in mind.
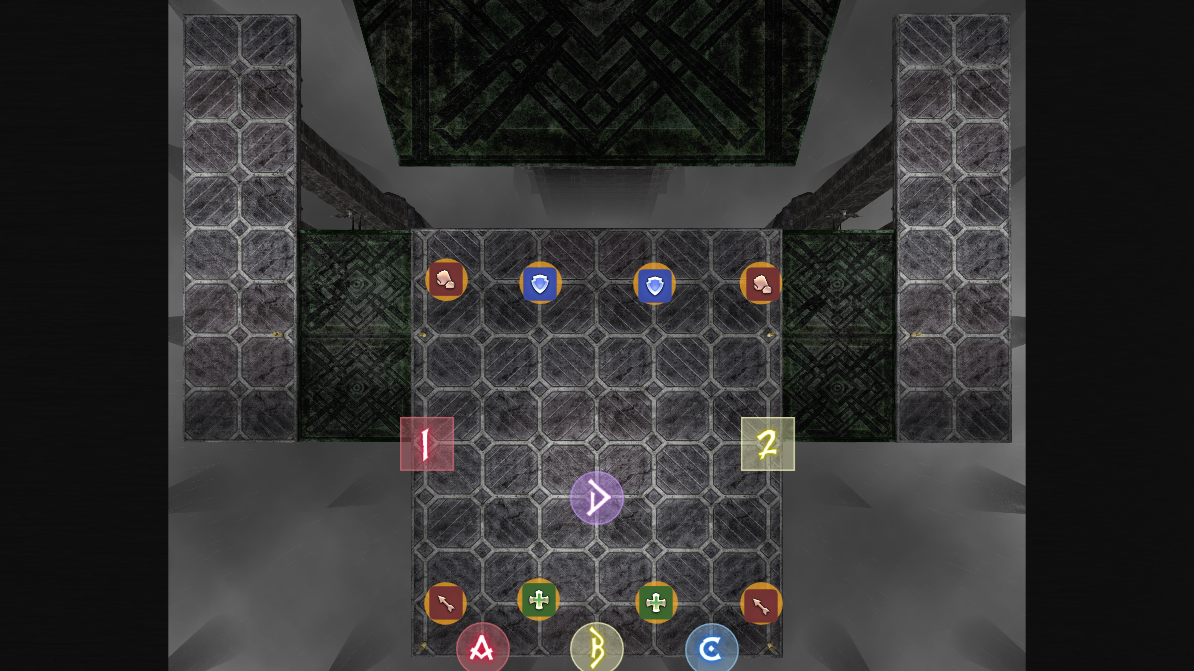
The boss then casts Pandaemoniac Turrets. Players will stand in the tower on their light party's side of the arena, with melee and tank taking the front two towers and the ranged and healer taking the back two towers. These towers will spawn cannon turrets marked in order from one to four. These turret beams must be baited by players in order of melee, healer, ranged, then tanks. Light party 1's players will always take the west-most turret, and light party 2 players will always take the right-most turret. Tanks will stack with each soaking player to mitigate the damage, making sure that they are behind them relative to the turret to not get the vuln debuff. When a player is done baiting the turret beam, they will dodge all remaining turret beams.
On the third set, tanks should try and get knocked back close to the fourth set of turrets, which they will be taking by themselves with a cooldown. This is because if they are slow getting to the fourth set, two beams will likely bait on one of the tanks, killing them. Immediately after the tanks get knocked forward, players will either need to spread in their tower spots, or stack with their partner. Afterwards, they will have to do the opposite, depending on which debuff was expiring first.
This is immediately followed by Pandaemoniac Ray. Players on the unsafe side should move to the safe side, and all players need to dodge the line AoEs from the bits that spawn on the other side. This is followed by another Ultima, Soul Grasp, and Wicked Step. Tanks should be sure to save mitigation for both busters.
The next mechanic set is one of the most difficult in the fight due to the fast pace. Entangling Web is cast, so build the bridges over the poison again. Following this is Silkspit, so all players need to spread again, with melee and tanks going to the side platforms and ranged and healers staying in the centre. At this time, the boss will cast Daemonic Bonds, which will always cast Tetradaemonic Bonds and Daemonic Bonds. Note which debuff has the shorter duration, as that will resolve first. Immediately after the AoE from Silkspit resolves, the melee and tanks on the side platforms need to return to the centre for Pandaemoniac Pillars.
After the towers, get into the safe spot either in or out as Circles of Pandaemonium or Pandaemon's Holy is cast yet again. After dodging, the boss will cast Pandaemoniac Ray, and note what debuff resolves first. Note that after the half-room cleave, bits will also spawn and do the line AoE during the second debuff's expiration. If Daemonic Bonds has the shorter duration, players will need to spread in their quickmarch positions. If Tetradaemoniac Bonds has the shorter duration, players will need to stack in their role in the middle. Players will need to do this on one side of the arena, then resolve the second debuff's positioning while dodging line AoEs from the bits.
Heal up and prepare for the next mechanic. If many players died to the previous mechanic set, it is a good idea to healer LB3 to raise the party before the next mechanic. Players will have to do the Dividing Wings and Steel Web mechanic from the beginning of the fight on the side platforms, as the boss will cast Touchdown. Supports will go to the left platform, and DPS will go to the right platform, while tethered players will obey their tether and go to the platform their wing is on. Point the tether South, and the stack should go North in a triangle formation. The tethered player needs to free the stacked players, and quickly return to the centre to heal up the bleed.
The phase ends with Pandaemoniac Meltdown into Soul Grasp. Tanks may want to invuln this one if they do not plan on using it in the last phase to free up some cooldowns.
Phase Three
Pandaemonium gains the following abilities starting in the third phase.
- Pandaemoniac Web: Casts Entangling Web on three random players and Steel Web on one random player. Afterwards, the three players in the Steel Web stack will also receive Entangling Web markers.
- Harrowing Hell: Deals eight instances of extremely heavy physical damage to the party, and then one instance of colossal physical damage to the party which knocks players off the arena unless there is an impassable web to catch them. The two closest players will take extra damage.
- Parted Plumes: A giant puddle in the centre of the arena which inflicts paralysis will spawn. This will spawn conal AoEs that rotate around the middle.
The final phase of the fight consists of a mechanical check, and then one of the most difficult mitigation and healing checks in the game. The boss will cast Dividing Wings and Pandemoniac Web. Players should stand in a line to ensure that they know what position they have for the webs. Three players will be marked with an AoE web, and they should go to the A, B, and C markers at the very edge of the room. The players at A and C need to hit the post with their web AoE, and all three AoEs need to overlap. The player marked with Steel Web needs to stand close to the middle outside of the boss's hitbox, and the unmarked players will form a triangle with that player. This ensures that they are sufficiently far enough from each other, and so that they know which marker they are going to afterwards. The tethered players will take them to the edge of the platform, pointing the AoE away from the party. This is because the boss casts Pandaemon's Holy as the first set of AoEs go off.
Immediately after the first set of AoEs go off, the three players that had the AoE need to move forward to help break the players out of the web. These players will then receive web AoEs, and they need to place them at A, B, and C, in front of the already-formed web. Players at A and C need to again ensure that their AoE hits the post. You will know if the webs were formed correctly, as a pop-up message will display saying that "the webs are impassable."
Players will then need to move to the front of the arena and check their debuffs from Daemonic Bonds and begin to heal up and mitigate for Harrowing Hell. Tanks must stand closer to the boss and use cooldowns to mitigate the heavy damage, while the party stands behind them and uses their mitigation tools to survive. There are eight hits of heavy damage that ramps up over 13 seconds, then one final hit of colossal damage that knocks the party back. Each instance of damage snapshots mitigation, so it is preferable to use mitigation in the middle to cover the heavier hits towards the end.
During the mechanic, players need to get in formation for the Daemonic Bonds after the knockback. If it's Tetradaemoniac Bonds, have the supports on the left and DPS on the right. If it's Duodaemoniac Bonds, have the players in the positions for their Pandemoniac Turrets towers, as it will be easier to resolve. Immediately after the knockback, tanks and melees should dash to the boss. This will leave plenty of space for all players to do the mechanic. If it's Daemonic Bonds first, players can stay where they are (after dashing in). If it's Tetradaemoniac Bonds, the ranged players should run up to melee range, and the melee players should run back a bit to ensure everyone is in the stack. If it's Duodaemoniac Bonds, tanks can stack with their melee in their light party, and healers can stack with their ranged. Resolve the other mechanic afterwards.
Heal up, as the final part of the fight follows with another Ultima and Soul Grasp. Tanks will definitely have fewer cooldowns for this, as most of them were likely used on the previous Soul Grasp and Harrowing Hell. This is followed by Wicked Step, and healers should take care to spot heal the tanks due to the heavy incoming tank damage. This is followed by Entangling Web, so create the bridge for your tanks. The final new mechanic of the fight is Parted Plumes. Players should find where the conal AoEs start and go one spot behind it, then move into it as the first one goes off. However, the boss will cast Pandaemoniac Ray during this time, so move along with the conal AoEs to the safe half of the room if necessary. Make sure to dodge the line AoEs from the bits.
The final few mechanics are ones previously seen. The boss will cast Silkspit, so spread to the side platforms. This is followed immediately by Pandaemoniac Pillars, and a Circles of Pandaemonium or Pandaemon's Holy while dodging the cannons. Pandaemoniac Meltdown comes after, and make sure the prey markers leave the stack.
Afterwards, the soft enrage will begin. The boss will begin casting Harrowing Hell, but this time there are no webs to save you from getting knocked off. After nine hits, the final hit will do colossal damage and knock you off the arena, so deal damage and kill the boss before it kills you!
Loot
When Pandaemonium is defeated, a treasure coffer will appear that contains Anabaseios Gear Coffers and upgrade tokens. When opened by a player, these coffers contain item level 660 Anabaseios equipment for the job the player is currently on. The amount of coffers that appear depend on how many players have already cleared during the weekly lockout. If no players have cleared yet, an Anabaseios Head, Hands, and Feet coffer will drop, as well as a Divine Shine and a Hermetic Tomestone. If one to four players have already cleared, the loot is halved. If five or more players have already cleared, no treasure coffer will appear.
Players who defeat the encounter for the first time during the weekly reset will also receive an Anabaseios Mythos II token. Four of these can be traded in for an Anabaseios Head, Hands, or Feet gear of your choosing at a Pandaemonium gear vendor. Three of these can be traded for a Divine Shine, used to upgrade Credendum accessories.
Changelog
- 13 Jun. 2023: Fixed an error with loot description.
- 09 Jun. 2023: Guide added.
More FFXIV Content

This guide has been written by Lyra an accomplished raider in FFXIV and has written raid guides for the game for the past five years. You can follow him on Twitter and he streams raids on Twitch.
- How Character Action Skins Will Give You More Ways to Customize
- How Auto Content Balancing Will Change How You Play Evercold
- This Rare FFXIV Minion Secretly Became Sellable in Patch 7.55
- The Yo-kai Watch Event Returns Again to Eorzea
- Best Crafting Rotations for 7.55 Phantom Occultum Relics
- FFXIV Hits the Switch 2 Soon! Here’s What We Know About the Release Date
- Hear, Feel, Think: What Eorzea Immersion Sounds Like
- New Character Creation Updates With FFXIV’s Patch 8.1