Ennead Guide for New World
Welcome to the ultimate guide for The Ennead expedition in New World: Aeternum. This challenging end-game expedition takes you into the mysterious sands of the desert, where ancient pyramids and long-lost secrets await discovery. Within this guide, you'll find expert strategies for each boss, detailed tips on how to be most effective with your build, gear recommendations, detailed steps for each puzzle, and more.
Location and General Information
This expedition is located towards the center of Brimstone Sands. Its in-game recommended level is 60, signaling that this is an endgame expedition designed for characters who have solid gear and a grasp of their role in an expedition. It's recommended to attempt this expedition once you have a gearscore of at least 590.
Mob Types
The Ennead has a mixed variety of mob types, which means it can actually be beneficial to
swap gear at times. This expedition has both Ancient and Corrupted mob types. With that being said, it's important to
ensure you have both ![]() Infused Ancient Coatings and
Infused Ancient Coatings and ![]() Infused Corrupted Coatings
if you wish to swap back and forth for maximum DPS on certain mobs and bosses. In an ideal situation, you would
also have three
Infused Corrupted Coatings
if you wish to swap back and forth for maximum DPS on certain mobs and bosses. In an ideal situation, you would
also have three ![]() Ultimate Combat Trophy items (one in each house) to ensure you maximize your damage output towards all
mob types.
Ultimate Combat Trophy items (one in each house) to ensure you maximize your damage output towards all
mob types.
Layout
The Glyphs
The beginning of the expedition will have you activating various Glyph constructs, in total there are six. You will need to clear whatever trash mobs are in your path and then use your Azoth Staff to activate the construct. In the first room there will be two, there will be four more throughout the expedition and you will need to activate all of these to receive a bonus chest.
As you finish the first room and continue clearing enemies you will reach a forked hallway. Clear all the rooms and activate their respective constructs. While doing so you will encounter both Shai and Horon, neither of these enemies have significant mechanics to be aware of.
Godling Khepri Supernal
Abilities
- Charge — Khepri will quickly dash forward, dealing damage and knocking down any players in the path.
- Laser — A player will be focused and targeted with a large laser beam. The player will need to continue moving. As the Laser moves it will leave a ground damage AoE, so be mindful of where the Laser is being tracked.
- Summon Relics — Several structures will float in the air. These will target players and strike them, applying a large DoT.
- Scarab Mines — Khepri will leave mines throughout the room. If they are stepped on they will detonate and deal large amounts of burst damage.
- Crush and Slash — Khepri has two melee abilities. They will either Slash in front of themselves twice, or jump upwards and crush the ground below. The Crush will deal AoE damage to anyone in the area.
Strategy
This fight is highly mobile and the tank will be responsible for keeping the group safe. The tank should move Khepri if the Relics are active or if the area is flooded with mines. When this happens, it is advantageous for the tank to move to the opposite side of the room.
When a player is focused by the laser they need to be careful. They need to continue moving but try to leave the Laser AoE in the smallest area possible. It is best to move in a "snake" pattern where you tightly move horizontally then forward or backward, and track the same path back. You can also elect to move in one straight line along the outer edge of the room so that it is away from your allies.
Avoid any melee abilites and continue moving as needed.
Seal of Sovereign, Timeless Crypt and Corrupted Monument
After defeating Khepri and moving through the portal you will encounter three new areas. You will have to clear the enmies within the Timeless Crypt and the Corrupted Monument. This will then allow oyu to enter The Seal of the Sovereign where you will fight the next boss.
General Crassus
This is a three phase fight in which Crassus will gain access to different abilities. He will also spawn a variety of adds that have access to unique abilities.
Spear Abilities
- Mirror Image Charge — Crassus will spawn several copies of himself in a line. They will all charge forward and deal AoE damage.
- Spear Charge — Crassus and his mirror images will all use a spear to thrust forward and deal large amounts of burst damage. Crassus will also do the same ability if his images are not present, so be cautious.
- Summon Signifiers — Crassus will summon special adds that will apply a rend debuff to party members. There will also be standard Corrupted enemies.
Bow Abilities
- Arrow Volley — Each party member will be targeted and have a volley of arrows shot at them.
- Explosive Arrow — Several explosive arrows will be fired at party members, after a short moment they will explode and deal AoE damage.
- Rapid Shot — Crassus will shoot multiple arrows, one after the other, in the direction he is facing.
- Summon Legioneers — Crassus will summon special adds that will knockdown and stun party members. There will also be standard Corrupted enemies.
Staff Abilities
- Meteor Shower — Crassus will cast several meteors that focus players and fall from above, dealing massive damage to anyone who is struck.
- Orbs — Crassus will unleash a frontal cone of damaging orbs, this will deal AoE damage to anyone in their path.
- Explosive Runes — Runes will be scattered on the floor of the arena. These will explode after a short duration.
- Summon Cyclops — Crassus will summon special adds that will shoot laser beams that deal significant damage to whoever is targeted. They will also stun and knockdown party members. There will also be standard Corrupted enemies.
Strategy
Crassus will change phases at 66% and 33% health. He will begin in the Spear phase. Make sure that you prioritize clearing the adds. especially the Signifiers so that you do not get rended. Be mindful of when Crassus winds up his spear so that you can be ready to dodge and thrusts coming in your direction.
The Bow phase will be where the most damage is dealt. It is important to always be looking at Crassus as he will telegraph his next ability when he starts to draw back his bowstring. Simply clear the adds in the arena, prioritize killing the Legioneers first. Aboid any incoming arrows and at 33% health he will transition.
In the Staff phase it is important to defeat the Cyclops that spawn first. Clear the rest of the adds and then be prepared to finish the fight. Try to position behind Crassus to avoid any Orbs that may come your way. It is also crucial to be aware of your positioning as there will be runes forming and meteors being casted.
Terrace of the Creator
This section will have large statues and patroling enemies. The statues will progressively awaken and will need to be defeated. Avoid the patrols as they will deal damage to anyone that steps within their telegraphed circle. Defeat all the enemies and you will encounter Sah. Once defeated you will reach the final bosses.
Anpu and Heru
This is a two boss fight that has three seperate phases. It is more mechanically complex than the previous fights.
Anpu Abilities
- Earthquake — Anpu will jump upwards and slam down, creating an AoE earthquake that will hit anyone below.
- Charge — Anpu will begin focusing one player at a time. He will drop all aggro and leave an AoE damage path behind him. These pools will deal significant amounts of damage. In order to stop this, make sure the player who is targeted stands behind one of the four floating relics. If Anpu charges into one he will stop and be vulnerable.
- Ancient Cleave — Anpu will use his fists and punch them together to cleave any players directly in front of him.
- Whirlwind — Anpu will spin around and deal damage to nearby enemies. This will also generate an electric field around him that deals additional damage.
Heru Abilities
- Laser Beam — Heru will project a large laser beam that will focus on a random player. If struck they will be stunned and a large burst of AoE damage will explode from them.
- Ancient Relics — Heru will run to the middle of the room and begin channeling. He will cast pulses of energy that will generate a wave that moves outward, dealing damage to anyone in the room--these can be dodged. A player must run to each relic and cleanse them to stop him from channeling.
- Holy Burst — Heru will cast a burst of holy energy that comes down from above, dealing AoE damage in the area and applying a DoT.
- Holy Pools — Pools of holy energy will be summoned and will move around the room. Anyone that touches them will take damage.
Strategy
When the fight starts you will only fight Anpu. His abilities are easily avoidable. The one mechanic your team must be mindful of is his charge attack. When he begins, spread out and send a player in the direction of each pillar. Use any mobement necessary so that a pillar can be placed in between him and a player. He will then charge into a relic and stop his Charge. This will give a brief moment of vulnerability.
Once Anpu is defeated, Heru will join the fight. Be mindful of the bursts of holy light and the lasers that he will project. As the fight goes on the room will become more crowded with Holy Pools. Just be mindful of where you are standing and Heru's direction. He will cast abilities in the direction he is facing. Throughout this stage you will see Heru run toward the middle of the room and begin channeling. This will cause holy waves to generate outward. Determine an Ancient Relic for each party member to run toward before this phase starts. Once each player reaches their relic, these must channel a cleanse. You will have to stop cleansing to avoid the waves so that you do not take unnecessary damage. Simply stop, dodge, and continue--you will not lose progress on your channel if you stop.
Once Heru is defeated, Anpu and Heru will fight together. You will have to be mindful of all the mechanics you have seen in the previous two phases. In the Ancient Relic phase, be sure that they tank is not responsible for doing any cleansing. You must defeat the bosses within 10 seconds of one another, otherwise they will regenerate their health. It is best to focus down one boss to a low amount of health and then focus on the other. Then cleave them down quickly.
Loot Drops
The loot in The Ennead is designed for end-game players, and therefore can be some of the best found in the game. There are different drops depending on whether you are in the mutated or regular version of the expedition. Below is a list of some common items you'll find when running this expedition.
 Dja of Bes
 Hand of Jupiter
 Tear of Aset
 Soulbinding Band
 Priestess Charm
 Staff of the Throne
 Claw of Orcus
 Mnevin Staff
 Beastfang
 Ornament of Legates
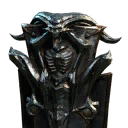 Wall of Stone
 Ligo
Ligo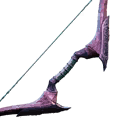 Charioteer's Bow
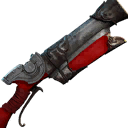 Buchis Rage
 Arquebus
 Sobek's Hunger
 Legate's Pride
 Darion's Spatha
 The Blue Crown
 Lorica Squamata
 Simple Skirt
 Honorable Shoes
 Guardian's Gauntlets
Heartrune
To acquire Heartrunes you must complete an expedition. The final boss will have a high chance to drop the Minor version which can be upgraded into a legendary variant.
Mutated Drops
Some items can only drop on certain difficulty levels of the mutated version within some expeditions. Below is a list of some of the most sought-after items that can be found within the mutated version of The Ennead.
 Sun Lord's Headdress
 Sun Lord's Wings
 Sun Lord's Gloves
 Sun Lord's Skirt
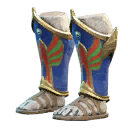 Sun Lord's Boots
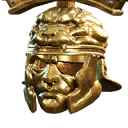 Aureate's Golden Galea
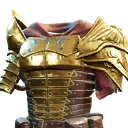 Aureate's Golden Lorica Segmentata
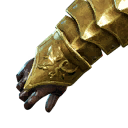 Aureate's Golden Manica
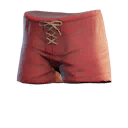 Aureate's Golden Braccae
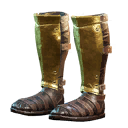 Aureate's Golden Caligae
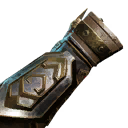 Scourge of the Depths
 Unyielding Cleaver
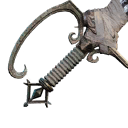 Grimbolt
 Infernal Dread
 Spinechiller
 Second Strike
 Hunter's Grace
 Companion's Courage
Artifacts
Once your character reaches max level, you will be given the opportunity to retake this
expedition at a more difficult level (the mutated version, as mentioned above). When taking down the Heru boss in this mutated
expedition (at least M1), you will have a chance of obtaining a rare sheild artifact known as ![]() The Wall, which
is arguably one of the best shields in the game. The Shield has two unique perks, the first being "Shield Wall", allowing you to gain 5% base
damage reduction and an additional 33% more stamina (in exchange of not being able to dodge), and the "Chromatic Ward" perk, allowing you to take 25% less damage
from all elemental sources, making this a great add for certain tank builds.
The Wall, which
is arguably one of the best shields in the game. The Shield has two unique perks, the first being "Shield Wall", allowing you to gain 5% base
damage reduction and an additional 33% more stamina (in exchange of not being able to dodge), and the "Chromatic Ward" perk, allowing you to take 25% less damage
from all elemental sources, making this a great add for certain tank builds.
Changelog
- 03 Sep. 2024: Guide updated for current patch. Additional best practices added. "The Wall" shield artifact info added.
- 20 Apr. 2023: Guide created.
Savvvo is a full-blown MMORPG try-hard who overthinks every build, min-maxes every stat, and theorycrafts like his life depends on it. If there’s a meta, he’s dissecting it. If there isn’t, he’s creating one.
You can take a closer look at his guides and content on YouTube.
- AMA Session with New World’s Former Lead World Designer
- New World Aeternum 2026 Roadmap Revealed
- Can New World Be Saved? Offers Are Starting to Pop Up.
- The Last Day of New World: Aeternum
- New World Server Mergers (Again)
- What Else Was Planned for New World: Aeternum?
- Global Storage Search is Now Live in New World: Aeternum
- Daggers Are Officially Live in New World: Aeternum