Tempest's Heart Guide for New World
Welcome to the ultimate guide for conquering the Tempest's Heart expedition in New World: Aeternum. This end-game expedition plunges you into Isabella's corrupted mind as you face off against her most dangerous creations. With detailed strategies for each boss, essential tips, and inside knowledge on overcoming each challenge, this guide has everything you need to complete the Tempest's Heart expedition.
Location and General Information
This expedition is located in Northern Shattered Mountain. Its in-game recommended level is 60, signaling that this is an end-game expedition designed for characters who have have solid gear and a grasp of their role in an expedition. It is recommended that you have at least an average gear score of 575 before entering this expedition.
Mob Types
Tempest's Heart is full of Corrupted mobs, which are weak to Thrust, Nature, and Arcane damage. Builds that use the Spear, Rapier, Blunderbuss, or Bow are good options for this expedition.
Additionally, it will be greatly beneficial to make sure you have ![]() Infused Corrupted Coatings and three
Infused Corrupted Coatings and three ![]() Major Corrupted Combat Trophys (one in each house)
to maximize your damage output towards these types of mobs.
Major Corrupted Combat Trophys (one in each house)
to maximize your damage output towards these types of mobs.
Repeatable Quests
"Isabella's Madness" is a repeatable quest found just outside of Tempest's Heart. It is highly recommended to accept this quest before you enter this expedition each time to pick up a handful of additional rewards.
Layout
This expedition's layout is rather straight-forward, but there are a few events and a puzzle along the way.
Starting Gate
Your first room that you encounter with have a large corrupted monolith and a gate that Isabella will be standing in front of. Once you approach her she will begin spawning Corrupted mobs around her, including a boss enemy: Uzret. This encounter will be similar to the open-world Corrupted Monolith events. Uzret wields a large Greatsword, dodge his attacks and focus him down. Have somebody clearing all of the pylons that surround the monolith. Once the monolith is cleared all of the remaining enemies will despawn. If there is specific loot you are wanting from Uzret, be sure to focus him down first.
Corrupted Passage
After clearing the Corrupted Monolith, the large gate doors will open. Simply progress through the passage and clear any trash along the way. Be mindful of the Corrupted tentacle enemies, as they will deal large amounts of damage. If you wish to skip these enemies you may run past them. To clear this section quickly, run your entire party through the passage and gather the trash enemies just before Ekheke, the first boss. Do one large AoE pull and make sure to line of sight any ranged enemies.
Ekheke
Abilities
- Cleave — Ekheke will swing is club horizontally and cleave all players in front of him. This has a long range and is very wide. If you are hit it will deal a large amount of damage and stagger you.
- Smash — Ekheke will strike downwards and smash all enemies in front of him for a large burst of AoE damage.
- Roots — Ekheke will jump upwards and cause an earthquake upon landing. This will force roots out of the ground that will deal AoE damage to all players nearby.
Strategy
This fight can be very simple depending on the abilities Ekheke uses and your groups positioning. To have the easiest time make sure that your tank holds Ekheke on the right side of the room (The right side if you were just walking into the room) against the large stone wall. Have your DPS quickly kill the adds at the start of the fight. Once your tank is positioned properly, the boss will not be able to move and will continue to cycle through his abilities. Simply dodge all incoming abilities and position any ranged away from the group.
First Corrupted Portal and the Cellar
After defeating Ekheke you will go up the staircase right next to where your group should have finished the fight. You do not need to kill any enemies on your way up. Simply go up and walk into the corrupted portal.
In the first portal you will encounter High Maiden Lai. She functions similar to enemies within Dynasty Shipyard. Once you defeat her you will be able to open the chest in the middle of the room. Go to the portal at the end in order to return back to the location where your group defeated Ekheke. Go toward the cellar entrace and whoever grabbed the key will be able to open the door.
In the cellar you will encounter Vroeg - his mechanics are the exact same as any other Corrupted Brute that you may encounter in the open-world, OPR, or an invasion. Once Vroeg is defeated, you will have to talk to the main within the back room of the cellar.
Graveyard and Basilica
After leaving the cellar you will reach a Corrupted Graveyard where you face a few waves of enemies. Once the third wave spawns you will encounter Cutthroat Eduardo. He is easy to kill and has no specific mechanics. Once you have defeated him the gates will open. You will encounter many enemies on your way up to the Basilica, you may kill them if you wish.
When speed-running, it is best to pull all of the enemies to the door of the Basilica and wait for them to open. As soon as you can enter all of the enemies will not be able to follow you and they will drop you as their target. You can then jump down to the platform below and encounter Isabella.
Isabella Fight - One
- Dash — At times Isabella will quickly dash in the direction she is facing and will damage all players within her path.
- Orb — Isabella will shoot a large orb in a straight line of the direction she is facing. This will go through all players it hits.
- Corrupted Sword — Isabella will slash all enemies in front of her. This will deal damage as a frontal AoE cone.
This is an easy fight in which Isabella only needs to get down to 75% health. Before she does any ability there will be a clear voice line, so use that as your queue to prepare to dodge.
Basilica Continued
After you finish Isabella the first time you will enter a large Corrupted cathedral. You will encounter High Priestess Ifel here. Simply defeat all enemies within the room so that you can progress to the next sections.
Isabella Fight - Two
The mechanics are the same as the previous Isabella fight. The only difference now is that there are enemies that spawn throughout the fight. Clear any cultists that spawn otherwise they will give Isabella an empower buff. Be sure that your entire team is on the platform before starting the fight because the bridge will disappear once the encounter begins. Also, do not try to exit the room too quickly as you can run off of the platform after you defeat Isabella.
Sea of Corruption
Jump down into the canyon below. You will encounter large Void Destroyers that will be shooting a laser at a random party member. You will need to make your way to the repeater nearby and then shoot each eye until the Destroyer is defeated. You can line of sight the laser, so while you run to the repeater hug tight to the wall of the broken boat on the left side.
After the first destroyer one party member will be able to use their Azoth Staff and create a bubble. Have your party all stand within the bubble and be escorted to the next repeater. All enemies that touch the bubble will be instantly defeated and nobody will be hit by the laser.
After defeating the Destroyers have the players with the bubble speak to Isabella at the City.
The City
If you collected any swords for the bonus chest this is where you will interact with the statues.
You do not need to kill any enemies until you reach High Priest Basir. There are no special mechanics with this fight.
Your group will progress until you reach the room with all of the summoners who are creating a large Corrupted bubble. Defeat all the summoners to gain access to the second corrupted portal.
Do not hit any enemies other than High Priest Basir and any enemies within the summoner room. There regular trash will not engage you unless you strike them first.
Corrupted Portal - Two
Within this portal you will encounter Headman Pang. Once he is defeated walk toward the portal at the end of the room and you will reach the next boss: Neishatun
If you wish, you can simply run to the portal at the end of the room and skip Headman Pang.
Neishatun
- Tail Swipe — Neishatun will do a quick spin and swipe his tail at all enemies in front of it. This will knockback and deal a large amount of damage. Do not have your back facing the ledge of the platform or you will be knocked off.
- Charge — Neishatun will lock onto a player and dash at them. Anyone in the line of this path will be hit and it will leave a ground damage effect..
- Arrow Volley — A player will be marked with a large red icon above their head. Neishatun will draw back his bow and shoot toward the player, hitting anyone in the path.
Glyphs and Runestone
The rest of the fight will remain the same with those mechanics. At 75% health the boss will disappear and large glyphs will form on the ground. You will need to find a safe area and will have some time before they detonate. If you are hit it will deal burst damage and apply a DoT that will persist through the remainder of the fight. This DoT will stack and cannot be removed.
After the first cycle of glyphs Neishatun will reappear. From this point forward Runestones will spawn toward the middle of the room. These must be destroyed, so have all DPS focus damage on the Runestone. If they detonate all party members will be hit and receive the DoT.
Neishatun will disappear one more time and the glyphs will begin detonating. Once he returns the glyphs will continue throughout the rest of the fight
Isabella Final Boss
- Corrupted Vines — Isabella will call forth large vines from the ground after she stomps. This will deal initial damage and then the vines will move toward specific players. Dodge the vines to prevent incoming damage..
- Flight — Isabella will mark a player and begin to fly at them. This will happen three times. Right before she reaches you simply dodge to avoid the damage. She will hit any players within her path.
- Corrupted Sword — Isabella will slash all enemies in front of her. This will deal damage as a frontal AoE cone.
- Corrupted Burn — A high damage DoT will be applied to a randomly targeted player.
- Spin — Isabella will do a quick whirlwind with her wings and deal damage to anyone who is struck.
- Monoliths — Isabella will summon a small monolith on one of the three platforms. This will have an AoE surrounding it and it can be cleansed by any player's Azoth staff. Once the AoE ability ends, send a player to cleanse the monolith. There will also be corruption falling from above that will cause AoE damage on anyone that is hit.
Strategy
Have your tank and melee DPS on one platform and your ranged DPS on another. As long as the tank holds Isabella and everyone dodges her abilities that will be the majority of the fight. Most abilities will focus melee players, so it will be important to make use of your dodge. Whenever the pylons spawn simply cleanse it, and the continue the fight just as you did at the start. This fight is not mechanically challenging.
Loot Drops
The loot in the Tempest's Heart is designed for endgame players and therefore can be some of the best found in the game. There are different drops depending on whether you are in the Mutated or Regular version of the expedition. Below is a list of some items you can expect to pick-up while going through this expedition.
 Twisting Fates
 A Pleasant Reminder
 Wayward Thread
 Sunrise Kiss
 Omen
Omen Portent
 Vision of Viciousness
 Calamitous Intent
 Fallow Fields
 Infinite Chaos
 Reluctant Savior
 Emberstone's Promise
 Glacial Sorrow
- Blackguard's Longsword
- Blackguard's Rapier
- Blackguard's Hatchet
- Blackguard's Great Axe
- Blackguard's War Hammer
- Blackguard's Spear
- Blackguard's Bow
- Blackguard's Musket
- Blackguard's Life Staff
- Blackguard's Fire Staff
- Blackguard's Ice Gauntlet
- Blackguard's Void Gauntlet
 Blackguard's Kite Shield
 Blackguard's Blunderbuss
 Blackguard's Greatsword
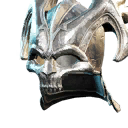
 Conqueror's Helm
 Conqueror's Breastplate
 Conqueror's Gauntlets
 Conqueror's Greaves
 Conqueror's Boots
 Raider's Hat
 Raider's Coat
 Raider's Gloves
 Raider's Pants
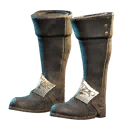 Raider's Boots
 Tactician's Hat
 Tactician's Shirt
 Tactician's Gloves
 Tactician's Pants
 Tactician's Shoes
- Sagacious Hat
- Sagacious Shirt
- Sagacious Gloves
- Sagacious Pants
- Sagacious Shoes
- Wizened Hat
- Wizened Shirt
- Wizened Gloves
- Wizened Pants
- Wizened Shoes
 Neishatun's Helm
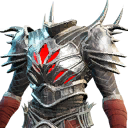 Neishatun's Breastplate
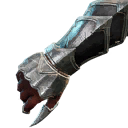 Neishatun's Gauntlets
 Neishatun's Greaves
 Neishatun's Boots
- Honest Thief's Hat
- Honest Thief's Shirt
- Pious Scout's Hat
- Pious Scout's Coat
- Doomwalker's Helm
- Doomwalker's Breastplate
 Isabella's Rapier
 Isabella's Amulet
 Forgotten Vow
 Keepsake Of The Divines
 Surgeon's Ring
 Fanciful Earring
 Berserker's Sword
 Afterthought
Heartrune
To acquire Heartrunes you must complete an expedition. The final boss will have a high chance to drop the Minor version which can be upgraded into a legendary variant.
Mutated Drops
Some items can only drop on certain difficulty levels of the Mutated version within some expeditions. Below is a list of some of the most sought-after items from the mutated version of this expedition.
 Nimble Eye
 Cindersweep
 Gloomfury
 Feral Cleaver
 Lightning's Whisper
 Butcher's Delight
 Grip of Decay
 Vortex Cannon
 First Freeze
 Isabella's Gaze
 Isabella's Breastplate
 Isabella's Gauntlets
 Isabella's Pants
 Isabella's Greaves
Artifacts
Once your character reaches max level, you will be given the opportunity to retake this
expedition at a more difficult level (the mutated version, as mentioned above). When taking down Isabella in this mutated
expedition, you will have a chance of obtaining a rare heavy glove artifact known as ![]() Magnetic Gauntlets, which
has a very rare perk that increases your crit chance by 50%, but decreases your crit damage by up to 30%. This is a very unique artifact, that
many tend to use within heavy Void Gauntlet builds.
Magnetic Gauntlets, which
has a very rare perk that increases your crit chance by 50%, but decreases your crit damage by up to 30%. This is a very unique artifact, that
many tend to use within heavy Void Gauntlet builds.
Changelog
- 09 Sep. 2024: Guide updated with curent patch. Additional tips added. New artifact (Magnetic Gauntlets) info added.
- 20 Apr. 2023: Guide created.
More New World Content
Savvvo is a full-blown MMORPG try-hard who overthinks every build, min-maxes every stat, and theorycrafts like his life depends on it. If there’s a meta, he’s dissecting it. If there isn’t, he’s creating one.
You can take a closer look at his guides and content on YouTube.
- AMA Session with New World’s Former Lead World Designer
- New World Aeternum 2026 Roadmap Revealed
- Can New World Be Saved? Offers Are Starting to Pop Up.
- The Last Day of New World: Aeternum
- New World Server Mergers (Again)
- What Else Was Planned for New World: Aeternum?
- Global Storage Search is Now Live in New World: Aeternum
- Daggers Are Officially Live in New World: Aeternum