The Shattered Halls Dungeon Guide
The recommended level range to run this dungeon on Normal is 68-70. Heroic
mode will require Level 70 and the ![]() Flamewrought Key to enter.
Flamewrought Key to enter.
This dungeon will take approximately 35-45 minutes to complete with an
average group. This dungeon is commonly abbreviated as "ShH" or "shatt halls".
To enter the dungeon, you will need someone to unlock the gate with the
![]() Shattered Halls Key or a Rogue with
Shattered Halls Key or a Rogue with ![]() Pick Lock.
Pick Lock.
In this guide, we will cover dungeon quests, the layout of the dungeon, an overview of trash mobs, tactics for each boss, loot that can be obtained, and ideal group compositions.
The Shattered Halls Quests
Before heading into The Shattered Halls, we advise you to get all the dungeon quests related to it. To make this process easier, we have written a separate guide for the quests and their chains.
The Shattered Halls Entrance Location
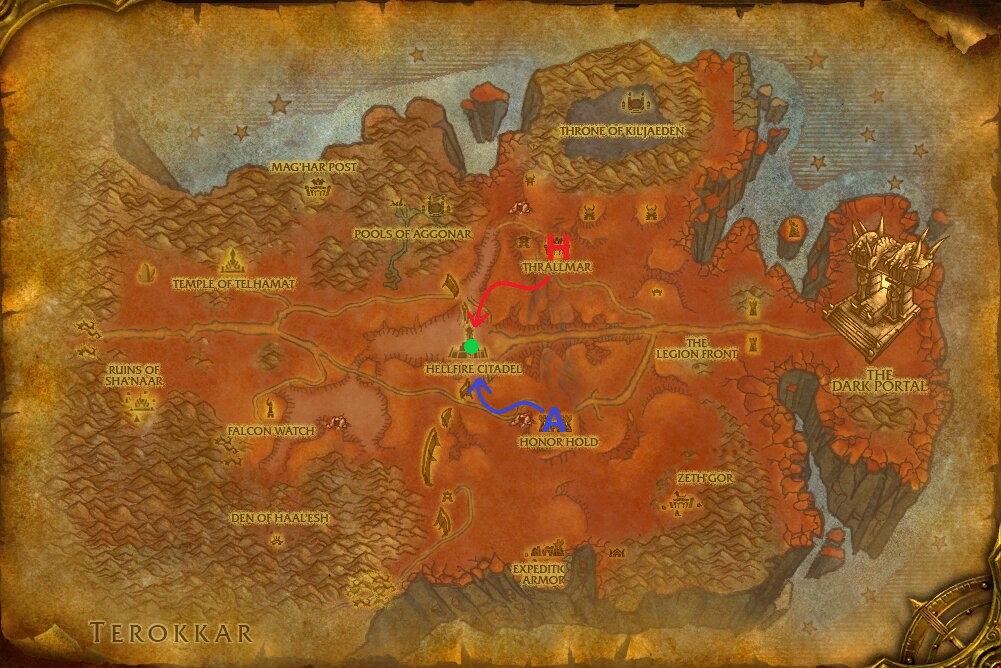
Conveniently, all dungeons in Hellfire Peninsula are located in one centralized location: Hellfire Citadel. This structure can be easily found in the very center of the map and can be reached by using one of the two connecting bridges found on either the North or South side.
Unlike the other two dungeons in this area, The Shattered Halls is found behind a locked gate which requires a key from a quest chain to open. Check out The Shattered Halls Quests section above to learn how to obtain this key.
The dungeon portal for The Shattered Halls can be found at coordinates (48,51). The summoning stone is located directly next to the Ramparts dungeon portal.
Layout of The Shattered Halls
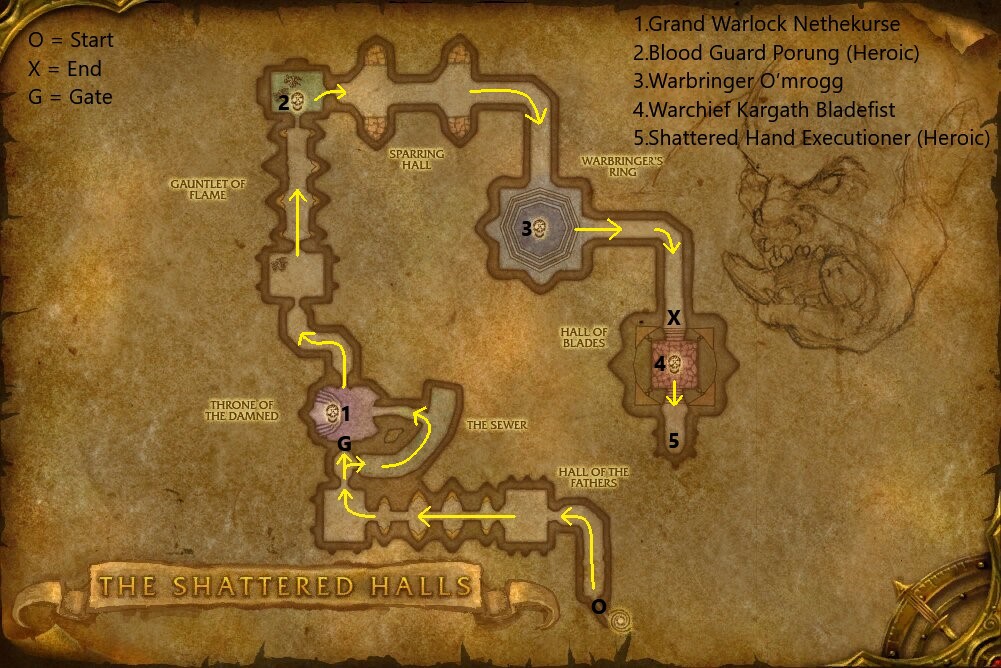
The layout of The Shattered Halls is almost completely linear, following a
one-way path. The only deviation possible is at a locked gate found before
Grand Warlock Nethekurse. If you can ![]() Pick Lock the gate open,
you can skip the gauntlet on the right and save some time.
Pick Lock the gate open,
you can skip the gauntlet on the right and save some time.
Reputation From The Shattered Halls
Killing mobs in this instance grants either Thrallmar or Honor Hold reputation.
Normal Difficulty
- Most orcs grant 12 reputation each.
- Each boss grants 120 reputation.
- A Normal run of The Shattered Halls will give around 1,350 reputation.
- Reputation gains in Normal go all the way up through Exalted.
Heroic Difficulty
- Most orcs grant 15 reputation each.
- Each boss grants 250 reputation.
- A Heroic run of The Shattered Halls will give around 2,200 reputation.
Notable Trash in The Shattered Halls
In this section, we will briefly go over each of the trash mobs that pose a threat to you in this dungeon.
Shattered Hand Legionnaire

- Whenever a nearby ally dies, a reinforcement will be called in to replace them.
 Aura of Discipline
 Pummel
These need to be focused first, as the reinforcements summoned in are
essentially a replacement to the mob killed previously. Focus these down and
avoid any additional reinforcements. Tank these away from casters to prevent
the ![]() Pummel from interrupting them.
Pummel from interrupting them.
Shattered Hand Heathen

These deal massive damage. Aim to crowd control and stun these as much as possible to avoid their massive damage output.
Shattered Hand Savage

These can be quite dangerous as they have very high attack speed when
buffed with ![]() Slice and Dice and
Slice and Dice and ![]() Enrage. These should be a
high priority to kill early or crowd control whenever possible.
Enrage. These should be a
high priority to kill early or crowd control whenever possible.
Shadowmoon Acolyte

Ideally you will focus on interrupting these as their healing can be quite annoying if left alone. Try to line-of-sight these to force them to come into melee range.
Shadowmoon Darkcaster

Try to interrupt the ![]() Fear and
Fear and ![]() Rain of Fire if possible.
Utilize line-of-sight to force these to engage in melee combat.
Rain of Fire if possible.
Utilize line-of-sight to force these to engage in melee combat.
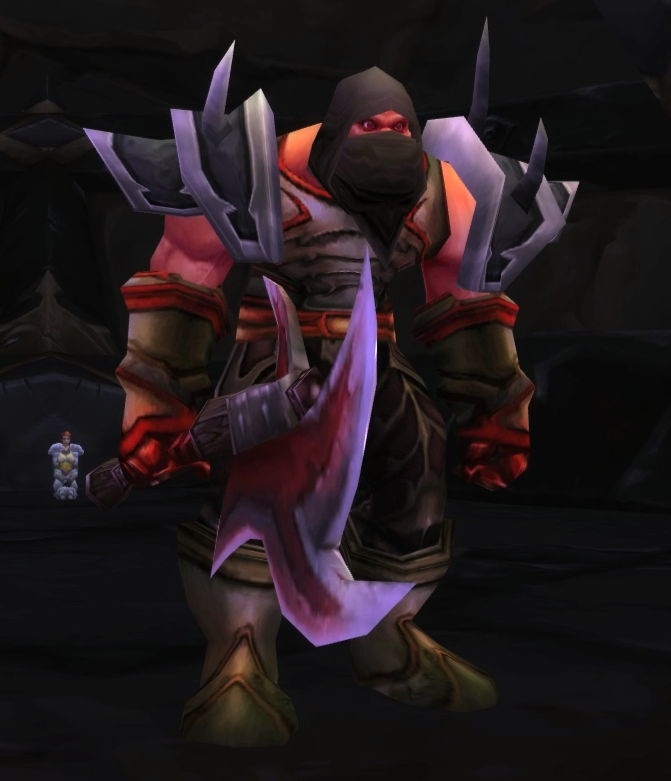
Shattered Hand Assassin

Be mindful of these throughout the entire dungeon as they can be hidden in
corners you previously thought were safe. Tanks may get ![]() Sapped at the
start of combat with these, try to CC, stun, or kite them until the tank is free.
Sapped at the
start of combat with these, try to CC, stun, or kite them until the tank is free.
Shattered Hand Brawler

These can be quite deadly with ![]() Thrash. If possible, keep
Thrash. If possible, keep
![]() Curse of the Shattered Hand removed from the tank at all times as the
increased damage taken can be quite deadly when facing so many mobs at once.
Tank these away from casters to avoid them being interrupted by
Curse of the Shattered Hand removed from the tank at all times as the
increased damage taken can be quite deadly when facing so many mobs at once.
Tank these away from casters to avoid them being interrupted by ![]() Kick.
Prioritize killing these early on or using crowd control on them.
Kick.
Prioritize killing these early on or using crowd control on them.
Shattered Hand Sharpshooter

These consistently deal high damage to random players in their range. The
entire party should use line-of-sight as much as possible to avoid as many
attacks as they can. Use any resources your party has to remove the
![]() Viper Sting as soon as possible to keep the group's Mana high;
Viper Sting as soon as possible to keep the group's Mana high;
![]() Cleanse,
Cleanse, ![]() Abolish Poison, and
Abolish Poison, and
![]() Poison Cleansing Totem are all great counters to this spell.
Poison Cleansing Totem are all great counters to this spell.
Creeping Ooze and Creeping Oozeling

These are the creatures you will need to fight if you cannot open the gate found before Grand Warlock Nethekurse. Avoid standing near them as the attack and movement speed slow can add up quickly. The Creeping Oozeling should be AoEd down as soon as possible while the tank focuses on the Creeping Ooze.
Shattered Hand Archer
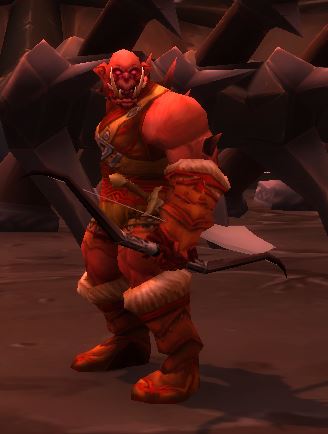
- Fires flaming arrows down the hallway, leaving sections of the ground covered in fire.
These are found at the end of the gauntlet and are responsible for the patches of fire that are on the ground. Engaging these in combat will stop them from placing new patches of fire.
Shattered Hand Champion

These can be quite annoying to gain initial threat on as the
![]() Concussion Blow can easily prevent a tank from getting decent threat
early on. Make sure to avoid standing near these as a caster, as the
Concussion Blow can easily prevent a tank from getting decent threat
early on. Make sure to avoid standing near these as a caster, as the
![]() Shield Bash will lock you out of casting for 8 seconds.
Shield Bash will lock you out of casting for 8 seconds.
Shattered Hand Executioner
This is the enemy needed for multiple quests as mentioned above. He is only available in Heroic difficulty. He drops various primals and potions if you kill him before he begins to execute his prisoners.
Overview of Bosses in The Shattered Halls
Here we will give you a full rundown of what you can expect from each of the bosses found here on both Normal and Heroic difficulties as well as the items they drop.
Grand Warlock Nethekurse

 Death Coil
 Shadow Cleave
 Dark Spin
- An unnamed ability that creates Fissures in the room
This is a fairly easy boss. Move out of the Fissures as soon as possible to
avoid taking unnecessary damage. Try to save cooldowns for when the boss reaches
low health, as the ![]() Dark Spin can be punishing if it takes too long to
kill him.
Dark Spin can be punishing if it takes too long to
kill him.
Loot from Normal
| Item | Required Level | Item Type | Slot |
|---|---|---|---|
| 68 | Plate | Head | |
| 68 | Cloak | Back | |
| 68 | Cloth | Wrist | |
| 68 | Waist | ||
| 68 | Idol | Relic | |
| 375 | Tailoring Pattern | Misc |
Loot from Heroic
As with most end game Level 68+ dungeons, Rare drops are the same between Normal and Heroic difficulties. In this section, we will list the items specific to Heroic mode only.
| Item | Required Level | Item Type | Slot |
|---|---|---|---|
| BoP | Gem | Misc | |
| BoP | Gem | Misc | |
| BoP | Gem | Misc |
Blood Guard Porung

- Cleave
- This boss is accompanied by two Shattered Hand Archer
Blood Guard Porung can only be found in the Heroic difficulty. He is at the end of the gauntlet where players must dodge flaming arrows and patches of fire while fighting through continually-spawning waves of Shattered Hand Zealots.
Make sure to not be in front of him to avoid his large ![]() Cleave.
Typically you will want to kill or crowd control the two Shattered Hand Archers
that are linked with him, as they deal high damage and have some AoE. Be
cautious to not run too far into the area he is located as there may be a
Shattered Hand Assassin nearby in hiding.
Cleave.
Typically you will want to kill or crowd control the two Shattered Hand Archers
that are linked with him, as they deal high damage and have some AoE. Be
cautious to not run too far into the area he is located as there may be a
Shattered Hand Assassin nearby in hiding.
Loot from Heroic
As this boss is specific to Heroic difficulty only, he only has a Heroic loot table.
| Item | Required Level | Item Type | Slot |
|---|---|---|---|
| 70 | Accessory | Neck | |
| 70 | Plate | Shoulder | |
| 70 | Waist | ||
| 70 | Cloth | Legs | |
| 70 | Leather | Feet | |
| BoP | Gem | Misc | |
| BoP | Gem | Misc | |
| BoP | Gem | Misc |
Warbringer O'mrogg

You will want to start off by clearing the pack of two
Shattered Hand Champions nearby and scouring the area surrounding
Warbringer O'mrogg for any hidden Shattered Hand Assassins. These
can cause a wipe if pulled by a player attempting to run away from the boss or
if accidentally pulled by someone during a ![]() Fear.
Fear.
Warbringer O'mrogg consists of two phases. The first phase is very
straightforward, requiring no special treatment. The second phase begins with
O'mrogg turning red and resetting his threat. He will use ![]() Beatdown on
a random player, giving them a high amount of threat right after resetting all
previous threat. This person will need to kite the boss until the tank can
regain threat, or kite in a manner so that other DPS can still reach O'mrogg
and keep DPSing.
Beatdown on
a random player, giving them a high amount of threat right after resetting all
previous threat. This person will need to kite the boss until the tank can
regain threat, or kite in a manner so that other DPS can still reach O'mrogg
and keep DPSing.
During this phase he will cast ![]() Blast Wave, slowing
nearby players. He also deals very high damage as he ignites his weapon with
Blast Wave, slowing
nearby players. He also deals very high damage as he ignites his weapon with
![]() Burning Maul and deals splash damage to anyone around
his target if his melee attacks land.
Burning Maul and deals splash damage to anyone around
his target if his melee attacks land.
Loot from Normal
| Item | Required Level | Item Type | Slot |
|---|---|---|---|
| 70 | Shoulder | ||
| 68 | Cloth | Feet | |
| 68 | Dagger | Main-Hand | |
| 68 | Two-Handed Mace | Weapon | |
| 68 | Bow | Ranged Weapon |
Loot from Heroic
As with most end game Level 68+ dungeons, Rare drops are the same between Normal and Heroic difficulties. In this section, we will list the items specific to Heroic mode only.
| Item | Required Level | Item Type | Slot |
|---|---|---|---|
| BoP | Gem | Misc | |
| BoP | Gem | Misc | |
| BoP | Gem | Misc |
Warchief Kargath Bladefist

When engaging the boss, it is important to move up together at the same time as a group. When the boss is engaged, Shattered Hand Assassins will spawn at the bottom of both ramps, effectively preventing escape from Warchief Kargath Bladefist. Make sure to move up together and not leave anyone behind including any pets, totems, or anything similar that might draw the assassins' attention.
Warchief Kargath Bladefist deals very large amounts of AoE damage
with all of his abilities. As such, it is very important to spread out as much as
possible. Melee DPS should attempt to stand at max melee range and be as spread
from others as possible, while ranged players should look for a corner of the room currently
not occupied by anyone else. It is very possible to die in a matter of
seconds from the ![]() Blade Dance if your party is grouped up too much.
Blade Dance if your party is grouped up too much.
Periodically throughout the fight, adds will be called in to aid
Warchief Kargath Bladefist You will typically want to have the tank
pick these up and keep nuking the boss down, or use some form of crowd control
on them. If your group is melee-heavy, it may be beneficial to have one melee
DPS stick to the adds to help spread the ![]() Blade Dance damage out. The
adds spawned during the fight can be found below:
Blade Dance damage out. The
adds spawned during the fight can be found below:
- Heathen Guard — This enemy has no abilities worth mentioning, but deals moderate damage.
- Reaver Guard — These will deal moderate damage, along with a
Cleave and
 Uppercut. Avoid getting knocked out of the room
by their abilities.
Uppercut. Avoid getting knocked out of the room
by their abilities. - Sharpshooter Guard — This Ranged-based attacker will
disorient a random target for 4 seconds with
 Scatter Shot.
Loot from Normal
| Item | Required Level | Item Type | Slot |
|---|---|---|---|
| 70 | Hands | ||
| 70 | Hands | ||
| 70 | Plate | Hands | |
| 70 | Cloth | Hands | |
| 70 | Cloth | Hands | |
| 70 | Leather | Hands | |
| 70 | Plate | Legs | |
| 70 | Accessory | Trinket | |
| 70 | Fist Weapon | Main-Hand | |
| 70 | One-Handed Mace | Main-Hand | |
| 70 | Off-Handed Weapon | Off-Hand | |
| 70 | Wand | Ranged Weapon |
Loot from Heroic
As with most end game Level 68+ dungeons, Rare drops are the same between Normal and Heroic difficulties. In this section, we will list the items specific to Heroic mode only.
| Item | Required Level | Item Type | Slot |
|---|---|---|---|
| 70 | Cloth | Wrist | |
| 70 | Leather | Wrist | |
| 70 | Plate | Feet | |
| 70 | Weapon | Main-Hand Fist | |
| BoP | Gem | Misc | |
| BoP | Gem | Misc | |
| BoP | Gem | Misc |
Recommended Group Composition for The Shattered Halls
The Shattered Halls consists of mostly trash pulls that have six or more mobs in them. For that reason, a Protection Paladin is the most desirable tank for this dungeon. That being said, this dungeon can still easily be completed by any tank. As mentioned, the packs are fairly large so AoE damage is preferable.
A minimum of one form of crowd control is strongly advised for this dungeon, and any more beyond that will be put to good use as the packs are extremely large here. On Heroic difficulty, this is almost essential to completing the dungeon safely.
A Hunter is a strong addition to any Shattered Halls group, as
![]() Misdirection helps greatly with pulls and either
Misdirection helps greatly with pulls and either
![]() Frost Trap can be used to slow the mobs or
Frost Trap can be used to slow the mobs or
![]() Freezing Trap can be used to crowd control one instead.
Freezing Trap can be used to crowd control one instead.
A Shaman is also another great addition to the party, as
![]() Poison Cleansing Totem,
Poison Cleansing Totem, ![]() Earth Shock, and
Earth Shock, and
![]() Bloodlust /
Bloodlust / ![]() Heroism can be utilized to great
effect in this dungeon.
Heroism can be utilized to great
effect in this dungeon.
Finally, a Mage is a very solid pickup for their consistent crowd
control with ![]() Polymorph and ranged interrupts via
Polymorph and ranged interrupts via
![]() Counterspell.
Counterspell.
Changelog
- 16 Jun. 2021: Added images of enemies.
- 26 May 2021: Guide added.
This guide has been written by Abide, TBC veteran for nearly a decade. Abide is a Warrior tank and multi-class expert currently playing on Faerlina as Horde. You can find him in the the Icy Veins Discord. You can also see him live on Twitch.
- UI Updates: Burning Crusade Classic Hotfixes, July 17th
- The Best Camelot Theory Yet Connects Classic+ to WoW’s Original Design
- Classic Era’s New UI Could Break Nameplate and Raid Frame Addons
- Icy Veins is Looking for Dedicated WoW Classic Writers
- WoW Classic+ Leak Claims Deadmines, Death Knights, and Karazhan Are Coming
- WoW Classic on a Phone?! This Player Shows It Actually Works
- Blizzard Confirms No Fresh Season of Discovery Servers, Fueling Classic+ Rumors
- XP Blocker Moves: Season of Discovery Hotfixes, June 25th