
Crucible of the Unbroken Guide for Beastmaster — Dawntrail 7.56
This page covers the Crucible of the Unbroken, Beastmaster-specific content that has you progressing through a series of combat challenges.
Introduction
The Crucible of the Unbroken is the exclusive solo challenge content for Beastmaster. It was designed by Masaki Nakagawa ("Mr. Ozma"), FFXIV's lead combat designer, and is described as "a completely new type of duty, unlike anything else in FFXIV so far."
That description is doing quite a bit of handwaving. Quite simply, the Crucible is a roguelite. You take a roster of beasts onto a board, move between nodes, fight a series of encounters with no healer and limited resources, and try to reach the end with your team intact. If you have played this kind of game before you will find your footing quickly. If you have not, the first board is a genuine wall, and that is worth knowing going in rather than discovering the hard way.
It is also not optional. The Beastmaster job questline runs directly through the first three boards, so if you want to finish the story, you are clearing these.
The Five Boards
There are five boards in total, split into two groups. The three Boards of the Unbroken are the "easier" boards. The two Master's Boards unlock afterwards and are where the difficulty lives.
| Board | Sync | Notes |
|---|---|---|
| First Board of the Unbroken | Level 30, Beast Rank 5 | Your introduction, and the hardest board relative to what you have available when you first reach it. |
| Second Board of the Unbroken | Level 40, Beast Rank 10 | Requires a bit more usage of the duty actions for juggling damage. |
| Third Board of the Unbroken | Level 50, Item Level 100, Beast Rank 15 | A noticeable step up, and where an untrained roster becomes more noticeable. |
| First Master's Board | Level 50, Item Level 120, Beast Rank 20 | Another big step up, may require grinding gear upgrades. |
| Second Master's Board | Level 50, Item Level 135, Beast Rank 25 | A significant step up, will definitely require many gear upgrades. |
How a Board Works
A board is a set of connected nodes that you move through. Most nodes are encounters, and the rest are campsites, item pickups, and similar. You are given coins and items along the way, and both are spent within the run. Anything you are still holding at the end disappears, so there is no reason to hoard.
For the full list of what you can pick up, buy and equip inside a run, and what the Crucible-specific stats on those items actually do, see the Crucible Items page.
Read the Board Before You Fight
This is the single most useful habit and the game does a poor job of pointing you at it. Every enemy on the board can be clicked before you engage it, which opens a panel telling you what it is weak to, in red text, by both element and physical or magical damage type. It also tells you whether its casts can be interrupted, and to which status effects it is vulnerable.
All of the information you need to solve an encounter is in that panel before you walk into it. The board is a knowledge check far more than a damage check, and most of the people bouncing off it are the ones treating it like a dungeon pull.
Campsites
Campsites let you rest, healing yourself and your familiars, and feed your beasts. There is a wrinkle worth exploiting. If you do not heal any of your beasts at a campsite, you receive a 90% personal heal instead. When your beasts are in reasonable shape and you are the one who is hurt, skip healing them entirely.
Camp is a great way to heal up if you're hurting. At each camp, you can divide the healing between yourself and your beasts. The total amount of healing goes up the further into the Crucible you get, but the total amount of healing gets split between you and the number of beasts you select. For example, if you have the option to heal yourself and two familiars you can heal yourself for 90%, yourself and one familiar for 45%, or yourself and two familiars for 30% each.
Several of the board bonuses ask you to clear without ever using a campsite or without ever feeding, so on a scoring run these are worth banking rather than spending.
What You Lose Going In
Before the duty actions, it is worth knowing what you do not have in here, because it shapes every decision you make.
- No (outside) potions. This one is specific to the Crucible. You cannot use them at all inside it.
- No role actions, so no Second Wind, no Bloodbath and no Arm's Length. This is not a Crucible rule, Beastmaster simply does not get role actions anywhere, but it bites hardest here.
Combined with Beastmaster having almost no innate sustain, this is why the mode is built around not taking damage in the first place. Crowd control and aggro management are your health bar.
Duty Actions
You get two duty actions inside the Crucible, and they exist because Beastmaster has no enmity tools of its own. Learning them is not optional, and the very first encounter on the very first board is built specifically to teach you.
 Challenge forces the enemy to target you.
 Snarl turns your familiar into the tank and forces enmity
onto it. Note that it also nullifies your own enmity generation, which the
in-game help text does not explicitly mention.
Scoring, Ranks, and Board Bonuses
Every clear is scored, and the score sets your rank. The ranks are (in order): Apprentice, Novice, Journeyman, Adept, Exemplary, Renowned, Elite, Apex, and Legendary. The higher your score on a run, the more experience and Remnants you get as rewards.
Score comes from board bonuses, which are a long list of optional clear conditions. They cover roughly these categories:
- Roster size: Separate bonuses for clearing with 1-3, 4 -5, or 6-7 familiars. This counts your roster, not how many you actually used, so bringing extra beasts along to level them will cost you the bonus.
- Survival: No incapacitated familiars, all familiars at full HP, Beastmaster at full HP, and no damage down or vulnerability up taken. On top of this, there are additional points awarded for your own HP at the end even if it's not completely full. If you're already using items, it is worth it to try to heal yourself at the end to get extra points.
- Restrictions: No campsite, no feeding, no coins spent, no items used, no beast gear acquired. There are inverted versions of several of these that reward heavy use instead, which is sort of nice in the item case. You still collect items as you go, and if you don't use them you could end up with the "have 10 items" bonus at the end.
- Kin Gambit: A bonus for clearing with a team drawn from a single kin type (Beastkin, Soulkin, etc.). These also feed the Gambit achievements and their associated titles on the Second Master's Board.
- Universality: Performing the full combo at least 5, 10, or 15 times. Fights are generally way to short for these to actually come up.
- Degrees: Clearing under the first, second, or third degree.
You can see the full list, and what each one pays, from View Bonuses on the board layout screen, either before or during a run.
As a rough guide to the top end, Legendary tends to land around ~17500-18500 points depending on the board.
One tool worth knowing about for scoring runs is the
 Temporal Sand item, which fully resets an encounter. If you are
chasing an Unbeastable bonus and you fumble an encounter partway through, you
can deliberately wipe, redo the fight, and keep the bonus.
Degrees
Once you have completed all boards and worked through the Beastmaster job quests, you unlock a mode built specifically as a challenge. Degrees increase enemy HP and damage across three escalating levels, from the first degree to the third.
Third degree clears are the hard requirement for the best rewards in the job. The Unbroken Endgame achievement, which unlocks the Beastmaster's Earrings, wants all three Boards of the Unbroken and both Master's Boards cleared under the third degree.
Third degree is also a requirement for the Crucible rankings. This is an exceptionally difficult challenge and will take lots of practice to complete.
Leveling Your Beasts
Beasts gain ranks by running the Crucible, and rank matters a great deal. Ranks run to a maximum of 25, which is also when you unlock beast glamours.
The things that impact beast experience is:
- Score: Hire scores yield more experience.
- Clearing the board: You miss out on bonuses if you don't clear.
- How many beasts you bring: Fewer beasts = more exp per beast.
- Syncing: See below, because this is the one most people get wrong.
- Certain feeds:, which directly increases the experience a beast
earns from the run. Specifically
 G1 Primafodder and
 G2 Primafodder give experience bonuses.


Beast Rank Sync
Beasts cap at rank 25, but every board also has its own beast rank sync, and this is what decides where your leveling runs should go. You can see the figure for a board on the selection screen before you commit to a run, alongside the level and item level syncs.
The sync is very lopsided:
- Above the sync, you take an experience penalty. Returns diminish the further past it a beast is, so a high rank beast farming a low board is wasting most of the run.
- Below the sync, you gain nothing extra. An underranked beast does not earn accelerated experience to catch up.
Rank matters for clearing comfort. By rank 5, dealing significant damage lets you skip mechanics outright on the first board. You will definitely feel the difference as the beasts level up.
The best strategy for leveling up involves running whichever board doesn't sync the beasts down, that you can clear quickly, and that you can clear with a decent score. In practice, this just means bringing beasts:
- < 5 to board one,
- < 10 to board two,
- and so on.
This is also why the leveling run and the scoring run are genuinely separate activities. A scoring run wants three beasts and no feed. A leveling run wants a full roster, exp feeds, and the fastest clear you can get.
Rewards
- Bright and Faded Remnants: The upgrade currency for your job gear. The two exchange at two Faded for one Bright. A chunk of your weekly income is capped through the Challenge Log. These are also used for vanity items.
- Gourds: You can buy beasts outright. Every duty-locked beast can be bought this way, and the vendor's stock expands once you have cleared the second board, so a bad run of dungeon luck is never a dead end. See the Beasts page.
- Weapon and beast glamours: Weapon glamours for achievements, beast glamours for hitting rank 25 with that beast.
- Leaderboard placements. Rankings are datacenter wide, with achievements for placing at all, placing highly, and taking first. This system isn't fully understood yet since the first season starts two weeks after release
Picking Your Beasts
There is no fixed best team, and anyone who hands you one has misunderstood the content. Because every encounter tells you its weaknesses before you engage, the right roster is the one that covers the damage types and elements a given board asks for. What follows is how to think about it rather than a list to copy.
One piece of interface friction to know before you start: your beasts deselect after every encounter. You have to pick them again each time, and walking into a boss with an empty set of horns because you clicked ready too fast is a well-trodden way to lose a good run.
Crowd Control Is the Real Currency
You have no healer and very little self-sustain, so damage you never take is worth more than damage you deal. The beasts that lock enemies down carry runs:
 Chimera for
 The Ram's Voice, an instant Deep
Freeze. The strongest single piece of control in the job.
 Ziz for Petribreath, a 20 second petrify. This
is the answer if you have not captured a Chimera yet, and Ziz is a level 16
overworld capture rather than a dungeon boss.
 Buffalo for
 Heave, a straightforward stun.
Stun into
 Parting Blow deletes most trash outright.
 Treant for
 Acorn Bomb, an area Nightmare with no
duration falloff on repeats. Because it is a Trick rather than a Tempered
Release you can loop it, which makes it the most sustainable control you
have.
 Coeurl for Blaster and paralysis, with a 25%
damage reduction attached.


Do note that this is mostly only helpful for earlier encounters or encounters with add spawns, but if you're struggling with those sorts of fights then these will be immensely helpful to you.
Utility Worth a Slot
 Bat for
 Blood Drain. The closest thing you have
to a heal, plus evasion.
- Any Soulkin, such as
 Coblyn, for
 Soul Crush as
an interrupt. The board panel tells you which casts can be interrupted, so you
know before you walk in whether you need this.
 Slime or
 Geshunpest to survive one more
auto-attack, which is occasionally the difference between a clear and a
wipe.
 Wespe for Final Sting. This is your delete
button for a single priority target, and it is what turns some gimmick
encounters into non-events.


Use Your Beast as a Health Buffer
This took people a while to work out. Your familiar's HP is a resource rather than just a liability. Managing aggro with the duty actions so your beast absorbs damage that would otherwise land on you is one of the biggest levers in the whole mode.
Beast Loadout Recommendations
In general, any set of beasts will work as long as they are the appropriate rank for the board you're working on.
Some good starter loadouts that will work for all boards are:
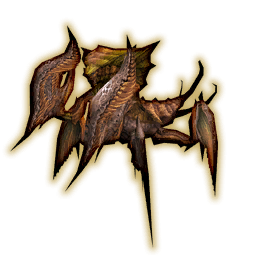 Mantis
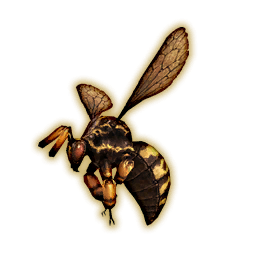 Wespe
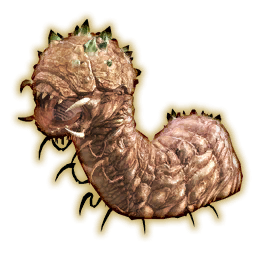 Worm
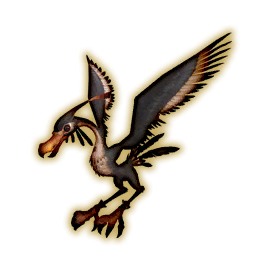 Vulture
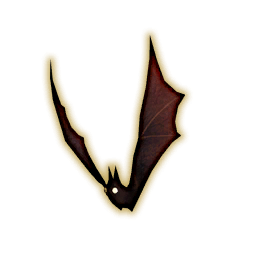 Bat
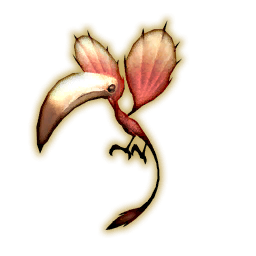 Colibri
Mantis, Diremite, and Wespe have a ton of damage together. The Wespe has
 Final Sting which is a fantastic finisher. If you do enough damage
you skip many mechanics which makes your life much easier.
Vulture, Bat, and Colibri also have a significant amount of damage and some utility. Vulture can dispel buffs from enemies and Bat can cleanse debuffs from you.
This can be your core set of beasts that carry you through the whole thing
even though it's only three beasts. To round out the rest, I recommend bringing
beasts like  Ice Golem to have an interrupt through
 Soul Crush and
 Geshunpest to have a dispel through
 Scouring Ash.
 Beastskin is a really strong buff and
it can be helpful to open up a fight by summoning a beastkin, using Beastskin,
then summoning a different beast to start the fight right after.
Gear Recommendations
For the first two boards you can use any level-appropriate gear or gear that syncs down (e.g. Ironworks Striking gear). For the last three boards you will want to use the Beastmaster gear and keep it upgraded as much as possible.
Refer to the Beastmaster Gear page for a full explanation on upgrade priorities.
Item Selections
Beast gear is strong and my preferred choice at most stops. Consumables can be helpful, and in some cases are extremely strong and let you trivialize certain stages (detailed below). It's important to pick whatever you need at any given moment; if you need healing grab a healing item. If you are doing well on health and can afford to take damage, take damage. More info can be found on the Crucible Items page.
General Advice
You will not encounter every enemy in every run, it depends on the path you take. Some are harder than others and I'll make some path recommendations based on that to give you an easier time where possible.
Make sure your gear is up to snuff! A lot of people attempt the first board without making sure they have a full set of level 30 gear and then get absolutely demolished. Similarly, the higher level boards benefit dramatically from having upgraded Beastmaster gear. It may take several tries and several upgrades before you can nail it down, but it does get easier each time. Additionally, make sure that your beasts are leveled up enough for the board that you are doing.
When first learning a fight, I recommend making very liberal use of
 Snarl and tanky minions like Ice Golem to soak damage while you
figure out the mechanics. If you treat each run as a learning opportunity rather
than a failed attempt, you can progress a lot more efficiently. Focusing on
troublesome mechanics and how to overcome them without panicking will go a long
way.
This page will not describe optimal rotations for each stage since it varies based on which beasts you bring and the fight itself. Outside of higher-level optimization any rotation works perfectly fine. To learn about Beastmaster rotation's in general, refer to the rotation page.
Board of the Unbroken Guides
Quick note: every enemy panel lists the important casts and how to answer them, so most of what follows is just explanations rather than "secret" or "cheese" strats. If an encounter has a hard requirement, it will be called out.
First Board of the Unbroken
Our first board which we are given during our level 30 job quest. It is a bit daunting the first time, but overall is not too bad. A lot of the enemies here will use abilities similar to what we have seen in dungeons previously.
My recommended safe path is:
- Left at the first fork
- Right at the second fork
This gets you two camps which allows you to heal twice. If you don't need the health, you can opt for going left at either fork to get an additional item.
First Board Encounters
Every encounter on the First Board of the Unbroken, in roughly the order you meet them. Select an encounter below for its ability list and how to handle it. You will not see all of these in a single run; which ones you get depends on the path you take. A good loadout that covers everything needed for this board is:
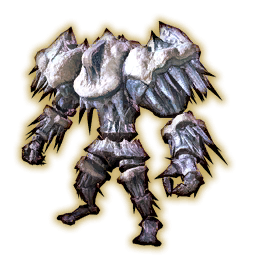 Ice Golem
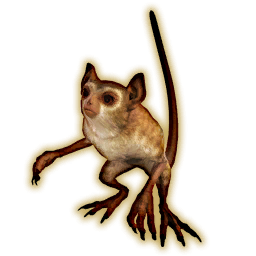 Opo-opo
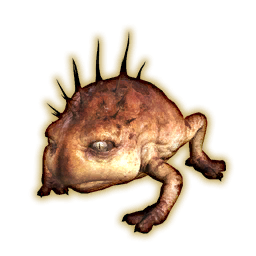 Gigantoad
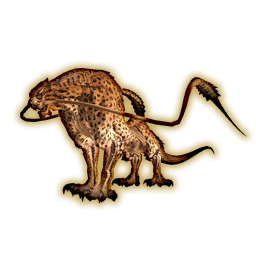 Coeurl
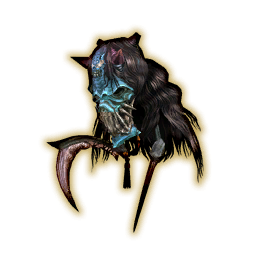 Geshunpest
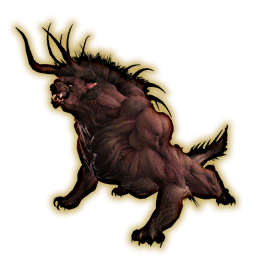 Behemoth
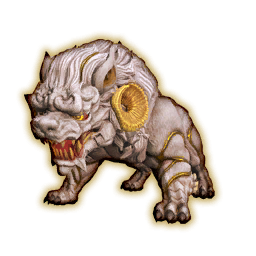 Cu Sith
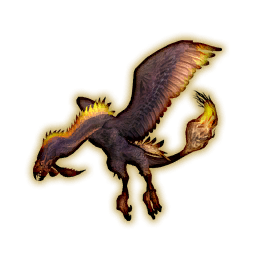 Zu
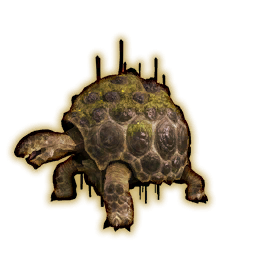 Adamantoise
Colibri
In this loadout, we have plenty of damage, interrupts, cleanses, and
tanks. If you find HP management difficult, you can use
Ice Golem,  Gigantoad,
 Behemoth,
 Cu Sith, and
 Adamantoise to tank for you on the
stages where they're recommended.
Enemy #1: Bone Knight and Bone Bishop
Recommended Loadout
Ice Golem
Opo-opo
Gigantoad
This gives you an interrupt, tankiness, and Blunt damage.
Bone Knight Abilities
- Ossify: interruptable damage up buff
- Tumulus: small circle AoE around the Knight
- Forward Guard: applies a Regen buff and Directional Parry buff, blocking all damage from the front
Bone Bishop Abilities
- Death Spiral: donut-shaped AoE centered on the Bishop
- Black Eruption: expanding/marching circle AoE that starts on the Bishop and expands outwards in cardinal or intercardinal directions
This fight has two targets up the whole time, but it's pretty easy to manage.
The Bishop will open up with Death Spiral which is a donut-shaped AoE, so
just stand underneath him when it goes off. The Knight will frequently cast
Ossify which gives a damage up debuff. This can be interrupted with the
the Soul Crush, but it's not too spooky otherwise. After Death
Spiral goes off, the Knight will start casting Tumulus, so just step
away from him. After this, the Bishop will cast Black Eruption. To avoid
this, stay away and wait for at least the second explosion before moving
underneath the Bishop, as there will be a small safe space underneath him during
the third onward. If you have trouble doing this, just stay out until it is very
safe to go in.
After a bit, the Knight will use Forward Guard. You can use
Snarl and  Challenge to juggle aggro so either you or
your beast can be behind and deal damage. After a certain amount of damage is
dealt he will drop his guard and return to the normal rotation.
At this point both will likely be dead, but if not then the Bishop will cast Ancient Aero which is a line AoE that applies a cleansable Windburn DoT effect. Beyond this, the mechanics will just cycle until they're dead.
Enemy #2: Arch Demon Piece
Recommended Loadout
Coeurl
Geshunpest
Behemoth
This gives you plenty of Lightning damage and bulkiness.
Arch Demon Piece Abilities
- Abyssal Charge: spawns several spears around the arena that shoot line AoEs at the player
- Dismember: five line AoEs going east to west, or west to east, that cover the whole board and go off one at a time
- Abyssal Transfixion: spawns a bunch of weapons that deal damage: swords that drop circle AoEs underneath them and an axe that deals a frontal cleave from the Arch Demon Piece
The Arch Demon is similar to many enemies we've already seen of this type throughout the game. It will open up with Abyssal Charge and start targeting you, so just move out of the line AoEs. The next attack will be Dismember, which I like to dodge by just standing in the middle and stepping into one of the dangerous squares after it's gone off. The timing for this is actually deceptively tricky so it may take a few tries to figure out the rhythm. After this he will use Abyssal Transfixion which spawns a bunch of swords in the air that drop circle AoEs underneath. Move away from these swords. He will finish by spawning an axe that performs a cleave attack in front, so stand behind.
The Arch Demon will loop these mechanics until it's dead, but it will start layering them on top of each other. I recommend trying to burn it down quickly to avoid this as it starts to get hectic.
Enemy #3: Piscodemon Piece
Recommended Loadout
Cu Sith
Zu
Adamantoise
This gives you plenty of damage, Slashing damage via Zu, and tankiness.
Piscodemon Piece Abilities
- Void Blizzard III: exaflare/marching-style AoEs from the north
- Clear Mind: applies damage up debuff
- Arcane Blast: unavoidable AoE
- Void Flare Star: spawns a fireball that deals proximity-based damage
- Void Thunder III: cross AoE under the player
- Void Aero III: donut AoE under the Piscodemon Piece
This boss gets a little tricky, and just like with the Arch Demon Piece will get hectic the longer it goes on, so I recommend trying to just kill it as quickly as possible if you choose this path. It will open up with Void Blizzard III; look at the north wall to see where the circle AoEs are spawning. Stand in one of the "lanes" that doesn't have the circles at first. The circles will start moving southward in their lanes. Once a circle goes by next to you, move into that lane to avoid the circles coming towards you.
After Blizzard, the Piscodemon Piece will use Clear Mind and apply a
damage up buff to itself and cast Arcane Blast. You can dispel the buff
with something like Bloodcurdling Caw. Next the enemy will cast
Void Flare Star; just move away to reduce incoming damage. Piscodemon
Piece follows up with Void Thunder III and Void Aero III, so dodge
accordingly. After this is another Clear Mind/Arcane Blast combo. At this point
the boss will begin looping mechanics but layering them over each other, so it
gets a bit hectic.
Enemy #4: Banemite Piece
Recommended Loadout
Geshunpest
Colibri
Ice Golem
This gives you a cleanse via Geshunpest, and then plenty of damage with Colibri, as well as extra Ice damage and tankiness from Ice Golem.
Banemite Piece Abilities
- Bedrock Uplift: expanding circle AoE
- Deadly Thrust: melee hit that applies cleansable poison debuff
- Venom Web: "Shiva circle" AoE
Miteling Piece Abilities
- Silkscreen: line AoE that applies Heavy
The Banemite Piece will open up with Bedrock Uplift. Stand next to the first circle that appears in the center of the room, and step into it when it goes off to avoid subsequent AoEs. It will follow up with Deadly Thrust, which is just a cleansable poison debuff. The Banemite Piece will then use Venom Web, which is similar to just about any "Shiva circle" AoE in the game. The center will explode first, and then a bunch of circles around the perimeter will explode in the order that they appear. Move out of the center and next to the first circle that appears on the outside, but on the opposite side of the rotation. Any safe space will do fine; just step into the center after it goes off.
After a bit the Banemite Piece will spawn three Miteling Pieces. These aren't too scary and mostly just cast Silkscreen, so dodge accordingly. At this point the boss will just loop mechanics again.
Elite Enemy #1: Ogre Piece
Recommended Loadout
Zu
Colibri
Gigantoad
This gives you a lot of damage with Zu and Colibri, as well as tankiness
and  Quelling Wave from Gigantoad.
Ogre Piece Abilities
- Scorching Smite: frontal cone
- Allfire: spawns two fire circles on the ground and many circle AoEs
- Burning Ward: goes invulnerable and spawns wisps on the perimeter that slowly march to the center, exploding on contact to deal damage and apply a vulnerability up debuff
- Fire Call: spawns a fireball that moves towards the player and blows up on contact
- Straight Punch: strong melee hit
This boss is quite similar to the last boss from Halatali, with some small twists. The Ogre Piece will open up by jumping to a wall and casting Scorching Smite, a large frontal cone AoE. Move to the side or behind him to avoid it. After this he uses Allfire and spawns two large fire circles on the ground while also spamming circle AoEs on the ground, so dodge accordingly. The Ogre Piece will then jump to one of the fire circles and begin casting Scorching Smite again. This time before the cast finishes, he will teleport to the other fire circle before the cone goes out. Instead of standing behind the boss, stand behind where he will appear on the other circle.
The boss will then cast Burning Ward and become invulnerable.
Several Wisp and Great Wisp Pieces will spawn around the arena and start
marching towards the center. Just kill these before they get to the center.
Use Gigantoad to add Quelling Wave to your arsenal which is
ranged and deals bonus damage to the Wisps.
Once Burning Ward is done, most of the mechanics will just be looping. There is a new cast in Fire Call, which spawns a fireball that drops a circle AoE underneath it when touched so just run away from it until it despawns. Straight Punch will also be used periodically.
Boss: Pas de Seul
Recommended Loadout
Cu Sith
Behemoth
Geshunpest
This gives you plenty of Piercing damage, a cleanse, and a large AoE to deal with the adds.
Pas de Seul Abilities
- Blood Rain: circle or donut AoE
- Void Aero II: untelegraphed line AoE that throws a wind orb which spawns radial cone AoEs
- Cold Caress: cleansable poison debuff
- Blood Sword: melee hit that heals her
- Beguiling Mist: applies Nightmare and spawns two purple hearts that begin moving towards each other, creating a large AoE when they connect
Succubus Mage Abilities
- Fanaticism: applies a cleansable damage up buff
- Void Fire: large circle AoE
Succubus Knight Abilities
- Sweet Steel: frontal cone AoE
Pas de Seul can be slightly daunting the first time you see her, but once you know her moves she isn't too bad. She will open up with Blood Rain; if she has her hand raised and glowing then this is a circle AoE and you need to get out, otherwise it is a donut AoE and you need to stay in. She will follow up with Void Aero II, so stand behind or to the side as she casts it to avoid it. This will spawn a wind orb that casts a bunch of radial cone AoEs, so just watch the ground and move into the safe spot.
Pas de Seul will then use Cold Caress, which is a cleansable
poison debuff, followed by Summon which will spawn a Succubus Mage and two
Succubus Knights. These are best dealt with by burning them down as quickly
as possible; using Behemoth's Meteor should one-shot these
adds with ease. Awhile after this, she will use Blood Sword which
will heal her. The last ability she will use is Beguiling Mist, which
applies Nightmare and spawns two purple hearts that are tethered together.
These will begin moving towards each other and create a large AoE underneath
when they connect, so just move away from them. After this, she will loop
mechanics until she is dead.
Second Board of the Unbroken
Our second board which we are given during our level 40 job quest. It is a small step up in difficulty from the first board, but is still easily doable. As with the first stage, many enemies here resemble enemies we have seen in dungeons previously.
My recommended safe path is:
- Right at the first fork
- Right at the second fork
This gets you an early camp for healing and avoids as many enemies as possible. You can try going left at the second fork if you really need a campsite, but you may end up fighting an enemy if you do so.
Second Board Encounters
Every encounter on the Second Board of the Unbroken, in roughly the order you meet them. Select an encounter below for its ability list and how to handle it. You will not see all of these in a single run; which ones you get depends on the path you take. A good loadout that covers everything needed for this board is:
Zu
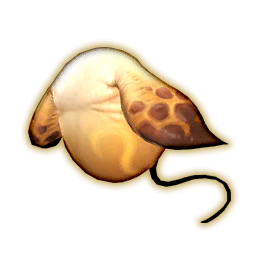 Ghost
Coeurl
Adamantoise
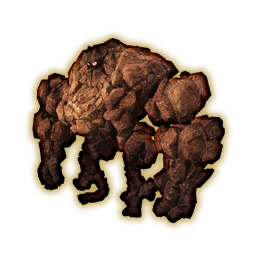 Golem
Worm
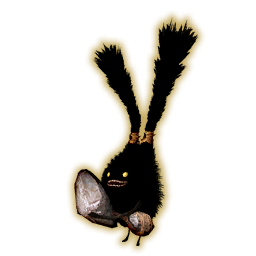 Spriggan
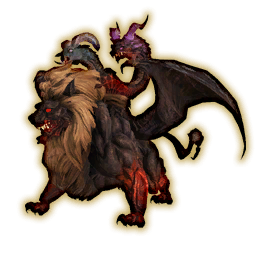 Chimera
Gigantoad
Opo-opo
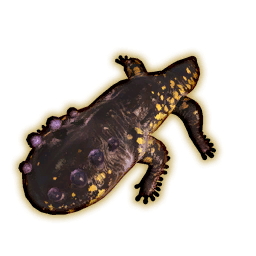 Salamander
Cu Sith
This covers every encounter on this board, so you can bring the whole roster and pick out the beasts you need at each stop.
Enemy #1: Manticore Piece
Recommended Loadout
Adamantoise
Zu
Ghost
This gives us tankiness and Wind damage.
Manticore Piece Abilities
- Arm and Hammer: cleaves one half of the room, with the glowing arm indicating which side will be cleaved
- Deadly Hold: strong melee hit
- Hammerleap: faces a wall and jumps to it with a large circle AoE
- Heads and Tails / Tails and Heads: cleaves in front and behind, or behind and in front respectively
- Charge and Hammer: telegraphs line AoEs for charges as well as an initial Arm and Hammer glowing side, then finishes by cleaving the initial Arm and Hammer followed immediately by the other
The Manticore Piece will use Arm and Hammer right away. Go to whichever side does not have the glowing arm. He will then do it again but with the other side. Immediately after this is Deadly Hold, which is unavoidable. You can have your pet tank it for you.
After Deadly Hold, the Manticore Piece will face a wall and use Hammerleap. Run away from the wall it is facing and get far away to avoid the AoE. He will follow up with Heads and Tails or Tails and Heads, so look at what he is casting and dodge accordingly.
The most complicated mechanic in this fight is Charge and Hammer. The Manticore Piece will signal a cleave with a glowing arm, so remember which for later. He will then telegraph line AoEs on the floor that must be avoided. After the charges, move to whichever side was safe from the glowing arm. Once it goes off, move to the side that he just cleaved since he will cleave the other side after.
After this, the boss will just repeat mechanics until it is dead.
Elite Enemy #1: Taurus Piece
Recommended Loadout
Cu Sith
Adamantoise
Chimera
This gives us Piercing damage with Cu Sith, but a lot of bulkiness for tanking with everyone.
Taurus Piece Abilities
- Mortal Ray: applies a Doom debuff with a 25 second duration
- Ruinous Ring: donut AoE
- Ruinous Locus: circle AoE
- Ray of Ignorance: spawns an orb that pulses circle AoEs that gradually grow in size as it casts
- Aetherial Fissure: spawns sigils that fire line-style AoEs across the arena
- Ruinous Contraction: donut AoE followed by circle AoE
In this boss, there are four squares on the ground. Stepping on these makes them gradually light up, and when fully lit up they will cleanse Doom debuffs. The boss starts the fight with Mortal Ray, so cleanse it by standing on one of the squares. It will also use Ruinous Ring followed by Ruinous Locus, so dodge accordingly. Immediately after, the Taurus Piece will use Ray of Ignorance. I recommend dropping this as far into the corner as you can to give yourself as much room to work with as possible. This will be paired with another Mortal Ray, so cleanse it the same way as before. The Taurus Piece will then use Aetherial Fissure. Look to the east and west to see which sigils are glowing first, and move out of their path. Once they shoot, move out of the other sigils' paths.
After this, the boss will summon four Ahriman in the corner which telegraph typical gaze-style mechanics, so look away. These apply Doom, so if you get it just cleanse it the same as before. After the gaze mechanic, the Ahriman become targetable so just kill them. The boss will start using Ruinous Contraction now which is essentially a Ruinous Ring followed by a Ruinous Locus. Beyond this, all mechanics will just be looping until the Taurus Piece is dead.
Enemy #2: Wyvern Piece
Recommended Loadout
Coeurl
Adamantoise
Cu Sith
This gives us good Lightning damage and bulkiness with Adamantoise and Cu Sith.
Wyvern Piece Abilities
- Storm's Grip: spawns wind sprites in the northwest and southeast that periodically shoot line AoEs across the entire north and south of the arena
- Typhoon: knockback, and spawns tornadoes on the edge of the arena that move to the opposite side, dealing damage when touched
- Liquid Hell: spawns fire puddles on the ground that apply Burns when walked through
- Blazing Trail: jumps to either the east or west wall and shoots a wide line-style AoE
- Storm Trail: three cone-style AoEs indicated by the glowing green sigils around the boss
The Wyvern Piece will open up with Storm's Grip. The sprites it spawns stick around for the rest of the fight, so you will be dodging their lines on top of everything that follows. It will follow up with Typhoon, so ride out the knockback and then dodge the tornadoes as they cross. Next up is Liquid Hell, so dodge accordingly, but keep an eye on where the puddles land because they stay on the ground and will matter in a moment. The Wyvern Piece will then use Blazing Trail, so run behind the boss while avoiding the puddles on your way over. The sprites will telegraph that they are about to fire while you are still moving, but you are safe to get behind the boss before those go off, so do not stop halfway. It finishes the sequence by returning to the center and casting Storm Trail, so dodge accordingly.
After this the Wyvern Piece will use Liquid Hell again, followed by another Typhoon. The tornadoes are noticeably bigger the second time, so give yourself more room than you did on the first set. Blazing Trail comes next and is handled exactly the same way as before. Beyond this, all mechanics will just be looping until the Wyvern Piece is dead.
Enemy #3: Voidmancer Piece
Recommended Loadout
Cu Sith
Golem
Worm
This gives us generally good damage coverage, as well as Earth damage and good AoE for dealing with the Zombie Pieces.
Voidmancer Piece Abilities
- Death Drive: creates a large AoE under the player that resurrects any Zombie Pieces in the area
- Dark Orb: massive circle AoE
- Evil Mist: spawns several orbs that pulsate with circle AoEs
- Mindjack: applies a Force March debuff to the player that causes them to run in the indicated direction when it expires
The Voidmancer Piece will open up with Death Drive. Drop it where it will catch as few Zombie Pieces as possible; the northeast and southwest both have tight spots along the wall that will only reach one, though the zombies are not much of a problem either way. Whatever comes up, kill it. Golem and Worm both have the area damage to clear them quickly. Their auto-attacks apply Wit's End, which becomes a Confusion debuff at 12 stacks, so do not let them chew on you for long. The Voidmancer Piece will follow up with Dark Orb and then Evil Mist, so dodge accordingly.
After this the Voidmancer Piece will use Death Drive again followed by another Dark Orb, both handled the same way as before. It finishes the sequence with Mindjack into Evil Mist. Get yourself into position before the debuff expires so that the forced run does not take you into the orbs. Beyond this, all mechanics will just be looping until the Voidmancer Piece is dead.
Elite Enemy #2: Tablitaur Pieces
Recommended Loadout
Spriggan
Chimera
Golem
This gives us plenty of damage, including Fire from Spriggan,
bulkiness, and two sources of Soul Crush to interrupt the
Rallying Cheer.
Tablitaur Piece Abilities
- 1000-tonze Swipe: half-room cleave in the direction that the enemy is facing
- 1111-tonze Swing: massive circle AoE around the enemy
- 10-tonze Stomp: knockback from blue circle on the ground
- 100-tonze Slash: strong line AoE
- Rallying Cheer: interruptible cast that applies a dispellable damage up buff
- Endless Swing: starts in a corner and slowly moves towards the player while constantly spinning and dealing AoE damage when touched
- Endless Swipes: jumps to the center and spams cone attacks while rotating
This fight has two targets up the whole time, and unlike the Bone Knight and Bone Bishop it is not easy to manage. Both Tablitaur Pieces hit for a decent chunk of damage, and they do not necessarily use their abilities in the same order every time, so you need to know how to handle all of them rather than learning a sequence. They also cast at the same time, so watch both cast bars to work out which one is resolving first.
For 1000-tonze Swipe, look at which one will finish first and
stand behind it, then swap sides when it goes off. 1111-tonze Swing
is the same idea in reverse: stand near the one casting it second, as far
away from the first as you can, then swap sides once the first has gone
off. With 10-tonze Stomp, position yourself so that you are not
knocked into a wall, and try to keep yourself and your beast from both
eating it to keep the overall damage down. 100-tonze Slash is
straightforward, so dodge accordingly. Rallying Cheer should be
interrupted with Soul Crush.
Endless Swing and Endless Swipes are the hard part. Keep running away from the spinning enemy while also avoiding the cones from the other one. This is tough, and it is worth expecting to take a few attempts before it clicks. Beyond this, all mechanics will just be looping until both Tablitaur Pieces are dead.
Boss: Loosefroxy Inkyjots and Chewchum Popoto
Recommended Loadout
Salamander
Gigantoad
Opo-opo
This gives us access to Quelling Wave for Water damage and
dispel, Blunt damage, and quite a bit of tankiness.
Loosefroxy Inkyjots Abilities
- Gobspin Headlops: either a donut or a circle AoE. If it's a sword held up and isn't glowing, it is a circle. If the sword is glowing, it is a donut
- Kinborrow: applies a dispellable vulnerability down debuff
- Gobbieboom Barrage: spawns waves of Gobbie Bombs with different effects. Small round bombs can be pushed with attacks and have a small circle AoE. Large spiky bombs cannot be pushed and have a large cross AoE
- Bomb Toss: small circle AoE
- Goblin Hammer: many medium circle AoEs all over the arena
Chewchum Popoto Abilities
- Sand Breath: frontal cone AoE
- Earthquake: enrage AoE
This is another multi-target fight, but it is way different from the previous one. The basic gist is that once again we do want to kill the targets at around the same time to prevent an infinite enrage sequence, but there is a hitch: Chewchum Popoto isn't always targetable!
The fight starts out with the worm burrowing underground. It will then
move to a sandpool, indicated with a "!" over it, and cast Sand
Breath. Move to that sandpool and stand behind it. Right after,
Loosefrox will start using Gobspin Headlops; if he shows a long
glowing sword then stay close, if it's a short non-glowing sword then get
away. Loosefrox will then use Kinborrow which can be dispelled with
Quelling Wave.
After a small delay, Loosefrox will cast Gobbieboom Barrage and spawn four round Gobbie Bombs in the center of the arena. The worm will then dash three times between different pools. Once it stops, attack one of the bombs so that it gets pushed into that pool. It will detonate and knock the worm up and onto its back. At this point use all the burst damage that you have available on the worm to get it as low as possible. During this Loosefrox will cast Bomb Toss so just sidestep the AoE while DPSing Chewchum Popoto.
The worm will do a set of three dashes followed by a Sand Breath, so dodge accordingly. At the same time, Loosefrox will drop four spiky bombs on the stage and also use Gobspin Headlops again. Avoid the spiky bomb cross AoEs while also dodging Gobspin Headlops. Loosefrox will then cast Kinborrow again, which can be cleansed as before. He follows this with Goblin Hammer which leaves very small safe spots, so dodge accordingly.
The next Gobbieboom Barrage will have both spiky and round bombs, which makes things a little bit spicier. Follow the worm to determine which pool it finishes in. The large bombs will detonate first, but there should be a safe space in the center of the arena. Hit a small bomb into the worm's pool while avoiding the spiky bomb AoE, and then again start wailing on the worm.
From this point on the mechanics will be repeating, sometimes layering over each other, until the bosses are dead.
Third Board of the Unbroken
Our third board and our first level 50 board! This one is deceptively difficult and may take many tries as well as leveling up of your beasts.
My recommended safe path is:
- Right at the first fork
- Right at the second fork
- Right at the third fork
This gets us two camps and a shop and can make things pretty safe. You
will want to make sure you pick up some sort of paralysis resistance along
the way for the final boss, such as  Crimson Ribbon or
 G2 Antiparalysis Soul Serum.
Third Board Encounters
Every encounter on the Third Board of the Unbroken, in roughly the order you meet them. Select an encounter below for its ability list and how to handle it. You will not see all of these in a single run; which ones you get depends on the path you take. A good loadout that covers everything needed for this board is:
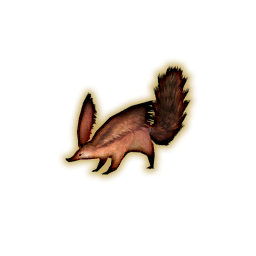 Squirrel
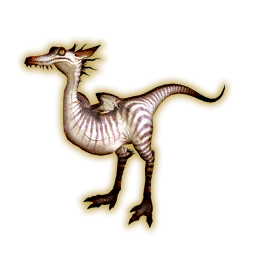 Raptor
Cu Sith
Behemoth
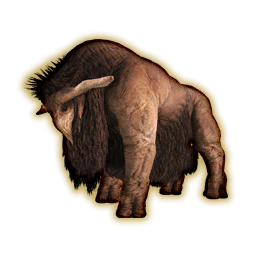 Buffalo
Ice Golem
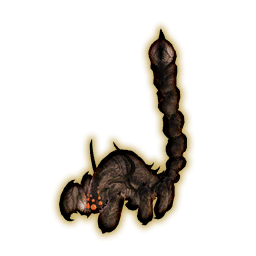 Diremite
Colibri
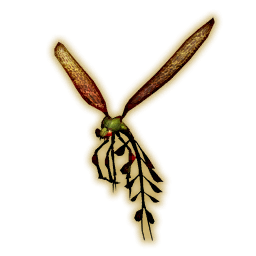 Damselfly
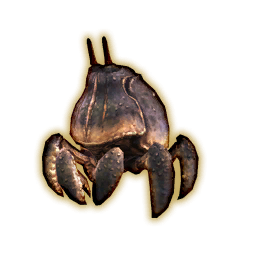 Crab
Wespe
Adamantoise
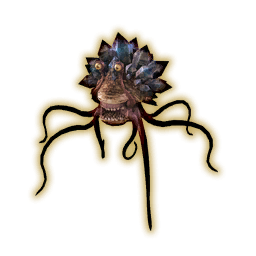 Coblyn
Mantis
Enemy #1: Cavalier Piece
Recommended Loadout
Raptor
Squirrel
Behemoth
This gets us a ton of damage, good AoE for the adds, and a lot of Fire damage.
Cavalier Piece Abilities
- Steelripper: frontal cone
- Doubling: absorbs up to five orbs to create clones
- Menace: large circle AoE from each clone
- Crushing Blade: knockback and high damage. Cannot be knockback immuned with pet cover
- Valfodr: line AoE across the entire arena from each clone
The Cavalier Piece will open up with two Bone Bishops, so kill them while avoiding Steelripper. It will follow up with Doubling and spawn two clones that use Menace, so move to a safe corner to avoid them. After this the boss will use Crushing Blade, so position yourself so that you do not get knocked out of the arena.
Two more Bone Bishops will spawn after a bit, and Meteor
makes quick work of them. This time the clones will spawn on a wall and
cast Valfodr. At this point the boss should be nearly dead, but
beyond this all mechanics will just be looping until the Cavalier Piece is
dead.
Enemy #2: Ymir Piece and Sahagin Piece
Recommended Loadout
Buffalo
Diremite
Ice Golem
Ymir and Sahagin Piece Abilities
- Paralyzing Spikes: buff on the Sahagin Piece that inflicts paralysis if hit. Cast at the start of the fight and whenever the Ymir Piece gets a new shell. Cannot be dispelled
- Water II: several baited AoEs
- Blanket Thunder: raidwide damage
- Tsunami: knockback from a wall that carries across about 90% of the arena. Cannot be knockback immuned with pet cover
- Dreadwash: interruptible cast that applies Hysteria
Spawn your Ice Golem at the beginning to get Soul Crush,
then switch to Buffalo. Start wailing on the Ymir Piece's shell, but do
not attack the Sahagin Piece while it has Paralyzing Spikes up. You
can interrupt Blanket Thunder with War Cry. After the
knockback from Tsunami, the Sahagin Piece will cast
Dreadwash, so make sure to interrupt it.
Once the Ymir Piece is out of its shell, use
 Parting Blow and swap to Diremite.
Silkscreen will root it in place so you can finish it, and
then you can switch to the Sahagin Piece and finish him off as well.
Another strat is to burn down the Sahagin Piece as soon as possible
before it puts up spikes, or to use Quelling Wave since it
does not reflect the paralysis and your pet ignores it completely. Once
the Sahagin Piece is dead you can just take care of the Ymir Piece
easily.
Enemy #3: Catoblepas Piece
Recommended Loadout
Colibri
Damselfly
Wespe
We don't need anything in particular for this fight, so we will just bring a ton of damage!
Catoblepas Piece Abilities
- Bestial Roar: spawns three orbs and three rings that travel outward. Each explodes on reaching a wall or on contact with you. Orbs are very large circle AoEs, rings are donuts. Getting hit petrifies
- Shifting Gaze: cast from the second Bestial Roar onward. The mechanic resolves as three pairs of one orb and one ring, with the boss tethering one from each pair. The tethered one showing an eye petrifies if looked at
- Jettataura: spawns an AoE underneath you that causes Hysteria
Bestial Roar is basically the only mechanic in the fight. Look for which orb or ring is about to hit the wall and move accordingly. The small orbs will be large circle AoEs when they hit the wall, and the multiple ring shape will be a donut. If you hit a shape early it will pop prematurely, so you can hit the donut ones early if that is helpful.
Once Shifting Gaze is up, handle the orbs the same way as before, but make sure to look away from the ones with the eye telegraph as they resolve. When it casts Jettataura, just move out of the puddle created on the ground. Beyond this, all mechanics will just be looping until the Catoblepas Piece is dead.
Elite Enemy #1: Zu Piece
Recommended Loadout
Ice Golem
Damselfly
Wespe
We just bring our highest damage beasts and an interrupt for this one.
Zu Piece Abilities
- Hatch: two eggs hatch if they are not killed before the cast bar ends
- Caustic Vomit: interruptible damage buff cast by the add
- Crossbreeze: plus-shaped AoE
- Flying Frenzy: AoE tank buster
- Ferocious Fore Carve / Ferocious Rear Carve: tether that cleaves in front or behind respectively. Does not break eggs
- Airy Pursuit: AoEs that follow you
The whole fight is about the eggs. Killing one gives the Zu Piece a permanent damage buff, and they have very little health and will also break if an AoE is dropped on them. The adds from Hatch are a different story, since killing them does not give the buff and they do not have much health. Two eggs will hatch, so kill the two adds and interrupt Caustic Vomit if you need to.
Everything else is a matter of keeping your AoEs off the eggs. Drop Crossbreeze in the middle and move out once it locks in place. Do not drop Flying Frenzy on your pet, and stretch the Ferocious Fore Carve and Ferocious Rear Carve tethers until they turn purple to minimize the damage. For Airy Pursuit, drop it at a wall and run straight across to the other wall.
Enemy #4: Lakhamu Piece
Recommended Loadout
Buffalo
Crab
Behemoth
Lakhamu Piece Abilities
- Landslip: spawns golems and knockback lines that move you about half the room. Cannot be knockback immuned with pet cover. The golems shoot lines and then become adds
- Sand Tempest: blind plus orbs that explode in circle AoEs. The blind cannot be cleansed
- Earth Shaker: cones on you and your pet
- Earthrender: three baited AoEs
The Lakhamu Piece will open up with Landslip, which pushes you
about two golems' worth of distance. Position yourself so that no golems are
looking directly at you after the knockback. The golems will then come to
life, and you can stun them with War Cry and finish them with
Parting Blow. After this you can swap to Crab and burn
her down with its Water damage.
Do not stack with your pet for Earth Shaker. When Earthrender is cast, just move out of the three puddles that appear under your feet, and when Sand Tempest is cast, just move to a space not occupied by orbs. Beyond this, the mechanics will just repeat until the Lakhamu Piece is dead.
Random Enemy #1: Cactuar Pieces
Recommended Loadout
Behemoth
Buffalo
Adamantoise
This just gives us good AoE, tankiness, and damage.
Cactuar Piece Abilities
- Emergency Order: the boss jumps away and starts spawning waves
- Healing Water: Flowertenders constantly AoE heal the Sabotenders
- ??? Needles: circle AoEs that go off in the order of their numbers
- Cover: Guardia takes all damage in place of the Campeador
- Seedling Needles: raidwide damage with the boss on the ground, donut with the boss in the air
- Needle Gnarl: circle AoE
Add Waves
- Wave 1: two Flowertenders and Sabotenders
- Wave 2: four Soldado and Sabotenders
- Wave 3: Guardia, Campeador and Sabotenders
Use Meteor to kill the adds that spawn first.
War Cry is good on the second wave once they are grouped up,
and then you can finish with  Shield Charge.
Adamantoise is really good tankiness and deals Lightning damage. Finish
off the last set of adds with Shield Charge and kill
the large enemies (Guardia then Campeador) to win!
Elite Enemy #2: Siren Piece
Recommended Loadout
Behemoth
Colibri
Cu Sith
This gives us AoE for the adds and a lot of Piercing damage for the boss.
Siren Piece Abilities
- Song of Torment: tank buster
- Unmooring Melody: untelegraphed. Jumps to a random wall and channels a cone that applies a stacking debuff, confusing at 16 stacks
- Feral Lunge: jumps to a random wall, then a line AoE
- Summon: summons three normal zombies and one tethered to you. The tethered one binds you if you make contact with it
- Dead Man's Dirge: donut with her wings spread, circle AoE with her wings together
- Distant Tune: summons three sets of orbs that explode in circle AoEs
- Inviting Verse: forced march. Paired with an Unmooring Melody, but the march does not happen until she stops singing
Try to keep a Shield Charge charge on hand, as gap
closing is valuable here. The Siren Piece will open up with Song of
Torment, so tank it or have your pet tank it. When she casts
Unmooring Melody, quickly run to her and stand at her side; this is
a FAST cast, so make sure to get over there quickly! When she casts
Feral Lunge, stay out of her path.
The adds from the first Summon can be killed with
Meteor. Dead Man's Dirge happens right after, so look
at her animation and dodge accordingly. Inviting Verse will resolve
right after an Unmooring Melody, so position yourself to run back towards
the center afterwards; the debuff indicates which direction you will
run.
Boss: Guttler Piece
Recommended Loadout
Adamantoise
Colibri
Cu Sith
We don't need anything special from our beasts, so we just bring a mix of tankiness and high damage.
Guttler Piece Abilities
- Gyrocleave: vertical line AoE
- Beastly Aura: knockback north and south of the boss
- Gluttonous Goring: jumps to a side and floats with the axe hanging below. Several swords spawn that do circle AoEs, and the boss does a massive circle AoE
- Gluttonous Gutting: jumps to a side and holds the axe behind. Several swords spawn that do circle AoEs, followed by a frontal cleave
- Thunderbolt: line tank buster
- Overpowering Point: baited line AoE
- Deadly Demesne: spawns cages and floating daggers. The cages detonate their tile and the four adjacent tiles, and the daggers hit the tile in the direction of the blades. The cages bind you if you stand in one
- Molten Metal: baited AoE that leaves a sword which then explodes in a proximity AoE
The auto-attacks are cones, so do not stand near your pet. The statues on the side will wake up if hit by AoEs, primarily from the line attacks, so when those target you make sure to aim them so that you don't hit the statues. If you do, just kill the adds that spawn. She follows something of a timeline, but the order of mechanics isn't always the same, so pay attention to each as it's happening to know how to resolve it.
For Gyrocleave, stand in the cubbies on the side of the arena. For Beastly Aura, position next to her to get knocked back directly into one of the cubbies on either side of the arena. Gluttonous Goring wants you at the cubby on the opposite side, and you should move early, with Sprint recommended here. Gluttonous Gutting is the reverse, so stand behind in the cubby the boss is occupying.
With Thunderbolt, make sure you don't hit both yourself and your pet. For Overpowering Point, move out once you see the AoEs lock in. Thunderbolt paralyzes, so use a serum if you got one (or passive resistance elsewhere). You should be able to pop them at the beginning of the fight and still have plenty of time to defeat her. Molten Metal should be dropped in one of the far cubbies, and then move to the other side after dropping it. Beyond this, all mechanics will just be looping until the Guttler Piece is dead.
First Master's Board
This board is actually a bit easier than the third board in my opinion,
but it's no pushover. If you see any poison resistance from shops
or treasure chests, make sure to take it as it makes the last boss
significantly easier. Something like  Angel Robe will
completely trivialize it.
My recommended path here is:
- Right at the first fork
- Left at the second fork
- Right at the third fork
This lets us maybe skip a fight, get a camp, and then only fight one normal enemy before the boss while also guaranteeing another shop.
First Master's Board Encounters
Every encounter on the First Master's Board, in roughly the order you meet them. Select an encounter below for its ability list and how to handle it. You will not see all of these in a single run; which ones you get depends on the path you take. A good loadout that covers everything needed for this board is:
Mantis
Damselfly
Wespe
Behemoth
Worm
Geshunpest
Coblyn
Adamantoise
Diremite
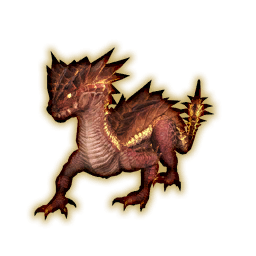 Drake
Gigantoad
Spriggan
Enemy #1: Strix Piece
Recommended Loadout
Mantis
Damselfly
Wespe
We mostly just bring high DPS beasts here to skip as much as possible.
Strix Piece Abilities
- Plummet: three rows of three AoEs
- On the Properties of Quakes: answered by standing in the levitation circle
- Magical Mallet Theory: turns you into a slime. Stuns you while transformed, but only deals 1 damage
- On the Properties of Floods: damage and knockback unless you are a kappa
- Ultimate Focus: dispellable magic damage buff
- On the Properties of Darkness: raidwide damage
- Windfeather Whisper: summons a feather add with an unavoidable knockback
- Check Out: summons books that do pairs of circle AoEs, in the order their mouths open
For Plummet, stand out of the first row and move in after it goes off. On the Properties of Quakes wants you in the levitation circle when it goes off, and for On the Properties of Floods you will want to turn into a kappa. For Magical Mallet Theory, step into the slime puddle to turn into a slime.
Ultimate Focus into On the Properties of Darkness can be
dispelled, but it doesn't hit that hard either way. After Windfeather
Whisper knocks you back, gap close with
Shield Charge. For Check Out, note which books
have their mouths open and move away from them, rotating as they go off.
Beyond this, the mechanics will just repeat until the Strix Piece is
dead.
Enemy #2: Morbol Piece
Recommended Loadout
Behemoth
Worm
Geshunpest
Morbol Piece Abilities
- Extremely Bad Breath: rotating cones that apply paralysis, blind and heavy. All cleansable
- Tremblor: knockback from the boss
- Vine Probe: line AoE in front
Add Abilities
- Seedlings: apply poison on auto-attack. Cleansable
- Carrion: slow add with heavy hitting autos. Applies vulnerability, heavy and paralysis in melee range, and the paralysis is cleansable
- Ochu: casts Acid Mist, a circle AoE that leaves a toxic puddle
Our main strategy here is to just burn the boss down as soon as
possible and ignore mechanics. Start by spawning Geshunpest to borrow
Scouring Ash, then switch to Behemoth. Make sure you're never
in front of the boss, and use Meteor to dispatch the
adds.
Use Scouring Ash if you get hit by any debuffs, and use
Parting Blow to kill subsequent adds before switching
to Worm. There is not too much else here, so just avoid the AoEs and burn
down the boss.
Random Enemy #1: Corpse Flower Piece
Recommended Loadout
Mantis
Damselfly
Wespe
This has a pretty high chance of just being a loot node, but the boss isn't too bad if you get it. We'll just bring high DPS beasts to burn it down and avoid mechanics.
Corpse Flower Piece Abilities
- Budding Thorns: summons three saplings with expanding thorns that slow you but prevent draw-in effects while you are inside them
- Floral Trap: binds you for two seconds and draws you in afterwards. If it lands, the boss eats you and gains a damage buff
- Rotten Stench: stack marker
- Queen Hawk: add that casts Final Sting if it is not killed in time
- Acid Rain: AoEs that follow you
Stand in the thorns to prevent the Floral Trap draw-in, and do not stand in front after the suck or it may still eat you. You can take Rotten Stench alone if you want to avoid your pet taking damage.
Floral Trap will eat the Queen Hawk and instantly kill it with no damage buff, so for the later Floral Traps, position yourself so that you don't get pulled in but the Queen Hawk does. For Acid Rain, keep moving to avoid the AoEs. Beyond this, the mechanics will just repeat until the Corpse Flower Piece is dead.
Random Enemy #2: Ice Dragon Piece
Recommended Loadout
Mantis
Damselfly
Geshunpest
Once again we just bring really high DPS beasts, but we bring
Geshunpest to borrow Scouring Ash at the beginning just in
case we get Frostbite.
Ice Dragon Piece Abilities
- Icy Torment: two variations. Floating icicles cleave the sides with the middle safe, and ice sucking in cleaves the middle with the sides safe
- Rime Wreath: circle AoE that applies a cleansable DoT
- Withering Eternity: AoE DoTs covering the arena with two safe spots on the cardinals. Follows up with Sheet of Ice, which is six baited AoEs
- Cauterize: stores four half-arena cleaves, ending with a knockback
For Icy Torment, if the icicles are on the side then just stand on top of the boss, and if there are no icicles then avoid the center and stay on the boss's sides. For Rime Wreath, get away if possible to avoid the damage.
Withering Eternity is pretty tough. Move to the safe cubby, then avoid the Sheet of Ice AoEs. They drop much slower than you expect, so just don't panic and avoid them as you drop them in place. For Cauterize, watch where the dragon telegraphs the lines and dodge accordingly, finishing with positioning so the knockback doesn't send you into the wall, and kill the ice sprites during it. Beyond this, the mechanics will loop until it's dead.
Elite Enemy #1: Gargoyle Piece
Recommended Loadout
Coblyn
Behemoth
Geshunpest
There is not much going on here with beasts, we just want tankiness and damage.
Gargoyle Piece Abilities
- Rippling Evisceration: circle AoE then a donut
- Sweeping Evisceration: tether. The boss dashes to you and cleaves in front, then behind
- Malady: spawns orbs that give the boss a damage buff. The orbs can be popped by standing on them, which gives stacks that cause Hysteria at five
- Fivefold Fallout: four raidwides ending in a knockback. Can be pet cover immuned
- Desolation: two casts of line AoEs in front
- Grim Fate: multi-hit tank buster
- Sea of Pitch: three baited lingering AoEs that inflict Hysteria if you stand in them
For Rippling Evisceration, stay out and then move in. Stretch the Sweeping Evisceration tether until it is purple to minimize the damage, then move behind, then in front. Malady will spawn a bunch of orbs, so take up to four at a time and wait for the debuff to time out before grabbing more, soaking them 4-4-2 to get rid of all of them.
The boss will use Sweeping Evisceration right after Malady, and will then move to the center for Fivefold Fallout. For Desolation, move out of the front. Grim Fate can be tanked by your pet or by you. For Sea of Pitch, kite around the boss and don't stand in the puddles. This will repeat until it is dead.
Random Enemy #3: Administrator Piece
Recommended Loadout
Adamantoise
Spriggan
Geshunpest
This gives us tankiness and also utility to deal with some of the mechanics present here. Lightning damage is a nice bonus.
Administrator Piece Abilities
- Flamethrower: frontal cone
- Confound: interruptible confusion debuff
Add Abilities
- Bug: slowly walks to the orb. If it is not killed in time the boss casts Object 199 for a damage and regen buff
- Drone: baited line AoEs
- Footman: follows you with decently damaging autos, and periodically casts a circle AoE
- Cobra: casts Noxious Nova, which applies poison. Cleansable, but each cast applies a separate stack
- Dreadnaught: frontal cone
Start with Spriggan to get Soul Crush. Dodge
Flamethrower and interrupt Confound, then handle the adds as
they spawn: kill the Bug, avoid the Drone AoEs, and so
on.
This boss dies FAST, so you can even just bring the Mantis, Damselfly and Wespe combo and burn it down before anything even really happens.
Elite Enemy #2: Golem Piece
Recommended Loadout
Gigantoad
Mantis
Damselfly
We mostly just take damage here, but Gigantoad has good Water damage and tankiness for us.
Golem Piece Abilities
- Earthen Ring: donut. If there is a tether it comes from the other golem
- Plaincracker: large circle AoE. If there is a tether it comes from the other golem
- Rock Wall: spawns walls with spikes. The spike side is hit once all of the walls have spawned, and stuns
- Stoneshower: six floating rocks. Normal rocks are circle AoEs, while glowing rocks shatter and become donuts
- Outcrop: frontal cone
- Obliterate: knockback. Can be pet covered
- Self-destruct: enrage
There are two golems to kill, and a separate enrage after both are dead. They occasionally change positions by tethering from one to another, and when that happens the next attack will be coming from the golem that is tethered. The mechanics don't necessarily happen in the same order every time, so keep an eye on the cast bars to see what is happening.
For Earthen Ring, stay close, and for Plaincracker, get
WAY away. With Rock Wall, look at where the spikes are: if they're
facing the middle of the arena, get out, and if they're facing out, get
in. For Stoneshower, look for the cracked rocks and stay underneath
them. Outcrop wants you standing behind or to the side, and after
Obliterate you can gap close, or have your pet take it with
Snarl.
After both golems are dead you will see the heart of a golem become targetable. Kill it before Self-destruct finishes.
Enemy #3: Treant Piece
Recommended Loadout
Behemoth
Worm
Spriggan
We're bringing plenty of AoE and also an interrupt for this.
Treant Piece Abilities
- Rustling Breeze: glowing hands means side cones with the middle safe, and a glowing face means a frontal cone with the sides safe
- Falling Leaves: summons adds
- Arboreal Storm: circle AoE that expands into donuts, knocking you up if it hits
- Acorn Bomb: spread AoE that applies sleep
Add Abilities
- Slugs: cast baited AoEs
- Sapling: continuously gains regen and damage stacks, and scales very high
- Biloko: casts Natural Nurture, which heals the Treant Piece for ~5% of its max health
- Diremite: casts line AoEs in front
Start with Spriggan to get Soul Crush, then swap to
Behemoth. Multiple add waves spawn in this fight and the boss doesn't do
too much itself. When Rustling Breeze happens, either stand in
front or to the sides depending on the telegraph.
Kill the first Falling Leaves wave with Meteor.
The second add wants to be burned down really quickly, but if you struggle
you can bring something like Diremite instead to push it away and give
yourself more time. Arboreal Storm will happen at some point, so
just wait for the first cast to go off then stand just outside the boss's
sand puddle.
The third add is the Biloko. Have your pet Snarl
for Acorn Bomb, then interrupt Natural Nurture and focus the Biloko
down. Otherwise just burn the adds down as they come.
Random Enemy #4: Progenitrix Piece
Recommended Loadout
Mantis
Damselfly
Spriggan
We don't need anything specific here, so we're really just bringing damage.
Progenitrix Piece Abilities
- Scalding Scolding: jumps to a side and cleaves in front
- Meltdown: marker. Line tank buster that binds and then knocks back, leaving three fire puddles along the path
- Fiery Fury: three knockbacks from purple circles. Cannot be knockback immuned
- Massive Explosion: interruptible raidwide
Add Abilities
- Bomb: leaves fire puddles when killed
- Grenade: the boss is immune while this is alive. Constantly casts raidwides, and gains an increasing damage buff each time it takes damage
- Snoll: explodes in a circle AoE when it dies
- Pyrobolus: several cone AoEs in all directions
The Progenitrix Piece will jump to a side and use Scalding Scolding, so move to its side to avoid it. Adds will spawn after this, so just kill them as soon as possible, but be mindful of the AoEs when they do die.
Kill the Grenade before it reaches 16 stacks or you will die. For Pyrobolus, avoid the cones. This one is not too bad, and everything repeats until it is dead.
Boss: Borgny Piece
Recommended Loadout
Coblyn
Diremite
Drake
If you got poison resistance, you can bring more DPS instead of Coblyn and Drake.
Borgny Piece Abilities
- Toxic Breath: the boss backsteps and then shoots a lingering cone that applies poison
- Toxic Vomit: four baited puddles
- Fuming Vomit: AoEs that spread into eight moving clouds. The clouds inflict a slight knockback if touched
- Wriggling Phlegm: baited AoE that spawns a slime. The slime moves toward the nearest puddle and explodes on touching one
- Cauterize: the boss flies to one of the sides and does a line divebomb that spawns moving clouds like Fuming Vomit, ending with a knockback from the middle
- Salivous Snap: tank buster
For Toxic Breath, move to the wall behind Borgny and
stand to the sides when it jumps. With Toxic Vomit, if you have
poison resistance you can just stand still; otherwise use
Vulcanize or Smoldering Scales to reduce the
damage, or just have your pet tank it for you. Try to drop the puddles on
the wall.
Avoid the Fuming Vomit puddles and the poison clouds that spawn.
The boss will use Toxic Breath again, so avoid it as before. For
Wriggling Phlegm, drop it away from the Toxic Vomit puddles if
possible. Once the ooze spawns you can use Diremite's
Silkscreen to root it and burn it down; if it reaches a
slime pool it will explode, dealing damage and applying a damage down to
you.
Watch for Cauterize while the boss is in the air. Salivous Snap can be tanked by either you or your pet. Beyond this, just burn down the boss as the mechanics repeat.
Second Master's Board
This is our final board and it looks extremely daunting, but once you know the mechanics is pretty straightforward.
My recommended safe path is:
- Right at the first fork
- Left at the second fork
- Right at the third fork
- Straight at the final fork
This yields us the most consistent path with the fewest elite enemies, as well as a camp right before the final boss.
Second Master's Board Encounters
Every encounter on the Second Master's Board, in roughly the order you meet them. Select an encounter below for its ability list and how to handle it. You will not see all of these in a single run; which ones you get depends on the path you take. A good loadout that covers everything needed for this board is:
Golem
Worm
Ghost
Behemoth
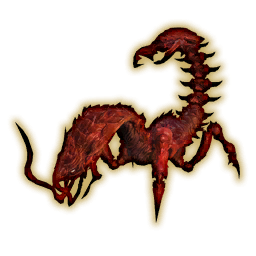 Karlabos
Raptor
Opo-opo
Drake
Mantis
Colibri
Cu Sith
Gigantoad
Ice Golem
Adamantoise
Geshunpest
This is a powerful team with good damage, tankiness, and utility when needed. If you are able to get Paralysis resistance for yourself or beasts, it will be helpful for the last boss in this board.
Enemy #1: Flauros Piece
Recommended Loadout
Golem
Worm
Ghost
This gives us a lot of tankiness, Earth damage, and a cleanse.
Flauros Piece Abilities
- Heat Lightning: summons three sprites that cast line AoEs. They have low health but can be ignored
- Charged Lightning: frontal half cleave
- Electric Shock: large circle AoE
- Aetherial Offering: enlarges any sprites still alive, which makes their lines bigger
- Erratic Blaster: tank buster with paralysis. Cleansable
Start by spawning Ghost to get Scouring Ash just in case
you end up with paralysis later, then summon Golem. You can have the Golem
tank most of the fight for you including the tank busters. The boss will
open with Heat Lightning, so either eliminate the sprites or dodge
the lines if you're able to. When the boss uses Charged Lightning,
just move behind.
After a while, the boss will use Erratic Blaster. If this hits you and you get paralyzed, just cleanse with your borrowed ability. If it hits the Golem, I recommend switching to Worm and having it tank the rest of the fight. The boss will then use Electric Shock so move away, then back in after it goes off. Mechanics will repeat until the boss is dead.
Elite Enemy #1: Mindflayer Piece
Recommended Loadout
Behemoth
Worm
Colibri
This just gives us solid AoE damage and burst damage for finishing the Mindflayer.
Mindflayer Piece Abilities
- Void Water III: spreads that drop puddles. Standing in a puddle reduces your lightning resistance
- Void Thunder III: AoE tank buster that explodes in a cross in the shape it leaves
- Arcane Utterance: summons four orbs that shoot lines in the directions of their arrows
- Arcane Enhancement: tethers the orbs to become larger and shoot larger lines
- Void Paralysis III: raidwide plus paralysis. Cleansable
- Void Flare Stare: proximity AoE
Add Abilities
- Myconid: leaves spore zones when it dies. Standing in one poisons you, and it is cleansable
Kill the Myconids in the puddles spawned by Void Water III to prevent the AoE poison. The boss will use Void Thunder III, so just make sure you're not in a water puddle when it goes off, then dodge the cross AoE.
The boss will return to the center and use Arcane Utterance. If
you use Worm's Bottomless Desert, the Heavy will buy you more
time as the Mindflayer Piece will take longer to return to the center.
Note the orbs that get tethered with Arcane Enhancement and dodge
the line AoEs they spawn, as the empowered orbs will have much larger
ones.
The boss will then use Void Paralysis III, and I recommend having your pet tank this and then swapping it out to the next one. For Void Flare Stare, just move to a corner opposite the flare star. This repeats until it is dead.
Random Enemy #1: Boogeyman Piece
Recommended Loadout
Behemoth
Worm
Geshunpest
We're just bringing these for AoE damage, tankiness, and a safety cleanse.
Boogeyman Piece Abilities
- Provision: swaps to the other weapon
- Ripples of Gloom: cleansable blind
- Veil of Darkness: the boss goes invisible and summons bombs and a deepeye. These adds also become invisible unless you are close to them. Light sprites spawn after a while and are always visible
- Swoop (sword): dashes forward to the wall and casts a large cone toward the center
- Swing Round (sword): large circle AoE
- Swoop (club): dashes forward to the wall and casts a massive circle AoE that also knocks back if it hits
- Swing Round (club): large knockback
Add Abilities
- Bomb: repeatedly casts Explosion, and self-destructs if it is not killed
- Deepeye: casts a gaze after a while that petrifies if looked at
- Sprite: casts a cone toward where it is facing when it dies
Spawn Geshunpest to start to get Scouring Ash, then switch
to Behemoth. The boss has two weapons and its attacks change based on
which it is holding, and the auto-attacks inflict a vulnerability of the
opposite weapon. Whenever it swaps weapons with Provision, swap
between yourself and your beast tanking.
For Swoop, stay out of the front and note where it's jumping:
with the sword, follow it and stand at the side, and with the club, move
away. For Swing Round, the sword wants you to move away, while the
club wants you to stay close and get knocked back so that you don't hit
the wall, and Shield Charge is helpful here.
When it uses Veil of Darkness, keep note of where the invisible
adds are. Meteor can take out many at once, and you should
prioritize the bombs and then the deepeye. Aim a dying sprite's cone
toward the boss to reveal it, and a good time for this is when the boss
jumps on you. Ripples of Gloom just wants the blind cleansed, but
it's not too bad otherwise. Beyond this, the mechanics will loop until it
is dead.
Random Enemy #2: Atomos Piece
Recommended Loadout
Behemoth
Worm
Adamantoise
Again we're just taking AoE damage and tankiness as needed.
Atomos Piece Abilities
- Mana Manifestation: summons adds at an AoE
- Shockwave: knockback from the middle. Can be pet cover immuned
- Dark II: frontal cone
- Forsaken Fount: spawns several orbs that periodically pulse AoEs, with larger orbs producing bigger ones
Add Abilities
- Gremlins: the red gremlin applies physical vulnerabilities, and the rest just attack
- Vodoriga: baited AoEs
- Bavarois: knocks back when killed, and spawns nine puddles that increase fire resistance and lower lightning resistance while you are in them
- Pudding: stack marker
- Flan: spread marker plus lots of AoEs
- Dahak: Tail Drive is a cone behind, and Rotten Breath is a cone in front
Kill the gremlins with Meteor and
Parting Blow. Kill the Bavarois before the
Pudding spawns, and position yourself so that you don't get knocked
out of the arena.
Stand in a puddle to reduce the damage from Pudding, but stand out of them for Flan. Beyond this, just avoid the AoEs and keep killing the boss.
Enemy #2: Drake Piece
Recommended Loadout
Behemoth
Gigantoad
Karlabos
This gives us good AoE for the initial adds as well as a dispel and Water damage for later.
Drake Piece Abilities
- Burning Cyclone: jumps to a side and then does a frontal cone. Spawns fireballs that do periodic circle AoEs, and when they stop one turns into a tornado that does a donut
- Blaze Spikes: dispellable. Reflects damage when the boss is attacked
- Mangling Fang: tank buster
Add Abilities
- Barbmole: casts Needles Out, which makes it reflect with a stacking bleed when attacked. Cannot be dispelled. Also casts Seeding Needles, a large circle AoE
- Abbadon: eats morphos and gains regen stacks. It will not gain regen if the morpho is low health when eaten
- Morpho: applies stacks that confuse at 16. Confuses you if killed normally, and must be eaten by the Abbadon
Spawn Karlabos to get Quelling Wave, then swap to
Behemoth. Follow the Drake Piece to the wall and avoid Burning
Cyclone, and cleanse Blaze Spikes with Quelling Wave. When the
Barbmoles spawn, kill them with Meteor and
Parting Blow.
When the Abbadon and Morphos spawn, kill the Morphos and then the Abbadon. If the Abbadon gets close to the Morphos it will eat them and gain a regen. One strategy is also to have the Abbadon eat all the Morphos and then just kite it until the regen falls off, though on standard mode you can just kill the Morphos quickly.
Elite Enemy #2: Durga Piece
Recommended Loadout
Raptor
Opo-opo
Drake
This gives us plenty of damage and also Drake for
Smoldering Scales.
Durga Piece Abilities
- Electric Absorption: tethers three pillars and absorbs energy into the hands
- Grounding Jolt: four AoEs from each hand. The hand that did not absorb energy does a smaller AoE. Rotates before attacking from the second cast onward
- Missile: line AoEs that track you and lock in when the lasers turn red
- Thermobaric Charge: baited very large knockback. Cannot be pet cover immuned
- Diffusion Ray: frontal cone
- Summon: summons four spinner-rooks, which is a damage check before the bar fills
- Atomic Ray: heavy hitting raidwide damage. Pet cover will not take this damage for you
Start with Raptor and DPS the boss. Note which arm isn't channeling
during Electric Absorption, as the safe spot during Grounding
Jolt is far away from the boss in the direction of that arm.
Thermobaric Charge will send you from corner to corner; it's a huge
knockback that can't be tanked with Snarl, so drop the
charge in a corner and get knocked back to the other corner, and
Shield Charge is good here.
For Missile, stand still until the missiles lock in, then move out of the line AoE. For Diffusion Ray, just stand to the side or behind. Kill the rooks when the boss casts Summon, swapping to Opo- opo for Blunt damage to kill them.
Watch your health for Atomic Ray, or dedicate a pet to sacrifice
for it if needed with a  Ring of Sacrifice. You can also swap to
Drake and use Smoldering Scales to dramatically reduce the
damage you take. After this, it's just the same mechanics as before but
layered over each other and sometimes a little faster, repeating until the
boss is dead.
Random Enemy #3: Medusa Piece
Recommended Loadout
Mantis
Colibri
Ice Golem
This just gives us a lot of damage and an interrupt through Ice Golem.
Medusa Piece Abilities
- Summon: summons two lamias on the first cast, then one lamia and four cyclops on the second
- Petrifying Regard: tether. Baited petrify cone that damage buffs lamias and petrifies cyclops when it hits them. Also has rotating versions. Being petrified by this kills you instantly
- Impassion: self vulnerability down and damage buff. Cannot be dispelled
- Rippling / Constricting Evisceration: spawns two sets of lines that fire cones in the order they spawned. Rippling is circle then donut, and Constricting is donut then circle
Add Abilities
- Lamia: attempts to revive any dead lamias. Otherwise does basic circle AoEs
- Cyclops: casts circle AoEs covering the entire arena when spawned. Instantly dies to any damage while petrified, and casts line AoEs in front afterwards
Start with Ice Golem to get Soul Crush, then switch to
Mantis. Burn down the adds, but make sure not to bait Petrifying
Regard onto the lamias. When one lamia dies, the other will try to
raise it, so interrupt that with Soul Crush. Another lamia will spawn
after, so interrupt and kill it too.
Four cyclops will spawn next. Bait a cone onto one to petrify it and kill it in one hit, then kill the other cyclops. If they're still up when the boss starts rotating with Petrifying Regard, you can petrify them again and one shot them.
Dodge Rippling Evisceration and Constricting Evisceration by avoiding the lines and staying out or in as appropriate, then swap positions to avoid the second AoE. This repeats until it is dead.
Elite Enemy #3: Chimera Piece
Recommended Loadout
Mantis
Colibri
Geshunpest
Once again this is just a lot of damage plus a cleanse.
Chimera Piece Abilities
- The Dragon's Roar: donut plus a breath
- The Ram's Roar: circle AoE plus a breath
- Rushing Roar: tether. Casts the breath after dashing
- The Ram's Keeper: marker. Drops an ice puddle that expands and freezes if touched
- Cacophony: lightning orb that follows you and explodes
- Toxic Tantrum: raidwide plus poison. Cleansable
Grab Scouring Ash from Geshunpest then swap to Mantis. The
attacks will mostly follow some sort of order, but it's best to just be
prepared for all of them. Three of its attacks are paired with a "breath":
fire from the lion cleaves in front, lightning from the dragon cleaves
left, and ice from the ram cleaves right.
The breaths will be paired with the roars, so note which are being cast and which head is glowing, and dodge accordingly. Stretch the Rushing Roar tether until it is purple at the edge, then dodge the breath. Toxic Tantrum applies a poison DoT, so either cleanse it with Scouring Ash or have your pet tank it.
Cacophony will spawn an orb, so just avoid it, but watch out for the roar and breath that happen at the same time. Drop The Ram's Keeper at the wall and then move away from it to avoid it expanding. This repeats until it is dead.
Enemy #3: Sphinx Piece
Recommended Loadout
Mantis
Colibri
Cu Sith
Here we're just frontloading damage but bringing some good Piercing as well.
Sphinx Piece Abilities
- Banish: posed like a sphinx is a donut, standing normally is a circle AoE, and flying is a half-room cleave on the glowing wing side
- Numeric Riddle: covers the floor in tiles numbered 1 to 9
- Assignment: gives one or two debuffs, each asking you to stand on a matching tile when it runs out. All Prime is 2, 3, 5 and 7; All Even is 2, 4, 6 and 8; All Odd is 1, 3, 5, 7 and 9; All Three is 3, 6 and 9
- Mnemonic Riddle: the boss asks which of four beasts is a certain classification. The beasts turn into little mandragoras and shuffle around, and you click the correct answer. Answering correctly rewards a heal and a 30 second damage buff, while answering wrong or timing out gives paralysis and turns the four beasts into adds
- Lost Hope: spinning pointer debuff above your head that only lets you move in the direction of the pointer
The Banish pose can be hard to tell apart, so watch it carefully. If it floats up, stand on the side opposite the glowing wing. If it's on the ground with its front feet together, stay in for the donut, and if it's on the ground with its front feet apart, get away for the circle.
Numeric Riddle is a raidwide followed by a number riddle, so stand on a square that corresponds to a correct answer! It follows with Mnemonic Riddle; note what it says and follow the beasts as they jump around, then interact with the mandragora that the correct beast turned into to solve the riddle. After this you can resume blasting the boss. Lost Hope can make dodging tricky, but you can definitely kill it before this happens.
Enemy #4: Gigantis Piece
Recommended Loadout
Gigantoad
Behemoth
Ice Golem
Here we need tankiness, AoE damage, and an interrupt.
Gigantis Piece Abilities
- Gigantic Rage: crouching with the club in front is a circle AoE, the club held in both hands overhead is a behind half cleave, and the club swinging one-handed is a front half cleave. All of them knock back if they hit
- Smashing Stamp: marker. Line AoE in front, with a smaller red rectangle inside it near the boss that will kill a slime standing in it and absorb its element
Add Abilities
- Slimes: cast Rupture, and self-destruct if it is not interrupted. Crushed slimes turn into several tiny ones
- Cyclops: casts Camaraderie, which heals the boss for 5% of its max health if it is not interrupted. Also casts frontal lines
Start with Ice Golem to get Soul Crush then swap to
Gigantoad before pulling. When the boss uses Gigantic Rage, note
the animation and dodge accordingly. It can be very tough to learn the
animations, so I recommend just standing away on its sides and moving
immediately when you see the telegraphs until you are comfortable with
them.
When the boss spawns a slime, bait Smashing Stamp onto it. When the boss crushes a slime it absorbs that element and gains an extra effect after a Gigantic Rage ends: a lightning club leaves a tower under you, so stay in it, and a fire club leaves an AoE under you, so move. Avoid hitting a slime with the same element as the club, or it will grow large instead of dying.
With two slimes up, have the boss crush the one with the opposite
element to the club and then interrupt the other, and you can blow up the
second when the next Smashing Stamp happens. The little slimes can be
taken out with Shield Charge, but
Meteor works well too. Kill the Cyclops adds if you see
them, then resume killing the boss.
Random Enemy #4: Moogle Pieces
Recommended Loadout
Behemoth
Worm
Ice Golem
Here we're basically just bringing AoE and tankiness again.
Add Waves
- First Wave: six Swordsmogs. Just kill them
- Second Wave: three Mogbreakers. They cast large circle AoEs when they spawn
- Third Wave: three Kinged Kupocasters and Kinged Kupocurers, either two and one or one and two. The Curers cast Pom Flood and the Casters cast Pom Flare, and each applies a vulnerability of its element
- Fourth Wave: three Kupocasters. Exaflares that grow larger as they move
- Fifth Wave: three Kupocurers. They do an AoE in a triangle connecting them
- Sixth Wave: one Kinged Swordsmog, one Mogmugger and two Melomogs. The Mugger steals your tokens and leaves after a while, the Melomogs spawn bubbles that heal and buff the Swordsmog, and the Swordsmog damage buffs itself and does raidwides
There isn't much of a strat here, we're really just killing the moogles as quickly as possible. The waves are on a timer and will start even if you have not killed all of the previous mobs.
Kill the first wave with your AoE. On the second wave, stand at the wall without a moogle. On the third wave, focus down a pair since those stacks would ramp faster. On the fourth wave, avoid the exaflares and kill the adds, and on the fifth wave you just kill them. On the sixth wave, step on the bubbles to pop them.
Elite Enemy #4: King Ahriman Piece
Recommended Loadout
Gigantoad
Behemoth
Geshunpest
Here we're just bringing tankiness, AoE, and a cleanse again. If you were lucky enough to get Doom resistance earlier you can ignore many of the mechanics here! The Ahriman does tend to reward extremely strong loot and can be worth it if you've been healthy so far.
King Ahriman Piece Abilities
- Roulette: pulls and binds you to an hourglass and spawns a rotating cursor. The hourglass cleaves in the cursor's direction when it dies
- Stare: no cast bar. Line tank buster
- Double Vision: applies a random debuff. Sad means stand in red, and angry means stand in white
- Curtains for Rank 5: raidwide that also kills any pet whose rank is a multiple of 5
- Flare: proximity AoE that also hits your pet
Add Abilities
- Dirty Eye: casts a gaze that inflicts Doom, which cannot be removed
- Hapalit: occasionally inflicts burn on its target. Cleansable
Start with Geshunpest to get Scouring Ash, then swap to
Gigantoad. Gigantoad is a solid tank here, so you can have it tank for a
while for you. Kill the Roulette hourglass while the cursor is not
pointing at you; if you have Doom resistance, this can be used to kill
adds.
Double Vision works like World of Darkness, so stand in the
opposite half to your debuff. The debuff appears a second or two before
the Double Vision cast goes off. When the summon happens, just kill the
adds as soon as possible, look away from the Ahriman, and cleanse the
burns. Once again Meteor is solid here.
Release a pet of a rank divisible by 5 before Curtains for Rank 5 if you need to, otherwise it dies immediately. When Flare happens, just run to a wall away from your pet. This repeats until it is dead.
Random Enemy #5: Behemoth Piece
Recommended Loadout
Golem
Worm
Ghost
Behemoth Piece Abilities
- Meteor Impact: drops five rocks on you. A rock will explode if it is too close to another
- Lightning Barrage: gives two rings to a tower
- Charybdis: raised arm is a circle AoE, and on the ground is a donut
- Ecliptic Meteor: you must be behind a meteor, and your pet must be behind one too
- Meteor: multi-hit stack marker. Does not drop rocks despite the name
Add Abilities
- Lightning Sprite: the boss is immune until all of the sprites are dead. Shoots cross-shaped attacks, and also seems to shoot lightning puddles
- Giant: casts Grand Sword, a frontal cone that destroys any rocks it hits
This is going to be very similar to any other Behemoth we've ever seen in the game, with some slight twists. The Energy Towers gain a ring when hit by a lightning puddle and two stacks from Lightning Barrage. Interact with them to release their energy, and if they reach three rings they detonate and stun you.
Save at least one Meteor Impact rock for later, and make sure not to drop them too close to each other. For Lightning Barrage, stand next to a tower to transfer the debuff and step away once you see the circle under the tower. The sprite crosses do not charge the towers, but the puddles do. Nothing too spicy here, it will die fairly quickly if you end up fighting it.
Boss: Lauda Piece
Recommended Loadout
Adamantoise
Colibri
Geshunpest
This is essentially just for tankiness and damage.
Lauda Piece Abilities
- Vanishing Daggers: four sets of daggers spawn and go off in the order they spawned. They turn invisible after a while
- Point Maker: two sets of daggers spawn next to the boss, and the boss and the daggers fire line AoEs baited on you
- Unseen Force: binds you and teleports behind or in front of you, then throws a dagger that gives a debuff. When it times out you are knocked very far, in the direction the dagger was thrown relative to your character. The distance is from the north or south pocket to the opposite one
- Deadly Demesne: as in the Guttler Piece encounter, plus a variation where the cages have a circle of daggers facing inward that close in on the cage in an AoE
- Molten Metal: baited AoE that leaves a sword which then explodes in a proximity AoE
- Thunderbolt: as in the Guttler Piece encounter, but it also gives the boss a stacking damage buff
- Greater Strength: two sword adds spawn that make her immune and give a stacking magic damage buff. She spams raidwides while casting either Guttler Glutter, a knockback from the middle, or Searing Axe, a proximity AoE from the middle
Many of her moves carry over from the Guttler Piece encounter, and the only differences are Thunderbolt's stacking damage buff and the extra Deadly Demesne variation. If you don't have paralysis resistance or are low on HP, I recommend having a pet tank it for you and then swapping it out to the next pet. Once again you benefit more from knowing all the attacks rather than memorizing a specific timeline, and we handle most of the stuff the same as the first time we saw her.
Remember the Vanishing Daggers order before they disappear. For Point Maker, avoid hitting the statues on the sides. With Unseen Force, she will throw a dagger into your back or your front, and when the debuff expires you will get knocked in a direction corresponding to where the dagger hit you: front means knocked back, and back means knocked forward. When this is comboed with her Gluttonous attacks, you need to stand with her and position yourself to get knocked back. If she's doing the Gutting where you need to be with her, then gap close after and stand behind her. Otherwise if it's Goring, you can just ride the knockback to the other cubby to be safe.
The Deadly Demesne with the circular daggers looks spooky, but isn't too bad. Look at the two squares that are drawn in two corners, and stand in a corner along the opposite diagonal to drop the Molten Metal AoE then move away from it after the AoEs have gone off.
When she starts casting Greater Strength, kill the two swords and note what she is casting so you can reduce damage. You will either be close to get knocked back to a cubby or go far away to a cubby to avoid the proximity damage. After this, everything more or less repeats until she is dead, and it gets hectic the longer it goes on.
Changelog
- 17 Sep. 2026: Added guides and recommendations for third board and both Master boards.
- 14 Sep. 2026: Added second board guide/recommendations.
- 11 Sep. 2026: Updated with initial info and first board guide/recommendations.
- 14 May 2026: Page added.
Guides from Other Classes

This guide has been written by Liam Galt, who created the Blue Academy Youtube channel and Discord in response to the lack of consolidated and accurate Blue Mage resources available. Liam enjoys finding non-standard solutions to problems, so Blue Mage content with all of its zaniness is a natural interest! Outside of Blue Mage, he also enjoys Savage and Ultimate raiding which he streams on Twitch.
- Earn FFVII-Themed Prizes by Playing Keybound Brawler!
- Square Enix Announces Roland Bridge Cast FFXIV Edition Mixer
- FFXIV Tokyo Fan Fest Schedule Is Now Available!
- FFXIV Patch 7.57 Brings Crucible Rankings & Adjustments
- We Scare Grisly Bears: All Saints’ Wake Returns to FFXIV!
- Snag Nendoroid Haurchefant Before Pre-Orders Close!
- Rumble and Tumble to Victory: The Fall Guys Collab Returns!
- FFXIV Mobile Permanently Ceases Operations, What’s Next?