Brayflox's Longstop Dungeon Guide and Loot List
Welcome to our guide to Brayflox's Longstop, Final Fantasy XIV's level 32 dungeon. This guide aims to prepare players so they will know what to expect, with simple mechanic instructions and notes on how to progress through the dungeon.
Overview
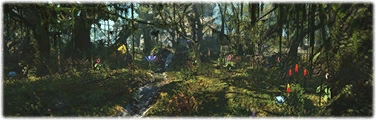
After a tiring journey across Eorzea, it is deep within the quiet jungles of Raincatcher Gully where the charismatic and enterprising young goblin, Brayflox Alltalks, chooses to build her tiny empire. What she does not realize, however, it that something else -something sinister- has also made the lush forest its home. Now driven from their rightful(?) claim, Brayflox and her brethren seek to retake the land, and are not above asking the help of lesser races (that would be you) to help them do so.
Information
- Minimum level required: 32
- Party size: 4
- Prerequisite quest: "Skeletons in Her Closet"
- Entrance: Easstern La Noscea (x14, y24)
Dungeon Guide
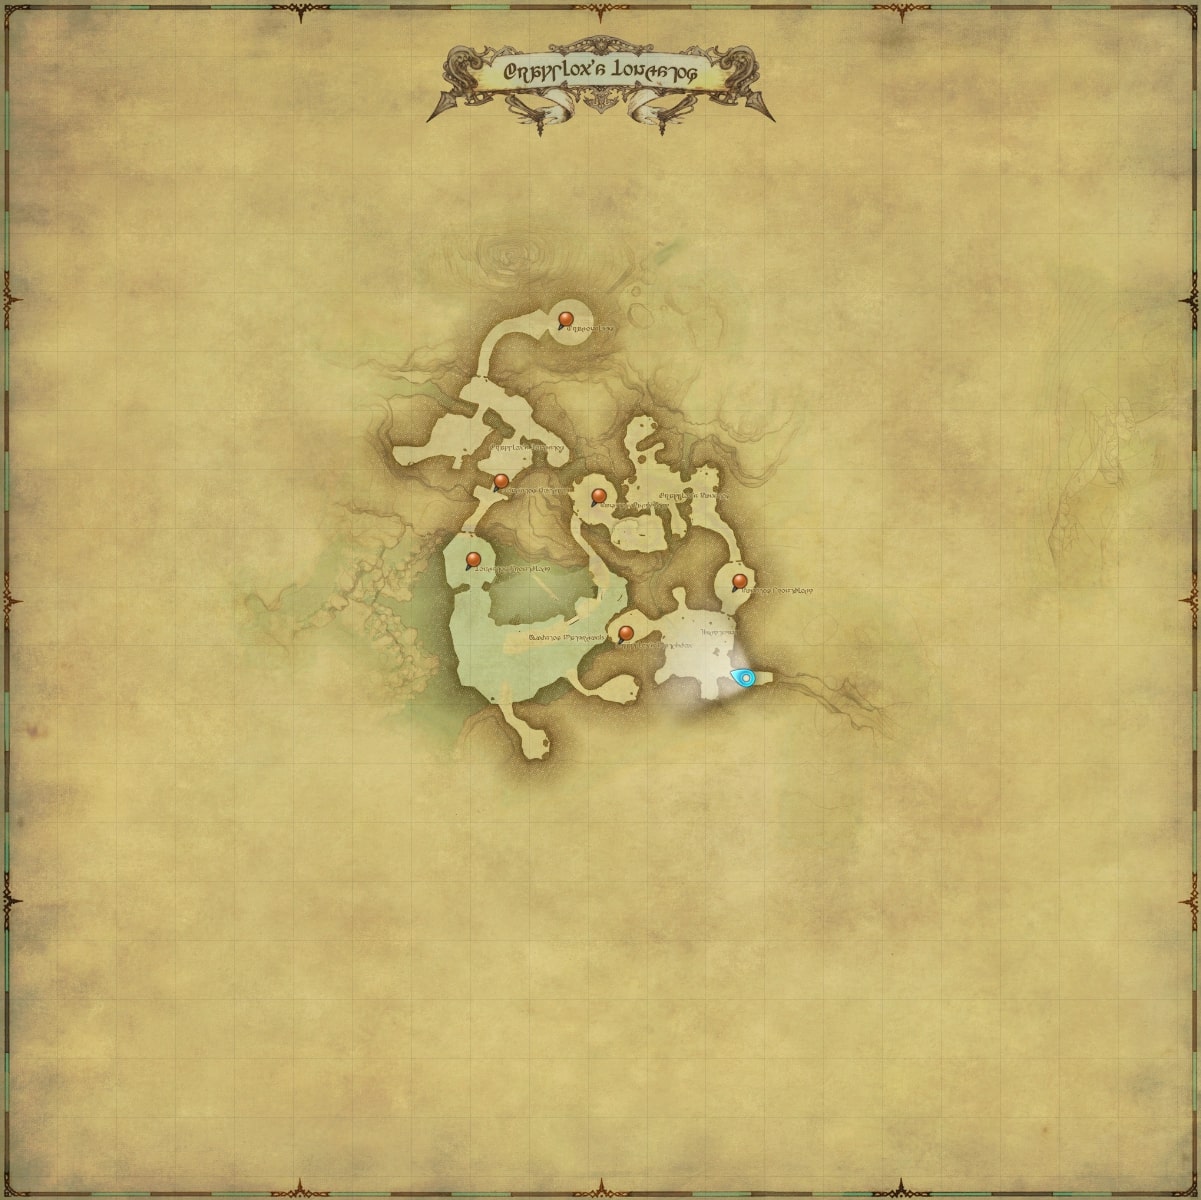
This is a relatively straight forward dungeon, with only a few mechanics that take you off the main path.
Straight ahead, on the eastern side of the first area, is a Goblin Pathfinder. Interact with them to receive the Runstop Headgate Key. This key is used at the Runstop Headgate to continue to the first Major Encounter.
Great Yellow Pelican
This boss starts with three Violet Back adds. Focus these monsters,
as they each cast Poison Breath, a cleave that applies a poison
DoT to players hit. As a tank, make sure you try to face them away from the
party to prevent excess damage. Healers can use ![]() Esuna to remove this
poison.
Esuna to remove this
poison.
The boss casts:
- Hammer Beak: A single target mild tank-buster.
- Numbing Breath: Casted conal AoE, targeted at the tank. If hit, applies a paralysis debuff. Face boss away from party and dodge when needed.
After a set amount of time, the boss will spawn a pack of three adds, two more Violet Backs and one Sable Back. This should be handled the same, face them away and focus them down. The Sable Back casts Slumber Breath, which is a casted conal attack that can be dodged. If hit, the player is afflicted with a sleep debuff.
Optional: On the path between the first and second major encounters, there are four Goblin Pathfinders that will start being attacked if you get near them. If you prevent them from dying to the monster pack, you are rewarded with additional treasure coffers. Tresure Coffers 1-4 can be obtained in this way.
Inferno Drake
The boss only has one skill: Burning Cyclone. This is a simple cleave on the tank. Make sure to face the boss away from the party.
After a time, a Tempest Biast will spawn which chases Brayflox Alltalks around the arena. This add will occasionally target Brayflox with Levinshower, a cleave attack. Avoid standing around Brayflox when his RP text appears to avoid this.
After the Tempest Biast is killed, Brayflox's RP text now means that the boss will be afflicted with Blaze Spikes and cast Burning Cyclone. Keep avoiding Brayflox to not get hit. The Blaze Spikes will cause fire damage back to attackers on hit. This damage is negligible however, and can just be healed through.
Hellbender
This is a pretty simple boss encounter. The boss casts these skills:
- Bog Bomb: Targets a non-tank player and fires an unavoidable AoE at them.
- Peculiar Light: Point blank AoE. Increases damage taken from magic attacks by 5%. Move out to avoid this.
- Stagnant Spray: Telegraphed conal AoE that targets the tank. Move to avoid this.
- Effluviation: Targets a non-tank player and traps them in a bubble. While in the bubble, the player takes continuous damage and cannot perform any actions. Players must focus down and destroy the bubble to free them.
At 20% health, a dragon named Aiatar will drop in, knocking back and dealing minor damage players, and killing Hellbender. You must now handle this monster until they fly away to end the encounter. Aiatar casts Dragon Breath, a telegraphed long AoE targeting a random player. Move to avoid this.
Optional: You can veer off the path to the final encounter and encounter a Deep-Jungle Coeurl. This encounter used to give bonus loot, but no longer does since the leveling dungeon overhaul. It is recommended to ignore this encounter.
Aiatar
This is a single-phase boss encounter that loves to afflict the party with poison. Skills are as follows:
- Salivous Snap: Low damage tank buster that afflicts a cleansable poison to the target. Tanks will want to
mitigate. Healers can cleanse this poison with
 Esuna.
 - Toxic Vomit: Random telegraphed ground AoEs will appear. After the AoE, a poison blob spawns that will grow and perform a massive point blank AoE from the blob. You will want to put some good distance between yourself and these blobs before they explode. Being hit will apply a cleansable poison DoT on the player.
- Dragon Breath: Same as before, a telegraphed long AoE targeting a random player. Move to avoid this.
On the second cast of Toxic Vomit, Aiatar will spawn two sets of blobs. After the first set explode, you will need to move again into the previous danger zones to dodge the second set of explosions.
Loot
This is a table of all unique dungeon drops.
Changelog
- 05 Jul. 2023: Guide added.

Hana tends to split their gaming time between FFXIV and Genshin Impact. In FFXIV, they have been playing since the relaunch of A Realm Reborn, but finally made the jump from WoW Heroic to FFXIV Savage Raiding in Shadowbringers, with a focus on playing Caster Jobs. In Genshin Impact they focus on Abyss and exploration content with Main DPS Characters being Yoimiya, Raiden Shogun, and Klee. You can find them occasionally streaming raid or playing games on Twitch.
- FFXIV’s Berlin Fan Festival Schedule Is Out!
- Pre-Order FFXIV Nendoroids Y’shtola & G’raha Now!
- From Action to Tab Targetting — How Did You Start FFXIV?
- Developing FFXIV Big Fish Together With Ryuta Suyama
- These Changes Will Make You Think Twice Before Tanking in Evercold
- Complete Dawntrail’s Art Book Collection With – Relics of Eternity –
- New Framer’s Kit With Return Of Breaking Brick Mountains
- Last Chance For THE PRIMALS x Download Festival T-Shirt!