Overview of FFLogs Replay Function in FFXIV
This page contains information on the website "FFLogs" and teaches the player how to utulize the Replay function on the website.
Using the Replay Feature
FFLogs has a lesser known feature called 'Replay.' Just as the name implies, the Replay view of a log reconstructs the fight based on the log data. Most importantly, it showcases position data of players and enemies, allowing more insight into what went on in a fight than what could be garnered from damage numbers or skill usage alone.
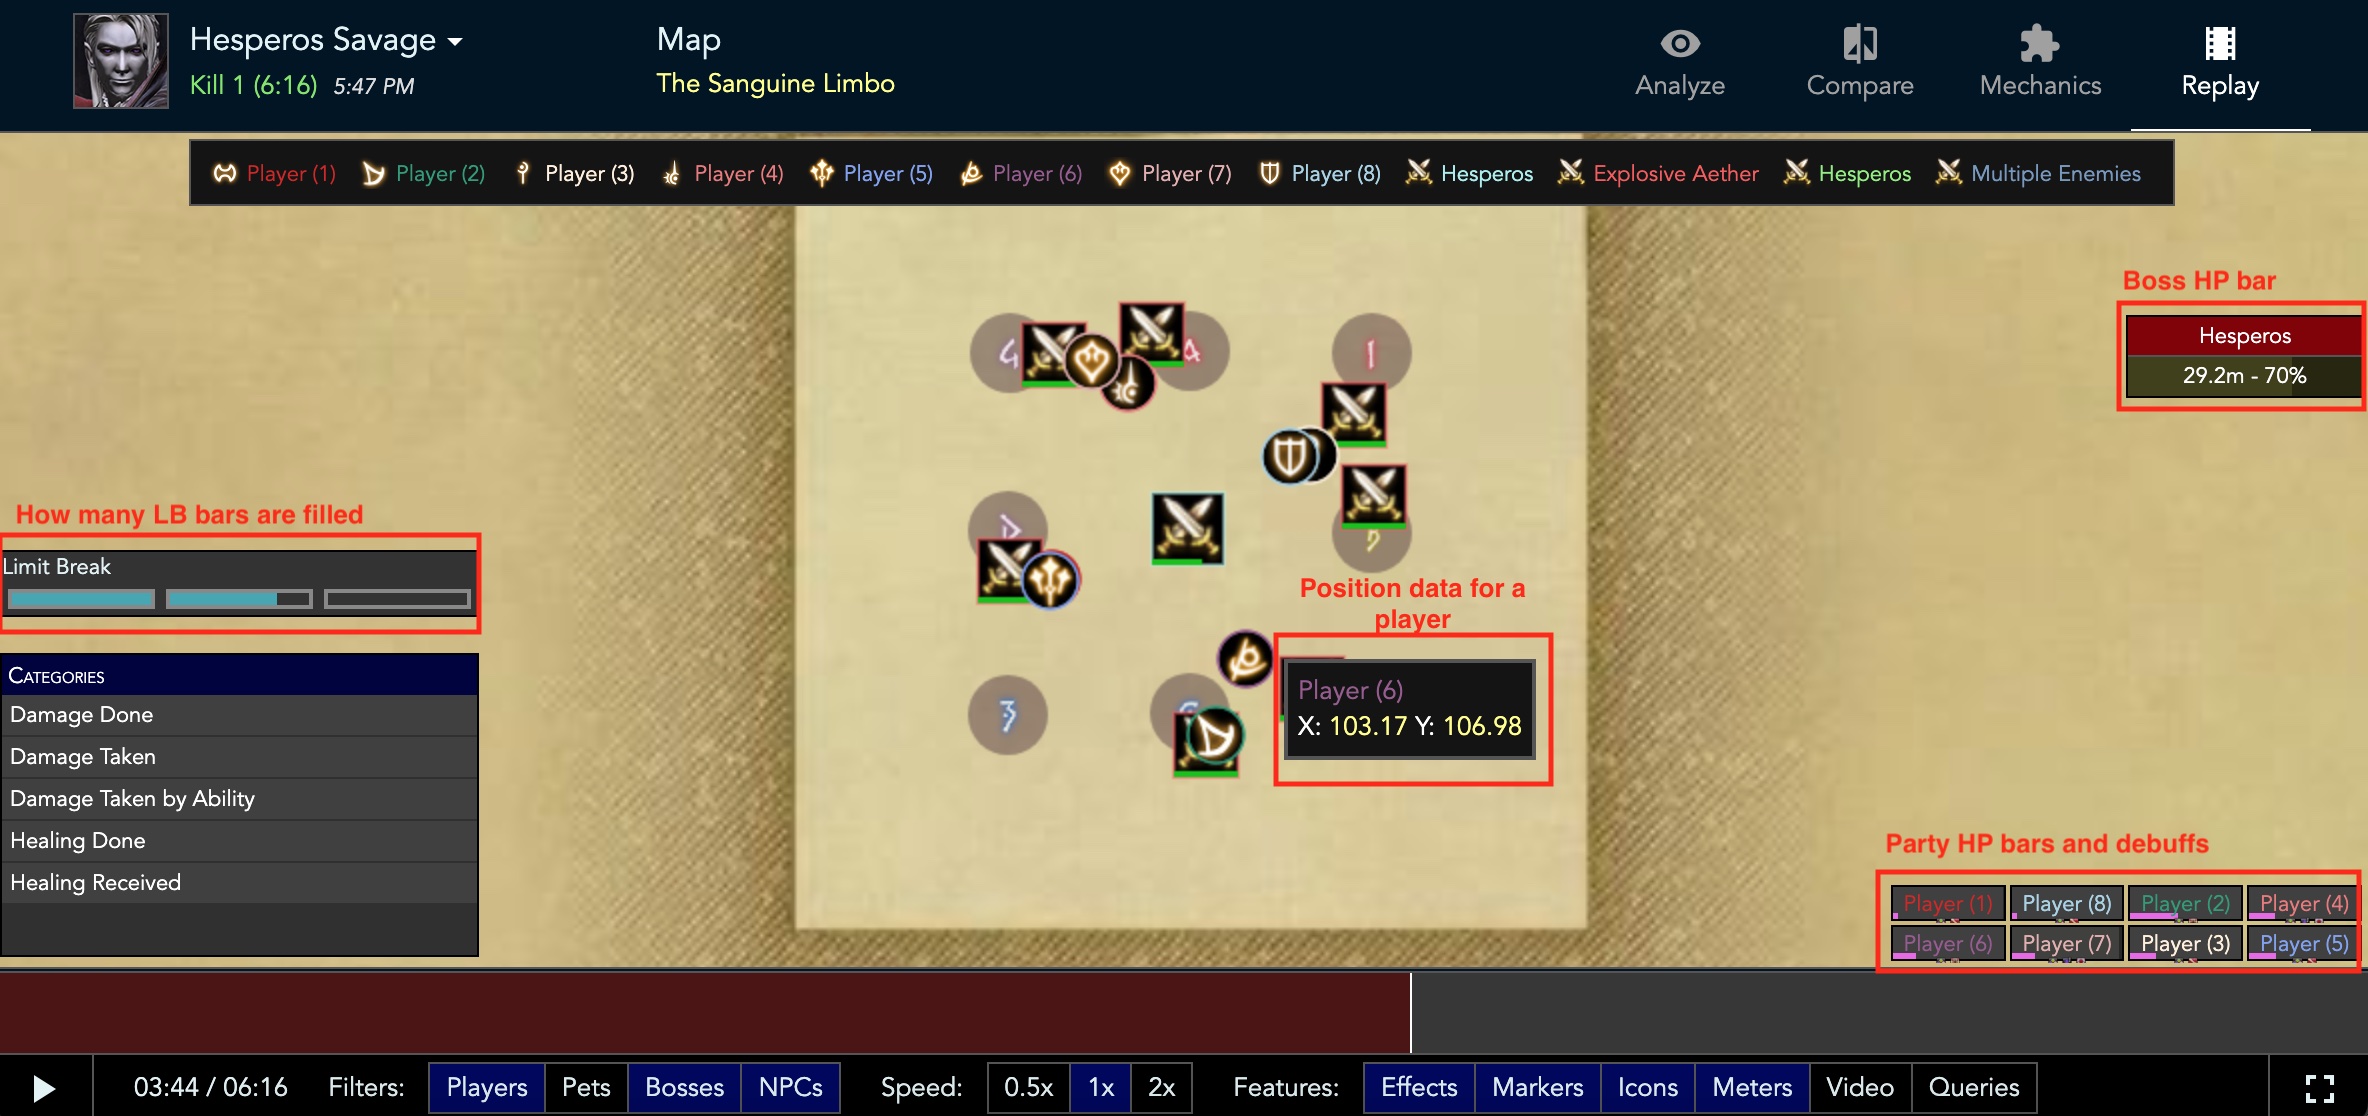
In the above example replay, you can see the positions of all players and relevant enemy actors on the map. In this case, the boss has spawned Explosive Aether orbs that need to be soaked by players, and they show up as additional enemy units. Hovering over any unit will show you their exact coordinates, and selecting a unit will show you the direction of their facing if applicable.
The side elements provide some additional information such as the state of the LB bar, the boss's HP, as well as the party's HP. Any casts performed by the boss will also show up under the boss's HP bar when they occur. The 'Categories' menu on the side will also display the selected information and how it changed over the fight. For example, clicking on 'Damage Done' will turn that menu into a damage meter.
Using Replay to Check Mechanic Strategy
One common use case for the replay feature is checking what strat a group employed for a mechanic that is positioning dependent. For example, Eden's Promise: Umbra (Savage) featured a mechanic where all eight players had to place a bramble object where they stood, and the placement affected how the group would approach subsequent mechanics. Below are some examples of various placement patterns as seen using the replay feature.
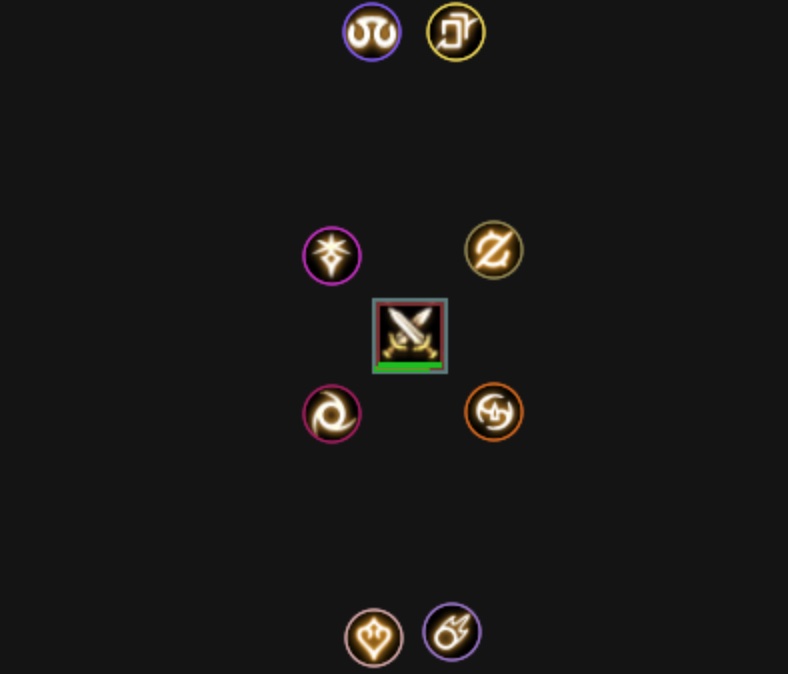
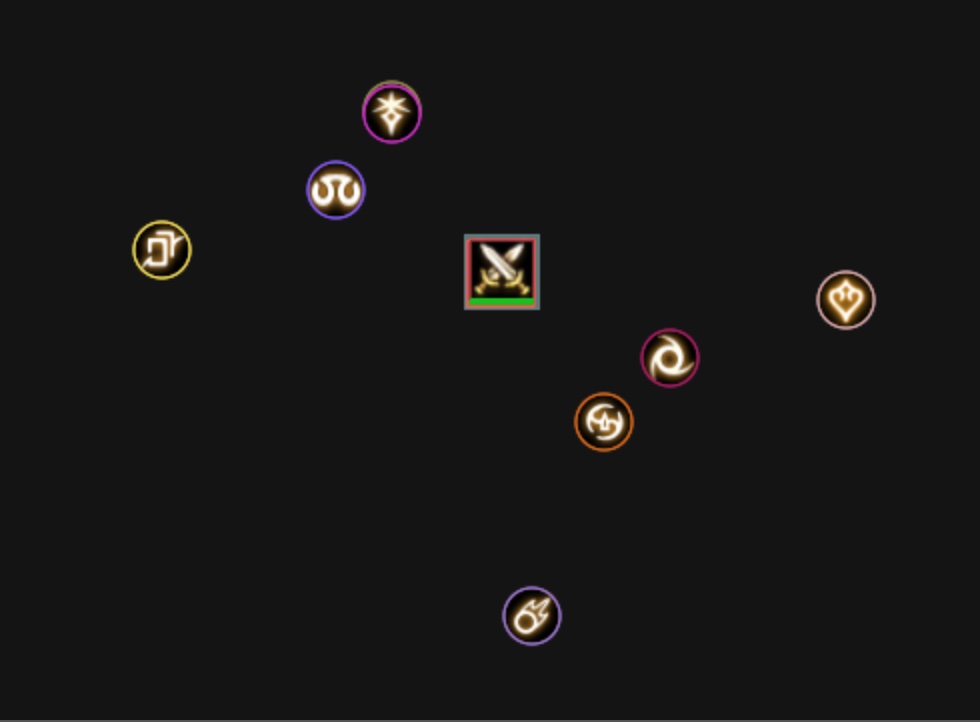
As you can see, the two teams employed very different placement strategies in this mechanic, with the second example choosing to stack two players together and drop their brambles in the same spot.
Diagnosing Mispositioning Issues
Replay can also be used to diagnose deaths that are not immediately obvious from damage data alone.

The above death is from the first Great Wyrmsbreath mechanic in the Nidhogg and Hraesvelgr phase in the Dragonsong's Reprise (Ultimate). In this mechanic, the two dragons each tether players with ice or fire tethers that they must stack with the opposing element to cancel out their effects. Additionally, the tethers themselves are proximity tethers that deal more damage when the player is closer to the point of origin. The Reaper took an unusually high amount of damage from Nidhogg's Flame Breath, and one might guess that it is due to the proximity scaling.
This is then confirmed by the replay view itself. The other pair visible on the screen, the Dancer and Astrologian, are stacked tightly on the center lane of the arena, while the Reaper is visibly offset towards the left - which is where Nidhogg spawns, causing him to take additional damage from proximity.
Diagnosing Convoluted Wipes
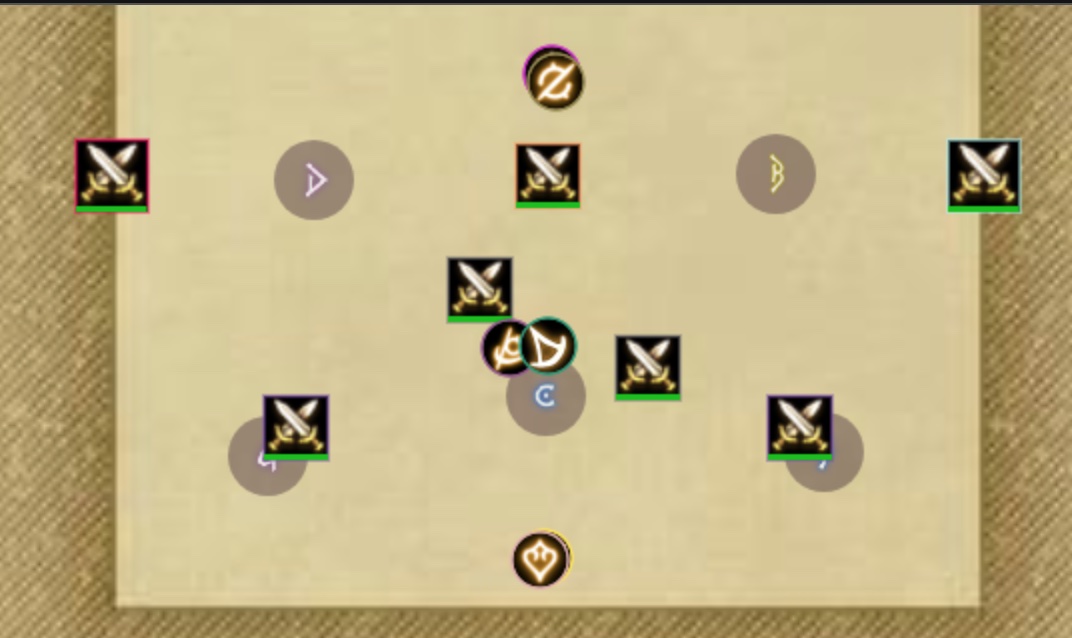
Similar to the previous example, the extra positioning information available in replays can help shed light on confusing wipes. The Storms of Asphodelos mechanic in Asphodelos: The Third Circle (Savage) is one mechanic that is prone to such wipes, as the mechanic involves six different baited flame cones at the same time, three from the boss itself and three from tornado objects that spawn north, southwest and southeast.

While the cause of the wipe is quite obviously a misbaited flame cone, it is nigh impossible to tell which cone is misbaited, especially when the cones originating from the boss and the tornados are both named Winds of Asphodelos. What we can deduce however, is that the Machinist was only hit with one cone from Phoinix 12 for a reasonable amount of damage and thus survived the carnage. The party instead was roasted by both Phoinix 13 and Phoinix 22. Let's keep those numbers in mind as we look at this moment in the fight using the replay feature.
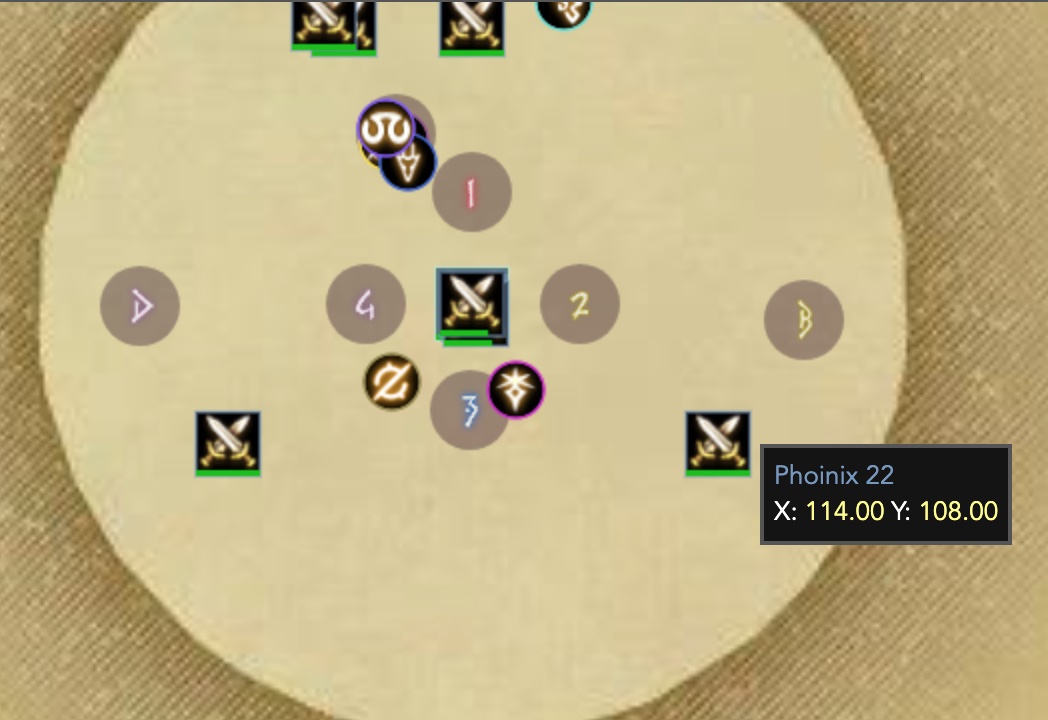
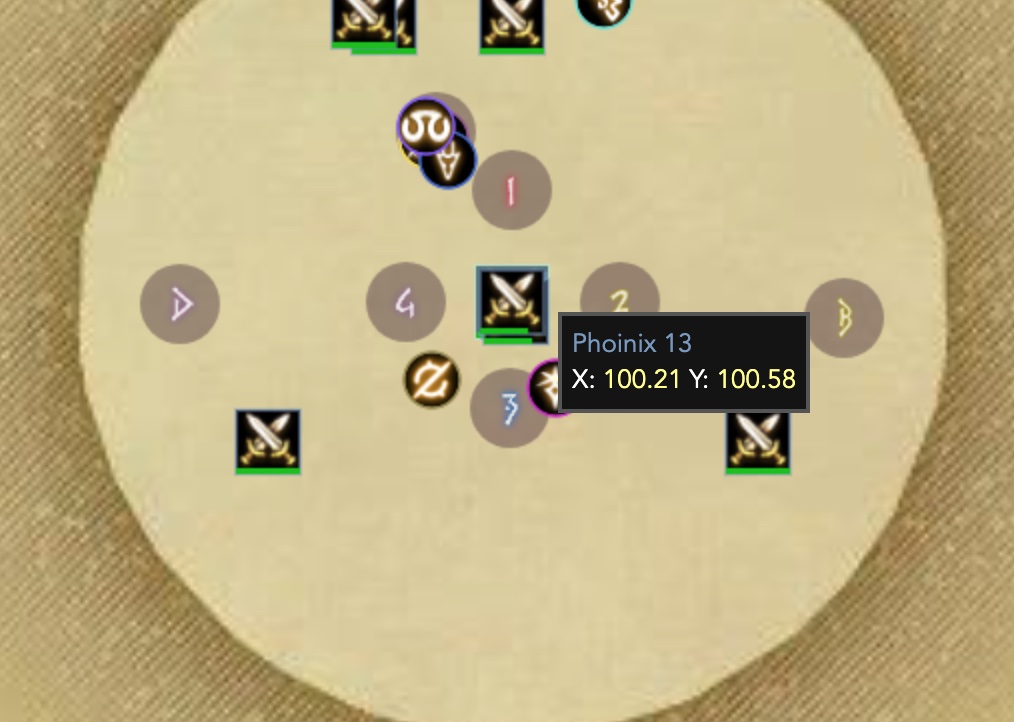
These actor names actually correspond to specific units in the replay view as can be seen in the above two screenshots. Phoinix 13 is the subactor that spawned on the boss itself and thus represents a boss proximity bait. Phoinix 22 is in the bottom right corner of the map, representing a tornado object. In this particular strategy, the party was supposed to take the proximity bait from the boss itself, so Phoinix 13 dealing damage to the party was expected. However, the attack from Phoinix 22 is a misbait, and the replay data helped us pinpoint exactly which tornado was misbaited. While not shown in the screenshots, hovering over the enemy unit at the top of the screen reveals it to be Phoinix 12, indicating that the Machinist successfully baited the northern tornado.
Changelog
- 19 Jun. 2022: Guide added.
More FFXIV Content

Meru has been raiding since early Stormblood and has done high end content in a variety of roles. She has a lot of experience reading and analyzing logs and has done extensive testing on a variety of mitigation related issues. She hangs out in the Balance Discord and is often pinged in multiple channels for mitigation questions, but sadly very little fishing questions.
- New Framer’s Kit With Return Of Breaking Brick Mountains
- Last Chance For THE PRIMALS x Download Festival T-Shirt!
- Team DN Claims #WorldFirst in FFXIV’s Dancing Mad!
- FFXIV Players Blown Away By Store Updates!
- Support #WorldFirst in FFXIV Dancing Mad Ultimate — Now Available!
- Calling FFXIV Fishers To Catch The Rainbow For Charity!
- Last Chance To Enter FFXIV x Jollibee Sweepstakes!
- The Senor Otters Make Their Grand Debut in FFXIV