Legion Raid Guide for Valtan Gate 2
Valtan is the first Legion Raid introduced into Lost Ark and comes packed with various mechanics, new features and serves as the entry to an entirely new raid structure. Valtan gate 2 allows the players to challenge Valtan himself. Similar to the first gate, players need to be item level 1415 to take on the normal difficulty and item level 1445 for the hard difficulty.
Valtan Gate 2 Introduction
After successfully defeating the boss in gate 1, players will now be able to challenge Valtan himself in gate 2. This fight brings alot more mechanics to the table, including destroyable surroundings as well as the instant death mechanic when being thrown off the map. Players will be rewarded with gold, materials and accessories upon clearing this gate.
Valtan Gate 2 Overview
Players will have to remember and execute alot more mechanics this time around. The fight is segmented into three phases, easily distinguished by the arena or Valtans appearance. Phase 1 starts in an enclosed arena, in which players have to lure Valtan into the walls to break the arena apart, unlocking more space and allowing players to dodge incoming attacks and mechanics. Phase 2 is triggered at around 115 HP bars. Valtan leaps into the air and the players will see a short cutscene, in which Valtan breaks the outer walls of the arena. The majority of the fight will take place in this phase as well as most mechanics. Valtan will continue to break parts of the arena at certain HP thresholds, at which point players need to tread carefully as getting knocked out near the edge will result in an instant death regardless of your current HP. Phase 3 will start once Valtan is brought to 16 or fewer HP bars, after which he turns into a ghost, which is why this is commonly referred to as the "ghost phase". After entering the third phase, the final 40 HP bars will appear and players are on the final push to clear the first Legion Raid.
Valtan Gate 2 Battle Items
While not needed, bringing the right battle items will make parts of the fight alot less dangerous and allows for smoother runs. It is highly recommended to bring these in order to ensure survival and proper execution of mechanics.
- Seven players should take Destruction Bombs
 to break Valtans armor in Phase 1
 - Player eight brings a Corrosion Bomb
 instead to improve destruction power.
 - Time Stop Potion
 to block certain mechanics
Optional battle items are:
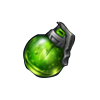
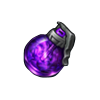
- Dark Grenade
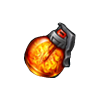
- Flame Grenade
- Campfire

Valtan Gate 2 Mechanics
Valtan himself will throw players into multiple mechanics throughout the fight. This section will cover the various mechanics players will encounter.
Charge and Armor Break
The players first goal is to lure Valtan into the breakable walls on the outer side of the arena. When done right, Valtan will knock himself down, allowing the party to break his armor, which increases the overall DPS of the raid. There are various ways on how to move Valtan around, the following pattern is one of such ways.
Example Armor Break Strategy
All players should immediately move to the far right at the start of the fight. Once Valtan charges, dodge out of the way and keep your Destruction Bombs ready. The Corrosion Bomb can be applied while he is pounding the ground before the charge. Continue to use skills with Destruction to break his first stack. When done right, players should move to the 1 o' clock. Valtan will leap after the players and will spin as a follow-up, breaking more walls which makes the fight easier. The next location is 11 o' clock, which will be Valtans second charge target. All grenades should be on cooldown at the moment, so just use destruction abilities this time. Valtan will leap into the air and throw down spears, after which he lands in the center, causing a massive floor wide AoE. The safezone for this AoE the outer layer of the arena, which, if done right, should be partially accessible due to how Valtan was lured earlier. Players should assemble at around 9 o' clock to break the last stack of armor. Repeat the same strategy, use Corrosion and Destruction Bombs and the armor should break without problems.
Floor Wipe
The first scripted mechanic players encounter in this fight. This can be a very tricky mechanic if the party decides to not use the Sidereal Balthorr. It is highly recommended to use this method over the regular clear unless you are taking on Inferno Valtan. Valtan will smash the ground twice. The first smash creates a dodgeable pattern, the second smash is an undodgeable floor wide AoE.
Sidereal Balthorr Method
Highly recommended in this fight, using Balthorr before he slams the ground grants all players protection against the two upcoming hits. You take minimal damage from the two smashes which would otherwise be lethal. The raid leader should ping and all players have to be inside the circle when Balthorr strikes down with his hammer. The buff lasts 30 seconds.
Normal Method
Only advised if you are with a fully capable party or doing Inferno. In order to survive the second smash, all players need to consume one of the blue orbs which reside on the pillars around the arena. Players can take multiple orbs, so be careful not to steal them from other members. When Valtan smashes the ground for the first time, all players need to dodge the attack by stepping out of the red indicator. If you do get hit by the first hit already, your buff will be consumed and the second hit will kill you.
Four Stone Pillars
Valtan will leap into the air and four stone pillars will appear in a cross shape. The arena will be covered in a yellow circle with one random player targeted by a red cone. To avoid damage from the yellow zone, players must hide behind the stone pillars. The targeted player should move the red cone in between two pillars. It will stop tracing after a few seconds, at which point the players must dodge out of the red cone. There are two options to survive:
- The player manages to hide behind one of the pillars to avoid the yellow zone damage.
- The player uses a Time Stop Potion once out of the red cone.
Upon landing, Valtan will target a random player again with a red cone, all other players can utilize this window to deal damage. No items are needed as long as everyone stays out of the cone
Arena Break and Stone Pillars
The first major change to the arena, Valtan leaps into the air and breaks one side of the arena. From this point on, any knockdowns near that edge will cause instant death. Tread carefully. Players should move to the opposite side. You cannot fall down by yourself, even if you click off the map, so hug the wall. After the wall break, four pillars will appear, similar to the mechanic before. Players need to hide behind them to avoid the yellow zone damage. Just like in the mechanic before, one random player will be targeted with a red cone, make sure to move it away from your partymembers. The hit will also cause the pillars to detonate, so be prepared to dodge or use movement abilities.
Charge Grab/Counter
Valtan will position himself in the center once again, accompanied by a short cutscene. After that, he will reach out with his hand, preparing for a charge which grabs all players who are in the line of the charge. A counter is needed to prevent that and instantly end the mechanic. The timing is fairly strict, ideally players count to three in their heads. Valtan will continue charging if the players are unable to counter. Getting grabbed usually results in death, but sometimes players can survive.
Arena Break and Stone Pillars
Valtan will leap into the air and break the other side of the arena, leaving the players with nothing but a platform to fight on. Players should hug the opposite side, remember, you cannot "walk" off the plattform, so do not be afraid to click outside of the map. After the floor break, the pillar mechanic will commence, following the same pattern as before. Yellow zone is avoided by standing behind the pillars, the random target should drag the cone away. Prepare to move or dodge away from the exploding pillars.
Ground Pound into Ghost Phase
The final mechanic before entering the third and final phase of the fight, Valtan leaps up again and comes down with a smash from the southern side of the platform. After landing, he will execute four strikes in all cardinal directions. The easiest way is to dodge the first one and then stand inside the area where the first strike landed, as he will not hit the same place twice. This is also the ideal place to use the Sidereal Balthorr. After the last strike, Valtan will pound the ground causing explosions to appear underneath every player. Stacking all players and then moving into a fixed direction, either clock or counterclockwise makes avoiding those a simple feat of walking. The explosions will lead into stone pillars, a mechanic players should now be familiar with. Hide behind those, and then move into the open spot to avoid the final blow. Using Balthorr will avoid people getting knocked around, however, you still take damage, so be ready to use Time Stop Potions if needed.
Ghost Phase
Valtan will now appear in an ethereal form, being located in the center of the arena. He will remain stationary throughout the fight. Players should have counters available, as this phase will require continious counters.
There is not really any mechanic to be done besides surviving and countering the ghosts which will be summoned periodically. Successful counters will strip away an armor stack and build a good amount of Sidereal gauge. Once filled, using Sidereal Thirain will unleash a powerful strike which deals around 15 HP bars in damage. He will also try to grab players three times, once directly at the start, usually as the second or third attack. The second grab will happen once you drop him below 28 HP bars and the final grab after 14 HP bars. Valtan will turn 180° degrees after the grab, unleashing a roar that knockdowns everyone in its path. So position yourself behind Valtan after the grab. Lastly, clones will rush around the edges of the arena, also knocking players down, so watch your step and look out for red indicators.
Valtan Gate 2 Attacks
The following paragraph highlights important and dangerous attacks to look out for. On hard mode, most attacks will knock players down, so tread carefully once the arena has been broken.
Swipe and Smash Combo
A fairly common combo, Valtan swipes his axe twice before smashing down with a blow, finishing the combo with a spinning hit that also creates a shockwave that expands.
Fist Ground Smash
Valtan puts down his axe and prepares to smash the ground with both fists, causing an explosion at the center followed up by a larger explosion on the outer side. Dodge this by moving out and then into the original fist smash location.
Bum Rush
Valtan opens multiple portals to charge at random locations. This deals major damage and knocks people around, which is quite dangerous in a broken arena. Move lateral to avoid being hit.
Parry
Valtan coils up, waiting for players to attack. If players do not halt, Valtan will unleash a devastating spin that deals heavy damage and knocks people far away. To avoid that spinning slash, players must stop their attacks. Even if not triggered, Valtan will do a spinning slash, to hide from that, players should locate themselves below his hand and weapon.
Valtan Gate 2 Rewards
Clearing the gate rewards you with materials, accessories, as well as gold. You also have the option to purchase an additional material reward with gold, which in return grants you more materials and accessories. This chest is useful if your character is new and you are trying to build any of the artifact sets quickly. After your charactr has all the items crafted, buying the chest depends on your personal goals. Check the market for prices and decide for yourself if the chest still holds enough value or if raw gold may be the better option for you.
Changelog
- 10 Sep. 2022: Guide Added