Flail Guide and Builds for New World
Welcome to our guide for Flail, a weapon in New World. Within these pages, you will find everything required to understand how best to play with this weapon in both PvE and PvP.
Flail Overview
The Flail is an impactful support weapon that comes with potent group buffing capabilities, as well as, devestating crowd-control and debuffs to help take down enemies..
Flail Strengths and Weaknesses
 Incredible group support through buffs, healing, and crowd control
- Acts as a secondary healing weapon
- Versatile and can fit into many builds
- Fantastic disruption weapon because of staggers and knockdowns

 Low damage output
- Lacks quick, consistent mobility
- Lacks ability diversity in META content

Flail Builds
No matter what build the Flail is in, it will be a support weapon. It will be primarily used for its secondary support build that offers the most group synergy, but it can be interestingly used as an option for a healer-damage hybrid in PvE.
For more builds, beyond the two builds we present below, please refer to our PvE and PvP build pages:
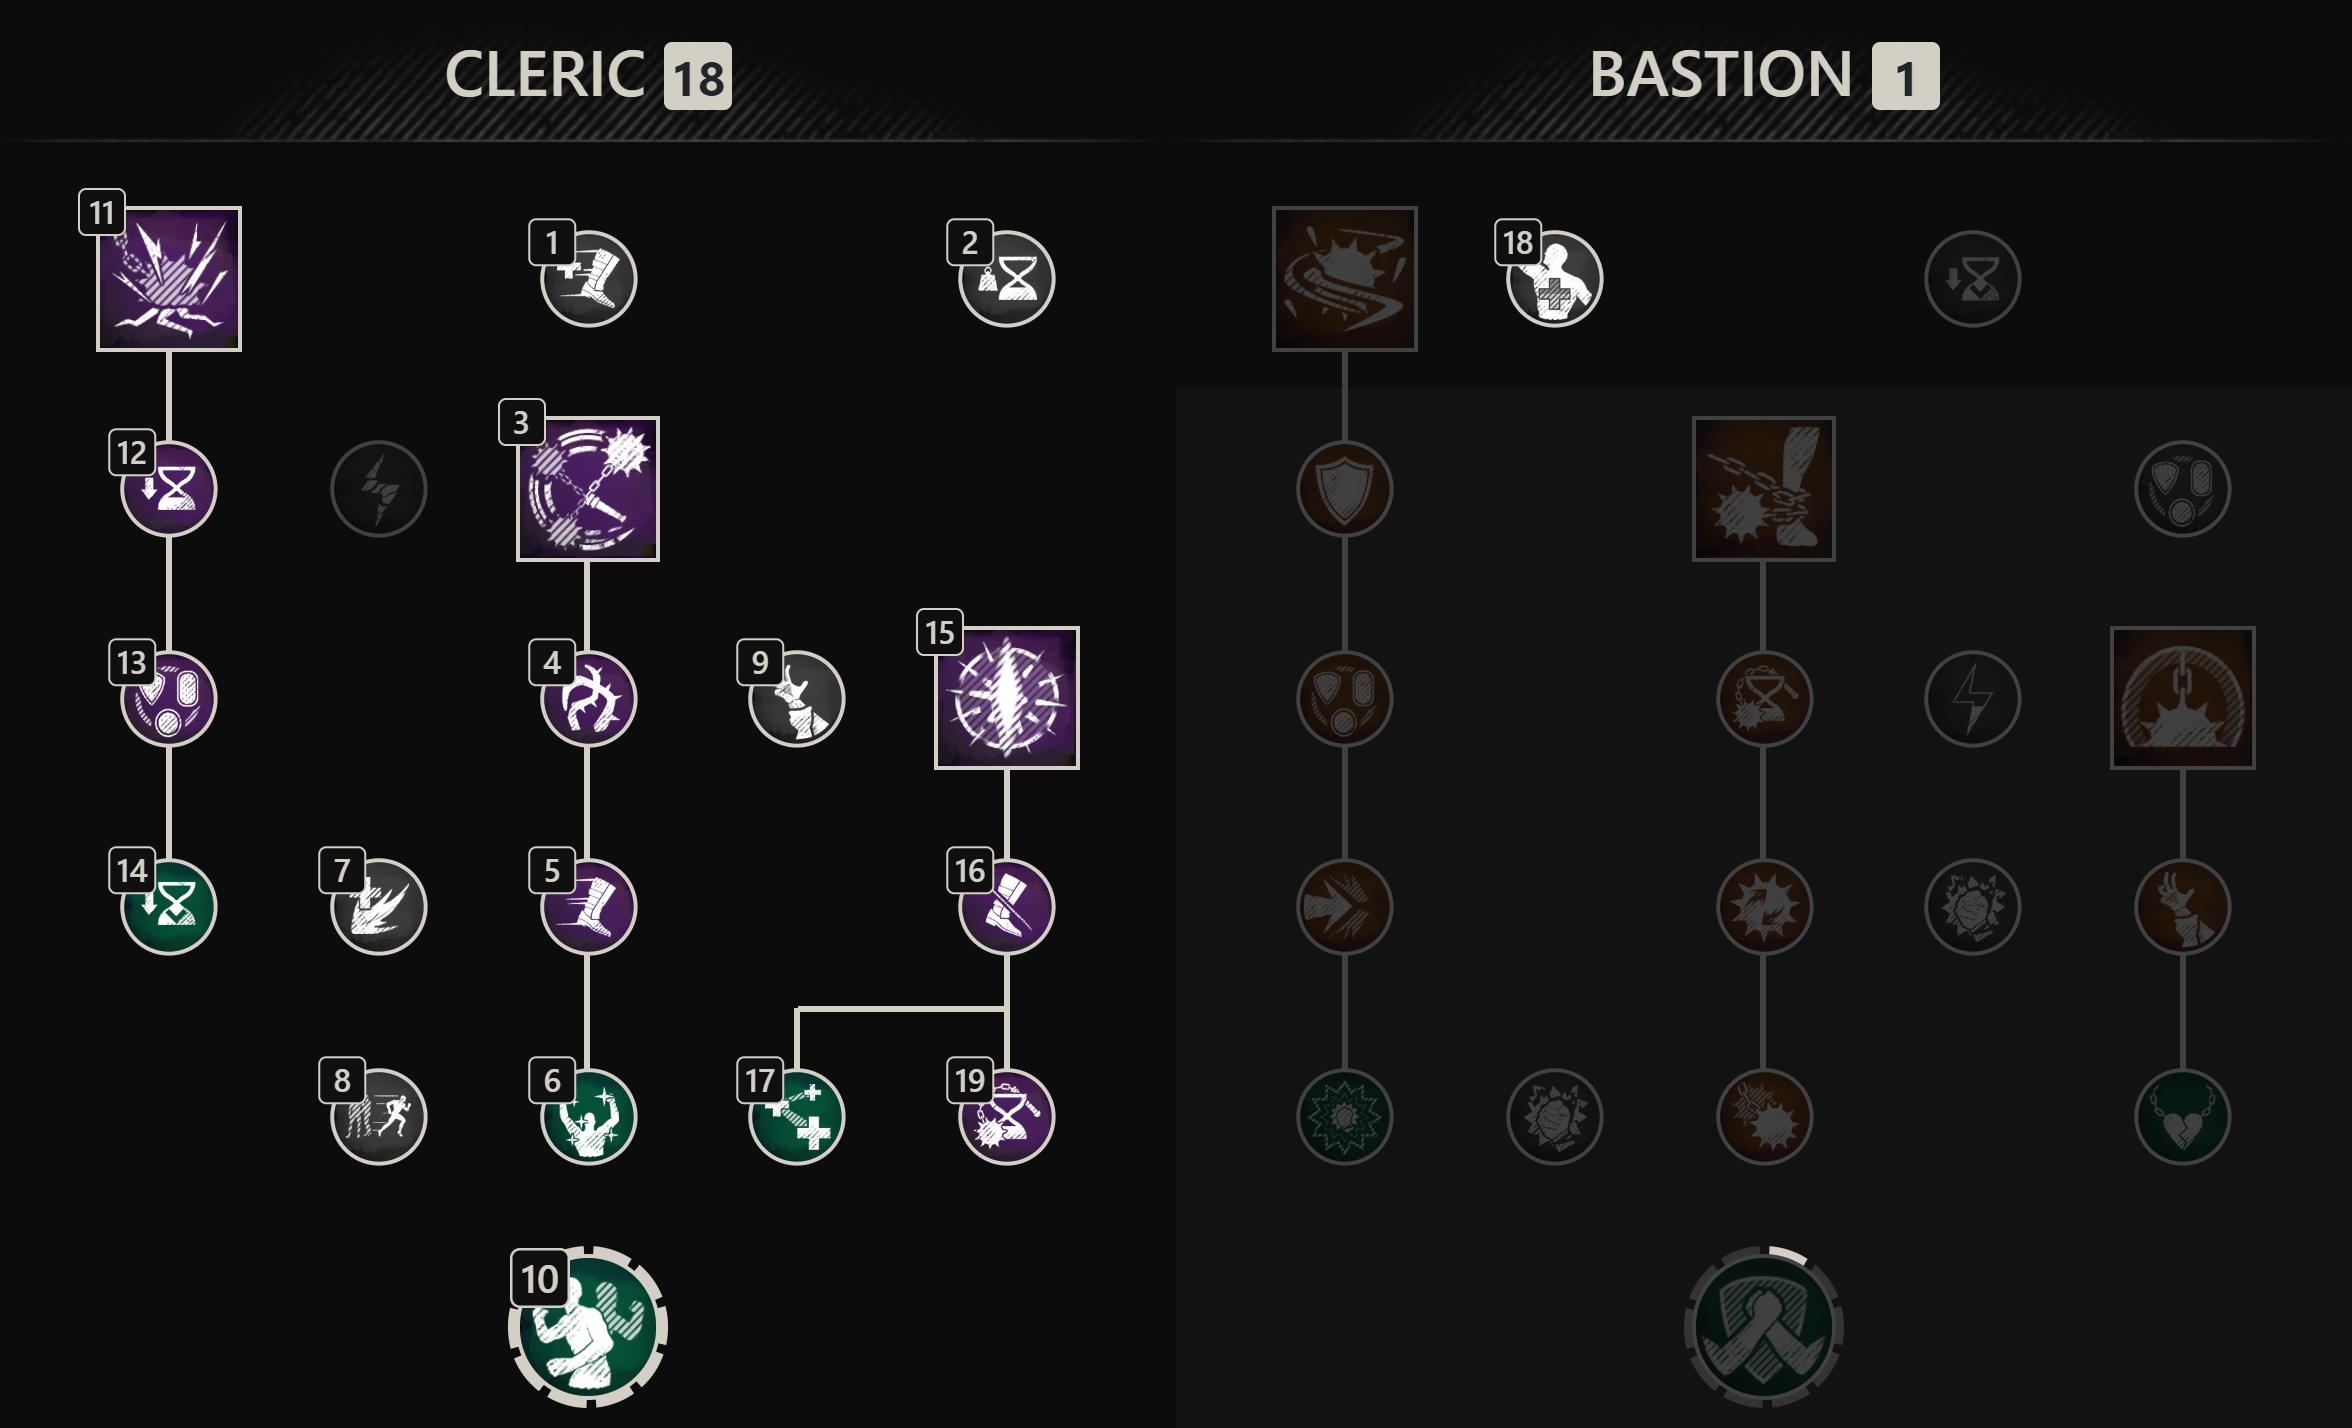
Void Gauntlet Support
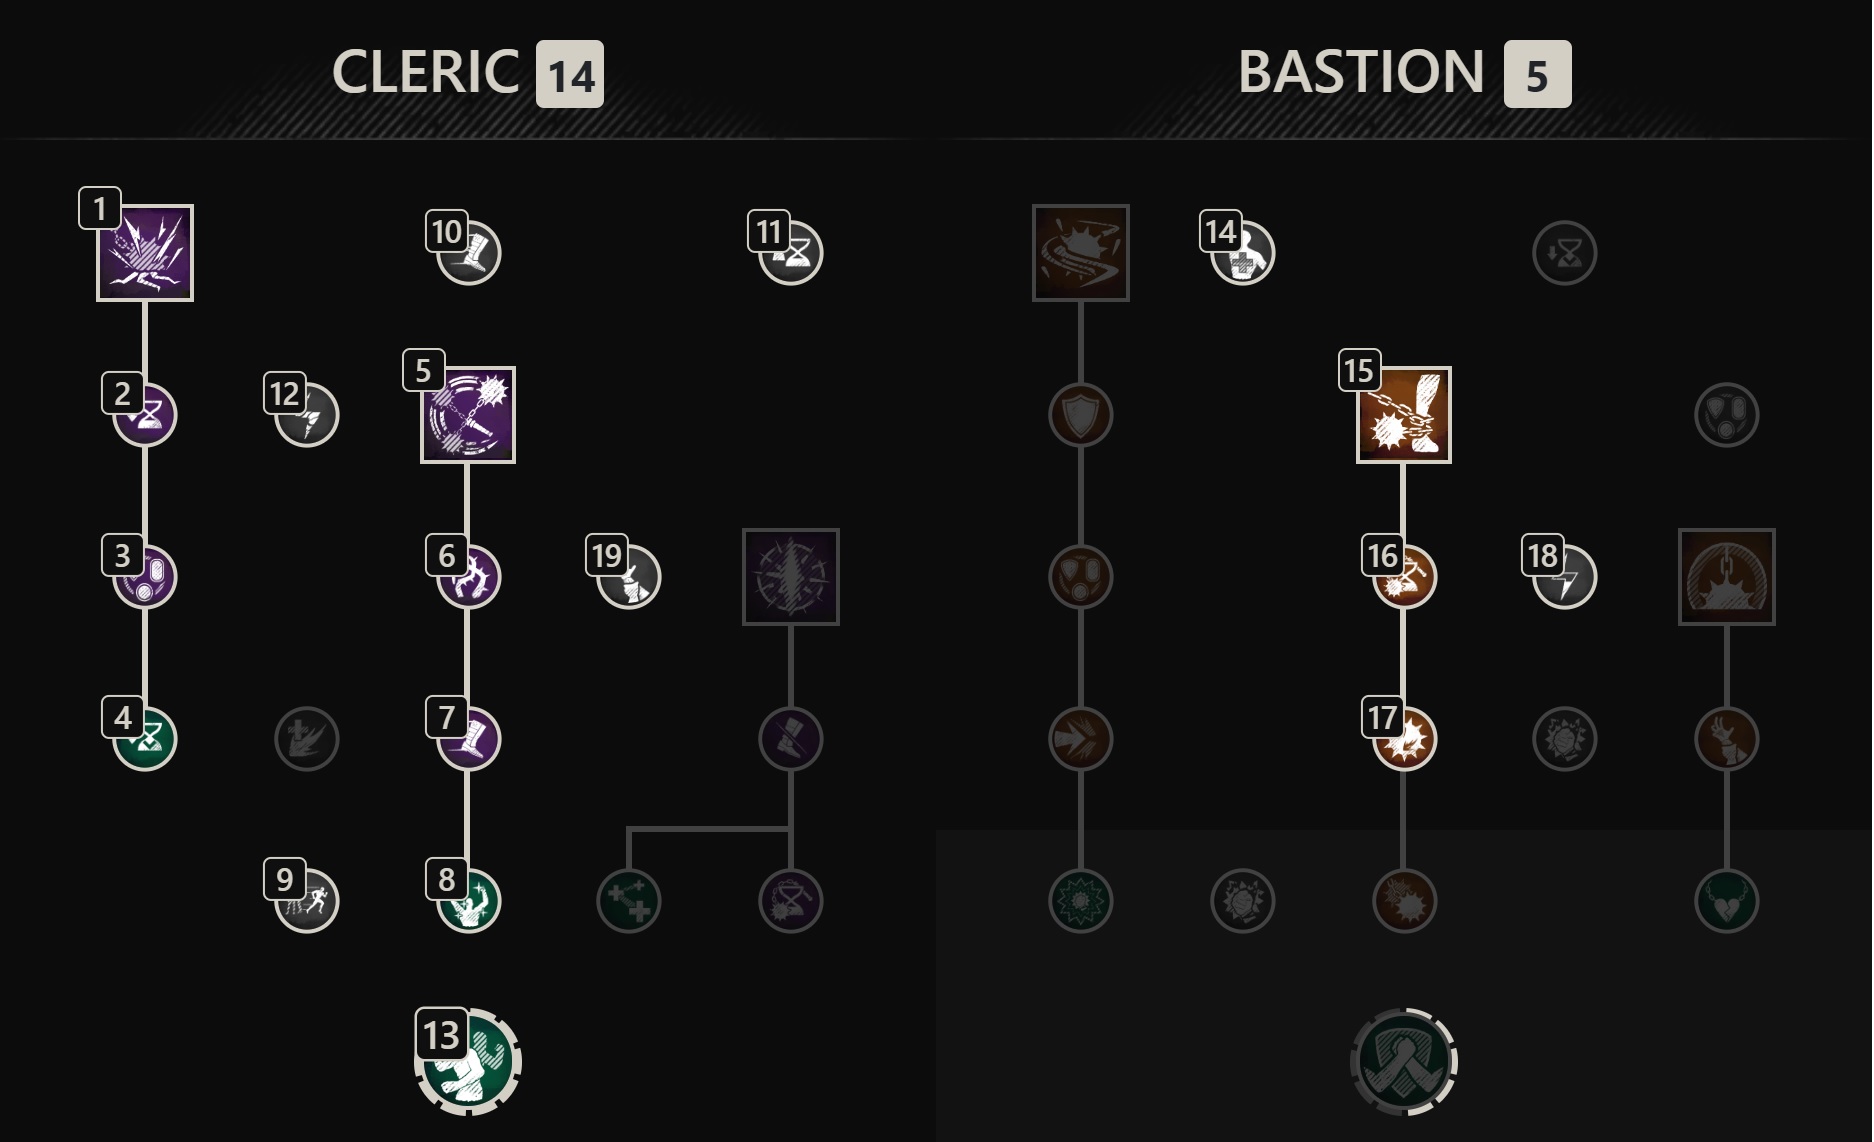
Life Staff PvP Secondary
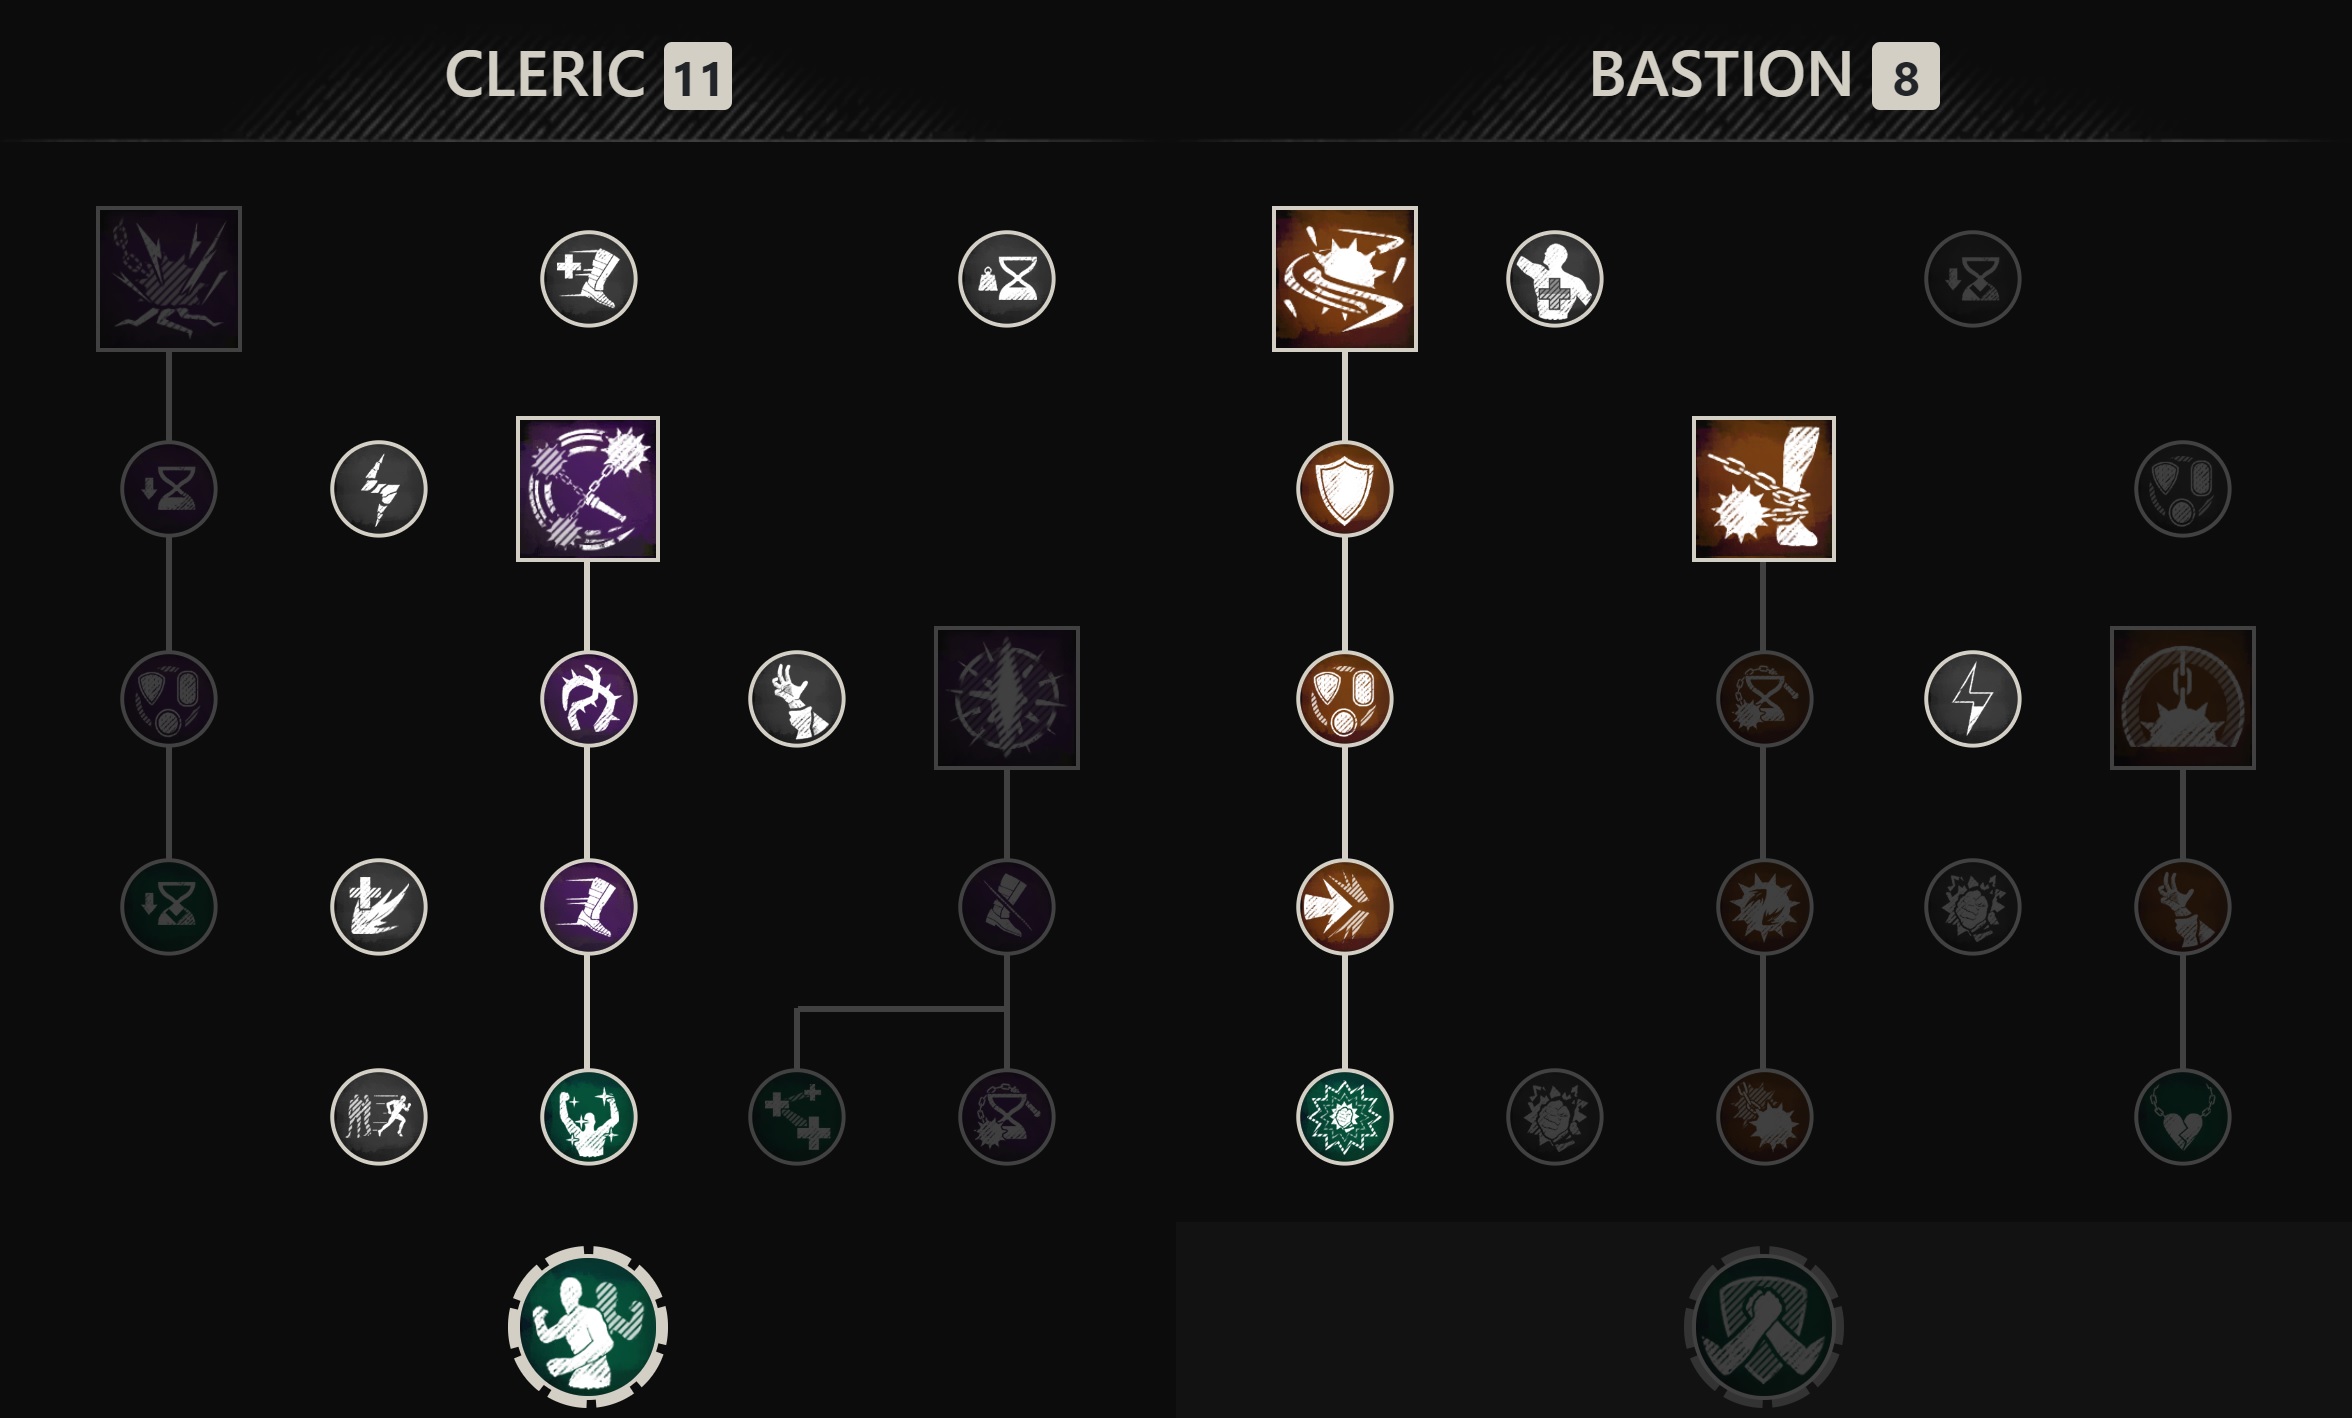
PvE Healer
Void Gauntlet
Void Gauntlet offers healing over time and burst healing through ![]() Orb of Decay. It allows you to root
enemies in place with
Orb of Decay. It allows you to root
enemies in place with ![]() Petrifying Scream for defensive utility and to set up kills for teammates. You can also use
Petrifying Scream for defensive utility and to set up kills for teammates. You can also use ![]() Oblivion
to increase damage output, stamina and mana regeneration, and remove enemy buffs.
Oblivion
to increase damage output, stamina and mana regeneration, and remove enemy buffs.
Sword and Shield
Sword and Shield synergize well with the flail as it also has the opportunity for 3 additional perks that can be provided from wearing a shield. Both of these weapons have potent support buffs, gap closers, and crowd-control lockdown potential..
Spear
Spear offers a second weapon that can be used to disrupt enemies. When paired with the Flail, this combination will provide a devestating mix of crowd-control abilities.
Other Weapons
The Flail is a support tool that can have viability when flexed into just about any weapon. It may not directly scale with the primary weapon that is selected, but you may use a support Flail build to still have effectiveness in combat.
Flail Attributes
Your attribute distribution will heavily rely on the build and playstyle you have selected. For clarity on attributes, please reference our PvP and PvE build sections.
Important Perks
This section restricts itself to the important perks of Flail. For a complete rundown, please read our dedicated guide:
Weapon Perks
Healer
 Blessed — This perk is NECESSARY for healing. It is one of
the only weapon perks that improves healing output.
Blessed — This perk is NECESSARY for healing. It is one of
the only weapon perks that improves healing output. Mending Vortex — This perk provides incredible PvP survivability
when using the Flail as a healer.
Mending Vortex — This perk provides incredible PvP survivability
when using the Flail as a healer. Keen Speed
Damage Support
A damage Flail becomes much more flexible and you can play to your preferences. It
is just paramount to have ![]() Refreshing Move within your build. It may also just
be best to use the Artifact -
Refreshing Move within your build. It may also just
be best to use the Artifact - ![]() Odo.
Odo.
PvP Perks
 Enchanted Ward
 Refreshing
 Shirking Heals
 Shirking Fortification
- Health
- Conditioning Perks — Use
 Thrust Conditioning or
  Slash Conditioning
across multiple pieces to counter damage from major sources of player damage.
Slash Conditioning
across multiple pieces to counter damage from major sources of player damage.  Freedom
PvE Perks
- Health
- Refreshing
- Conditioning Perks — These can be used to counter expedition specific elemental damage.
- Harnessing Perks
Jewelry Perks
Amulet
- Health — This is the standard pick for all builds, it is free
health that will add to the defensiveness of your kit.
 Stamina Recovery — This is a backpocket save when being
focused and taking heavy damage. You will receive a burst of stamina that will
allow you to potentially get a quick dodge that can save your life and continue
the fight.
Stamina Recovery — This is a backpocket save when being
focused and taking heavy damage. You will receive a burst of stamina that will
allow you to potentially get a quick dodge that can save your life and continue
the fight. Thrust Protection — This acts as a third perk option that
provides more defensiveness against Bows, Muskets,
Blunderbusses, Spears, and Rapiers.
Thrust Protection — This acts as a third perk option that
provides more defensiveness against Bows, Muskets,
Blunderbusses, Spears, and Rapiers. Slash Protection — This acts as a third perk slot that
provides more defensiveness against Greatswords,
Great Axes, Hatchets, and
Swords.
Slash Protection — This acts as a third perk slot that
provides more defensiveness against Greatswords,
Great Axes, Hatchets, and
Swords.
Ring
- Sacred — This perk functions similarly to Blessed. It
is one of the only ring perks that will result in a healing output increase.
This should be the main perk you are searching for on a ring. ONLY USE IF YOU
ARE A HEALER
- Hearty — This provides an increase to your stamina cap by
10%, which is just enough to allow you to dodge twice while in light armor
without draining your entire stamina bar. It significantly improves your
mobility, making it a high priority in light armor, but it is not needed in
medium or heavy loadouts.
- Purifying
 Invigorated Punishment
 Arcane Damage
 Strike Damage
Earring
Artifacts
Weapon
- Primary Flail Options:
 Odo,
Odo,  Power Stone
 - Secondary Artifact Weapon Options:
 The Abyss,
  Trsna
Trsna
Armor
 Tumbler Feetwraps
 Featherweight
 Void Darkplate (if in Heavy)
Jewelry
Flail Heartrunes
Stoneform
![]() Minor Heartrune of Stoneform is the most defensive and useful option a
healer has. It allows you to freely break out of crowd control effects, become
immune to stagger, and obtain defensive buffs. There are three viable upgrade
options:
Minor Heartrune of Stoneform is the most defensive and useful option a
healer has. It allows you to freely break out of crowd control effects, become
immune to stagger, and obtain defensive buffs. There are three viable upgrade
options:
![]() Stalwart Heartrune of Stoneform is the best pick as it not
only gives a 10% Fortify, but a healing over time effect as well.
Stalwart Heartrune of Stoneform is the best pick as it not
only gives a 10% Fortify, but a healing over time effect as well.
Grasping Vines
![]() Minor Heartrune of Grasping Vines is the best option for non-healer support
builds that are trying to emphasize their presence in a fight with crowd-control.
Minor Heartrune of Grasping Vines is the best option for non-healer support
builds that are trying to emphasize their presence in a fight with crowd-control.
There are three viable upgrade options:
 Brutal Heartrune of Grasping Vines
- Stalwart Heartrune of Grasping Vines
- Cunning Heartrune of Grasping Vines
![]() Brutal Heartrune of Grasping Vines is the best pick to make sure that enemies caught
in the rooting effect are vulnerable to high damage bursts.
Brutal Heartrune of Grasping Vines is the best pick to make sure that enemies caught
in the rooting effect are vulnerable to high damage bursts.
When using other weapons, or if you are seeking more damage, ![]() Minor Heartrune of Detonate can be used.
Minor Heartrune of Detonate can be used.
There are two viable upgrade options:
![]() Brutal Heartrune of Detonate makes you more vulnerable, but will result in a massive
AoE burst of damage. This is best in more defensive builds or for light armor builds
where you play with more risk.
Brutal Heartrune of Detonate makes you more vulnerable, but will result in a massive
AoE burst of damage. This is best in more defensive builds or for light armor builds
where you play with more risk.
Gems and Consumables
Gems
For more detailed information on how to properly use Gems in your Flail build, please refer to the our Flail Gems guide.
Weapon Gems
It is best to use a Runeglass variant of a ![]() Cut Pristine Diamond. This will allow for a mixture
of increased damage and healing all while also applying damage over time effects.
Cut Pristine Diamond. This will allow for a mixture
of increased damage and healing all while also applying damage over time effects.
PvP Gems
In PvP it is most effective to have an even resistance split, and then dedicate additional defensiveness to Thrust or Slash through an amulet perk
like ![]() Thrust Protection or
Thrust Protection or ![]() Slash Protection.
Slash Protection.
 Cut Pristine Onyx x4 &
  Cut Pristine Opal x4
PvE Gems
In PvE combat, more specifically mutators, elemental resistance is the main concern. You can use the following gems in your gear:
- Elemental Resistance Gem x8 (Based on mutator elemental effect) + Amulet Protection Perk (Based on mutator elemental effect)
Consumables
For more information on how to manage your cooldown hotbar, what consumables to use, what foods should be eaten, or tips on how to be more effective with your consumables in PvP and PvE, please refer to our Flail Consumables guide.
Flail Rotation and Gameplay
Your rotation will change dependent on the build you are playing. For more specific rotations please refer to our PvP Builds and PvE Builds:
For more information, about Flail abilities, we have a dedicated guide that goes through every single ability in great detail:
Changelog
- 20 Nov. 2024 (this page): Guide updated with additional artifact information and tips.
- 14 Oct. 2024 (perks page): Guide updated for expansion.
- 15 Oct. 2023 (PvP builds page): Guide added.
- 15 Oct. 2023 (PvE builds page): Guide added.
- 15 Oct. 2023 (gems page): Guide added.
- 15 Oct. 2023 (perks page): Guide added.
- 15 Oct. 2023 (abilities page): Guide added.
- 15 Oct. 2023 (this page): Guide added.
More Weapon Guides
Savvvo is a full-blown MMORPG try-hard who overthinks every build, min-maxes every stat, and theorycrafts like his life depends on it. If there’s a meta, he’s dissecting it. If there isn’t, he’s creating one.
You can take a closer look at his guides and content on YouTube.
- AMA Session with New World’s Former Lead World Designer
- New World Aeternum 2026 Roadmap Revealed
- Can New World Be Saved? Offers Are Starting to Pop Up.
- The Last Day of New World: Aeternum
- New World Server Mergers (Again)
- What Else Was Planned for New World: Aeternum?
- Global Storage Search is Now Live in New World: Aeternum
- Daggers Are Officially Live in New World: Aeternum