Brutallus Encounter Guide: Strategy, Abilities, Loot
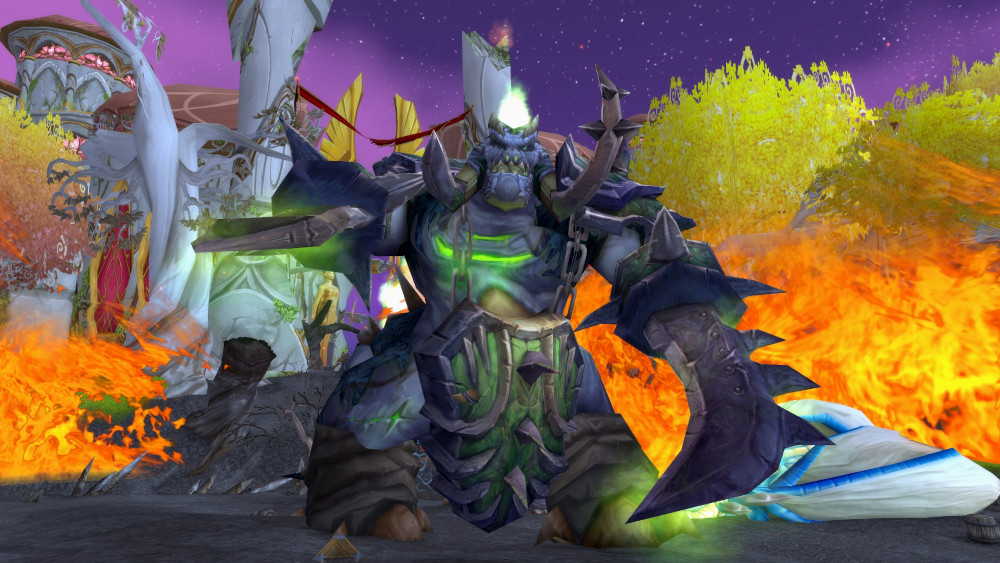
Brutallus is the second boss you will encounter in Sunwell Plateau on the Isle of Quel'Danas. Brutallus is an extremely simple fight mechanically that will demand your raid's maximum HPS and DPS. This boss is considered a massive throughput check and will push your raid to find creative ways to maximize your output. Check out our in-depth guide below to prepare as much as possible for your encounter with Brutallus.
Overview
Brutallus is the second boss you will encounter in the Sunwell Plateau
raid instance. Brutallus is a challenge that will demand both the maximum amount
of DPS and HPS your raid can produce. While Brutallus has a hard enrage (![]() Berserk)
at the 6-minute mark your raid group may end up needing to use extra healers
compared to what is considered normal to kill this boss. Check out the mechanics
listed below so you will know how to properly handle this boss.
Berserk)
at the 6-minute mark your raid group may end up needing to use extra healers
compared to what is considered normal to kill this boss. Check out the mechanics
listed below so you will know how to properly handle this boss.
Role-Specific Tips for Brutallus
Healer Tips
Make sure the Healers are evenly assigned between the two groups and consider
utilizing Mana cooldowns with Healers in mind opposed to Arcane Mages. This fight
is extremely HPS-intensive and will last at the absolute longest six minutes so
plan accordingly. If you run out of Mana at the six-minute mark it will not matter
because the boss' ![]() Berserk will quickly wipe the raid.
Berserk will quickly wipe the raid.
DPS Tips
Stay aware of the ![]() Burn debuff to ensure you do not spread it
to anyone. Focus on maximizing your DPS in a six-minute window as the boss'
enrage will almost instantly wipe the raid.
Burn debuff to ensure you do not spread it
to anyone. Focus on maximizing your DPS in a six-minute window as the boss'
enrage will almost instantly wipe the raid.
Tank Tips
Try to manage damage reduction CDs around the application of the ![]() Stomp
debuff.
Stomp
debuff.
Brutallus Abilities
 Meteor Slash — deals a large amount of Fire damage that
splits evenly between players in the cone and also applies a stacking debuff that
increases Fire damage taken by 75% for 40 seconds.
Meteor Slash — deals a large amount of Fire damage that
splits evenly between players in the cone and also applies a stacking debuff that
increases Fire damage taken by 75% for 40 seconds. Burn — a random player will gain this debuff taking Fire
damage every second for 60 seconds, this amount doubling every ten seconds. This
debuff can spread if you are too close to another player.
Burn — a random player will gain this debuff taking Fire
damage every second for 60 seconds, this amount doubling every ten seconds. This
debuff can spread if you are too close to another player. Stomp — deals massive Physical damage to Brutallus' current
target and reduces their Armor by 50% for 10 seconds.
Stomp — deals massive Physical damage to Brutallus' current
target and reduces their Armor by 50% for 10 seconds.
Strategy for Brutallus
Pulling the Boss
Brutallus should be kept as close to his original positioning as possible and
the raid should spread into two pre-assigned groups to either side of the boss
with clear areas between the two groups on north and south side of the boss for
players with ![]() Burn to go to.
Burn to go to.
Phase 1
Brutallus is a one-phase boss that is the exact same from pull to kill. The
raid should split evenly in two groups, one on the east side of the boss and
one on the west. These groups should consist of one tank and an even amount of
DPS and Healers. If you have a Holy Paladin
you can prioritize putting more of your
Restoration Shamans
on the other side of the boss to allow them to ![]() Chain Heal
through the tank that will be out of range of your Holy Paladin. The mechanics to this
boss are extremely simple but require the most throughput you can generate both
for DPS and HPS.
Chain Heal
through the tank that will be out of range of your Holy Paladin. The mechanics to this
boss are extremely simple but require the most throughput you can generate both
for DPS and HPS.
Each group should take three stacks of ![]() Meteor Slash
and once the third stack is applied the opposite group's Tank should taunt the
boss and continue to tank until their group receives 3 stacks. This process
is repeated until the boss dies or six minutes pass when the boss hits
Meteor Slash
and once the third stack is applied the opposite group's Tank should taunt the
boss and continue to tank until their group receives 3 stacks. This process
is repeated until the boss dies or six minutes pass when the boss hits
![]() Berserk. Players affected by
Berserk. Players affected by ![]() Burn should get out of the
group as quickly as possible and head to one of the designated safe areas on
either the north or south side of the boss to avoid spreading the debuff; this
debuff does additional damage to those with the Meteor Slash debuff
so make sure to keep an eye on those with Burn. Tanks should try to
rotate damage reduction/avoidance cooldowns when hit with
Burn should get out of the
group as quickly as possible and head to one of the designated safe areas on
either the north or south side of the boss to avoid spreading the debuff; this
debuff does additional damage to those with the Meteor Slash debuff
so make sure to keep an eye on those with Burn. Tanks should try to
rotate damage reduction/avoidance cooldowns when hit with ![]() Stomp. Rinse
and repeat until the boss dies or enrages.
Stomp. Rinse
and repeat until the boss dies or enrages.
Brutallus Loot
| Item | Item Type | Slot |
|---|---|---|
| Tier Token | Belt | |
| Tier Token | Belt | |
| Tier Token | Belt | |
| Weapon | Mace | |
| Accessory | Necklace | |
| Accessory | Necklace | |
| Accessory | Off-Hand | |
| Plate | Legs | |
| Cloth | Legs |
Other Sunwell Plateau Guides
If you were looking for a full guide for the Sunwell Plateau raid, or would like to know what specializations the loot from Brutallus should be prioritized to, see the links below.
Changelog
- 03 May 2022: Page added.