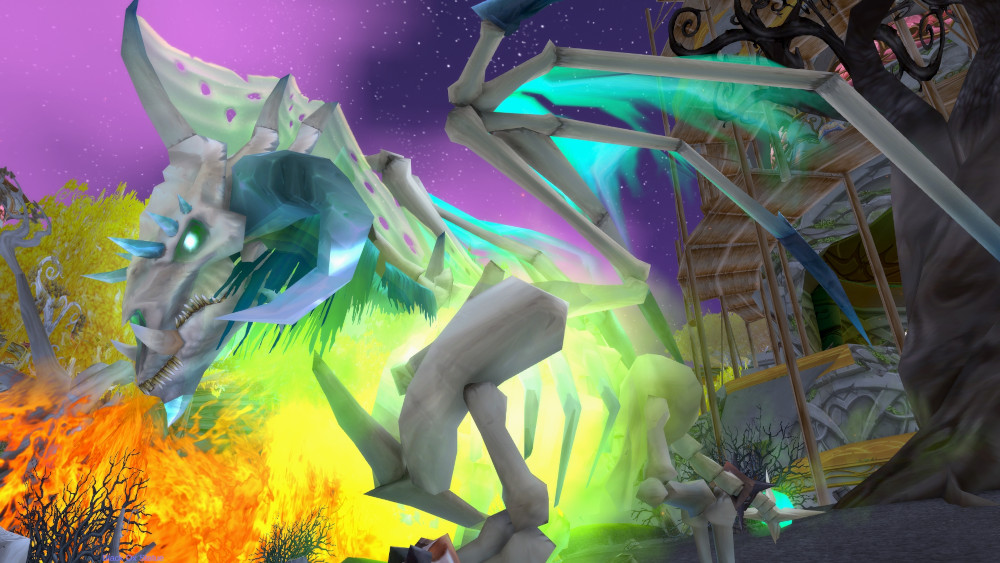
Felmyst Encounter Guide: Strategy, Abilities, Loot
Felmyst is the third boss you will encounter in Sunwell Plateau on the Isle of Quel'Danas. While Felmyst is a relatively simple boss it is important that all of her mechanics are handled properly, as one mistake can lead to not only you dying but possibly killing other members of your raid. Check out our in-depth guide below to prepare as much as possible for your encounter with Felmyst.
Overview
Felmyst is the third boss you will encounter in the Sunwell Plateau raid instance. Felmyst is a unique challenge that will test your Healers' reaction time and your raid's ability to adapt to changing circumstances. Two tanks make this boss considerably easier, though it can be done with one. Protection Paladins are able to trivialize the Unyielding Dead. Check out the mechanics listed below so you will know how to properly handle this boss.
Role-Specific Tips for Felmyst
Healer Tips
Have a clear way to see ![]() Encapsulate and be ready to heal the person
targeted with it as quickly as possible. Priests of
all specs should be ready to cast
Encapsulate and be ready to heal the person
targeted with it as quickly as possible. Priests of
all specs should be ready to cast ![]() Mass Dispel when
Mass Dispel when ![]() Gas Nova
is cast.
Gas Nova
is cast.
DPS Tips
Prioritize proper positioning above personal DPS on this fight. While there
is an enrage it is quite lenient and you can easily kill members of your raid
if you mishandle ![]() Encapsulate or
Encapsulate or ![]() Demonic Vapor.
Demonic Vapor.
Tank Tips
Be ready to utilize your abilities and consumables to establish snap AOE threat on the Unyielding Dead that will be spawning. Try to coordinate with other members of your raid where you would like the beam kited and where your Healers will be standing so you can have an easier time picking them up.
Felmyst Abilities
Ground Phase
 Cleave — deals a considerable amount of damage to anyone
in a cone in front of Felmyst.
Cleave — deals a considerable amount of damage to anyone
in a cone in front of Felmyst. Corrosion — deals a large amount of Nature damage to the
current aggro target of Felmyst and increases Physical damage taken by 100%.
Corrosion — deals a large amount of Nature damage to the
current aggro target of Felmyst and increases Physical damage taken by 100%. Noxious Fumes — an aura that will pulse for 1,000 Nature
damage every three seconds to all players in the raid. This cannot be mitigated
by Nature resist.
Noxious Fumes — an aura that will pulse for 1,000 Nature
damage every three seconds to all players in the raid. This cannot be mitigated
by Nature resist. Gas Nova — deals a considerable amount of Nature damage to
everyone within 25 yards of Felmyst and applies a debuff that will deal a large
amount of damage over time if not dispelled quickly.
Gas Nova — deals a considerable amount of Nature damage to
everyone within 25 yards of Felmyst and applies a debuff that will deal a large
amount of damage over time if not dispelled quickly. Encapsulate — a random player will be targeted and lifted
off the ground. This player will be taking massive amounts of Arcane damage for
five seconds and will deal a considerable amount of damage to anyone within 20
yards of the player who is Encapsulated.
Encapsulate — a random player will be targeted and lifted
off the ground. This player will be taking massive amounts of Arcane damage for
five seconds and will deal a considerable amount of damage to anyone within 20
yards of the player who is Encapsulated.
Air Phase
 Demonic Vapor — Felmyst will choose a random player and chase
them with a beam that must be kited. The beam deals a massive amount of Nature
damage if it hits anyone and will also leave a trail that spawns Unyielding Dead.
If any player steps into the trail left by the beam they will take massive Nature
damage and spawn additional Unyielding Dead. Felmyst will cast Demonic Vapor
twice, back to back.
Demonic Vapor — Felmyst will choose a random player and chase
them with a beam that must be kited. The beam deals a massive amount of Nature
damage if it hits anyone and will also leave a trail that spawns Unyielding Dead.
If any player steps into the trail left by the beam they will take massive Nature
damage and spawn additional Unyielding Dead. Felmyst will cast Demonic Vapor
twice, back to back. Fog of Corruption — Felmyst will choose a section of the room,
about 1/3rd of the space, and cover it in a green fog. Anyone caught inside of this
fog will instantly become mind controlled and start attack the raid, dealing 300%
additional damage while under the mind control.
Fog of Corruption — Felmyst will choose a section of the room,
about 1/3rd of the space, and cover it in a green fog. Anyone caught inside of this
fog will instantly become mind controlled and start attack the raid, dealing 300%
additional damage while under the mind control.
Strategy for Felmyst
Pulling the Boss
Felmyst can remain almost exactly where it spawns, but should be faced toward the firewall in the back of the room to allow for the most space for your raid to spread and minimize the damage dealt by the other mechanics.
Ground Phase
The majority of your time fighting Felmyst will be on the ground so the
it is extremely important to have positions figured out going into the fight.
Your Tank should be located in front of the boss with an even number of Healers and
Ranged DPS on either side of Felmyst to take full advantage of the room to spread
and minimize the damage done by mechanics like ![]() Encapsulate. Melee DPS
should be behind the boss as Felmyst has no tail swipe like many other dragons.
Encapsulate. Melee DPS
should be behind the boss as Felmyst has no tail swipe like many other dragons.
The focus on the ground should be to dispel ![]() Gas Nova as quickly as possible
so make sure your Priests of all specs are ready to
Gas Nova as quickly as possible
so make sure your Priests of all specs are ready to
![]() Mass Dispel and there is a Priest in range of every member of the
raid. When someone is targeted with
Mass Dispel and there is a Priest in range of every member of the
raid. When someone is targeted with ![]() Encapsulate, everyone near the
Encapsulated player should move away as quickly as possible to minimize its damage
and allow Healers to focus on both the player that is Encapsulated and the Tank.
Encapsulate, everyone near the
Encapsulated player should move away as quickly as possible to minimize its damage
and allow Healers to focus on both the player that is Encapsulated and the Tank.
Air Phase
The air phase of the boss is much more punishing so it is important to stay
aware of what mechanics are happening and who they are happening to. The raid
should avoid being in the middle of the room as Felmyst will target players with
![]() Demonic Vapor and having it run through the middle of the room can
lead to a lot of unnecessary damage, spawning of Unyielding Dead, and
will complicate avoiding
Demonic Vapor and having it run through the middle of the room can
lead to a lot of unnecessary damage, spawning of Unyielding Dead, and
will complicate avoiding ![]() Fog of Corruption. Felmyst will cast
Demonic Vapor twice and then Fog of Corruption three times. The focus needs to
be on avoiding these two mechanics and then DPSing down the Unyielding Dead.
Fog of Corruption. Felmyst will cast
Demonic Vapor twice and then Fog of Corruption three times. The focus needs to
be on avoiding these two mechanics and then DPSing down the Unyielding Dead.
Repeat these two phases until the boss dies and collect your loot!
Felmyst Loot
| Item | Item Type | Slot |
|---|---|---|
| Tier Token | Boots | |
| Tier Token | Boots | |
| Tier Token | Boots | |
| Weapon | Staff | |
| Off-Hand | Shield | |
| Accessory | Necklace | |
| Leather | Legs | |
| Legs | ||
| Plate | Gloves |
Other Sunwell Plateau Guides
If you were looking for a full guide for the Sunwell Plateau raid, or would like to know what specializations the loot from Felmyst should be prioritized to, see the links below.
Changelog
- 03 May 2022: Page added.
This guide has been written by Sellin, a former top 10 US raider and current season and several time Gladiator, long time WoW Player and passionate about all things Warcraft and Theorycrafting. You can follow him on Twitter and watch him on Twitch.
- UI Updates: Burning Crusade Classic Hotfixes, July 17th
- The Best Camelot Theory Yet Connects Classic+ to WoW’s Original Design
- Classic Era’s New UI Could Break Nameplate and Raid Frame Addons
- Icy Veins is Looking for Dedicated WoW Classic Writers
- WoW Classic+ Leak Claims Deadmines, Death Knights, and Karazhan Are Coming
- WoW Classic on a Phone?! This Player Shows It Actually Works
- Blizzard Confirms No Fresh Season of Discovery Servers, Fueling Classic+ Rumors
- XP Blocker Moves: Season of Discovery Hotfixes, June 25th