Introduction to Heaven on High in FFXIV
This page aims to prepare you for the Deep Dungeon Heaven on High and provide you with generalized information alongside access to specific guides for completing the content in both group and solo instances.
Introduction to Heaven on High
Heaven on High is the second Deep Dungeon players will encounter, with 100 floors and a level cap of 70. All players will begin at level 61 when starting on Floor 1, and level 70 when starting on Floor 21. You must complete the quest Knocking on Heaven's Door in order to enter the duty, as well as have completed the first 50 floors of Palace of the Dead.
Links to each floorset can be found at the top of this page, above the Table of Contents.
Rewards for Clearing Heaven on High
Clearing a floorset inside Heaven on High rewards players with gil, experience, and Allagan Tomestones of Poetics at all levels. Players at the current level cap are also awarded both the capped and uncapped tomestones currently available.
Upon reaching floor 100, a shrine can be found. Interacting with this will
give all players an ![]() Empyrean Reliquary, which can be exchanged for
accessories or housing items at the Confederate Custodian
in Onokoro.
Empyrean Reliquary, which can be exchanged for
accessories or housing items at the Confederate Custodian
in Onokoro.
Various Titles are available from clearing Heaven on High.
- Hiruko Hunter: Clear floor 30 of Heaven on High.
- Heavenly Gate Crasher: Clear floor 100 of Heaven on High.
- True Hero: While wearing the four Empyrean Accessories, speak with the Cast-Off Confederate. This also awards the
 Juedi Horn.
 - Lone Hero: Clear floor 100 of Heaven on High solo, having started from floor 1 and not recorded a single KO.
Consumables
- Q: What food should I use?
- A: Use the highest item level food available, as it gives the most Vitality. As of patch 7.4, this
food is i770
 Caramel Popcorn or equivalent.
- A: Use the highest item level food available, as it gives the most Vitality. As of patch 7.4, this
food is i770
- Q: What healing potions should I use?
- A: If your HP is above 14400, a
 Hyper-Potion is recommended as it will restore the
most amount of HP. If you have less than that, you will gain the same HP back from a
  Super-Potion,
and can therefore use either one.
- A: If your HP is above 14400, a
- Q: Should I use damage potions?
- A: Damage-increasing Tinctures can be used for a dps boost as necessary. The cheapest HQ Tinctures you can currently buy will be the ones for the current raid tier most of the time, as they have the highest supply. As of patch 7.4, these are Grade 4 Gemdraught Tinctures.
- Q: Is there anything else I need to know about consumables?
- A:
 Empyrean Potions have their own 15s recast timer. However, all other potions mentioned above
share the same recast timer. As damage Tinctures have a 4m30s recast, this means you will be unable to use
a healing potion until that timer is done, so be aware of this if you plan to use one.
- A:
Empyrean Potions and how to farm them quickly
![]() Empyrean Potions are an item that can only be used inside Heaven on
High. They give the user a health regeneration effect for 30 seconds, and have
a 15 second cooldown, allowing them to be permenantly in effect if necessary.
These potions are extremely helpful in party runs, but are required for survival
in solo runs, especially on jobs with few or no other ways of healing.
Empyrean Potions are an item that can only be used inside Heaven on
High. They give the user a health regeneration effect for 30 seconds, and have
a 15 second cooldown, allowing them to be permenantly in effect if necessary.
These potions are extremely helpful in party runs, but are required for survival
in solo runs, especially on jobs with few or no other ways of healing.
20 Empyrean Potions can be bought with 1 ![]() Empyrean Potsherd from the
Confederate Custodian
in Onokoro. Potsherds can rarely be found inside
Empyrean Potsherd from the
Confederate Custodian
in Onokoro. Potsherds can rarely be found inside
![]() Bronze Coffers in Heaven on High. You also get a guaranteed one after the
floor 30 boss.
Bronze Coffers in Heaven on High. You also get a guaranteed one after the
floor 30 boss.
In order to farm Potsherds efficiently, you should enter the dungeon on floor 21 with either a matched party or a fixed party of four players. From here, defeat the floor 30 boss as quickly as possible in order to obtain the guaranteed drop, though be sure to open any Bronze Coffers you find along the way. Upon clearing the floorset, delete the save file and re-enter, repeating as needed.
If you wish to attempt a solo clear of Heaven on High in order to obtain
the ![]() Heaven Is a Lonely Place II achievement and the Lone Hero title,
you should ideally have at least 400
Heaven Is a Lonely Place II achievement and the Lone Hero title,
you should ideally have at least 400 ![]() Empyrean Potions before beginning.
While you may find yourself needing more potions than this across the entire
run, with some jobs requiring over 500, you will be picking up more Potsherds
along the way that can be exchanged for pots between floorsets.
Empyrean Potions before beginning.
While you may find yourself needing more potions than this across the entire
run, with some jobs requiring over 500, you will be picking up more Potsherds
along the way that can be exchanged for pots between floorsets.
How to quickly farm Aetherpool
Players will be restricted to the use of an
![]() Empyrean Aetherpool Arm
and
Empyrean Aetherpool Arm
and ![]() Empyrean Aetherpool Armour
while inside Heaven on High. In addition to gaining levels, players must enhance these items as
they progress through the dungeon by opening
Empyrean Aetherpool Armour
while inside Heaven on High. In addition to gaining levels, players must enhance these items as
they progress through the dungeon by opening ![]() Silver Coffers, up to the cap of +99 for each item.
Silver Coffers, up to the cap of +99 for each item.
In order to farm Aetherpool efficiently, you should enter the dungeon on
floor 21 with either a matched party or a fixed party of four players, and
open as many ![]() Silver Coffers as possible. Upon clearing the floorset, delete the
save file and re-enter, repeating as needed.
Silver Coffers as possible. Upon clearing the floorset, delete the
save file and re-enter, repeating as needed.
You can exchange 10 aetherpool from both your Arm and Armour for an
![]() Empyrean Aetherpool Grip at the Confederate Custodian.
You can then exchange 10 Grips (total 100/100 Aetherpool) for an i365
Empyrean weapon, allowing you to glamour the appearance
of your Empyrean Atherpool Arm to regular weapons outside of Heaven on High.
Empyrean Aetherpool Grip at the Confederate Custodian.
You can then exchange 10 Grips (total 100/100 Aetherpool) for an i365
Empyrean weapon, allowing you to glamour the appearance
of your Empyrean Atherpool Arm to regular weapons outside of Heaven on High.
Rare NPCs in Heaven on High
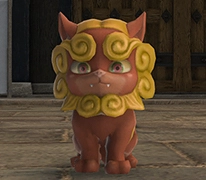
Throughout the Deep Dungeon, there is a small chance that unique NPCs will spawn. These Auspices take the form of specific creatures that can rarely be found wandering a floor of the dungeon, and will provide players with a buff when approached.
| Auspice | Image | Buff Effect |
|---|---|---|
| Komainu |  |
Grants a |
| Inugami |  |
Grants a |
| Senri |  |
Grants a |
Soloing Heaven on High
While clearing Heaven on High with a full party of four players is usually faster, safer and easier than entering alone, clearing the dungeon by yourself from beginning to end is not only possible, but rewards players with the rare title, Lone Hero, upon clearing floor 100 with no deaths on a run that started from floor 1.
Clearing Heaven on High solo relies entirely on a player's individual skill, and can therefore be a welcome change of pace for those who are used to the standard eight player content of Savage and Ultimate raids. However, it is easy for some players to become frustrated or burnt out when attempting to clear, and being able to take a break for as long as needed before returning to the same save file and picking up where you left of is important to keep in mind if you find yourself struggling.
Choosing a Job to attempt a Solo Clear with
As of 7.05, every job has cleared Heaven on High solo. However, some jobs are much easier or harder to achieve this feat with. For example, Tanks and Healers will find it harder to stay on pace when progressing through later floorsets, as their damage output is lower than that of DPS jobs which will result in more time taken per floor.
The jobs listed below are the main standouts at both ends of the difficulty scale for soloing Heaven on High.
- Machinist
- Machinist excels in kiting and burst damage, as well as highly useful crowd control in the form of
 Head Graze,
 Leg Graze and
  Foot Graze.
  Peloton is also an extremely valuable skill for
navigation through the floors, as the extra movement speed allows you to traverse floors faster. It also has an extra
mitigation tool compared to the other physical ranged dps in
  Dismantle, making it even safer.
- Machinist excels in kiting and burst damage, as well as highly useful crowd control in the form of
- Summoner
- Summoner, like Machinist, excels in kiting and burst damage. Unlike Machinist and most other jobs, it has no
gauge it needs to build or resources it needs to manage beyond
 Fester charges, and can simply chain
pull enemies rather than wait for cooldowns to come back before initiating. It also has a strong survivabiltiy tool with
 Radiant Aegis.
- Summoner, like Machinist, excels in kiting and burst damage. Unlike Machinist and most other jobs, it has no
gauge it needs to build or resources it needs to manage beyond
- Warrior
- Warrior excels in survivability, having access to abilities such as
 Raw Intuition. It has good
burst with
  Inner Release and
  Fell Cleave, and with
  Holmgang having such
a short cooldown in relation to other tank invulnerability skills, it can be used to save runs or more frequently
enable strategies such as intentionally stepping on Landmines after having rounded up multiple enemies in order to
quickly clear a floor.
- Warrior excels in survivability, having access to abilities such as
- Red Mage
- Red Mage is a very balanced job to take into Heaven on High, with good burst and access to healing in the form
of
 Vercure as well as the ability to
  Sleep mobs in an emergency.
- Red Mage is a very balanced job to take into Heaven on High, with good burst and access to healing in the form
of
- Gunbreaker
- Gunbreaker is another balanced job to take into Heaven on High, with extremely strong healing provided by
 Aurora
and
  Brutal Shell, while also dealing deceptively high damage once it hits level 70 with access to
 Continuation.
- Gunbreaker is another balanced job to take into Heaven on High, with extremely strong healing provided by
- Astrologian
- Astrologian has the lowest personal dps of all jobs in the game, due to being designed around gaining a
significant amount of its power from feeding teammates raid buffs such as its cards and
 Divination
in eight-player raids. As such, it is by far the hardest job to clear Heaven on High with, and needs to make full use
of both pomanders and strategies like intentionally stepping on Landmines in order to clear floors fast enough to have a
chance of completing each floorset.
- Astrologian has the lowest personal dps of all jobs in the game, due to being designed around gaining a
significant amount of its power from feeding teammates raid buffs such as its cards and
- and Dancer
- Despite having access to all the same role actions as Machinist, as well as Bard having
 The Warden's Paean,
both of these jobs can struggle with Heaven on High due to their lower personal dps, as like Astrologian they are designed
around contributing significantly to the rest of the party.
- Despite having access to all the same role actions as Machinist, as well as Bard having
Changelog
- 27 Jan. 2026: Page updated.
- 11 Aug. 2024: Page updated for Dawntrail.
- 05 May 2024: Guide added


Stella is a long-time FFXIV player who started in 2018, and has become a Mentor for The Balance in the years since. She enjoys large-scale content such as Eureka and Save the Queen areas and raids, and can be found on Twitter, Youtube and Twitch, as well as Discord (EshEhdAfah). After several previous tiers of raiding casually, she has cleared Anabaseios Savage week 1, completed four out of five Ultimate raids, and taken to challenging herself by using unorthodox, high-speed builds for certain jobs in older ultimates in Party Finder.
- Only a Month Until 7.5! Savage Catchup Tips for Taking on the Tyrant
- This Eternal Bonds VR Demo is a Hidden-Gem You Can’t Miss!
- Final Fantasy XIV’s Moogle Treasure Trove Is Back With Mounts You Don’t Want to Miss
- Patch 7.4 Moogle Treasure Trove Starts Next Week!
- Get Some Eggcellent New Cosmetics in This Year’s Hatching-tide!
- Savage Catchup: How to Ride Your Way to a Clear in M10S
- First Look at Patch 7.5 Comes This Friday — Here’s What to Know
- Here’s What You’ll Need to Step into The Merchant’s Tale