Serpentshrine Cavern Raid Guides
Serpentshrine Cavern is one of two raids that make up Tier 5 and includes one of World of Warcraft's most infamously buggy raid bosses, Lady Vashj. Serpentshrine Cavern is a 25-player raid instance that can be found in the heart of the Coilfang Reservoir in Zangarmarsh. With the most recent update to The Burning Crusade Classic you are no longer required to become attuned to Serpentshrine Cavern to enter the instance, but completing the quest line that was formerly required will grant you the unique title "Hand of A'dal". Check out our Serpentshrine Cavern Attunement guide to be able to quickly navigate through the quest chain!
Overview
Serpentshrine Cavern is a 25-player, 6-boss raid located in Zangarmarsh and is a part of the second tier of content available as a part of Phase 2 of The Burning Crusade Classic.
Serpentshrine Cavern Attunement
With the most recent change to The Burning Crusade Classic you are no longer required to become attuned to Serpentshrine Cavern to enter the instance but completing the quest line that was formerly required will grant you the unique title "Hand of A'dal". Listed below is our in-depth guide on the quest chain and how to complete it.
Serpentshrine Cavern Entrance Location
Serpentshrine Cavern's entrance is located inside of the Coilfang Reservoir in Zangarmarsh. This area is in the middle of the map on the Northern side in the water.
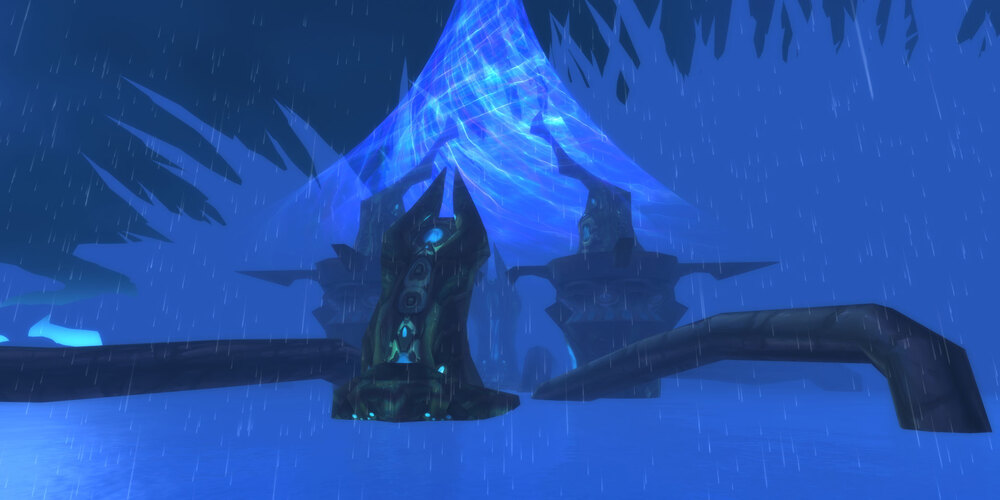
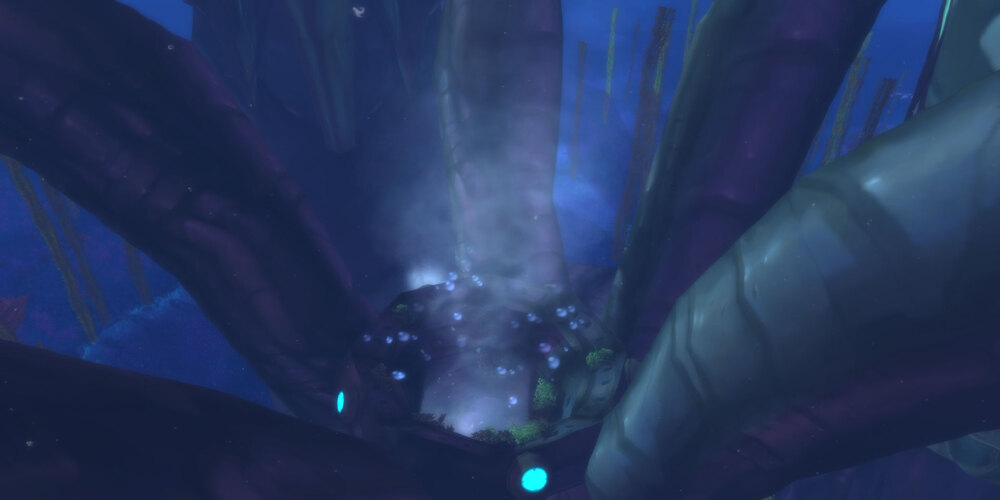
You will need to swim toward the middle of the lake until you come across the structure in the picture above. After that swim down and you will see a pipe opening, shown below, to swim through. Swim through to the other side to emerge with the summoning stone in front of you.
The instance portal is hidden behind a large waterfall in the center of the Reservoir. When you have completed the attunement quest you will be able to interact with a panel near the waterfall disabling the wall of water and allowing you to walk into the instance portal.
Serpentshrine Cavern Trash Mobs
Serpentshrine Cavern is filled with trash mobs that can be quite dangerous if not managed correctly. Below we will include the most deadly mobs and how you should handle each of them.
Coilfang Hate-Screamer
Coilfang Hate-Screamers can be found along the way to the first boss
and are by far the most important mob to kill in these early trash packs. The
![]() Silence ability will silence everyone within 30 yards of the mob,
rendering them unable to cast, and also deals large damage with
Silence ability will silence everyone within 30 yards of the mob,
rendering them unable to cast, and also deals large damage with
![]() Sonic Scream. Focusing down the Hate-Screamer is a high priority as
the other mobs found in these packs can easily be tanked and ignored. Just make
sure to pay attention to where the mobs are facing as the
Coilfang Beast-Tamers found in the same pack can cleave!
Sonic Scream. Focusing down the Hate-Screamer is a high priority as
the other mobs found in these packs can easily be tanked and ignored. Just make
sure to pay attention to where the mobs are facing as the
Coilfang Beast-Tamers found in the same pack can cleave!
Underbog Colossus
Underbog Colossi can be found patrolling all throughout the instance and are very dangerous, so it is extremely important to keep track of them to ensure you do not have to fight them while dealing with another trash pack. The Underbog Colossus is unique in that each colossus will have a random pair of abilities; the possible combinations include:
 Frenzy and
  Atrophic Blow — This is easy to deal
with; just ensure your Hunters are casting
Atrophic Blow — This is easy to deal
with; just ensure your Hunters are casting  Tranquilizing Shot or
your Druids are casting
Tranquilizing Shot or
your Druids are casting  Soothe Animal to remove the Frenzy.
 Acid Geyser and
  Serpentshrine Parasite — Acid
Geyser targets an individual and will deal a large amount of damage to them and
any allies within an 8-yard radius so it is crucial that the person targeted by
this ability gets away from the rest of the group. The Serpentshrine Parasite will
deal massive damage (about 2,000 every 2 seconds) to a target and after 10 seconds
will spawn a mob that you have to kill quickly before it attacks another player,
infecting them with the same debuff.
Serpentshrine Parasite — Acid
Geyser targets an individual and will deal a large amount of damage to them and
any allies within an 8-yard radius so it is crucial that the person targeted by
this ability gets away from the rest of the group. The Serpentshrine Parasite will
deal massive damage (about 2,000 every 2 seconds) to a target and after 10 seconds
will spawn a mob that you have to kill quickly before it attacks another player,
infecting them with the same debuff. Spore Quake and
  Initial Infection — with this
combo the best way to handle it is by simply out-ranging the Quake and making
sure someone dispels the Infection as soon as possible as it deals more damage
the longer the debuff is active.
Initial Infection — with this
combo the best way to handle it is by simply out-ranging the Quake and making
sure someone dispels the Infection as soon as possible as it deals more damage
the longer the debuff is active.
Greyheart Tidecaller
The Greyheart Tidecaller has three abilities, all of which are
important to handle correctly. The most important of their abilities is
summoning a Water Elemental Totem; the Water Elemental spawned by this totem
will despawn if you kill the totem. It is important to focus the totem itself
and not the Water Elemental. ![]() Poison Shield is a buff that the
Greyheart Tidercaller will cast on themselves and it must be purged as quickly
as possible.
Poison Shield is a buff that the
Greyheart Tidercaller will cast on themselves and it must be purged as quickly
as possible. ![]() Arcane Lightning deals a moderate amount of damage and
silences everyone hit by it, so spreading helps mitigate this effect.
Arcane Lightning deals a moderate amount of damage and
silences everyone hit by it, so spreading helps mitigate this effect.
Greyheart Nethe-Mage
 Arcane Destruction
 Arcane Lightning
 Arcane Volley
 Blink
Blink Cone of Cold
 Fire Destruction
 Fireball
 Frost Destruction
 Frostbolt
 Rain of Fire
 Scorch
Much like the Underbog Colossus mentioned earlier, there are
different types of Greyheart Nether-Mages. They use either Arcane,
Frost, or Fire spells. They deal a considerable amount of damage regardless of
what school of magic they end up with and it is crucial to either interrupt them
or ![]() Polymorph them. The Nethermage will give itself a buff that
corresponds with the school of magic it is using and it is important that this
debuff is dispelled or spellstolen by your own Mages for a damage
increase. These debuffs are as follows:
Polymorph them. The Nethermage will give itself a buff that
corresponds with the school of magic it is using and it is important that this
debuff is dispelled or spellstolen by your own Mages for a damage
increase. These debuffs are as follows: ![]() Arcane Destruction for Arcane,
Arcane Destruction for Arcane,
![]() Frost Destruction for Frost, and
Frost Destruction for Frost, and ![]() Fire Destruction for Fire.
Fire Destruction for Fire.
Serpentshrine Lurker
The Serpentshrine Lurkers can be quite difficult to deal with when
handling other mobs as well, but they are able to be ![]() Banished.
Doing so makes things considerably easier and it is typically best to leave the
Lurker Banished until the rest of the trash pack is dead.
Banished.
Doing so makes things considerably easier and it is typically best to leave the
Lurker Banished until the rest of the trash pack is dead.
![]() Poison Bolt Volley deals massive damage to the raid and should
be dispelled from your raid members as quickly as possible.
Rancid Mushroom spawns mushrooms in the room that will explode and do
a large amount of damage to anyone in range, so try to avoid them as soon as you
see them spawning.
Poison Bolt Volley deals massive damage to the raid and should
be dispelled from your raid members as quickly as possible.
Rancid Mushroom spawns mushrooms in the room that will explode and do
a large amount of damage to anyone in range, so try to avoid them as soon as you
see them spawning.
Bosses in Serpentshrine Cavern
- Hydross the Unstable
- The Lurker Below
- Leotheras the Blind
- Fathom-Lord Karathress
- Morogrim Tidewalker
- Lady Vashj
Recent Instance Nerfs
Leading up to the release of Phase 3 of The Burning Crusade Classic many of the health values in the Serpentshrine Cavern raid have been reduced. Listed below are the most notable changes you are likely to experience.
- Hydross the Unstable's health has gone from 3,794,000 to 3,414,600 (10% reduction)
- Leotheras the Blind's health has gone from 455,280 to 3,794,000 (16.67% reduction)
- Lady Vashj's health has gone from 6,070,000 to 4,856,000 (20% reduction)
Changelog
- 14 Dec. 2021: Updated to reflect recent nerfs.
- 31 Aug. 2021: Guide added.