WoW Classic Best Addons and Macros Guide
Earning gold is an incredibly important part of Classic WoW and will be very important for many things. There are large purchases that you will want to make, such as getting your epic mount or getting better gear from the auction house.
You will also have lots of reoccurring purchases, such as consumables for raiding and PvP. The bottom line is that gold is important, both for quality of life and for getting important items to help your gameplay. One of the most important things to do once you hit Level 60 for the first time, or even before that, is to work to establish a gold making source.
Class-specific Addon & Macro Guides
Before we get started on addons and macros, we would like to present you our Icy Veins' class-specific guides.
Addons
How to install addons
Addons are an important part of WoW Classic, but are not intuitive to install. If you want to download and install an addon, follow the steps listed below.
- First, download the addon that you want. Once it is done downloading, open the downloaded folder. You should have a folder with the addon's name on it, such as "Questie."
- Copy the folder.
- Go to the directory where World of Warcraft is installed on your computer. Usually it will be in Program Files (x86) unless you downloaded it somewhere else.
- Open your World of Warcraft folder, then open the classic folder inside.
- From there, go to Interface and then to AddOns.
- Inside the AddOns folder, paste in the folder of the addon that you should have copied, or drag it in from wherever you downloaded it.
- Restart your WoW client, and the addon should be installed. In the bottom-left of your character select screen, there should be a button that says AddOns. You will want to click on that to check and make sure your new addon is there and loaded.
- Start up the game, and your new addon should be there. Every addon has different ways to change or configure things, so you will need to check out that addon's instructions on the page you downloaded it from for more information.
Alternatively, you can use the Twitch Desktop App to install addons that are available on curseforge.com and automatically update them. A drawback of this method is that it only works with addons available on Curseforge.
Questie (Quest Helper)
Quest helper addons like Questie are a must have and will make your leveling experience much smoother. Over the years, Blizzard has reworked WoW's questing interface to make it more user friendly and to present more information. In Classic, that was not the case. Quests were not readily displayed on the map, enemies did not have text to indicate you should kill them for a quest you had, and items did not have the glowing lines or sparkles around them to let you know that you should interact with them for a quest.
Weak Auras
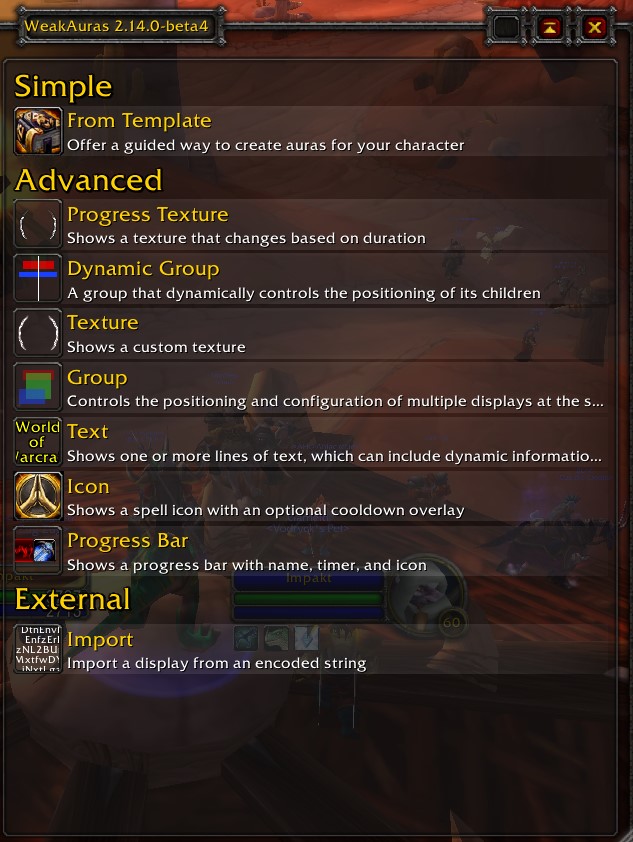
Weak Auras is a very popular addon in modern WoW that allows you to create and customizes trackers for different auras such as your damage cooldowns or debuffs you might get from raid bosses. This addon gives you lots of customization and will let you track whatever you want, however you want. It is an absolute must have for anyone looking to raid.
Details (Damage Meter)
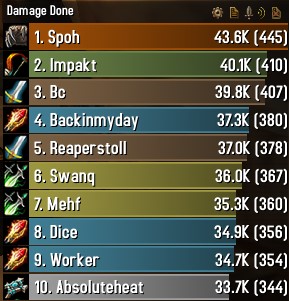
Being able to track and compare your damage with other people's is a valuable tool and does not exist in the default UI. Details is the most popular damage meter in modern WoW, and has been ported over to Classic. If you are looking to improve, being able to track your own numbers and compare them is a vital first step.
Boss Mods
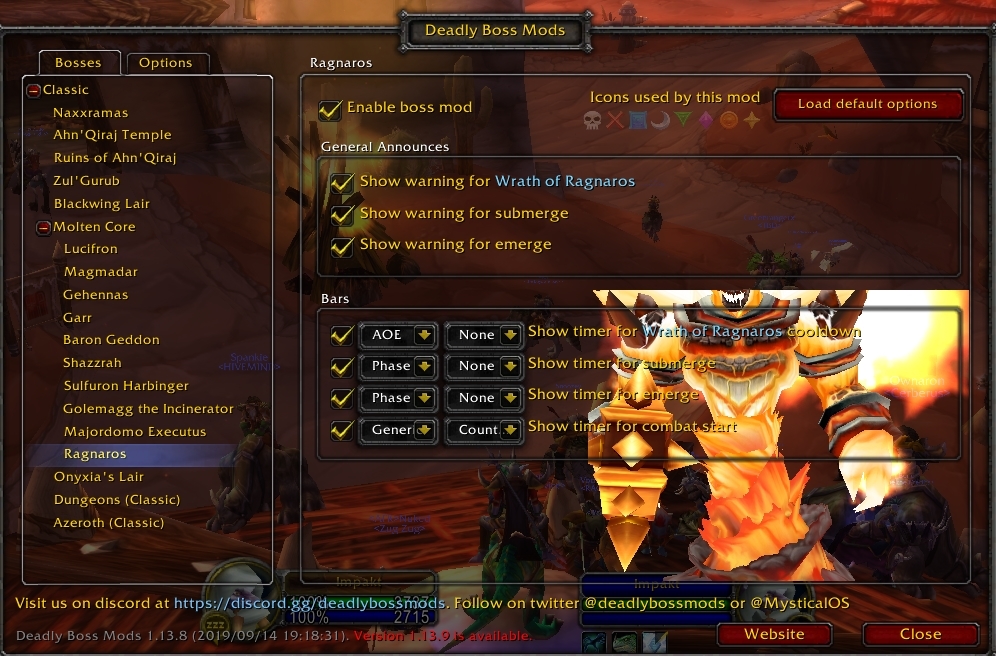
If you plan to raid, having a Boss Mod addon, such as Deadly Boss Mods is a must. It will help you track important raid abilities and give you important messages from fight to fight. Most importantly, it will give you warnings and notifications if you are targeted by something or if an important mechanic is happening. Most raiding guilds require this addon because of how useful it is in raids.
Threat Meter
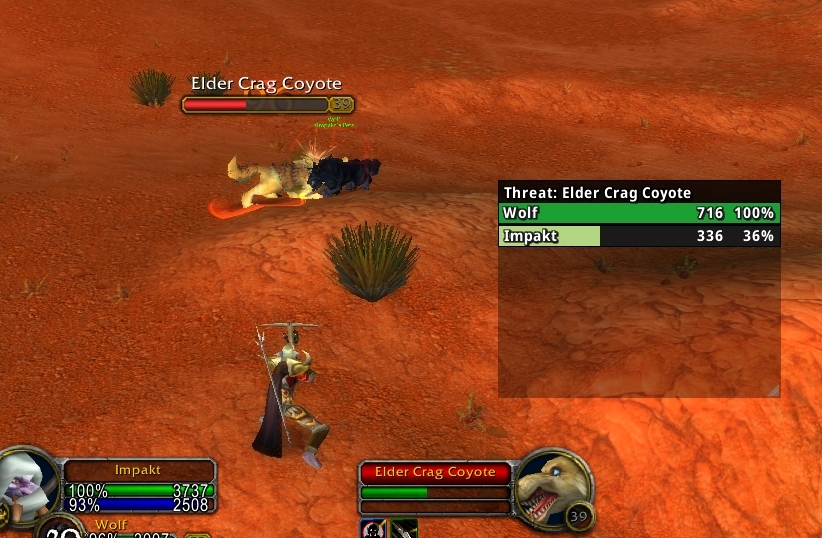
If you have done any sort of dungeon in WoW Classic, then you know how easy it can be for a tank to lose aggro on an enemy. On the default UI, you really have no way of knowing when an enemy will start attacking you until it goes to attack you. Having a threat meter like Classic Threat Meter can make a world of difference since it gives you a way to track threat, and will show you when you are in danger of pulling threat. This is another incredibly important addon for raids, where pulling aggro off a tank can mean a wipe on some bosses.
Classic Cast Bars
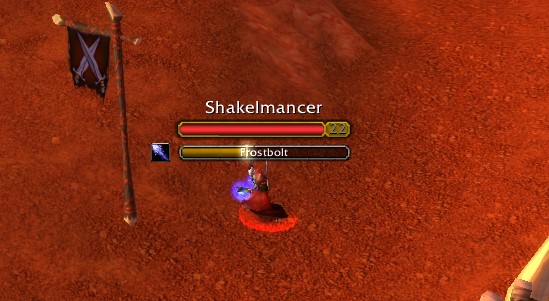
By default, you cannot see enemy cast bars below their name plates like you can in modern WoW. Classic Cast Bars fixes this, and will show you enemy cast bars.
Classic Aura Durations
By default, you cannot see the duration of debuffs when you target an enemy, even your own DoT effects. Classic Aura Durations puts a timer on the debuffs to how you how long is left, making it look closer to how it does in modern WoW.
Vendor Price
In WoW Classic, items do not have their vendor price on the tooltip normally. Early on, every copper counts, and the decision to delete items if you are out questing and your bags are full can often come down to what will vendor for the least amount. Vendor Price just adds the vendor sell price of an item onto it's tooltip, allowing you to see ahead of time what it is worth.
Atlas Loot Classic
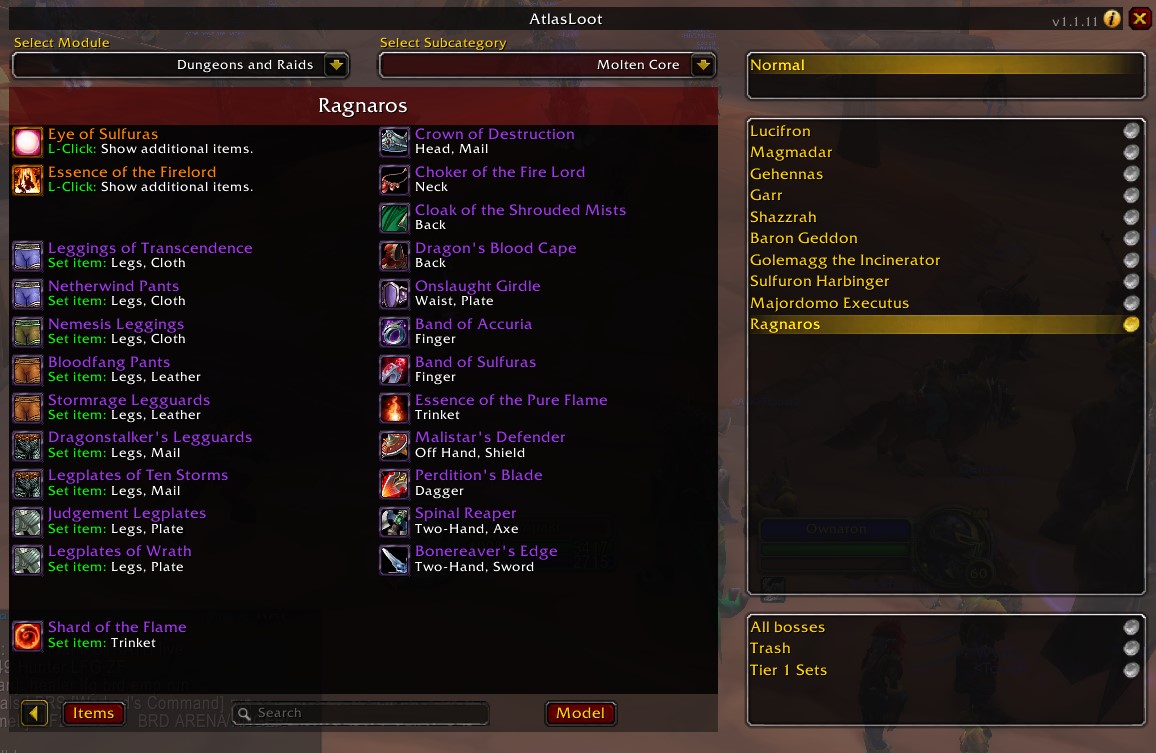
By installing Atlas Loot, you become able to browse loot from various sources (PvP, Raids, Dungeons, Crafting, etc.) inside the game, without the need to visit third party websites.
Macros
While most macros are class specific, you can make macros to do lots of things. This is a short guide on how to write macros to do some basic stuff, which can be adapted to your own personal needs. To look at more class specific macros, check out our class addon and macro guides.
#showtooltip
This is the most common line found at the start of lots of macros. This is so
when you mouse over the tooltip of the macro while it is on your bar, it will show
the tooltip of the specified spell. For instance, if you had #showtooltip Fireball
it would show the ![]() Fireball tooltip when you moused over the macro. If you
do not specify a spell, it will default to showing the tooltip of the first item or spell used
in the macro.
Fireball tooltip when you moused over the macro. If you
do not specify a spell, it will default to showing the tooltip of the first item or spell used
in the macro.
- #showtooltip Fireball
/cast and /use
When you want to cast a spell in a macro, you start the line with /cast,
followed by the name of the spell that you want to cast. For instance, you could
make it /cast Fireball which would cast the spell ![]() Fireball. If you do
not specify a spell rank, such as /cast Fireball(rank 4), then it will default
to casting the highest possible rank. The same thing works for items, except instead
of doing /cast, you do /use, such as /use Major Healing Potion.
Fireball. If you do
not specify a spell rank, such as /cast Fireball(rank 4), then it will default
to casting the highest possible rank. The same thing works for items, except instead
of doing /cast, you do /use, such as /use Major Healing Potion.
Example of a ![]() Fireball macro:
Fireball macro:
- #showtooltip Fireball
- /cast Fireball
Example of a ![]() Major Healing Potion macro:
Major Healing Potion macro:
- #showtooltip Major Healing Potion
- /use Major Healing Potion
Start and stop commands
There are several options for ways you can start and stop attacks and casts in a macro. Each of the commands listed below can be added to any macro in its own line to add the command to the macro. Remember that macros can do multiple things at once, so adding multiple commands is alright.
- /attack makes you start auto attacking the target.
- /stopattack makes you stop auto attacking the target.
- /petattack commands your pet to attack the target, which includes running at the target if it is not near.
- /petpassive commands your pet to stop attacking, which will make it run back to your side.
- /stopcasting stops your current cast, regardless of how close it is to finishing.
Example of a /attack and ![]() Mortal Strike macro:
Mortal Strike macro:
- #showtooltip Mortal Strike
- /attack
- /cast Mortal Strike
Example of a /attack, /petattack, and ![]() Serpent Sting macro:
Serpent Sting macro:
- #showtooltip Serpent Sting
- /attack
- /petattack
- /cast Serpent Sting
Example of a /stopcasting and ![]() Hammer of Justice macro:
Hammer of Justice macro:
- #showtooltip Hammer of Justice
- /stopcasting
- /cast Hammer of Justice
Targeting
By default, when you cast a spell or start an attack in a macro, it will be
against your current target. If you want to change that, you can add some text
into the line that will specify the target. For instance, if you wanted to cast
a ![]() Polymorph at a specific player named John, you could change the line
to say /cast [@John] Polymorph. Just change "John" to any name that you want,
either enemy for damage spells or friendly for healing spells.
Polymorph at a specific player named John, you could change the line
to say /cast [@John] Polymorph. Just change "John" to any name that you want,
either enemy for damage spells or friendly for healing spells.
- [@john] targets a specific target named "john".
- [@player] targets yourself.
- [@targettarget] targets your target's target.
- [@mouseover] targets your the player or enemy under your mouse cursor. This is commonly used in healing macros.
Example of a macro to cast ![]() Polymorph on John:
Polymorph on John:
- #showtooltip Polymorph
- /cast [@john] Polymorph
Example of a macro to cast ![]() Holy Light on yourself:
Holy Light on yourself:
- #showtooltip Holy Light
- /cast [@player] Holy Light
Example of a macro to cast ![]() Smite on your target's target:
Smite on your target's target:
- #showtooltip Smite
- /cast [@targettarget] Smite
Example of a macro to cast ![]() Blind on your mouseover target:
Blind on your mouseover target:
- #showtooltip Blind
- /cast [@mouseover] Blind
Target Conditions
While the macros above specify how you want to target someone, this can sometimes be a bit limiting. For instance, look at the Smite macro:
- #showtooltip Smite
- /cast [@targettarget] Smite
This is great if you are targeting a tank and do not want to have to target
something new just to cast ![]() Smite, but what if you are targeting an
enemy player instead? You probably do not want to be Smiting their target, you
would rather be Smiting them. We can resolve this by adding various conditions
to our macros. In the case of the Smite macro, we could add the condition harm
in one or two ways:
Smite, but what if you are targeting an
enemy player instead? You probably do not want to be Smiting their target, you
would rather be Smiting them. We can resolve this by adding various conditions
to our macros. In the case of the Smite macro, we could add the condition harm
in one or two ways:
- #showtooltip Smite
- /cast [harm][@targettarget] Smite
or:
- #showtooltip Smite
- /cast [@targettarget, harm] Smite
These are generally the two ways you can add conditions onto macros. In both cases, we have added the "harm" condition onto the macro, but they do very different things based on how we added them. The first macro uses [harm][@targettarget], which specifies that if you are targeting an enemy (harmful) player, you want to cast Smite. If not, then you want to cast Smite at your target's target. The second one uses [@targettarget, harm] which specifies that you want to cast Smite at your target's target, but only if it is an enemy target. There are several conditions like this, the most popular of which are listed below.
- [harm] specifies to only target enemies.
- [help] specifies to only target friendlies.
- [exists] will only attempt to cast if your target exists, which if you are using a mouseover healing macro on raid frames, is generally required for it to work.
- [dead] or [nodead] specifies to only target either dead or alive targets.
- [stealth] or [nostealth] mainly used by Rogues and Druids, this specifies to only cast a spell either while stealthed or not stealthed.
With this in mind, we can now create new macros. This macro casts ![]() Smite
at your target if it is an enemy or at your target's target otherwise:
Smite
at your target if it is an enemy or at your target's target otherwise:
- #showtooltip Smite
- /cast [harm][@targettarget] Smite
This macro casts ![]() Regrowth on your mouseover target, if it exists and is friendly. Otherwise,
it casts it on you.
Regrowth on your mouseover target, if it exists and is friendly. Otherwise,
it casts it on you.
- #showtooltip Regrowth
- /cast [@mouseover,exists,help][@player] Regrowth
This macro casts ![]() Rake if you are not stealthed and
Rake if you are not stealthed and ![]() Pounce if you are stealthed.
Pounce if you are stealthed.
- #showtooltip
- /cast [nostealth] Rake; [stealth] Pounce
Changelog
- 18 Sep. 2019: Guide added.
Classic Dungeon Guides
This guide has been written by Impakt, an Officer in BDGG, the #2 North American guild on retail. In addition to live WoW, he has also been a classic theorycrafter and enthusiast for many years. You can watch him stream on Twitch, or follow him on Twitter.
- Burning Crusade Classic Phase 2 Now Live: Here’s What to Expect
- Did Blizzard Just Quietly Invite Creators to Play WoW Classic’s Next Chapter?
- WoW Weekly Returns: Patch 12.0.5, Twitch Drops & Classic Updates
- WoW BCC Anniversary Edition: Overlords of Outland – Everything Coming May 14
- Battleground Honor Significantly Increased
- Limited-Time Mount Alert: Get the Voidfeather Dragonhawk for TBC Classic Servers Now!
- Could WoW Be Added to Xbox Game Pass Ultimate?
- MoP Classic Escalation PTR Update Details New Content