Shadowfang Keep Dungeon Guide
Shadowfang Keep is an early dungeon that Horde players are more likely to venture into, but Alliance Warlocks and Paladins will have to complete for their class quests. You can enter the dungeon at Level 11, but it is recommended to only do the dungeon once you reach Level 18 to 21. You should be able to complete the dungeon in under an hour.
The keep was once the home of Baron Silverlaine, but it was forcibly taken from him by Arugal and his legions of Worgen. It is now haunted by the spirits of the fallen and those that killed them.
Shadowfang Keep Entrance Location
The entrance to Shadowfang Keep is located in Silverpine Forest, in the northern part of the Eastern Kingdoms. The instance is north of Pyrewood Village.
This is much easier to get to as a Horde player, but unlike with other dungeons, Alliance players that have chosen to play a Paladin or Warlock will have to complete this dungeon for their class quests.
Shadowfang Keep Quests
Before setting foot in Shadowfang Keep, we strongly advise you to get all the dungeon quests related to it. To make this process easier, we have written a separate guide.
Layout of Shadowfang Keep
Shadowfang Keep is a very straightforward dungeon, with a set path to follow as you go through it. Once you have killed the first boss and freed your faction's prisoner, you will go through the newly opened door into the courtyard and then just keep moving forward through the instance. There are no alternate paths to be taken.
Notable Trash in Shadowfang Keep
In the courtyard after the first boss, players will encounter the Shadowfang Moonwalkers. These mobs will go magic immune periodically and casters should avoid targeting these mobs when they are immune.
The steeds that are in the stables of the courtyard are a skippable set of
trash, but are worth killing if your group requires bags. They have a chance
of dropping a 10-slot bag, ![]() Fel Steed Saddlebags. Be careful pulling these
as they do a huge amount of damage.
Fel Steed Saddlebags. Be careful pulling these
as they do a huge amount of damage.
The last piece of notable trash is the Wailing Guardsman mobs that you will encounter on your way to Odo the Blindwatcher. These mobs have an AoE silence last 5 seconds and are one of the reasons why Paladin tanks do not work well in this dungeon.
Bosses in Shadowfang Keep
Rethilgore
-

 Soul Drain
Rethilgore is a Level 20 elite humanoid and the first boss of the instance.
There are no mechanics that are worth mentioning for this boss, but it is important to know that, after the boss dies, you must free your faction's prisoner by opening their cage and talking to them. They will then open the way to the courtyard.
Loot from Rethilgore
| Item | Required Level | Slot |
|---|---|---|
| 15 | Shoulder |
Razorclaw the Butcher
-
 Butcher Drain
Razorclaw the Butcher is a Level 22 elite humanoid and the second boss of the instance.
If you follow our group advice and do not take a Paladin tank to this dungeon, then there are no mechanics worth mentioning on this boss; however, if you do, this boss will be extremely difficult, as you will have no Mana to get aggro on the boss due to his Mana drain.
Loot from Razorclaw the Butcher
| Item | Required Level | Slot |
|---|---|---|
| 18 | Chest | |
| 18 | Weapon | |
| 20 | Weapon |
Baron Silverlaine
-

 Veil of Shadow
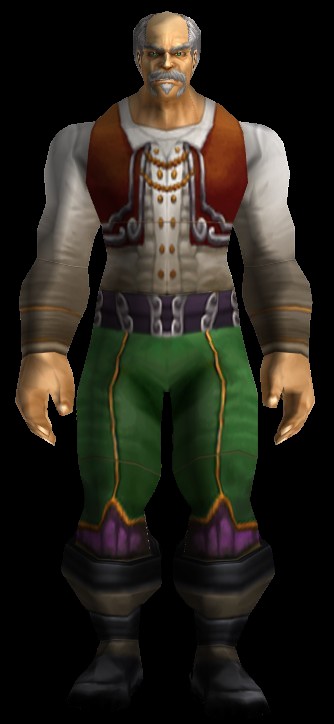
Baron Silverlaine is a Level 24 elite Undead and the third boss of the instance.
The main mechanic for this boss, and the reason why bringing a Mage or Druid
is so important, is his curse, ![]() Veil of Shadow. This reduces the healing
the target receives by 75% for 15 seconds and needs to be removed as soon as
possible.
Veil of Shadow. This reduces the healing
the target receives by 75% for 15 seconds and needs to be removed as soon as
possible.
Loot from Baron Silverlaine
Along with the items listed below, Silverlaine can drop a number of BoE green items.
| Item | Required Level | Slot |
|---|---|---|
| 20 | Weapon | |
| 21 | Ring |
Commander Springvale
-

 Hammer of Justice
 Holy Light
 Divine Shield

Commander Springvale is a Level 24 elite Undead and the fourth boss of this instance.
The boss will cast ![]() Holy Light, which should be interrupted. Other
than this, kill the adds and then Springvale afterwards.
Holy Light, which should be interrupted. Other
than this, kill the adds and then Springvale afterwards.
Loot from Commander Springvale
| Item | Required Level | Slot |
|---|---|---|
| 21 | Weapon | |
| 23 | Off Hand |
Odo the Blindwatcher
-

 Howling Rage
Odo the Blindwatcher is a Level 24 elite beast and the fifth boss of the instance.
Face the bats away from the group and kill them before killing Odo.
Loot from Odo the Blindwatcher
| Item | Required Level | Slot |
|---|---|---|
| 21 | Belt | |
| 21 | Weapon |
Deathsworn Captain
-

 Cleave
 Hamstring
There is one rare boss elite in the dungeon, Deathsworn Captain and he is found before Fenrus the Devourer.
Loot from Deathsworn Captain
| Item | Required Level | Slot |
|---|---|---|
| 21 | Weapon | |
| 20 | Chest |
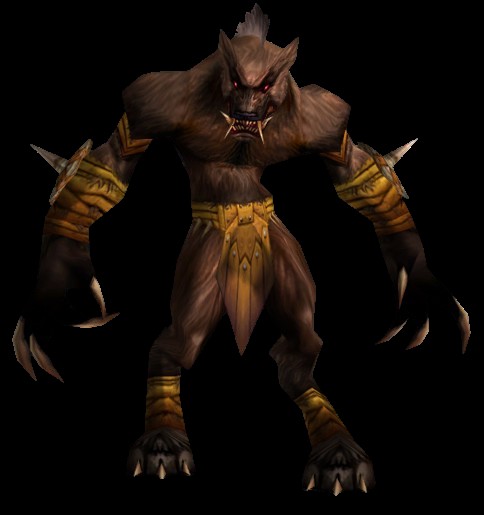
Fenrus the Devourer
-

 Toxic Saliva
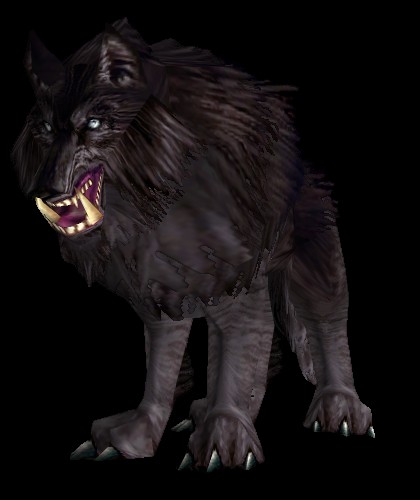
Fenrus the Devourer is a Level 25 elite beast and the sixth boss of the instance.
If you followed our group recommendations, then this boss has no mechanics to
worry about. If you brought a Paladin tank, it is important to pay attention to
![]() Toxic Saliva, as it will drain your Mana.
Toxic Saliva, as it will drain your Mana.
Watch out for the trash that will spawn immediately after Fenrus' death.
Loot from Fenrus the Devourer
| Item | Required Level | Slot |
|---|---|---|
| 21 | Back | |
| 21 | Wrist |
Wolf Master Nandos
-
 Call Bleak Worg
- Call Lupine Horror
- Call Slavering Worg
Wolf Master Nandos is a Level 25 elite humanoid and the penultimate boss of the dungeon.
There are no mechanics to this fight beyond killing his adds as he summons them.
Loot from Wolf Master Nandos
| Item | Required Level | Slot |
|---|---|---|
| 22 | Back | |
| 23 | Shoulder |
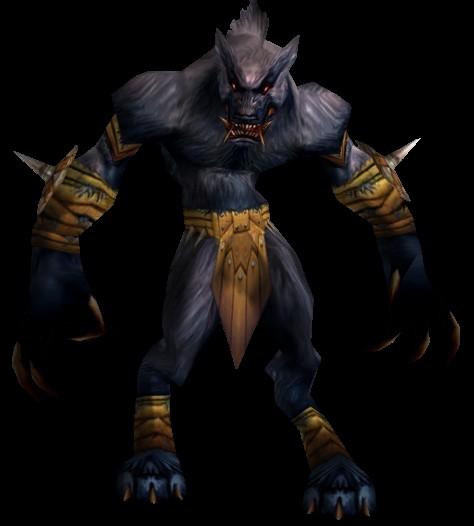
Archmage Arugal
-
 Arugal's Curse
 Shadow Port
 Thundershock
 Void Bolt
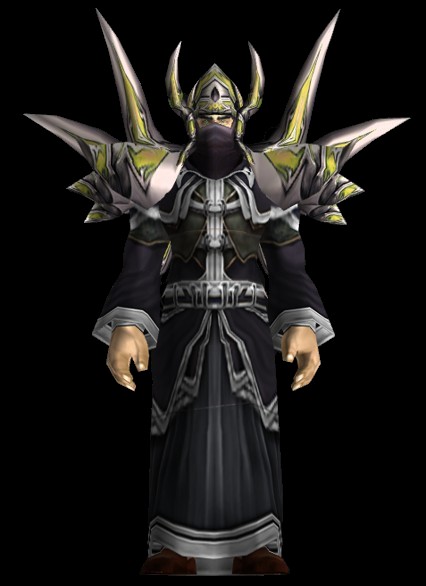
Archmage Arugal is a Level 26 elite humanoid and the final boss of the dungeon.
This boss deals a huge amount of damage compared to the other bosses of the
dungeon. As soon as you pull him, your whole group should move up to the platform
where Arugal is standing. Your tank will take consistent, heavy damage from
![]() Void Bolt and will need to be healed frequently. The players in melee
range will also take damage from
Void Bolt and will need to be healed frequently. The players in melee
range will also take damage from ![]() Thundershock, stunning them for 5
seconds. You can try to predict this, but it is not necessary.
Thundershock, stunning them for 5
seconds. You can try to predict this, but it is not necessary.
Arugal will teleport around the platforms of the room, still casting
![]() Void Bolt from his new location. You can try to chase him, but be
careful that you do not line of sight your healer while doing so.
Void Bolt from his new location. You can try to chase him, but be
careful that you do not line of sight your healer while doing so.
The final mechanic of the fight is his mind control, ![]() Arugal's Curse,
which makes players hostile to their party for 10 seconds. If your healer gets
this, any class that can off-heal will need to heal the tank, otherwise they
will likely die to the
Arugal's Curse,
which makes players hostile to their party for 10 seconds. If your healer gets
this, any class that can off-heal will need to heal the tank, otherwise they
will likely die to the ![]() Void Bolt spam.
Void Bolt spam.
Loot from Archmage Arugal
| Item | Required Level | Slot |
|---|---|---|
| 24 | Weapon | |
| 24 | Chest | |
| 24 | Waist |
Recommended Classes for Shadowfang Keep
For your tank, we recommend against taking a Paladin in this instance; there are multiple mobs that silence and drain Mana throughout and this will hinder a Paladin's ability to generate threat. A Warrior or Druid works fine.
You will need a Mage or a Druid that is not actively tanking in order to
dispel the curse from Baron Silverlaine, ![]() Veil of Shadow. You
cannot use a Druid tank to dispel this, as they will need to shift out of
Veil of Shadow. You
cannot use a Druid tank to dispel this, as they will need to shift out of
![]() Bear Form.
Bear Form.
You should also make sure to bring a melee-heavy composition of DPS, as there are multiple groups of trash that are magic-immune throughout the dungeon.
Changelog
- 18 Nov. 2024: Page updated for Classic Anniversary.
- 05 Apr. 2024: Added boss pictures and abilities.
- 09 Oct. 2019: Moved quest section to new page.
- 16 Aug. 2019: Guide added.
Classic Leveling Guides
Classic Dungeon Guides
Classic Profession Guides
This guide has been written by Abide, TBC veteran for nearly a decade. Abide is a Warrior tank and multi-class expert currently playing on Faerlina as Horde. You can find him in the the Icy Veins Discord. You can also see him live on Twitch.
- Burning Crusade Classic Phase 2 Now Live: Here’s What to Expect
- Did Blizzard Just Quietly Invite Creators to Play WoW Classic’s Next Chapter?
- WoW Weekly Returns: Patch 12.0.5, Twitch Drops & Classic Updates
- WoW BCC Anniversary Edition: Overlords of Outland – Everything Coming May 14
- Battleground Honor Significantly Increased
- Limited-Time Mount Alert: Get the Voidfeather Dragonhawk for TBC Classic Servers Now!
- Could WoW Be Added to Xbox Game Pass Ultimate?
- MoP Classic Escalation PTR Update Details New Content