Buru the Gorger Guide: Strategy, Abilities, Loot
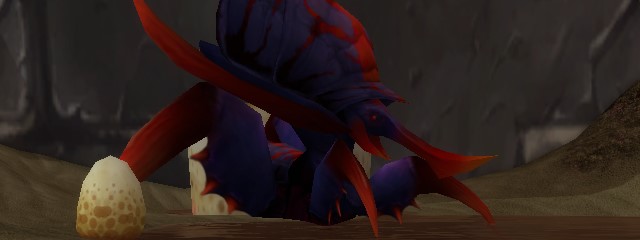
Buru the Gorger is the fourth boss in the Ruins of Ahn'Qiraj, and the second of the optional bosses.
Buru is another unique encounter, since instead of killing the boss directly, you will spend most of the fight kiting him over the eggs around the room, letting him kill himself from the eggs exploding. Remember to always focus on the kiting over everything else!
Season of Discovery Changes
As with previous phases of SoD, all bosses will drop both new and improved loot for players to collect. The list below shows the new and original loot for a side-by-side comparison.
New Loot
| Classic | SoD |
|---|---|
Buru the Gorger Summary by Role
Tanks
- The boss cannot be tanked in this fight. Instead, you will need to pick up the adds that spawn out of the eggs that are destroyed. They do not do anything special, so just one tank is enough.
Healers
- Everyone will be taking lots of raid damage at sub-20% health on the boss, so be ready for the last part of the fight with cooldowns and consumables.
- The mechanics of the fight, specifically kiting the boss correctly, will be more important than your healing for the first 80%.
DPS
- The boss will take massively reduced damage until he is below 20% health, so do not bother attacking him until the end.
- The last 20% is a major DPS race, so save all cooldowns for then.
- During the first 80%, focus on killing the eggs and the adds. Do not kill eggs unless the boss is near them. Just get them low if the boss is not nearby.
- The mechanics of the fight, specifically kiting the boss correctly, will be more important than your damage for the first 80%.
General Tips for Buru the Gorger
- The mechanics of the fight, specifically kiting the boss correctly, will be more important than your damage and healing for the first 80%.
- The final 20% of the fight is a hectic burn, so save all cooldowns for then.
- Only kill eggs that are near the boss so they can damage him when they die.
Strategy for Buru the Gorger
Buru is an unconventional boss that is not tanked, nor killed directly, by players. For the first 80% of the fight, Buru will take massively reduced damage from players, making it a waste of time to attack him at all. Buru will also fixate on a random player at all times, constantly walking towards them to attack. Whoever is fixated must always run away, with the goal being to kite Buru over the eggs that are around the room. If Buru walks over an egg, it will explode, which will deal about 5% of his health in damage and spawn an add. The adds that spawn are relatively easy to kill, just have a tank pick them up and the DPS can kill them. The first 80% of the fight is just a repeat of this process over and over, with the fixated target kiting him over eggs to slowly get him to 20% health. During this time, the DPS can attack the eggs around the room, but only kill eggs that are near the boss, so that their explosion will reach him and actually damage him. Once he hits 20%, the burn phase begins.
Once the boss reaches 20% health, Phase 2 begins. This phase works exactly like the first phase, except the boss will now be vulnerable to damage and players should attack him. However, the entire room will now be covered in a plague that will slowly kill the raid, dealing more damage the longer you are affected. This makes the remaining 20% a burn, where you need to kill the boss before the plague kills you. All cooldowns, both from DPS and healers, should be saved for this phase. Remember to keep kiting the boss like before, but all non-fixated targets can kill the boss or heal the raid.
Changelog
- 18 Nov. 2024: Page updated for SoD P6 & Classic Anniversary.
- 06 Aug. 2024: Guide reviewed and updated.
- 23 Jun. 2020: Guide added.
This guide has been written by Abide, TBC veteran for nearly a decade. Abide is a Warrior tank and multi-class expert currently playing on Faerlina as Horde. You can find him in the the Icy Veins Discord. You can also see him live on Twitch.
- Burning Crusade Classic Phase 2 Now Live: Here’s What to Expect
- Did Blizzard Just Quietly Invite Creators to Play WoW Classic’s Next Chapter?
- WoW Weekly Returns: Patch 12.0.5, Twitch Drops & Classic Updates
- WoW BCC Anniversary Edition: Overlords of Outland – Everything Coming May 14
- Battleground Honor Significantly Increased
- Limited-Time Mount Alert: Get the Voidfeather Dragonhawk for TBC Classic Servers Now!
- Could WoW Be Added to Xbox Game Pass Ultimate?
- MoP Classic Escalation PTR Update Details New Content